It’s 11 PM on a Wednesday. You’ve just spent three hours toiling on your next Arduino project, and FINALLY, you’re ready to give your sketch a whirl. You hit upload, palms sweaty with anticipation to see all your hard work come to fruition. It’s then you see the error:
No such file or directory.
Surely this is a chance aberration. “Nothing to worry about,” you mutter, sleep-starved and semi-delirious as you hit upload again. And once more, those maddening words, “no such file or directory,” stare back at you in hostile gaslighting mockery.
Have you been here?
If you’re trying to run an Arduino sketch but keep coming across the “no such file or directory” error, don’t worry. This is actually a pretty common problem, and there are two easy fixes that almost always work.
Keep on reading. We’ll show you what they are.
No such file error!
Error messages can be such a pain. They do, however, serve a useful purpose by telling us something about what went wrong. At first glance, the no such file or directory error is particularly maddening because it seems to break that useful purpose rule. Of course there’s a file or directory! You just made the thing, and it’s right there, tucked inside a directory.
But hold up, let’s take a closer look. If you look at the bottom portion of the Arduino IDE where the error message shows up, there’s this handy little button that says “copy error messages.”

Click on that now. You probably won’t fall off your chair to learn that by clicking that button, you just copied the error message from the little window at the bottom of The Serial Monitor’s UI to the clipboard of your computer.
This copy feature is ridiculously useful. You could, for example, paste the error message into Google and learn more about the error. Or you could take advantage of the active Arduino community by asking for help in a forum. For this situation, however, we can be a bit more basic. All we’re going to do is take a closer look at what the message is actually saying. To do that, just fire up your PC’s text editor and paste it into the blank screen.
Decoding the no such file error
Here it is, that pesky error in all its freshly pasted glory.

I’ll break it down for you line by line.
- The first line is easy. It’s just describing the Arduino version in use, what operating system is running, and which board you have selected.
- Line 2 begins to zero in on the problem.
- The first bit, “knob,” is referring to the name of the program. This is your sketch, basically.
- The second bit is what usually begins to confuse people, but it’s easy once you know. The “10” in this example is telling you the error occurred on line 10 of your sketch. The “19” is telling you the length of the line of code in spaces and characters. The first number is usually the more helpful of the two because you can use it to locate the error in your sketch.
- Then we get to the smoking gun of the error. It says, “servo.h: No such file or directory”.
So this thing, “Servo.h.” That’s the thing we need to fix, and thanks to line 2, we know where to find it. Line 10. It’s always line 10.
Now that we know what’s going on a bit better, let’s get down to the business of implementing a fix.
The error of our ways
Let’s lay down some scrutiny on this accursed line 10.
It says “#include <servo.h>”
When we verify this code, this line is telling the Arduino IDE compiler, “Hey, for this program to work, you need to go get this file called servo.h”.
Let’s say you had a label-making machine, and you wanted to use it to print some cool motivational labels, like “Success!” and “Keep Trying!” and “Look, Nachos!” To make that happen, you’ll first have to load in a roll of labels. No roll of labels? Well, then the label maker isn’t gonna work.
The sketch you’re trying to upload is like the label maker. The file (in our example, the file named “servo.h”) is the roll of labels.

So the error message actually is saying something useful. It’s saying, “Hey programmer, you said I needed this other file. Well, I looked for it and it’s not there. What gives?”
Now we know the error message isn’t complete gibberish, let’s look at the two most common scenarios that cause it.
Scenario 1 – Fat fingers
This sketch is one that you’ve written. You’re actually the one who wrote the “#include” line. The first thing you should check is your spelling and capitalization. Maybe you spelled the name of the library incorrectly? Or (as with the example below) perhaps you capitalized the wrong letters.

So “servo.h” should actually have a capital “S.” In full and with correct capitalization, it should read, “Servo.h.” You’ll notice above that the word servo changes color when it’s correctly capitalized. That color change signifies that the library name “Servo” is recognized as a “keyword” in the Arduino IDE.
Keep in mind that might not be the case for all the libraries you’re using. In other words, the color change won’t always indicate you’re using the right spelling or capitalization, but it’s often a helpful visual reminder.
Oh, and it’s probably good to mention that everyone in the history of Arduino programming has misspelled or incorrectly capitalized a word at some point. It’s amazing how long you can stare at a line of code and miss something like that.
So don’t sweat it.
Scenario 2 – Missing files
This brings us to the next common scenario for the “no such file or directory” error.
So often, working with Arduinos involves taking code that someone else has developed and shared online and then tailoring it to your project. That’s part of what makes it so easy to get stuff done with Arduino. One problem that frequently happens when we do that, however, is we accidentally introduce code without a matching file.
An easy way to check to see if you have the file a sketch is looking for is to navigate to Sketch > Include Library from within the Arduino IDE. Then look for the name of that library.

Whatever library the #include statement was calling for, you want to look through this big long list for a library with the exact same name. If you don’t see the file name there, this means the library isn’t installed. You’ll have to add that library before the sketch will compile without errors.
So, how do you add that library?
The easiest way is to go to Sketch > Include Library > Manage Libraries. The Arduino IDE will open up a dialogue box from which you can search for the library you need.

Make sure you type the exact word that matches the #include line. Once you find the missing library, go ahead and click Install. The Arduino IDE will let you know that it’s installing the library you requested and updating the software accordingly.
Next, just double-check that the library has been successfully installed by going to Sketch > Include Library. You should see your new library in the dropdown list.
Good news! If the library is there, you should now be able to compile your sketch error-free.
Other library locations
OK, there’s one little fly in the ointment. How do these dang ointment flies always manage to complicate things so?
Here’s the thing. Not all libraries live in this convenient pop-up window inside the Arduino IDE. The Arduino community is bubbling with clever ideas, but cleverness (unlike processed cheese) doesn’t always come in conveniently standardized, individually wrapped slices. There are tons of different ways to find Arduino libraries on the web.
If you’re downloading or copying a program from the internet, just go to the page where you got that program and take a close look at the library the author is referencing. They may, for example, have a link to GitHub, which is a place where people keep a lot of code libraries.

Wherever you find it, usually the library will be included in a .zip file package. Once you’ve downloaded the .zip file, fire up the Arduino IDE and go to Sketch > Include Library > Add .ZIP library. Then navigate to the location you downloaded the file and select it. Assuming no additional ointment flies invade your workflow, the Arduino IDE will pop up the message “Library added to your libraries” just above the dark area where the original “no such file or directory” error appeared.
Now it’s business as usual! Just go to Sketch > Include Library, and the new library will appear in the drop-down list.
As the dyslexic Frenchman once said to the oversized violinist: “Viola!”
You now know not one but two ways to add a new library. What a time to be alive!
Review
A quick recap, then.
We’ve looked at the two main scenarios that cause the “no such file or directory” error to appear after you compile your sketch:
- The fat fingers phenomenon: Check your spelling and capitalization! If you wrote the sketch, there’s a mighty good chance you introduced a tiny error. And don’t beat yourself up over it! Literally every coder has done this.
- The missing files mixup: Failing that, if you copied code from someone else check that you have the correct libraries installed. Don’t see your library? Install it using the method described above, and you should be good to go.
There may be no such thing as a free lunch, a coincidence, or a luck dragon. But rest assured. Your files and directories? They’re alive and well.
13-12-2020, 16:31
3 комментариев
Даже опытные программисты-«ардуинщики» могут столкнуться с ошибками компиляции. Исправить их не сложно, а вот найти порой не так просто. Мы решили рассказать сегодня в деталях, какие системные ошибки чаще возникают на различных платах Ардуино, как их исправить и по возможности избежать.
Для начала рассмотрим базовые, так называемые синтаксические ошибки. Они встречаются чаще всего у новичков, но и опытные электронщики с ними точно знакомы не понаслышке. Искать их обычно супер-просто – в Arduino IDE некорректный синтаксис выделяется построчно (таким образом значительно легче отыскать неточность в кодах). Обычно это: отсутствие скобки в конце команды, пропуск этой самой служебной команды или слова, нехватка важных функций, неправильное их написание и т.д.
Для быстрого поиска ошибки советуем рассмотреть строку-подсказку. Ничего не помогло? Тогда для вас наша подборка наиболее распространенных синтаксических ошибок:
С синтаксисом все понятно – вставляем пропущенные символы, убираем лишние знаки, возвращаем функции по умолчанию.
Напомним, в среде разработки Ардуино IDE можно заливать скетчи для различных микроконтроллеров. По умолчанию обычно указана плата Genuino Uno. Если вы работаете с Mega, следует выбрать именно эту платформу (меню «Сервис»), иначе вас ожидает неприятное предупреждение: “programmer is not responding”.
Ошибка компиляции для платы Arduino Uno чаще всего возникает из-за проблем, связанных с библиотеками, например, неправильно подключили, не то ПО инсталлировали. В этом случае вы увидите напоминание “fatal error: … No such file or directory” (библиотека не перенесена в папку libraries) или “redefinition of void setup”.
Обозначенная на скриншоте ERROR означает, что программирование завершилось некорректно (расшифровываем: внутренние проблемы с компилятором, не обновили версию IDE, сбой в библиотеке, неправильный выбор разрядности операционной системы и др.).
Важно! Не забывайте использовать подсказки приложения – они очень помогают. Включаем тут: Файл -> Настройки -> «Показать подробный вывод во время компиляции».
Что делать, если произошла ошибка при загрузке скетча Arduino Nano. Тут могут быть те же причины, что мы описали выше. Особых отличий в компиляции плат нет, главное, их правильный выбор первоначально. Однако часто пользователи настраивают не те показатели скорости порта: 9600 вместо необходимых 57600 либо не имеют соответствующих драйверов на устройствах – все это нужно проверить и исправить!
СОДЕРЖАНИЕ ►
- Произошла ошибка при загрузке скетча в Ардуино
- programmer is not responding
- a function-definition is not allowed arduino ошибка
- expected initializer before ‘}’ token arduino ошибка
- ‘что-то’ was not declared in this scope arduino ошибка
- No such file or directory arduino ошибка
- Compilation error: Missing FQBN (Fully Qualified Board Name)
Ошибки компиляции Arduino IDE возникают при проверке или загрузке скетча в плату, если код программы содержит ошибки, компилятор не может найти библиотеки или переменные. На самом деле, сообщение об ошибке при загрузке скетча связано с невнимательностью самого программиста. Рассмотрим в этой статье все возможные ошибки компиляции для платы Ардуино UNO R3, NANO, MEGA и пути их решения.
Произошла ошибка при загрузке скетча Ардуино
Самые простые ошибки возникают у новичков, кто только начинает разбираться с языком программирования Ардуино и делает первые попытки загрузить скетч. Если вы не нашли решение своей проблемы в статье, то напишите свой вопрос в комментариях к этой записи и мы поможем решить вашу проблему с загрузкой (бесплатно!).
avrdude: stk500_recv(): programmer is not responding
Что делать в этом случае? Первым делом обратите внимание какую плату вы используете и к какому порту она подключена (смотри на скриншоте в правом нижнем углу). Необходимо сообщить Arduino IDE, какая плата используется и к какому порту она подключена. Если вы загружаете скетч в Ардуино Nano V3, но при этом в настройках указана плата Uno или Mega 2560, то вы увидите ошибку, как на скриншоте ниже.

Такая же ошибка будет возникать, если вы не укажите порт к которому подключена плата (это может быть любой COM-порт, кроме COM1). В обоих случаях вы получите сообщение — плата не отвечает (programmer is not responding). Для исправления ошибки надо на панели инструментов Arduino IDE в меню «Сервис» выбрать нужную плату и там же, через «Сервис» → «Последовательный порт» выбрать порт «COM7».
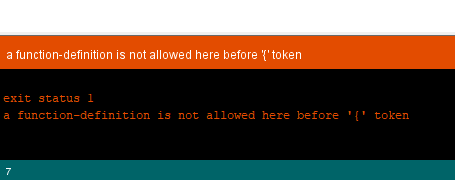
a function-definition is not allowed here before ‘{‘ token
Это значит, что в скетче вы забыли где-то закрыть фигурную скобку. Синтаксические ошибки IDE тоже распространены и связаны они просто с невнимательностью. Такие проблемы легко решаются, так как Arduino IDE даст вам подсказку, стараясь отметить номер строки, где обнаружена ошибка. На скриншоте видно, что строка с ошибкой подсвечена, а в нижнем левом углу приложения указан номер строки.

expected initializer before ‘}’ token / expected ‘;’ before ‘}’ token
Сообщение expected initializer before ‘}’ token говорит о том, что вы, наоборот где-то забыли открыть фигурную скобку. Arduino IDE даст вам подсказку, но если скетч довольно большой, то вам придется набраться терпения, чтобы найти неточность в коде. Ошибка при компиляции программы: expected ‘;’ before ‘}’ token говорит о том, что вы забыли поставить точку с запятой в конце командной строки.
‘что-то’ was not declared in this scope
Что за ошибка? Arduino IDE обнаружила в скетче слова, не являющиеся служебными или не были объявлены, как переменные. Например, вы забыли продекларировать переменную или задали переменную ‘DATA’, а затем по невнимательности используете ‘DAT’, которая не была продекларирована. Ошибка was not declared in this scope возникает при появлении в скетче случайных или лишних символов.

Например, на скриншоте выделено, что программист забыл продекларировать переменную ‘x’, а также неправильно написал функцию ‘analogRead’. Такая ошибка может возникнуть, если вы забудете поставить комментарий, написали функцию с ошибкой и т.д. Все ошибки также будут подсвечены, а при нескольких ошибках в скетче, сначала будет предложено исправить первую ошибку, расположенную выше.
exit status 1 ошибка компиляции для платы Arduino
Данная ошибка возникает, если вы подключаете в скетче библиотеку, которую не установили в папку libraries. Например, не установлена библиотека ИК приемника Ардуино: fatal error: IRremote.h: No such file or directory. Как исправить ошибку? Скачайте нужную библиотеку и распакуйте архив в папку C:Program FilesArduinolibraries. Если библиотека установлена, то попробуйте скачать и заменить библиотеку на новую.

Довольно часто у новичков выходит exit status 1 ошибка компиляции для платы arduino uno /genuino uno. Причин данного сообщения при загрузке скетча в плату Arduino Mega или Uno может быть огромное множество. Но все их легко исправить, достаточно внимательно перепроверить код программы. Если в этом обзоре вы не нашли решение своей проблемы, то напишите свой вопрос в комментариях к этой статье.
missing fqbn (fully qualified board name)
Ошибка возникает, если не была выбрана плата. Обратите внимание, что тип платы необходимо выбрать, даже если вы не загружаете, а, например, делаете компиляцию скетча. В Arduino IDE 2 вы можете использовать меню выбора:
— список плат, которые подключены и были идентифицированы Arduino IDE.
— или выбрать плату и порт вручную, без подключения микроконтроллера.
I downloaded the Adafruit_GPS library from Adafruit and I’m trying to compile the example code (due_parsing) but I can’t seem to get past this silly error:
In file included from due_parsing.ino:15:

/Users/haddad/Documents/Arduino/libraries/Adafruit_GPS/Adafruit_GPS.h:24: fatal error: SoftwareSerial.h: No such file or directory
compilation terminated.
This is the location in the example Arduino Sketch where SoftwareSerial.h is mentioned:
#ifdef __AVR__
  #include <SoftwareSerial.h>
#endif
I noticed it’s around an ifdef guard, so shouldn’t it not even matter that I don’t have this library?
I went into the .h and .cpp files and commented out the where it called SoftwareSerial.h, but I’m still getting that above error.
Does anybody know how to fix this?
I am using Arduino IDE v1.5.5
Update:
I didn’t put the library in the library direct on my mac but I’m now getting tons of errors, all the errors are with SoftwareSerial.cpp. Is anybody else having similar issues when you go to compile?
![]()
asked Apr 10, 2014 at 20:01
![]()
4
According to your comment:
after commenting out those ifdef guards, it worked
I would say that is a bug in the Adafruit_GPS library.
As a matter of fact, the DUE is not using the AVR architecture (it uses ARM), that explains why #ifdef __AVR__ in Adafruit_GPS.h never passes; but then something else should be done specifically for the DUE (missing #else or #elif).
After checking on github, there is an issue open for that; unfortunately, as of April 2014, it has not moved for 10 months.
Your best guess would be to go there and try to «reactivate» this issue.
answered Apr 11, 2014 at 4:36
![]()
jfpoilpretjfpoilpret
8,9356 gold badges34 silver badges53 bronze badges
1
So I went into the interface file (.h) and removed all references to AVR and then went into (.cpp) and removed all references to AVR there as well. It now seems to be working, although sometimes it says «Not supported Architecture ARM» during compilation…very weird
answered Apr 11, 2014 at 23:22
![]()
mosawimosawi
1611 gold badge2 silver badges4 bronze badges
this is a «bug» in the arduino IDE pre-compilation process.
If you turn on the compiling verbositi in thge precerences menu, you will see that arduino has copied all file (with a rater «stupid» code that just look for include) into a temp folder (wiring lib are not copied, but the below still aplly). Until here, ugly but still fine.
Then, it will -force- compilation of every «included» file, one by one, the facto bypassing the #ifdef.. and this is why you get that problem.
Solution is to heavy change the ide so it will force compilation only in the main, and let the compiler include and compile needed libraries.
I still have no idea why every file is forced, but a change like this is really heavy and break-old-code prone..
Newest IDE to bypass this problem (and also some other problem, like depeency) use a «config» file that will tell the IDE if use the AVR or ARM or x86 library, probabily this file is missing and the ide see te lib as only AVR by default.
Double check if it is really usable on DUE
answered Apr 12, 2014 at 9:53
![]()
LestoLesto
7613 silver badges10 bronze badges
When you encounter a «No such file or directory» error it usually means you need to install the library that contains the missing file (in this case ArduinoJson.h).
Ideally the documentation for the code you are trying to compile will have instructions for installing dependencies. Sometimes the author did not make the effort to write this documentation and you’ll need to go searching for the missing library.
Many Arduino libraries are in the Library Manager index, which makes them quite easy to install:
Library Manager installation
- (In the Arduino IDE) Sketch > Include Library > Manage Libraries.
- Wait for the download to finish.
- In the «Filter your search…» box, type your search query, in this case «ArduinoJson» would be appropriate.
- Scroll through the search results to find something that looks correct (in this case «ArduinoJson by Benoit Blanchon»), then click on it.
- Click «Install».
- Wait for installation to finish.
- Click «Close».
If you don’t find the library you need in Library Manager you’ll need to spend some time with your favorite search engine. Once you find the library and download it you’ll need to install it.
.ZIP Installation
(In the Arduino IDE) Sketch > Include Library > Add .ZIP Library
Select the downloaded file (must be a .zip).
Click «Open».
The above installation instructions require the .zip file to have a specific folder structure. In some cases the library author has not been kind enough to provide the correct folder structure. If you get a «Zip doesn’t contain a library» error message then you will need to do a manual installation of the library.
Manual Installation
- Unzip the downloaded file
- Browse through the unzipped folder until you find the library folder. This will either have a library.properties file and/or a .h file.
- Copy the library folder to {Sketchbook folder}/libraries. You can find the sketchbook folder in the Arduino IDE at File > Properties > Sketchbook location.
You will need to restart the Arduino IDE before the examples sketches for manually installed libraries will appear under the File > Examples menu.