New issue
Have a question about this project? Sign up for a free GitHub account to open an issue and contact its maintainers and the community.
By clicking “Sign up for GitHub”, you agree to our terms of service and
privacy statement. We’ll occasionally send you account related emails.
Already on GitHub?
Sign in
to your account
Comments
![]()
$ make

.....
Scanning dependencies of target libwabt
[  1%] Building CXX object CMakeFiles/libwabt.dir/src/token.cc.o
In file included from /Users/sam/wasm/wabt/src/token.cc:17:
/Users/sam/itt/wasm/wabt/src/token.h:20:10: fatal error: 'string' file not found
#include <string>
         ^~~~~~~~
1 error generated.
make[3]: *** [CMakeFiles/libwabt.dir/src/token.cc.o] Error 1
make[2]: *** [CMakeFiles/libwabt.dir/all] Error 2
make[1]: *** [all] Error 2
make: *** [clang-debug] Error 2
How to fix it?
cmake version: 3.8.0
mac version: 10.13.3 High Sierra
![]()
This seems to be a common issue, see #716 (comment). Some were able to solve with xcode-select --install, try that.
![]()
It did not fix:
$ xcode-select --install
xcode-select: error: command line tools are already installed, use "Software Update" to install updates
![]()
So I believe you need to go to the AppStore and update Xcode tools and in particular «Command Line Tools «.
![]()
I’m having the same problem.
$ xcode-select --version
xcode-select version 2349.
$ make
token.h:20:10: fatal error: 'string' file not found
UPDATE After removing out folder and make it works.
![]()
I’m having the same issue, @artdias90 I tried removing the out folder than make, and still having same issue. Am I missing something?
![]()
Any updates on this? Had the same issue on OSX:
$ make
/Applications/Xcode.app/Contents/Developer/usr/bin/make --no-print-directory -C out/clang/Debug/ all
-- Using prebuilt re2c lexer
-- Configuring done
-- Generating done
-- Build files have been written to: /Users/jou/gocode/src/github.com/jingweno/wabt/out/clang/Debug
Scanning dependencies of target libwabt
[  1%] Building CXX object CMakeFiles/libwabt.dir/src/token.cc.o
In file included from /Users/jou/gocode/src/github.com/jingweno/wabt/src/token.cc:17:
/Users/jou/gocode/src/github.com/jingweno/wabt/src/token.h:20:10: fatal error: 'string' file not found
#include <string>
         ^~~~~~~~
1 error generated.
make[3]: *** [CMakeFiles/libwabt.dir/src/token.cc.o] Error 1
make[2]: *** [CMakeFiles/libwabt.dir/all] Error 2
make[1]: *** [all] Error 2
make: *** [clang-debug] Error 2

$ xcode-select --version
xcode-select version 2349.

$ cmake --version
cmake version 3.12.1

CMake suite maintained and supported by Kitware (kitware.com/cmake).
![]()
@jingweno Have you installed the XCode «Command Line Tools» as described above? If so, did you remove the out directory before compiling again?
If your command line tools are installed correctly, you should be able to run the following command without error:
echo "#include <string>" | clang++ -E -x c++ - | grep "/string" | head -n 1
On my Mac this produces:
# 1 "/Applications/Xcode.app/Contents/Developer/Toolchains/XcodeDefault.xctoolchain/usr/bin/../include/c++/v1/string" 1 3
On my Linux laptop it produces:
# 1 "/usr/lib64/gcc/x86_64-pc-linux-gnu/8.2.0/../../../../include/c++/8.2.0/string" 1 3
![]()
FWIW, on a new Mac, you need to actually launch Xcode before trying to install something that depends on the command line tools. Otherwise, all of the various components are not yet installed. I ran into this issue on a new headless Mac Mini.
![]()
What is this ‘out’ directory that everyone has referenced? Where can I find it?
I get the same output as binji
![]()
It’s the build folder containing your built files.
![]()
Its kind of annoying how the default cmake configuration doesn’t print the command line that failed, only its output.
I think this is another good reason to switch to the ninja cmake generator by default (in the top level Makefile). It will make these kind of but reports a lot more useful.
![]()
![]()
Right.. I’m just not sure the top level make passes that argument on generated makefile (does it?). And its kind of annoying to say «thanks for the bug report, please go back and run you failing build again with this other argument», when using ninja just makes it work.
![]()
Ah yes that does work.. thanks +$(MAKE)
![]()
Sorry, I lost the conversation in my inbox. Yes, that is relatively annoying for the reporter. I tend to use make if I need to debug the build, specifically because of the verbosity setting, but that might not be the best default.
I am trying to compile a Cocoa app in xcode 4.0 and I’m getting this error…
fatal error: 'string' file not found
…when trying to compile to .pch file on this line:
#include <string>
I have another xcode project that does the same thing, but does not get the error. I have scoured the build settings for some different, but I can’t find one. The only difference is that the project that compiles OK was started as a command line project, not a Cocoa project, but the build setting are the same.
The target OS is Mac OS X 10.6
The error happens when compiling the precompiled header and doesn’t get to any of the other files. The only framework that the compiling version has is Foundation.framework and the non-compiling one has it as well.
Why is it not finding in one project and not the other? Any advice?
asked Sep 25, 2011 at 0:34
![]()
Roger GilbratRoger Gilbrat
3,7355 gold badges33 silver badges58 bronze badges
2
What is the extension of your source files? If it is «.m», try to change it to obj-cpp «.mm», so that Xcode will deduce correct language.
Or just put c++-specific headers inside «#ifdef __cplusplus» block
Update
The guard must exist for each language compiled in the project because this specific include is in the pch. IOW, if it were all c++ and/or objc++ there would be no error. Evidently, there is at least one file that does not recognize C++ (e.g. C or ObjC sources are also compiled in the target). Therefore, you simply guard it like so:
// MONPrefix.pch

#ifdef __cplusplus
#include <string>
#endif

// same for objc, so your C and C++ sources compile with no error:
#ifdef __OBJC__
#include <Foundation/Foundation.h>
#endif
![]()
justin
104k13 gold badges179 silver badges225 bronze badges
answered Jan 30, 2012 at 10:51
![]()
2
string is a C++ header (for std::string). If you are looking for stuff like strcpy you need to include string.h
answered Oct 12, 2011 at 15:45
![]()
Foo BahFoo Bah
25.4k5 gold badges54 silver badges79 bronze badges
My situation. uname -a gives Linux computer2 4.4.0-62-generic #83~14.04.1-Ubuntu SMP Wed Jan 18 18:10:30 UTC 2017 x86_64 x86_64 x86_64 GNU/Linux
I am trying to install HDF5 1.8.18 with GNU make 3.81 invoking gcc 6.3.0. I have successfully installed this gcc 6.3.0 alongside the version 4.8.4 that is shipped with the Ubuntu distribution.
My gcc 6.3.0 lives in /opt/gcc/6_3_0/. I use the following script to configure and pass on the commands, libraries and headers in non-standard directories:
export FC='/opt/gcc/6_3_0/bin/gfortran-6.3.0'   # probably unnecessary
export CC='/opt/gcc/6_3_0/bin/gcc-6.3.0'
export CXX='/opt/gcc/6_3_0/bin/g++-6.3.0'
export CPP='/opt/gcc/6_3_0/bin/cpp-6.3.0'
export LDFLAGS='-L/opt/gcc/6_3_0/lib -L/opt/gcc/6_3_0/lib64'
export CPPFLAGS='-I/opt/gcc/6_3_0/include -I/opt/gcc/6_3_0/lib/gcc/x86_64-pc-linux-gnu/6.3.0/include'

./configure
--prefix=${insdir}
--with-zlib=${zlibdir}/include,${zlibdir}/lib
--enable-fortran
--enable-cxx
where ${insdir} is an installation directory, ${zlibdir} is where zlib lives and the other switches are standards as per the installation guidelines
The configure step goes well. The make step fails with the error:
make[2]: Entering directory `<the source directory>/hdf5-1.8.18/c++/src'
CXX      H5Exception.lo
H5Exception.cpp:16:18: fatal error: string: No such file or directory
#include <string>
                ^
compilation terminated
If I understand it correctly, some header file is missing, and of a basic nature.
- Where should I get it from?
- Is there any flaw in the names and values of the environment variables?
StackExchange contains a host of posts on this error, but they seem to be mostly related to coding exercises. My aim is not to edit codes, rather to compile source codes successfully with my vanilla gcc 6.3.0.
Updated question
In the light of the helpful comments and Thomas Dickey’s answer below, it appears that a promising avenue is to install matching versions of libstdc++ and gcc. I have searched around in the GCC website and it appears that one can configure gcc with the following switch
—enable-version-specific-runtime-libs
Specify that runtime libraries should be installed in the compiler specific subdirectory (libdir/gcc) rather than the usual places. In addition, libstdc++’s include files will be installed into libdir unless you overruled it by using —with-gxx-include-dir=dirname. Using this option is particularly useful if you intend to use several versions of GCC in parallel. This is currently supported by ‘libgfortran’, ‘libstdc++’, and ‘libobjc’.
- Is this pointing in the right direction?
- Where would I be supposed to find the libstdc++’s include files that are distributed alongside the source of gcc, if this is switch is not used?
1) Get ready to download. A lot. Like over a gigabyte of data. If you have a limited connection, I’m sorry the android SDK is huge and it’s just the way things are. I recommend having a
movie or TV show to watch ready if a gigabyte takes a long time for you to download.
First you need to install the Java Development Kit (JDK). Using apt-get you can install it using the following command:
sudo apt-get install default-jdk
2) Download Android Studio on this page.

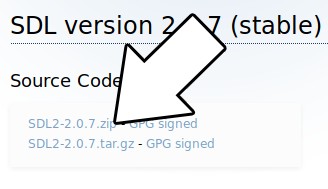
3) Download the SDL2 source. Not just the development libraries you use for desktop development, the full source. You can find the full source on
this page.
4) To run on an Android device we’re going to need the Android Debug Bridge (known as ADB). You can install it with apt-get using:
sudo apt-get install android-tools-adb
5) Extract the android-studio folder from the Android Studio zip we downloaded earlier. Put it some place convenient. For this tutorial we will be putting it inside of the home directory.
After it’s extracted, install and/or run Android Studio. Instructions on how to do so should be at ~/android-studio/Install-Linux-tar.txt
6) After starting Android Studio, go to Configure -> SDK Manager

7)
Under SDK Platforms, check Show Package Details and select Android SDK Platform 16 for installation and hit apply to install:

You may want to install the latest version of the Android SDK but unless you know what you’re doing and you actually need the latest features I would recommend against it. Newer SDK means less stable SDK.
 Click on SDK Tools and make sure to install:
- CMake
- NDK

9) Extract the SDL2 source code to some accessible directory that is ideally dedicated to containing Android libraries. For this tutorial we will put them in the directory
«~/androidlib/». After extracting the SDL2 source code you should have an Android makefile at «~/androidlib/SDL2-2.0.7/Android.mk».
Depending on your version of SDL, it could be at
«~/androidlib/SDL2-2.0.5/Android.mk» or
«~/androidlib/SDL2-2.0.4/Android.mk» and so on.
10) Start up Android Studio again and import the android project from the SDL2 source code which should be at
«~/androidlib/SDL2-2.0.7/android-project»

11) Set the destination to a new folder inside of some accessible directory that is ideally dedicated to containing Android projects. For this tutorial we will put the project in
«YOUR-HOME-DIRECTORY/androidprojects/SDL_Tutorial». Select the directory and import the project with the default settings.
12) Go to Build -> Make Project:

You will get an error that says:
Minimum supported Gradle version is 4.1. Current version is 2.14.1.
This means our project is set to use the wrong version of Gradle. To fix this, set the Project window to project mode, go to SDL_tutorial -> gradle -> wrapper -> gradle-wrapper.properties and change
distributionUrl=https://services.gradle.org/distributions/gradle-2.14.1-all.zip
to
distributionUrl=https://services.gradle.org/distributions/gradle-4.1-all.zip

Make project again (it may take a while to download Gradle 4.1) and you’ll get a new error:
cannot find symbol class Objects
13) That error was due to the fact that Android Studio cannot find the Java Objects class. It can’t find it because it is pointed at an old JDK. To make sure it compiles against the latest
version of Java, go to File -> Project Structure.

Select app under Modules and the set the Source/Target Compatibility to the latest version (currently 1.8):

Build again and you should get a new error.
14) If you try to hit Build -> Make Project you’ll get the following error:
Error:Execution failed for task ‘:app:compileDebugNdk’.
> Error: Your project contains C++ files but it is not using a supported native build system.
Consider using CMake or ndk-build integration with the stable Android Gradle plugin:
https://developer.android.com/studio/projects/add-native-code.html
or use the experimental plugin:
https://developer.android.com/studio/build/experimental-plugin.html.
This is complaining that the NDK setup is broken for our project.
Let’s back up a bit and talk about how SDL 2 on Android works. Android
development is mostly Java based and SDL is a C based library.
The Native Development Kit that allows Java to interface with native C/C++ code using the Java Native Interface. With the NDK, we’ll build
SDL2 as a shared object that will interface with Java, and we’ll build our game as another shared object that will interface with SDL 2.
What we need to do is tell Gradle (the build tool used by Android Studio) to use the Android make file for our project. Open up the project window, right click on app and select «Link C++ with Gradle».

Set the Build System to ndk-build and set the project path to point to the Android make file which should be at
«~/androidprojects/SDL_Tutorial/app/src/main/jni/Android.mk».

Hit Build -> Make Project and you’ll get a bunch of new errors saying something like
Android NDK: Module main depends on undefined modules: SDL2
15) What the previous error was complaining about was that it can’t find the SDL 2 module. What we need to do is set up a symbolic link to the SDL 2 source we extracted.
Go to the JNI directory inside the project using this command:
cd ~/androidprojects/SDL_Tutorial/app/src/main/jni
And create a symbolic link directory to the SDL 2 source directory we extracted (REMEMBER: This path will vary depending on your version of SDL 2):
ln -s ~/androidlib/SDL2-2.0.7/ SDL2
Try to rebuild the project. You’ll new a new error but at least now you’ll see symbolic link in the project:

16) That Gradle error didn’t tell us much so we’ll have to open up the Gradle console:

Scroll up a bit and you’ll see some errors from the ndk-build. You’ll probably see this error:
make: *** No rule to make target `~/androidprojects/SDL_Tutorial/app/src/main/jni/src/YourSourceHere.c’, needed by `~/androidprojects/SDL_Tutorial/app/build/intermediates/ndkBuild/debug/obj/local/armeabi-v7a/objs-debug/main/YourSourceHere.o’. Stop.
make: *** No rule to make target `~/androidprojects/SDL_Tutorial/app/src/main/jni/src/YourSourceHere.c’, needed by `~/androidprojects/SDL_Tutorial/app/build/intermediates/ndkBuild/debug/obj/local/x86/objs-debug/main/YourSourceHere.o’. Stop.
In this case, the error «No rule to make target» actually means it can’t find the file you’re asking to compile. It’s trying to compile «~/androidprojects/SDL_Tutorial/app/src/main/jni/src/YourSourceHere.c» but can’t find it which
makes sense because it doesn’t exist. YourSourceHere.c is a place holder for our application source file so we need to replace it with ours. Download the
source for lesson 52 and place 52_hello_mobile.cpp at «~/androidprojects/SDL_Tutorial/app/src/main/jni/src/52_hello_mobile.cpp». Open up
«~/androidprojects/SDL_Tutorial/app/src/main/jni/src/Android.mk» and change «YourSourceHere.c» to «52_hello_mobile.cpp». Build and you should get a new error in the Gradle build menu.
17) The error
fatal error: ‘string’ file not found
is due to the fact that the project is not set up to us the standard C++ library. To fix this, open up
«~/androidprojects/SDL_Tutorial/app/src/main/jni/Application.mk» and change
# APP_STL := stlport_static
to
APP_STL := stlport_static
so it’s no longer commmented out. Build again and you should get no errors.
18) Open «~/androidprojects/SDL_Tutorial/app/src/main/res/values/strings.xml» and change
<string name=»app_name»>SDL App</string>
to
<string name=»app_name»>SDL Tutorial</string>
This will change the name under the App’s icon from «SDL App» to «SDL Tutorial».
19) At this point the app will run our code but it will fail because it can’t load the media files for the tutorial. Media files go in the assets directory. Create a folder called
«assets» at «~/androidprojects/SDL_Tutorial/app/src/main/assets». Copy the directory inside of the zip we downloaded and place it in the assets directory. If the application needs to open «52_hello_mobile/hello.bmp», it needs to be
at «~/androidprojects/SDL_Tutorial/app/src/main/assets/52_hello_mobile/hello.bmp» when building.
20) Our SDL application is ready to build and run, but first we need to set up our device. You can use an Android emulator, but the emulator is can be really, really slow so I recommend
getting an Android device if you can.
First you’ll need to enable USB debugging on your device. That is version/device specific which is why I won’t go over it here. Google search «android enable usb debugging» with your device name and they’ll show you how to do it.
After you set up your Android device, go to Run -> run App.

If you want to see the console output of the app, you can see it in the Android Monitor:

The Android Monitor can also show you if there are any ADB errors.
Now that you have SDL 2 running on your device, it’s time to go onto part 2 of the tutorial.

Topic: ‘string’ file not found. (Read 8317 times)
0 Members and 1 Guest are viewing this topic.
Hey there SFML community, it’s been a while since I’ve made a thread here and during this time of absence I’ve obtained a new computer which I’m having trouble setting up so I can develop in C++ using SFML.
Like usual, I feel ridiculous asking questions because I know they’re simple yet I can’t figure them out (being a noob at this stuff and all)
So basically my problem is that when I compile the default SFML 2.1 project I get an error «‘string’ file not found» and I’m not even able to #include <iostream> without getting a similar error. I’m using a Mac running the latest version of Mac OSX and I have the latest Xcode installed yet it seems like I’m not even able to compile basic C++ programs, help? 
Thanks,
MarcuzPwnz.
« Last Edit: July 30, 2013, 07:55:37 am by MarcuzPwnz »

Logged
Make sure that your file is compiled as C++, not as C (most IDEs deduce the language from the file extension).
Are you able to include C headers, like <stdio.h>?
Logged
Laurent Gomila — SFML developer
I would assume I’m compiling as C++ as I’m using a .cpp file and my language settings on the IDE look like this 
And I am unable to include <stdio.h> also.
Thank you for the reply.
Logged
Do you have a custom version of clang installed on your system? (I had this issue yesterday.)
Logged
SFML / OS X developer
I’m using the default compiler supplied with the installation of Xcode from the app store.
Logged
so when you run
which clang
in a terminal you get
/usr/bin/clang
, right? (just to make sure)
Logged
SFML / OS X developer
I can’t even run clang as a command in terminal, this is obviously a problem.
Is is possible Xcode didn’t even install a compiler?
Logged
I’m not 100% sure that the issue but you can try installing the CLT. See this SO
Logged
SFML / OS X developer
I just managed to compile a basic command line application using Xcode so I’m assuming that’s not the issue. 
Just clicked your link, I do remember installing the CLT on my last Macbook, I’ll give this a try now, thanks.
Edit: Installed and now I’m getting the following Apple Mach-O-Linker errors.

« Last Edit: July 30, 2013, 04:15:35 pm by MarcuzPwnz »
Logged
Does anybody have an idea or solution as to what may be causing this issue or how to fix it?
Logged
Does anybody have an idea or solution as to what may be causing this issue or how to fix it?
For starters, what about try reading what your error is? The very first error in your list is…
Directory not found for option ‘-L/usr/local/lib’
That means your linker can not find your lib folder, so that would be something to check that your have the correct path in there to the SFML libraries.
Logged
Logged
SFML / OS X developer
Managed to fix it, thank you for pointing me in the right direction and I apologise for being troublesome and not reading through everything as I should have first.
Logged
Asked
8 years, 2 months ago
Viewed
63k times
I wrote the program kai.c and now am trying to compile it with gcc kai.c -o kai, which returns:
kai.c:5:18: fatal error: string: No such file or directory
 #include <string>
                  ^
compilation terminated.
What can I do?
gcc version is: (Ubuntu 4.8.2-19ubuntu1) 4.8.2
![]()
αғsнιη
34.6k39 gold badges126 silver badges189 bronze badges
asked Nov 28, 2014 at 17:13
![]()
2
#include <string> is a C++ directive.
Rename your file to kai.cpp
And compile it with g++ kai.cpp -o kai
![]()
αғsнιη
34.6k39 gold badges126 silver badges189 bronze badges
answered Nov 28, 2014 at 17:15
![]()
Oli♦Oli
286k115 gold badges669 silver badges829 bronze badges
3
C
The string library is the file string.h, so:
#include "string.h"
Example:
#include "string.h"
#include "stdio.h"

void main(){
    char src[2] = "Hi";
    char dest[2];
    strcpy(dest, src);
    printf("%sn", dest); // Will print Hi
}
![]()
answered Nov 28, 2014 at 18:01
![]()
LucioLucio
18.4k31 gold badges104 silver badges190 bronze badges