Moderators: adafruit_support_bill, adafruit
Please be positive and constructive with your questions and comments.
-

Fugit185
- Posts: 2
- Joined: Sun Oct 21, 2018 3:17 pm

VL53l0X: fatal error: VL53L0X.h: No such file or directory
Post
by Fugit185 » Sun Oct 21, 2018 3:27 pm
Hi,
When I try to compile my program I get following error: «fatal error: VL53L0X.h: No such file or directory»
I’m using IDE 1.8.0 and here is beginning in my code
//SONAR
#include «VL53L0X.h»
#include «Wire.h»
I’m running IDE in windows 10
I have tried all library version of Adafruit VL53L0X library from 1.0,0 to 1.04
Br
-Pauli
-
Fugit185
- Posts: 2
- Joined: Sun Oct 21, 2018 3:17 pm
Please be positive and constructive with your questions and comments.
Return to “Other Products from Adafruit”
Jump to
- General Forums
- ↳ Announcements
- ↳ For Educators
- Supported Products & Projects
- ↳ Internet of Things: Adafruit IO
- ↳ Adafruit IO Wippersnapper Beta
- ↳ Adafruit CircuitPython
- ↳ Feather — Adafruit’s lightweight platform
- ↳ Circuit Playground and Circuit Playground Express
- ↳ Trinket and Trinket M0
- ↳ Metro and Metro Express, Grand Central
- ↳ Itsy Bitsy 32u4, M0, M4
- ↳ CLUE
- ↳ MakeCode
- ↳ ADABOX! Show us what you made!
- ↳ Glowy things (LCD, LED, TFT, EL) purchased at Adafruit
- ↳ Adafruit Raspberry Pi® accessories
- ↳ Other Products from Adafruit
- ↳ Wearables
- ↳ Wireless: WiFi and Bluetooth
- ↳ FONA
- ↳ MiniPOV
- ↳ MintyBoost
- ↳ USBtinyISP
- ↳ TV-B-Gone Kit
- ↳ XBee products from Adafruit
- ↳ Clocks
- ↳ Beagle Bone & Adafruit Beagle Bone products
- ↳ SpokePOV
- ↳ YBox2
- ↳ Fuzebox
- Arduino
- ↳ Arduino
- ↳ Arduino Starter Pack
- ↳ Other Arduino products from Adafruit
- ↳ Arduino Shields from Adafruit
- Electronics
- ↳ General Project help
- ↳ Microcontrollers
- ↳ Citizen Engineer (retired forum)
- ↳ Kitbiz
- Tools
- ↳ SMT (Surface Mount Tech)
- ↳ Laser
- ↳ Tools Tools Tools
- Unsupported Projects
- ↳ MintyMP3
- ↳ Wave Bubble
- ↳ MIDIsense
- x0xb0x
- ↳ x0xb0x Project Status 2010
- ↳ General x0xing
- ↳ Making x0x
- ↳ x0xm0dz
- ↳ x0x shop
- ↳ Test Message Forum
- ↳ Administrative
- ↳ Ask an Engineer! VIDEO CHAT
Moderators: grovkillen, Stuntteam, TD-er
-
QcVictor
- Normal user
- Posts: 46
- Joined: 23 Feb 2016, 00:47
Plugin 133 VL53L0X I2C Ranging LIDAR
#1
Post
by QcVictor » 28 Jun 2018, 14:51
Hi Guys
Try to compile from the latest sources the VL53L0X plugin from playground but get this error
Code: Select all
In file included from /Users/Pascal/Downloads/ESPEasy/ESPEasy.ino:76:0:
sketch/ESPEasy-Globals.h:375:20: fatal error: I2Cdev.h: No such file or directory
 #include <I2Cdev.h>
                    ^
compilation terminated.
exit status 1
Error compiling for board WeMos D1 R2 & mini.
I looking for I2Cdev.h found here https://github.com/jrowberg/i2cdevlib/b … v/I2Cdev.hbut no luck,
Some clue
Regards
Vic
-
TD-er
- Core team member
- Posts: 7344
- Joined: 01 Sep 2017, 22:13
- Location: the Netherlands
- Contact:
Re: Plugin 133 VL53L0X I2C Ranging LIDAR
#2
Post
by TD-er » 29 Jun 2018, 00:08
I guess we have to make some decision on those playground plugins, since a lot of users try to compile them but they are hardly maintained.
If you fetch the latest Mega source, you will have the I2C files and the accompanying library.
The status of these plugins is unknown (at least to me) and pulling them into the Mega branch will not only make those images too big, but also will most likely lead to an explosion of support questions.
But leaving them as unsupported and not maintained as they are now, is also not a good idea.
-
QcVictor
- Normal user
- Posts: 46
- Joined: 23 Feb 2016, 00:47
Re: Plugin 133 VL53L0X I2C Ranging LIDAR
#3
Post
by QcVictor » 29 Jun 2018, 00:25
OK I understand but with further investigation, it’s not related to this plugin, with the latest source and or last fork untouched I have the same error.
-
TD-er
- Core team member
- Posts: 7344
- Joined: 01 Sep 2017, 22:13
- Location: the Netherlands
- Contact:
Re: Plugin 133 VL53L0X I2C Ranging LIDAR
#4
Post
by TD-er » 29 Jun 2018, 00:29
I guess you’re compiling with the Arduino IDE?
I normally use PlatformIO (with Atom and also VScode) and I know the Arduino IDE has some issues finding files.
You could change the <> into «» to test, if you’re sure you did install that library. (or use PlatformIO ![]() )
)
-
QcVictor
- Normal user
- Posts: 46
- Joined: 23 Feb 2016, 00:47
Re: Plugin 133 VL53L0X I2C Ranging LIDAR
#5
Post
by QcVictor » 29 Jun 2018, 15:54
Ok I give it a try to platformio but no luck
Code: Select all
collect2: error: ld returned 1 exit status
*** [.pioenvs/normal_ESP8266_4096/firmware.elf] Error 1![]()
-

grovkillen
- Core team member
- Posts: 3621
- Joined: 19 Jan 2017, 12:56
- Location: Hudiksvall, Sweden
- Contact:
Re: Plugin 133 VL53L0X I2C Ranging LIDAR
#6
Post
by grovkillen » 29 Jun 2018, 16:32
You might need to delete the .pioenv folder prior to compile.
-
QcVictor
- Normal user
- Posts: 46
- Joined: 23 Feb 2016, 00:47
Re: Plugin 133 VL53L0X I2C Ranging LIDAR
#7
Post
by QcVictor » 30 Jun 2018, 18:34
grovkillen wrote: ↑29 Jun 2018, 16:32
You might need to delete the .pioenv folder prior to compile.
tks for the tips Grovkillen, it’s working, have a good weekend.
Maybe another questions, I add the Plugin «_P133_VL53L0X.ino» in folder «src» add library required in the folder «lib» and start compilation, which version should contain the image file updated? ESP_Easy_mega-20180625_dev/_normal or _test
-
grovkillen
- Core team member
- Posts: 3621
- Joined: 19 Jan 2017, 12:56
- Location: Hudiksvall, Sweden
- Contact:
Re: Plugin 133 VL53L0X I2C Ranging LIDAR
#8
Post
by grovkillen » 30 Jun 2018, 20:11
You also need to include it in the «define_plugin_sets.h»
-
TuWi
- Normal user
- Posts: 1
- Joined: 22 Jul 2018, 16:03
Re: Plugin 133 VL53L0X I2C Ranging LIDAR
#9
Post
by TuWi » 22 Jul 2018, 16:41
Hi
I need help. I get these errors when I try to upload (PIO upload/dev_ESP8266_4096)
Compiling .pioenvsdev_ESP8266_4096FrameworkArduinocore_esp8266_wiring_analog.c.o
C:/Users//ESPEasy_mega-20180720/Source/src/_P133_VL53L0X.ino: In function ‘boolean Plugin_133(byte, EventStruct*, String&)’:
C:/Users//ESPEasy_mega-20180720/Source/src/_P133_VL53L0X.ino:275:212: error: ‘Plugin_133_begin’ was not declared in this scope
Compiling .pioenvsdev_ESP8266_4096FrameworkArduinocore_esp8266_wiring_digital.c.o
Does anyone have an idea.
I intend to use VL53L0X for my wood pellet heating supplie. I have tested the HD-SR04 without good results.
-
drf10034
- Normal user
- Posts: 2
- Joined: 07 Aug 2018, 20:15
Re: Plugin 133 VL53L0X I2C Ranging LIDAR
#10
Post
by drf10034 » 15 Jan 2019, 16:04
I was able to upload the firmware to my device, but most of the time, the SW Watchdog resets the device for about 10 times in a row, before disabling the device.
Code: Select all
Soft WDT reset

ctx: cont
sp: 3ffffaf0 end: 3fffffd0 offset: 01b0

>>>stack>>>
3ffffca0:  00000002 00000001 3fff0da9 40201c5c
3ffffcb0:  00000001 00000001 3fff0da9 40201c5c
3ffffcc0:  00000029 00000000 4bc6a7f0 00000000
3ffffcd0:  00000000 3fff12a4 40106bb0 3fff12a4
3ffffce0:  00000000 3fff12a4 3fff0da9 402089bc
3ffffcf0:  0001dc6a 00000029 3fff0d98 402089e4
3ffffd00:  402a0d0c 0000001a 3ffffd30 4020bb9b
3ffffd10:  3fff1f4d 00000000 3fff12a4 4020bf1d
3ffffd20:  3fff1f4d 00000029 3ffffe80 4023c0ce
3ffffd30:  00000000 00000000 00000000 401006dc
3ffffd40:  3fff2f84 000004f3 000004f3 4010020c
3ffffd50:  3fff1c18 3fff5c0c 0000001f 0000001c
3ffffd60:  3fff2f84 000004f0 000004f0 4010020c
3ffffd70:  3fff1c18 00000003 3ffffdb0 401006dc
3ffffd80:  3fff1b24 3fff4a2c 3ffffdb0 40265778
3ffffd90:  00000000 00000000 402a0b10 40265794
3ffffda0:  3ffe91b4 3fff2084 402a0b10 40218d46
3ffffdb0:  00000000 00000000 00000000 0000002f
3ffffdc0:  3fff1c18 00000003 3ffffe80 40226e4c
3ffffdd0:  3fff55ac 0000000f 00000000 3fff55c4
3ffffde0:  0000000f 00000000 3fff55dc 0000000f
3ffffdf0:  00000000 3fff5bdc 0000000f 00000000
3ffffe00:  3fff5bf4 0000000f 00000000 00000000
3ffffe10:  00000000 00000000 00000000 00000000
3ffffe20:  00000000 00000000 00000000 00010000
3ffffe30:  3fff2f84 00000173 3ffffeb0 4026583d
3ffffe40:  0006485d 3ffe91b4 3ffffeb0 4026588a
3ffffe50:  3ffe91b4 00062b57 402b06c8 40265778
3ffffe60:  00000000 00000000 3ffffe80 3fff225c
3ffffe70:  3fff59ad 3fff1e14 3fff25fc 4024853e
3ffffe80:  3fff4024 0000000f 00000000 3fff3fa4
3ffffe90:  0000000f 00000000 3fff419c 0000000f
3ffffea0:  00000000 3fff557c 0000000f 00000000
3ffffeb0:  3fff5594 0000000f 00000000 00000000
3ffffec0:  00000000 00000000 00000000 00000000
3ffffed0:  00000000 00000000 00000000 00010000
3ffffee0:  00000000 00000000 00000000 00000000
3ffffef0:  0000000b 4bc6a7f0 19581062 00000000
3fffff00:  00062abd 000001a3 000001a3 4010020c
3fffff10:  00000001 3fff1dac 00000193 30000000
3fffff20:  3fff1b24 3fff263c 00000000 4022152d
3fffff30:  00000963 0001b263 3ffe87c8 30000000
3fffff40:  3fff1b24 00062b57 00000000 402486ce
3fffff50:  3fffdad0 00062a82 00000000 402022b5
3fffff60:  3fff1b24 00062a82 00000000 40261d15
3fffff70:  3fffdad0 00000193 402668f4 3fffefb0
3fffff80:  402022c0 00000001 3fff1c00 3fff2e28
3fffff90:  3fffdad0 00000000 3fff1c00 40261dfd
3fffffa0:  00000000 00000000 00000001 40266915
3fffffb0:  3fffdad0 00000000 3fff2e22 40266984
3fffffc0:  feefeffe feefeffe 3ffe87c8 40100721
<<<stack<<<
it sometimes does work, but I do not know why…
Any hints on where to look for the problem? Did something change in the plugin structure that causes this problem?
Frank
-
rmhoutz
- Normal user
- Posts: 36
- Joined: 08 Sep 2017, 14:09
Re: Plugin 133 VL53L0X I2C Ranging LIDAR
#11
Post
by rmhoutz » 16 Apr 2021, 01:29
TD-er wrote: ↑29 Jun 2018, 00:08
If you fetch the latest Mega source, you will have the I2C files and the accompanying library.
I feel like I must be missing something. I downloaded the latest Mega source and followed the instructions found here.https://espeasy.readthedocs.io/en/lates … noIDE.html
But when attempting to compile I’m was seeing the missing I2Cdev.h after commenting it out of _Plugin_Helper I’m now getting this.
Code: Select all
In file included from sketch_Plugin_Helper.h:36:0,
                 from F:arduino-1.8.13P230portablesketchbookESPEasyESPEasy.ino:101:
sketchsrc/Helpers/_Plugin_Helper_serial.h:5:27: fatal error: ESPeasySerial.h: No such file or directory
 #include <ESPeasySerial.h>
                           ^
compilation terminated.
exit status 1
Error compiling for board Generic ESP8266 Module.
Do I just need to keep adding new lib files?
-

Ath
- Normal user
- Posts: 2401
- Joined: 10 Jun 2018, 12:06
- Location: NL

Re: Plugin 133 VL53L0X I2C Ranging LIDAR
#12
Post
by Ath » 16 Apr 2021, 08:25
Are you sure you have the latest sources, cloned from Github?
Can we motivate you to set up VSCode with PlatformIO, that’s a much easier way of building ESPEasy, IMHO.
-
TD-er
- Core team member
- Posts: 7344
- Joined: 01 Sep 2017, 22:13
- Location: the Netherlands
- Contact:
Re: Plugin 133 VL53L0X I2C Ranging LIDAR
#13
Post
by TD-er » 16 Apr 2021, 08:35
rmhoutz wrote: ↑16 Apr 2021, 01:29
[…]
Do I just need to keep adding new lib files?
The libs you should get from the lib directory, not trying to install via the library manager of the Arduino IDE as some libraries do not exist in the Arduino Library manager and some have ESPEasy specific changes which are not present in the original libraries.
-
rmhoutz
- Normal user
- Posts: 36
- Joined: 08 Sep 2017, 14:09
Re: Plugin 133 VL53L0X I2C Ranging LIDAR
#14
Post
by rmhoutz » 16 Apr 2021, 15:05
[/quote]
you should get from the lib directory, not trying to install via the library manager
[/quote]
Hi TD-er
Confirmed I copied all the files from the first lib file found in the download as instructed here.
https://espeasy.readthedocs.io/en/lates … noIDE.html
I can even find the ESPEasySerial folder containing the ESPeasySerial.h file but despite all that I am still getting the error in Arduino when attempting to compile.
Code: Select all
In file included from sketch_Plugin_Helper.h:36:0,
                 from F:arduino-1.8.13P230portablesketchbookESPEasyESPEasy.ino:101:
sketchsrc/Helpers/_Plugin_Helper_serial.h:5:27: fatal error: ESPeasySerial.h: No such file or directory
 #include <ESPeasySerial.h>
                           ^
compilation terminated.
exit status 1
Error compiling for board Generic ESP8266 Module.
I feel like I missed a step or something when following the Arduino IDE tutorial.
-
TD-er
- Core team member
- Posts: 7344
- Joined: 01 Sep 2017, 22:13
- Location: the Netherlands
- Contact:
Re: Plugin 133 VL53L0X I2C Ranging LIDAR
#15
Post
by TD-er » 16 Apr 2021, 15:16
What is the content of your Custom.h file?
Please have a look at the file define_plugin_sets.h:
Code: Select all
/******************************************************************************
 * Libraries dependencies *****************************************************
******************************************************************************/
#if defined(USES_P049) || defined(USES_P052) || defined(USES_P053) || defined(USES_P056) || defined(USES_P071) || defined(USES_P075) || defined(USES_P078) || defined(USES_P082) || defined(USES_P085) || defined(USES_P087) || defined(USES_P094) || defined(USES_P102) || defined(USES_P108) || defined(USES_C018)
  // At least one plugin uses serial.
  #ifndef PLUGIN_USES_SERIAL
    #define PLUGIN_USES_SERIAL
  #endif
#else
  // No plugin uses serial, so make sure software serial is not included.
  #define DISABLE_SOFTWARE_SERIAL
#endif
As you can see, there is a number of plugins mentioned here that depend on the ESPEasySerial library.
So either you include your USES_P133 in that list, or you simply define PLUGIN_USES_SERIAL and undef DISABLE_SOFTWARE_SERIAL in your Custom.h file
Code: Select all
  #ifndef PLUGIN_USES_SERIAL
    #define PLUGIN_USES_SERIAL
  #endif
  #ifdef DISABLE_SOFTWARE_SERIAL
    #undef DISABLE_SOFTWARE_SERIAL
  #endif
Or if that doesn’t work, try including one of those plugins that need the serial, so it is defined for sure.
Problem with Arduino IDE is that defines needed for libraries may need to be set before you compile (so not defined in a Config.h file) or else builds may fail.
See also here how to make global defines.
And the least issues compiling would be to use PlatformIO.
-
Ath
- Normal user
- Posts: 2401
- Joined: 10 Jun 2018, 12:06
- Location: NL
Re: Plugin 133 VL53L0X I2C Ranging LIDAR
#16
Post
by Ath » 16 Apr 2021, 15:40
Plugin P133 from the PluginPlayGround has been merged into the mega branch as P110 since a couple of weeks. No need to grab it from the playground anymore ![]() Unfortunately there wasn’t enough room in a testing build to have it included in that type of build, but in your Custom.h you should un-comment the «#define USES_P110» line. It is available in an ESP32 MAX build, but you’ll need an ESP32 with 16MB flash to run that…
Unfortunately there wasn’t enough room in a testing build to have it included in that type of build, but in your Custom.h you should un-comment the «#define USES_P110» line. It is available in an ESP32 MAX build, but you’ll need an ESP32 with 16MB flash to run that…
And, this plugin does not rely on a serial connection in anyway, as it’s using I2C to communicate.
-
rmhoutz
- Normal user
- Posts: 36
- Joined: 08 Sep 2017, 14:09
Re: Plugin 133 VL53L0X I2C Ranging LIDAR
#17
Post
by rmhoutz » 16 Apr 2021, 19:08
Hey Guys Thanks for all the Info.
I am attempting to use PlatformIO but I’m definitely not a programmer (but I’m a PC Analyst that’s been playing with Arduino and ESP’s for years so I’m not completely out of my element)
A few years ago I had used Arduino to create a custom bin but I no longer have access to the computer used. COVID 19 took my Job ![]()
When I open PlatformIO I feel like I’m 10 years old again sitting at a Win3.1 DOS prompt thinking ok now what. ![]()
And even when I get it to do something from the documentation I feel like ok what did I just do, and did it work?
The easiest is to go for the environment “env:custom_ESP8266_4M” and unfold that one. Then select “Build” to see if it will start building.
I did this and after some time thinking it’s working I ended up seeing this.
Code: Select all
Building in release mode
Generating .piobuildcustom_ESP8266_4M1Mcorecore_version.h
Compiling .piobuildcustom_ESP8266_4M1Mlib093Adafruit GFX Libraryglcdfont.c.o
Compiling .piobuildcustom_ESP8266_4M1Mlib72dESP8266WiFiESP8266WiFiGratuitous.cpp.o
C:Usersmyname.platformiopackagesframework-arduinoespressif8266librariesESP8266WiFisrcESP8266WiFiGratuitous.cpp:22:41: fatal error: lwip/init.h: No such file or directory
 #include "lwip/init.h" // LWIP_VERSION_*
                                         ^
compilation terminated.
Compiling .piobuildcustom_ESP8266_4M1Mlib330ESP8266SdFatFatLibFmtNumber.cpp.o
Compiling .piobuildcustom_ESP8266_4M1Mlib61eESP8266WebServerdetailmimetable.cpp.o
Compiling .piobuildcustom_ESP8266_4M1Mlib0bfccronexprccronexpr.c.o
Compiling .piobuildcustom_ESP8266_4M1Mlib0bfccronexprccronexpr_test.c.o
Compiling .piobuildcustom_ESP8266_4M1Mlib2beAdafruit_BME680bme680.c.o
Compiling .piobuildcustom_ESP8266_4M1MsrcsrcDataStructsCRCStruct.cpp.o
Compiling .piobuildcustom_ESP8266_4M1MsrcsrcGlobalsCRCValues.cpp.o
Compiling .piobuildcustom_ESP8266_4M1MsrcsrcGlobalsResetFactDefaultPref.cpp.o
Compiling .piobuildcustom_ESP8266_4M1MsrcsrcHelpersESPEasy_math.cpp.o
*** [.piobuildcustom_ESP8266_4M1Mlib72dESP8266WiFiESP8266WiFiGratuitous.cpp.o] Error 1
================================================================================================== [FAILED] Took 39.22 seconds ==================================================================================================
Environment          Status    Duration
-------------------  --------  ------------
custom_ESP8266_4M1M  FAILED    00:00:39.223
============================================================================================= 1 failed, 0 succeeded in 00:00:39.223 =============================================================================================The terminal process "C:Usersmyname.platformiopenvScriptsplatformio.exe 'run', '--environment', 'custom_ESP8266_4M1M'" terminated with exit code: 1.
Is that considered it’s working?
If that’s working, you can open the file “pre_extra_script.py”
I apologize for the long rambling post I just need to get more time with PIO and when I started this endeavor I was just trying to start using Homie
with my OpenHAB 3 server.
-
rmhoutz
- Normal user
- Posts: 36
- Joined: 08 Sep 2017, 14:09
Re: Plugin 133 VL53L0X I2C Ranging LIDAR
#19
Post
by rmhoutz » 16 Apr 2021, 19:29
TD-er wrote: ↑16 Apr 2021, 15:16
What is the content of your Custom.h file?
I don’t know if this is still important if I’m going to try using PlatformIO but here is my Custom.h file.
Code: Select all
#ifndef ESPEASY_CUSTOM_H
#define ESPEASY_CUSTOM_H

/*
    To modify the stock configuration without changing the EspEasy.ino file :
    1) rename this file to "Custom.h" (It is ignored by Git)
    2) define your own settings below
    3) define USE_CUSTOM_H as a build flags. ie : export PLATFORMIO_BUILD_FLAGS="'-DUSE_CUSTOM_H'"
 */


/*
 #######################################################################################################
   Your Own Default Settings
 #######################################################################################################
    You can basically ovveride ALL macro defined in ESPEasy.ino.
    Don't forget to first #undef each existing #define that you add below.
    But since this Custom.h is included before other defines are made, you don't have to undef a lot of defines.
    Here are some examples:
 */

#ifdef BUILD_GIT
# undef BUILD_GIT
#endif // ifdef BUILD_GIT

#define BUILD_GIT           "My Build: "  __DATE__ " "  __TIME__


#define DEFAULT_NAME        "ESP_000000"                        // Enter your device friendly name
#define UNIT                99                                        // Unit Number
#define DEFAULT_DELAY       60                                       // Sleep Delay in seconds

// --- Wifi AP Mode (when your Wifi Network is not reachable) ----------------------------------------
#define DEFAULT_AP_IP       192, 168, 4, 1                           // Enter IP address (comma separated) for AP (config) mode
#define DEFAULT_AP_SUBNET   255, 255, 255, 0                         // Enter IP address (comma separated) for AP (config) mode
#define DEFAULT_AP_KEY      "configesp"                              // Enter network WPA key for AP (config) mode

// --- Wifi Client Mode -----------------------------------------------------------------------------
#define DEFAULT_SSID                         "MyWifi"            // Enter your network SSID
#define DEFAULT_KEY                          "mypassword" // Enter your network WPA key
#define DEFAULT_USE_STATIC_IP                false                   // (true|false) enabled or disabled static IP
#define DEFAULT_IP                           "192.168.0.50"          // Enter your IP address
#define DEFAULT_DNS                          "192.168.0.1"           // Enter your DNS
#define DEFAULT_GW                           "192.168.0.1"           // Enter your Gateway
#define DEFAULT_SUBNET                       "255.255.255.0"         // Enter your Subnet
#define DEFAULT_IPRANGE_LOW                  "0.0.0.0"               // Allowed IP range to access webserver
#define DEFAULT_IPRANGE_HIGH                 "255.255.255.255"       // Allowed IP range to access webserver
#define DEFAULT_IP_BLOCK_LEVEL               1                       // 0: ALL_ALLOWED  1: LOCAL_SUBNET_ALLOWED  2:
// ONLY_IP_RANGE_ALLOWED
#define DEFAULT_ADMIN_USERNAME               "admin"
#define DEFAULT_ADMIN_PASS                   ""

#define DEFAULT_WIFI_CONNECTION_TIMEOUT      10000 // minimum timeout in ms for WiFi to be connected.
#define DEFAULT_WIFI_FORCE_BG_MODE           false // when set, only allow to connect in 802.11B or G mode (not N)
#define DEFAULT_WIFI_RESTART_WIFI_CONN_LOST  false // Perform wifi off and on when connection was lost.
#define DEFAULT_ECO_MODE                     false // When set, make idle calls between executing tasks.
#define DEFAULT_WIFI_NONE_SLEEP              false // When set, the wifi will be set to no longer sleep (more power
// used and need reboot to reset mode)
#define DEFAULT_GRATUITOUS_ARP               false // When set, the node will send periodical gratuitous ARP
                                                   // packets to announce itself.
#define DEFAULT_TOLERANT_LAST_ARG_PARSE      false // When set, the last argument of some commands will be parsed to the end of the line
                                                   // See: https://github.com/letscontrolit/ESPEasy/issues/2724
#define DEFAULT_SEND_TO_HTTP_ACK             false // Wait for ack with SendToHttp command.

#define DEFAULT_AP_DONT_FORCE_SETUP            false  // Allow optional usage of Sensor without WIFI avaiable // When set you can use the Sensor in AP-Mode without beeing forced to /setup

// --- Default Controller ------------------------------------------------------------------------------
#define DEFAULT_CONTROLLER   false                                          // true or false enabled or disabled, set 1st controller
                                                                            // defaults
#define DEFAULT_CONTROLLER_ENABLED true                                     // Enable default controller by default
#define DEFAULT_CONTROLLER_USER    ""                                       // Default controller user
#define DEFAULT_CONTROLLER_PASS    ""                                       // Default controller Password

// using a default template, you also need to set a DEFAULT PROTOCOL to a suitable MQTT protocol !
#define DEFAULT_PUB         "homie/%unitname%/%devicename%/%valname%"       // Enter your pub
#define DEFAULT_SUB         "homie/%unitname%/%devicename%/%valname%/set"                   // Enter your sub
#define DEFAULT_SERVER      "192.168.2.4"                                   // Enter your Server IP address
#define DEFAULT_SERVER_HOST ""                                              // Server hostname
#define DEFAULT_SERVER_USEDNS false                                         // true: Use hostname.  false: use IP
#define DEFAULT_USE_EXTD_CONTROLLER_CREDENTIALS   false                     // true: Allow longer user credentials for controllers

#define DEFAULT_PORT        1883                                            // Enter your Server port value

#define DEFAULT_PROTOCOL    5                                               // Protocol used for controller communications
                                                                            //   0 = Stand-alone (no controller set)
                                                                            //   1 = Domoticz HTTP
                                                                            //   2 = Domoticz MQTT
                                                                            //   3 = Nodo Telnet
                                                                            //   4 = ThingSpeak
                                                                            //   5 = Home Assistant (openHAB) MQTT
                                                                            //   6 = PiDome MQTT
                                                                            //   7 = EmonCMS
                                                                            //   8 = Generic HTTP
                                                                            //   9 = FHEM HTTP

#define DEFAULT_PIN_I2C_SDA                     0
#define DEFAULT_PIN_I2C_SCL                     0
#define DEFAULT_I2C_CLOCK_SPEED                 400000            // Use 100 kHz if working with old I2C chips

#define DEFAULT_SPI                             0                 //0=disabled 1=enabled and for ESP32 there is option 2 =HSPI

#define DEFAULT_PIN_STATUS_LED                  (-1)
#define DEFAULT_PIN_STATUS_LED_INVERSED         true

#define DEFAULT_PIN_RESET_BUTTON                (-1)


#define DEFAULT_USE_RULES                       false             // (true|false) Enable Rules?
#define DEFAULT_RULES_OLDENGINE                 true

#define DEFAULT_MQTT_RETAIN                     false             // (true|false) Retain MQTT messages?
#define DEFAULT_MQTT_DELAY                      100               // Time in milliseconds to retain MQTT messages
#define DEFAULT_MQTT_LWT_TOPIC                  "homie/%sysname%/$state"                // Default lwt topic
#define DEFAULT_MQTT_LWT_CONNECT_MESSAGE        "ready"              // Default lwt message
#define DEFAULT_MQTT_LWT_DISCONNECT_MESSAGE     "lost"               // Default lwt message
#define DEFAULT_MQTT_USE_UNITNAME_AS_CLIENTID   0

#define DEFAULT_USE_NTP                         true             // (true|false) Use NTP Server
#define DEFAULT_NTP_HOST                        "192.168.2.2"                // NTP Server Hostname
#define DEFAULT_TIME_ZONE                       -300                 // Time Offset (in minutes)
#define DEFAULT_USE_DST                         true             // (true|false) Use Daily Time Saving

#define DEFAULT_LATITUDE                        0.0f              // Default Latitude
#define DEFAULT_LONGITUDE                       0.0f              // Default Longitude

#define DEFAULT_SYSLOG_IP                       ""                // Syslog IP Address
#define DEFAULT_SYSLOG_LEVEL                    0                 // Syslog Log Level
#define DEFAULT_SERIAL_LOG_LEVEL                LOG_LEVEL_INFO    // Serial Log Level
#define DEFAULT_WEB_LOG_LEVEL                   LOG_LEVEL_INFO    // Web Log Level
#define DEFAULT_SD_LOG_LEVEL                    0                 // SD Card Log Level
#define DEFAULT_USE_SD_LOG                      false             // (true|false) Enable Logging to the SD card

#define DEFAULT_USE_SERIAL                      false              // (true|false) Enable Logging to the Serial Port
#define DEFAULT_SERIAL_BAUD                     115200            // Serial Port Baud Rate
#define DEFAULT_SYSLOG_FACILITY                 0                 // kern

#define DEFAULT_SYNC_UDP_PORT                   0                 // Used for ESPEasy p2p. (IANA registered port: 8266)


#define BUILD_NO_DEBUG


#define USES_SSDP


// #define USE_SETTINGS_ARCHIVE
// #define FEATURE_I2CMULTIPLEXER
// #define USE_TRIGONOMETRIC_FUNCTIONS_RULES


/*
 #######################################################################################################
   Special settings  (rendering settings incompatible with other builds)
 #######################################################################################################
 */

// #define USE_NON_STANDARD_24_TASKS

/*
 #######################################################################################################
   Your Own selection of plugins and controllers
 #######################################################################################################
 */

#define CONTROLLER_SET_NONE
#define NOTIFIER_SET_NONE
#define PLUGIN_SET_NONE


/*
 #######################################################################################################
 ###########     Plugins
 #######################################################################################################
 */

// #define USE_SERVO


// #define USES_P001   // Switch
// #define USES_P002   // ADC
// #define USES_P003   // Pulse
// #define USES_P004   // Dallas
// #define USES_P005   // DHT
// #define USES_P006   // BMP085
// #define USES_P007   // PCF8591
// #define USES_P008   // RFID
// #define USES_P009   // MCP

// #define USES_P010   // BH1750
// #define USES_P011   // PME
// #define USES_P012   // LCD
// #define USES_P013   // HCSR04
// #define USES_P014   // SI7021
// #define USES_P015   // TSL2561
// #define USES_P017   // PN532
// #define USES_P018   // Dust
// #define USES_P019   // PCF8574

// #define USES_P020   // Ser2Net
// #define USES_P021   // Level
// #define USES_P022   // PCA9685
// #define USES_P023   // OLED
// #define USES_P024   // MLX90614
// #define USES_P025   // ADS1115
// #define USES_P026   // SysInfo
// #define USES_P027   // INA219
// #define USES_P028   // BME280
// #define USES_P029   // Output

// #define USES_P031   // SHT1X
// #define USES_P032   // MS5611
// #define USES_P033   // Dummy
// #define USES_P034   // DHT12
// #define USES_P036   // FrameOLED
// #define USES_P037   // MQTTImport
// #define USES_P038   // NeoPixel
// #define USES_P039   // Environment - Thermocouple

// #define USES_P040   // RFID - ID12LA/RDM6300
// #define USES_P041   // NeoClock
// #define USES_P042   // Candle
// #define USES_P043   // ClkOutput
// #define USES_P044   // P1WifiGateway
// #define USES_P045   // MPU6050
// #define USES_P046   // VentusW266
// #define USES_P047   // I2C_soil_misture
// #define USES_P048   // Motoshield_v2
// #define USES_P049   // MHZ19

// #define USES_P050   // TCS34725 RGB Color Sensor with IR filter and White LED
// #define USES_P051   // AM2320
// #define USES_P052   // SenseAir
// #define USES_P053   // PMSx003
// #define USES_P054   // DMX512
// #define USES_P055   // Chiming
// #define USES_P056   // SDS011-Dust
// #define USES_P057   // HT16K33_LED
// #define USES_P058   // HT16K33_KeyPad
// #define USES_P059   // Encoder

// #define USES_P060   // MCP3221
// #define USES_P061   // Keypad
// #define USES_P062   // MPR121_KeyPad
// #define USES_P063   // TTP229_KeyPad
// #define USES_P064   // APDS9960 Gesture
// #define USES_P065   // DRF0299
// #define USES_P066   // VEML6040
// #define USES_P067   // HX711_Load_Cell
// #define USES_P068   // SHT3x
// #define USES_P069   // LM75A

// #define USES_P070   // NeoPixel_Clock
// #define USES_P071   // Kamstrup401
// #define USES_P072   // HDC1080
// #define USES_P073   // 7DG
// #define USES_P074   // TSL2561
// #define USES_P075   // Nextion
// #define USES_P076   // HWL8012   in POW r1
// #define USES_P077   // CSE7766   in POW R2
// #define USES_P078   // Eastron Modbus Energy meters
// #define USES_P079   // Wemos Motoshield

// #define USES_P080   // iButton Sensor  DS1990A
// #define USES_P081   // Cron
// #define USES_P082   // GPS
// #define USES_P083   // SGP30
// #define USES_P084   // VEML6070
// #define USES_P085   // AcuDC24x
 #define USES_P086   // Receiving values according Homie convention. Works together with C014 Homie controller
// #define USES_P087   // Serial Proxy
// #define USES_P088   // HeatpumpIR
// #define USES_P089   // Ping

// #define USES_P090   // CCS811
// #define USES_P091   // SerSwitch
// #define USES_P092   // DLbus
// #define USES_P093   // MitsubishiHP
// #define USES_P094   // CULReader
// #define USES_P095   // ILI9341
// #define USES_P096   // eInk
// #define USES_P097   // ESP32Touch
// #define USES_P098   //
// #define USES_P099   // XPT2046 touchscreen

// #define USES_P100   // DS2423 counter
// #define USES_P101   // WakeOnLan
// #define USES_P102   // PZEM004Tv3
// #define USES_P103   // Atlas_EZO_pH
// #define USES_P104   // Atlas_EZO_EC
// #define USES_P105   // Atlas_EZO_ORP
// #define USES_P106   // BME680
// #define USES_P107   // Si1145
 #define USES_P110   // VL53L0X Time of Flight sensor
// #define USES_P111   // RF522 RFID reader


// Special plugins needing IR library
// #define USES_P016   // IR
// #define P016_SEND_IR_TO_CONTROLLER false //IF true then the JSON replay solution is transmited back to the condroller.
// #define USES_P035   // IRTX
// #define P016_P035_Extended_AC // The following define is needed for extended decoding of A/C Messages and or using standardised
                                 //common arguments for controlling all deeply supported A/C units
// #define P016_P035_USE_RAW_RAW2 //Use the RAW and RAW2 encodings, disabling it saves 3.7Kb
// #define USES_P088   // Heatpump IR
// #define USES_P108   // DDS238-x ZN Modbus energy meters


/*
 #######################################################################################################
 ###########     Controllers
 #######################################################################################################
 */


// #define USES_C001   // Domoticz HTTP
// #define USES_C002   // Domoticz MQTT
// #define USES_C003   // Nodo telnet
// #define USES_C004   // ThingSpeak
// #define USES_C005   // Home Assistant (openHAB) MQTT
// #define USES_C006   // PiDome MQTT
// #define USES_C007   // Emoncms
// #define USES_C008   // Generic HTTP
// #define USES_C009   // FHEM HTTP
// #define USES_C010   // Generic UDP
// #define USES_C011   // Generic HTTP Advanced
// #define USES_C012   // Blynk HTTP
// #define USES_C013   // ESPEasy P2P network
// #define USES_C014   // homie 3 & 4dev MQTT
// #define USES_C015   // Blynk
// #define USES_C016   // Cache controller
// #define USES_C017   // Zabbix
// #define USES_C018   // TTN/RN2483


/*
 #######################################################################################################
 ###########     Notifiers
 #######################################################################################################
 */


// #define USES_N001   // Email
// #define USES_N002   // Buzzer


#endif // ESPEASY_CUSTOM_H-
rmhoutz
- Normal user
- Posts: 36
- Joined: 08 Sep 2017, 14:09
Re: Plugin 133 VL53L0X I2C Ranging LIDAR
#20
Post
by rmhoutz » 16 Apr 2021, 21:42
I got it working.
I’m not positive what solved the problem but I removed the Arduino IDE from my PC to make sure I wasn’t mixing the portable version and my local installed version.
After I posted I had the latest version of the source download I noticed it was a few days old, not more than 5 but still not the latest.
I followed the steps again on the Arduino IDE instructions and it allowed me to compile and flash it.
With that said I do still have a question.
Some of my settings like NTP server and Default MQTT PUB and SUB didn’t get set any idea why that would be if the flash was successful?
-
TD-er
- Core team member
- Posts: 7344
- Joined: 01 Sep 2017, 22:13
- Location: the Netherlands
- Contact:
Re: Plugin 133 VL53L0X I2C Ranging LIDAR
#21
Post
by TD-er » 16 Apr 2021, 21:46
Yep, that Custom.h can still be used for Custom builds.
It is either using the Custom.h file or (exclusive OR) the custom Python file.
The build scripts detect if the Custom.h is present and then use that instead of the pre_custom_espNNN.py file.
Code: Select all
C:Usersmyname.platformiopackagesframework-arduinoespressif8266librariesESP8266WiFisrcESP8266WiFiGratuitous.cpp:22:41: fatal error: lwip/init.h: No such file or directory
 #include "lwip/init.h" // LWIP_VERSION_*
Not sure where this comes from.
Maybe the build script did not checkout the complete esp8266/Arduino branch with all sub branches.
Do you have Git client installed on your PC?
See: https://espeasy.readthedocs.io/en/lates … requisites
See also: https://www.youtube.com/watch?v=ArqwMcY … Noorlander
-
TD-er
- Core team member
- Posts: 7344
- Joined: 01 Sep 2017, 22:13
- Location: the Netherlands
- Contact:
Re: Plugin 133 VL53L0X I2C Ranging LIDAR
#22
Post
by TD-er » 16 Apr 2021, 21:48
rmhoutz wrote: ↑16 Apr 2021, 21:42
[…]
With that said I do still have a question.Some of my settings like NTP server and Default MQTT PUB and SUB didn’t get set any idea why that would be if the flash was successful?
Those will only be set when creating a new config.
Either a new install (NTP settings) or adding a new controller (MQTT pub/sub settings)
-
rmhoutz
- Normal user
- Posts: 36
- Joined: 08 Sep 2017, 14:09
Re: Plugin 133 VL53L0X I2C Ranging LIDAR
#23
Post
by rmhoutz » 17 Apr 2021, 15:14
TD-er wrote: ↑16 Apr 2021, 21:46
Do you have Git client installed on your PC?
I do now and I believe I did when I received that message.
But if I’m honest I did miss that part when I first tried to run PlatformIO.
I feel like I should start a new Subject since we are way off topic of I2C and LIDAR.
by TD-er » 16 Apr 2021, 15:48
Those will only be set when creating a new config.
So if I flash the blank_4MB.bin then flash my Custom.h the settings will be picked up?
-
TD-er
- Core team member
- Posts: 7344
- Joined: 01 Sep 2017, 22:13
- Location: the Netherlands
-
Contact:
Re: Plugin 133 VL53L0X I2C Ranging LIDAR
#24
Post
by TD-er » 17 Apr 2021, 15:25
Of course you need to make a build with your Custom.h.
And you don’t need to wipe the entire unit by writing a blank image to it, you should be able to flash the new build via the web interface (as long as you keep the same layout like «4M1M»)
Who is online
Users browsing this forum: No registered users and 0 guests
-
phryan
- Posts: 1
- Joined: Mon Jan 29, 2018 9:49 pm
Help with VL53L0X Library
I am trying to use a VL53L0X Range Finder on my Rasberry Pi 2. This is one of the first times I have ventured into using the GPIOs on a Pi and first time with Python.
Using the VL53L0X Library found here. https://github.com/johnbryanmoore/VL53L0X_rasp_python
Followed instructions and the path to the directory is /home/pi/python/VL53L0X
The example file from /home/pi/python/VL53L0X/python will run so long as I am in that directory.
Trying to run it from any other directory fails with the below error, I believe it has something to do with pathing but I am clueless as to how to fix.
Code: Select all
$ python /home/pi/python/VL53L0X/python/VL53L0X_example.py
Traceback (most recent call last):
  File "/home/pi/python/VL53L0X/python/VL53L0X_example.py", line 26, in <module>
    import VL53L0X
  File "/home/pi/python/VL53L0X/python/VL53L0X.py", line 68, in <module>
    tof_lib = CDLL("../bin/vl53l0x_python.so")
  File "/usr/lib/python2.7/ctypes/__init__.py", line 362, in __init__
    self._handle = _dlopen(self._name, mode)
OSError: ../bin/vl53l0x_python.so: cannot open shared object file: No such file or directory
-
SurenSasin
- Posts: 4
- Joined: Tue Jan 30, 2018 11:49 am
Re: Help with VL53L0X Library
Sat Feb 10, 2018 8:02 am
Hi, I’m facing exact same issue while exploring VL53L0X Range Finder on my Rasberry Pi 3. It runs fine only in the directory but not outside it. Are u able to solve it? Here’s the error code I’m getting btw.
Code: Select all
Traceback (most recent call last):
  File "VL53L0X_multi_example.py", line 6, in <module>
    import VL53L0X
  File "/home/pi/VL53L0X_rasp_python/python/VL53L0X.py", line 70, in <module>
    tof_lib = CDLL("../bin/vl53l0x_python.so")
  File "/usr/lib/python2.7/ctypes/__init__.py", line 365, in __init__
    self._handle = _dlopen(self._name, mode)
OSError: ../bin/vl53l0x_python.so: cannot open shared object file: No such file or directory
-
skspurling
- Posts: 198
- Joined: Fri Jul 27, 2012 1:44 pm
- Location: US. Right in the middle…
Re: Help with VL53L0X Library
Sat Feb 10, 2018 11:26 pm
That looks like a path issue. I think you need to put the python library someplace globally accessible by the python interpreter. My Pi 3 is saying it is having issues talking to the module. I’m going to keep looking around to see why it’s not running for me….
-

paddyg
- Posts: 2616
- Joined: Sat Jan 28, 2012 11:57 am
- Location: UK

Re: Help with VL53L0X Library
Sun Feb 11, 2018 12:04 am
Ideally the code would be installed as a module but it doesn’t look like it’s been designed like that; more of a python wrapper for some C code. You might be able to get it to work by ‘hard coding’ the path on line 68 of /home/pi/python/VL53L0X/python/VL53L0X.py so it reads
tof_lib = CDLL(«/home/pi/python/VL53L0X/python/bin/vl53l0x_python.so»)
or wherever the make file has put it.
also https://groups.google.com/forum/?hl=en-GB&fromgroups=#!forum/pi3d
-
skspurling
- Posts: 198
- Joined: Fri Jul 27, 2012 1:44 pm
- Location: US. Right in the middle…
Re: Help with VL53L0X Library
Sun Feb 11, 2018 10:53 pm
Yeah, the above answer is the key. Because it’s a relative path in the wrapper, if you execute it in the wrong directory, even if you are calling it from another directory and it is where it is supposed to be, the path will be wrong and the association will fail.
So, I thought this should run out of the box, but my systems are up to date, and it appears that the current i2c kernel module is broken or something. I had to tell it to load the old dtoverlay to get it to work for me. I had to do this with another module of a different type also. I am trying to figure out why this keeps breaking stuff and why. There was a thread on it on here, but there wasn’t much of a resolution to the issue. Just someone saying to load the old dtoverlay in the /boot/config.txt file. Someone else said the issue is addressed, but it clearly isn’t because I keep having to use the old driver or I get access failures talking to the modules.
-
skspurling
- Posts: 198
- Joined: Fri Jul 27, 2012 1:44 pm
- Location: US. Right in the middle…
Re: Help with VL53L0X Library
Mon Feb 12, 2018 12:27 am
paddyg wrote: ↑
Sun Feb 11, 2018 12:04 am
Ideally the code would be installed as a module …
Since this is a C coded library for use in a python program, how would one normally do this without a wrapper? I am just curious, because I’ve not seen any tutorials on doing this. Most of the python stuff I’ve seen/found is pretty basic. I probably am just not looking in the right spot.
Return to “Python”
13-12-2020, 16:31
3 комментариев
Даже опытные программисты-«ардуинщики» могут столкнуться с ошибками компиляции. Исправить их не сложно, а вот найти порой не так просто. Мы решили рассказать сегодня в деталях, какие системные ошибки чаще возникают на различных платах Ардуино, как их исправить и по возможности избежать.
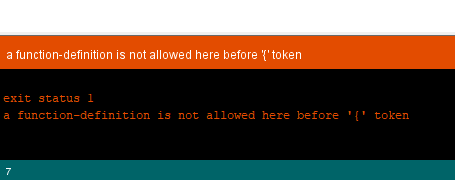
Для начала рассмотрим базовые, так называемые синтаксические ошибки. Они встречаются чаще всего у новичков, но и опытные электронщики с ними точно знакомы не понаслышке. Искать их обычно супер-просто – в Arduino IDE некорректный синтаксис выделяется построчно (таким образом значительно легче отыскать неточность в кодах). Обычно это: отсутствие скобки в конце команды, пропуск этой самой служебной команды или слова, нехватка важных функций, неправильное их написание и т.д.
Для быстрого поиска ошибки советуем рассмотреть строку-подсказку. Ничего не помогло? Тогда для вас наша подборка наиболее распространенных синтаксических ошибок:
С синтаксисом все понятно – вставляем пропущенные символы, убираем лишние знаки, возвращаем функции по умолчанию.
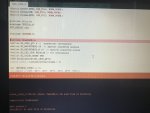
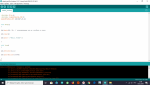
Напомним, в среде разработки Ардуино IDE можно заливать скетчи для различных микроконтроллеров. По умолчанию обычно указана плата Genuino Uno. Если вы работаете с Mega, следует выбрать именно эту платформу (меню «Сервис»), иначе вас ожидает неприятное предупреждение: “programmer is not responding”.
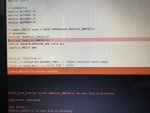
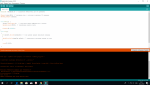
Ошибка компиляции для платы Arduino Uno чаще всего возникает из-за проблем, связанных с библиотеками, например, неправильно подключили, не то ПО инсталлировали. В этом случае вы увидите напоминание “fatal error: … No such file or directory” (библиотека не перенесена в папку libraries) или “redefinition of void setup”.
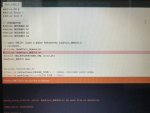
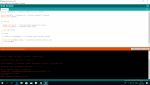
Обозначенная на скриншоте ERROR означает, что программирование завершилось некорректно (расшифровываем: внутренние проблемы с компилятором, не обновили версию IDE, сбой в библиотеке, неправильный выбор разрядности операционной системы и др.).
Важно! Не забывайте использовать подсказки приложения – они очень помогают. Включаем тут: Файл -> Настройки -> «Показать подробный вывод во время компиляции».
Что делать, если произошла ошибка при загрузке скетча Arduino Nano. Тут могут быть те же причины, что мы описали выше. Особых отличий в компиляции плат нет, главное, их правильный выбор первоначально. Однако часто пользователи настраивают не те показатели скорости порта: 9600 вместо необходимых 57600 либо не имеют соответствующих драйверов на устройствах – все это нужно проверить и исправить!
It’s 11 PM on a Wednesday. You’ve just spent three hours toiling on your next Arduino project, and FINALLY, you’re ready to give your sketch a whirl. You hit upload, palms sweaty with anticipation to see all your hard work come to fruition. It’s then you see the error:
No such file or directory.
Surely this is a chance aberration. “Nothing to worry about,” you mutter, sleep-starved and semi-delirious as you hit upload again. And once more, those maddening words, “no such file or directory,” stare back at you in hostile gaslighting mockery.
Have you been here?
If you’re trying to run an Arduino sketch but keep coming across the “no such file or directory” error, don’t worry. This is actually a pretty common problem, and there are two easy fixes that almost always work.
Keep on reading. We’ll show you what they are.
No such file error!
Error messages can be such a pain. They do, however, serve a useful purpose by telling us something about what went wrong. At first glance, the no such file or directory error is particularly maddening because it seems to break that useful purpose rule. Of course there’s a file or directory! You just made the thing, and it’s right there, tucked inside a directory.
But hold up, let’s take a closer look. If you look at the bottom portion of the Arduino IDE where the error message shows up, there’s this handy little button that says “copy error messages.”

Click on that now. You probably won’t fall off your chair to learn that by clicking that button, you just copied the error message from the little window at the bottom of The Serial Monitor’s UI to the clipboard of your computer.
This copy feature is ridiculously useful. You could, for example, paste the error message into Google and learn more about the error. Or you could take advantage of the active Arduino community by asking for help in a forum. For this situation, however, we can be a bit more basic. All we’re going to do is take a closer look at what the message is actually saying. To do that, just fire up your PC’s text editor and paste it into the blank screen.
Decoding the no such file error
Here it is, that pesky error in all its freshly pasted glory.

I’ll break it down for you line by line.
- The first line is easy. It’s just describing the Arduino version in use, what operating system is running, and which board you have selected.
- Line 2 begins to zero in on the problem.
- The first bit, “knob,” is referring to the name of the program. This is your sketch, basically.
- The second bit is what usually begins to confuse people, but it’s easy once you know. The “10” in this example is telling you the error occurred on line 10 of your sketch. The “19” is telling you the length of the line of code in spaces and characters. The first number is usually the more helpful of the two because you can use it to locate the error in your sketch.
- Then we get to the smoking gun of the error. It says, “servo.h: No such file or directory”.
So this thing, “Servo.h.” That’s the thing we need to fix, and thanks to line 2, we know where to find it. Line 10. It’s always line 10.
Now that we know what’s going on a bit better, let’s get down to the business of implementing a fix.
The error of our ways
Let’s lay down some scrutiny on this accursed line 10.
It says “#include <servo.h>”
When we verify this code, this line is telling the Arduino IDE compiler, “Hey, for this program to work, you need to go get this file called servo.h”.
Let’s say you had a label-making machine, and you wanted to use it to print some cool motivational labels, like “Success!” and “Keep Trying!” and “Look, Nachos!” To make that happen, you’ll first have to load in a roll of labels. No roll of labels? Well, then the label maker isn’t gonna work.
The sketch you’re trying to upload is like the label maker. The file (in our example, the file named “servo.h”) is the roll of labels.

So the error message actually is saying something useful. It’s saying, “Hey programmer, you said I needed this other file. Well, I looked for it and it’s not there. What gives?”
Now we know the error message isn’t complete gibberish, let’s look at the two most common scenarios that cause it.
Scenario 1 – Fat fingers
This sketch is one that you’ve written. You’re actually the one who wrote the “#include” line. The first thing you should check is your spelling and capitalization. Maybe you spelled the name of the library incorrectly? Or (as with the example below) perhaps you capitalized the wrong letters.

So “servo.h” should actually have a capital “S.” In full and with correct capitalization, it should read, “Servo.h.” You’ll notice above that the word servo changes color when it’s correctly capitalized. That color change signifies that the library name “Servo” is recognized as a “keyword” in the Arduino IDE.
Keep in mind that might not be the case for all the libraries you’re using. In other words, the color change won’t always indicate you’re using the right spelling or capitalization, but it’s often a helpful visual reminder.
Oh, and it’s probably good to mention that everyone in the history of Arduino programming has misspelled or incorrectly capitalized a word at some point. It’s amazing how long you can stare at a line of code and miss something like that.
So don’t sweat it.
Scenario 2 – Missing files
This brings us to the next common scenario for the “no such file or directory” error.
So often, working with Arduinos involves taking code that someone else has developed and shared online and then tailoring it to your project. That’s part of what makes it so easy to get stuff done with Arduino. One problem that frequently happens when we do that, however, is we accidentally introduce code without a matching file.
An easy way to check to see if you have the file a sketch is looking for is to navigate to Sketch > Include Library from within the Arduino IDE. Then look for the name of that library.

Whatever library the #include statement was calling for, you want to look through this big long list for a library with the exact same name. If you don’t see the file name there, this means the library isn’t installed. You’ll have to add that library before the sketch will compile without errors.
So, how do you add that library?
The easiest way is to go to Sketch > Include Library > Manage Libraries. The Arduino IDE will open up a dialogue box from which you can search for the library you need.

Make sure you type the exact word that matches the #include line. Once you find the missing library, go ahead and click Install. The Arduino IDE will let you know that it’s installing the library you requested and updating the software accordingly.
Next, just double-check that the library has been successfully installed by going to Sketch > Include Library. You should see your new library in the dropdown list.
Good news! If the library is there, you should now be able to compile your sketch error-free.
Other library locations
OK, there’s one little fly in the ointment. How do these dang ointment flies always manage to complicate things so?
Here’s the thing. Not all libraries live in this convenient pop-up window inside the Arduino IDE. The Arduino community is bubbling with clever ideas, but cleverness (unlike processed cheese) doesn’t always come in conveniently standardized, individually wrapped slices. There are tons of different ways to find Arduino libraries on the web.
If you’re downloading or copying a program from the internet, just go to the page where you got that program and take a close look at the library the author is referencing. They may, for example, have a link to GitHub, which is a place where people keep a lot of code libraries.

Wherever you find it, usually the library will be included in a .zip file package. Once you’ve downloaded the .zip file, fire up the Arduino IDE and go to Sketch > Include Library > Add .ZIP library. Then navigate to the location you downloaded the file and select it. Assuming no additional ointment flies invade your workflow, the Arduino IDE will pop up the message “Library added to your libraries” just above the dark area where the original “no such file or directory” error appeared.
Now it’s business as usual! Just go to Sketch > Include Library, and the new library will appear in the drop-down list.
As the dyslexic Frenchman once said to the oversized violinist: “Viola!”
You now know not one but two ways to add a new library. What a time to be alive!
Review
A quick recap, then.
We’ve looked at the two main scenarios that cause the “no such file or directory” error to appear after you compile your sketch:
- The fat fingers phenomenon: Check your spelling and capitalization! If you wrote the sketch, there’s a mighty good chance you introduced a tiny error. And don’t beat yourself up over it! Literally every coder has done this.
- The missing files mixup: Failing that, if you copied code from someone else check that you have the correct libraries installed. Don’t see your library? Install it using the method described above, and you should be good to go.
There may be no such thing as a free lunch, a coincidence, or a luck dragon. But rest assured. Your files and directories? They’re alive and well.
-
#251
Ребят, подскажите, что не так делаю. Плата от Михаила с подсветкой адресными светодиодами. Есть в этой теме в сообщении 219 скетч для ардуинки, для часов с такой подсветкой. Как его правильно прислонить, чтоб заработало?))
Есть все для прошивки Алекса Никсиклок 1.3, ардуинку прошил, все получилось. Пытаюсь открыть этот скетч — при проверке ошибка
(автор библиотек не оставил во вложении)
Arduino: 1.8.10 (Windows 7), Плата:»Arduino Nano, ATmega328P (Old Bootloader)»
timeVersion:43:10: error: Adafruit_NeoPixel.h: No such file or directory
compilation terminated.
exit status 1
Adafruit_NeoPixel.h: No such file or directory
-
#252
Добрый день!
Сперва при проверке писала, что нет библиотеки, когда подгрузи пишет:
Arduino: 1.8.10 (Windows 10), Плата:»Arduino/Genuino Uno»
In file included from D:sketch_jan28asketch_jan28a.ino:1:0:
Несколько библиотек найдено для «SoftwareServo.h»
C:Users������DocumentsArduinolibrariesSoftwareServo/SoftwareServo.h:4:10: fatal error: WProgram.h: No such file or directory
#include <WProgram.h>
^~~~~~~~~~~~
Используется: C:UsersСергейDocumentsArduinolibrariesSoftwareServo
compilation terminated.
exit status 1
Ошибка компиляции для платы Arduino/Genuino Uno.
Этот отчёт будет иметь больше информации с
включенной опцией Файл -> Настройки ->
«Показать подробный вывод во время компиляции»
-
#253
@technotrasher, хотел проверить. Не чего в прошивке не менял не трогал. Вылезла ошибка
-
250.8 KB
Просмотры: 109 -
222.1 KB
Просмотры: 82

-
#254
@technotrasher, хотел проверить. Не чего в прошивке не менял не трогал. Вылезла ошибка
Логично, что не хватает библиотеки.
-
14.5 KB
Просмотры: 104
-
#255
@technotrasher, оправь весь список библиотеки. Снова ошибка только другая
-
188.8 KB
Просмотры: 48
-
#256
@serg92319, я не программист, но по-моему ты должен всё перенести в корневой каталог любого из имеющихся дисков. Как уже упоминалось ИДЕ не любит кириллицу в пути к своим файлам и скетчам.
-
#258
Добрый вечер.Подскажите как убрать ошибку. Win 7,32-битная, arduino nano
upd^ нашла решение на другом форуме-«Заходишь в инструменты, где нужно выбрать процессор ATmega 328Р- выбираешь: ATmega 328Р(Old Bootloader) и будет тебе счастье. Расскажи другим.»(c)parikmaher72
-
73.3 KB
Просмотры: 44

Изменено: 1 Фев 2020
-
#259
Добрый вечер.
~~~
При компиляции скетча, видимо, что то пошло не так, и выдаёт мне ошибку » java.io.IOException: Отказано в доступе «
Для полноты картины: вчера переустанавливала ардуино с более старой версии, на новую. Быть может, я сделала что-то не так?
-
314.8 KB
Просмотры: 23

-
#260
Добрый вечер.
~~~
При компиляции скетча, видимо, что то пошло не так, и выдаёт мне ошибку » java.io.IOException: Отказано в доступе «Для полноты картины: вчера переустанавливала ардуино с более старой версии, на новую. Быть может, я сделала что-то не так?
Установи стабильную версию Arduino IDE, а не Hourly Build
-
#261
выдает
In file included from C:UsersUserDownloadsStairs_FinalStairs_Final.ino:1:0:
C:UsersUserDocumentsArduinolibrariesUltrasonic/Ultrasonic.h:11:10: fatal error: WProgram.h: No such file or directory
#include «WProgram.h»
^~~~~~~~~~~~
compilation terminated.
exit status 1
Ошибка компиляции для платы Arduino Nano.

-
#262
Первый опыт!
А здеся такое….
Уже мозг кипит((((
:Program FilesArduinofirmwareGyverDrink_v1.3GyverDrink_v1.3.ino:67:0: warning: «COLOR_DEBTH» redefined
#define COLOR_DEBTH 2 // цветовая глубина: 1, 2, 3 (в байтах)
In file included from C:Program FilesArduinolibrariesmicroLED/microLED.h:40:0,
from C:Program FilesArduinofirmwareGyverDrink_v1.3GyverDrink_v1.3.ino:60:
C:Program FilesArduinolibrariesmicroLED/ws2812_send.h:37:0: note: this is the location of the previous definition
#define COLOR_DEBTH 3
In file included from C:Program FilesArduinofirmwareGyverDrink_v1.3GyverDrink_v1.3.ino:60:0:
C:Program FilesArduinolibrariesmicroLED/microLED.h:58:1: warning: ‘typedef’ was ignored in this declaration
typedef struct LEDdata {
-
#263
Доброго времени суток, подскажите кто знает, вылезла ошибка при прошивки : #include <FHT.h> //преобразование Хартли . Что я не так сделал?
-
#264
@AlexGyver,
Arduino: 1.8.5 (Windows 7), Плата:»Arduino Nano, ATmega328P (Old Bootloader)»
gyverLight_v1.4:39: error: ‘HIGH_PULL’ was not declared in this scope
GButton touch(BTN_PIN, HIGH_PULL, NORM_OPEN);
^
gyverLight_v1.4:39: error: ‘NORM_OPEN’ was not declared in this scope
GButton touch(BTN_PIN, HIGH_PULL, NORM_OPEN);
^
In file included from C:UsersRedxxxDesktopGyverLight-masterfirmwaregyverLight_v1.4gyverLight_v1.4.ino:41:0:
C:Program Files (x86)ArduinolibrariesFastLED/FastLED.h:17:21: note: #pragma message: FastLED version 3.001.005
# pragma message «FastLED version 3.001.005»
^
C:UsersRedxxxDesktopGyverLight-masterfirmwaregyverLight_v1.4gyverLight_v1.4.ino: In function ‘void setup()’:
gyverLight_v1.4:86: error: ‘class GButton’ has no member named ‘setStepTimeout’
touch.setStepTimeout(50);
^
C:UsersRedxxxDesktopGyverLight-masterfirmwaregyverLight_v1.4gyverLight_v1.4.ino: In function ‘void loop()’:
gyverLight_v1.4:126: error: ‘class GButton’ has no member named ‘isStep’
if (touch.isStep()) {
^
Несколько библиотек найдено для «FastLED.h»
Используется: C:Program Files (x86)ArduinolibrariesFastLED
Не используется: C:Program Files (x86)ArduinolibrariesFastLED-stm32patch
Не используется: C:Program Files (x86)ArduinolibrariesFastLED-3.2.9
exit status 1
‘HIGH_PULL’ was not declared in this scope
Этот отчёт будет иметь больше информации с
включенной опцией Файл -> Настройки ->
«Показать подробный вывод во время компиляции»
Что это за ошибка?
-
#265
перерыл интернет в поисках решения но ничего не помогло ! скачивал разные библиотеки серавно не помогло. Суть в том что в проекте используется ИК приемник для этого скачал библиотеку IRremote.h c githab НО как оказалось никаких ошибок нет если в скетче не присутствует слово «tone» которое нужно для пьезо-динамика что делать я вообще не догадываюсь. ВОТ СКЕТЧ БЕЗ СЛОВА «tone» (все работает)

А ВОТ СКЕТЧ СО СЛОВОМ «tone» (c ошибкой)
-
#266
Дело в том, что функция ‘tone()’ использует таймеры (Т0, Т1). Для наны — это пины D4(Т0) и D5(Т1). Попробуйте прописать в скетче
pinMode(4, OUTPUT); , ну и соответственно tone(4, 1100, 100); . ИМХО, в данном скетче место этой функции в теле оператора «if». Ну, сразу после
Serial.println… И да, где же » #include <Arduino.h> » ?
Изменено: 15 Фев 2020
-
#267
@PiratFox, библиотека на месте …..program files 64; Arduino; libaries
«Дело в том, что функция ‘tone()’ использует таймеры (Т0, Т1). Для наны — это пины D4(Т0) и D5(Т1).»
И да, тогда почему без использования библиотеки, функция ‘tone()’ работает на любых цифровых пинах ?
И еще, ошибка не ушла: (проверил на обоих пинах 4,5 )
Изменено: 15 Фев 2020
-
#268
@veniamin, тогда напрашивается логический вывод: функция tone () и библиотека IRemote используют общий аппаратный ресурс, за который и дерутся. А поскольку и tone(), и IRemote имеют дело со временем, опять упираемся в таймер. Только внутренний, а не внешний. Ещё драка может быть за внутренний интеррапт, опять же внутренний таймер. Выходов здесь мне видится два: либо рихтовать библиотеку IRemote, либо написать свою функцию для звука, не задействуя tone(). Как по мне — второе проще и быстрее.
Изменено: 15 Фев 2020

-
#269
почитай описание IR библиотеки у iarduino, может чем то поможет https://iarduino.ru/file/257.html
Я когда вкрячивал в 1 нано серву, IR , лед ленту и часы тоже столкнулся с какой то несовместимостью, сейчас вот не могу вспомнить с какой. В результате оставил как раз указанную выше библиотеку, стандартную для сервы, фастлед и свою недобиблиотеку часов
ЗЫ. Как раз кажется я и отказался от IRremote
-
#270
@PiratFox, спасибо, но разве до меня никто не использовал функцию tone() и библиотеку IRemote, может у кого все получилось поделится решением ?? если таковых нет то и на этом спасибо.
-
#272
я же ссылку дал на другую библиотеку. Айардуинщики пишут свои, я их использовал
-
#273
@PiratFox, спасибо, но разве до меня никто не использовал функцию tone() и библиотеку IRemote, может у кого все получилось поделится решением ?? если таковых нет то и на этом спасибо.
Да может и не получилось ни у кого одновременно эти фишки совместить, как знать… Я как — то давно IRemote использовал в проекте, уж и не помню когда. Проблем таких вроде не было. Видимо, не задействовал tone().
-
#274
@Старик Похабыч,
даже с библиотекой которую вы дали такая-же история: без tone() все нормально, вместе с tone() ошибка.
-
#275
видимо ошибка из-за совместного использования 2-го прерывания, ардуино запрещает совместное использование.
Для простого писка можно попробовать плеер JQ6500, он с крохотной памятью и кроме как писки плюмы его сложно на что то другое использовать.