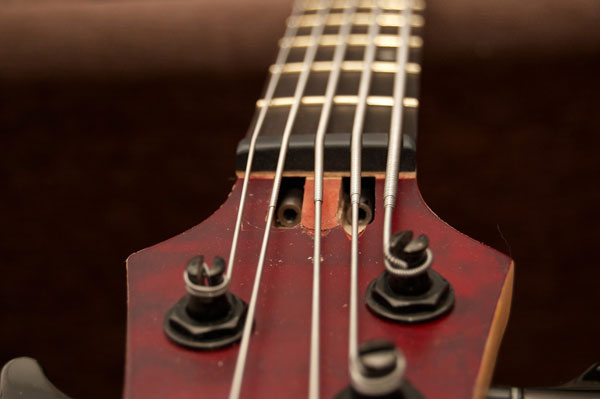
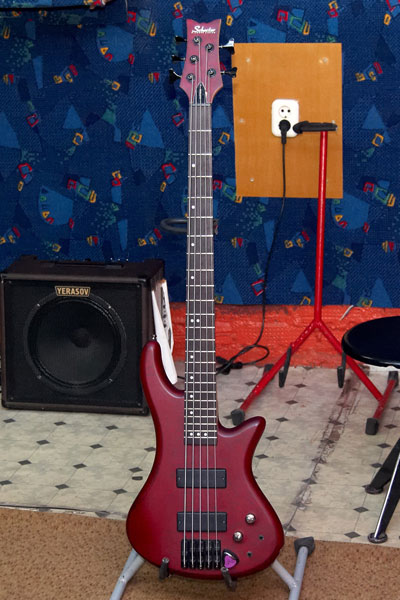
В воздухе начинает пахнуть весной, достаете вы гитарку после зимней спячки из чехла, а там……винт. Гриф повело винтом, все дребезжит, играть невозможно. Как же теперь запиливать Мальмстина и Вая, рубить Lamb of God и Корн?
Ответ: пока вы не отнесете гитару в мастерскую — никак. Нет, заколхозить ничего не получится, тут нужен профессиональный подход.
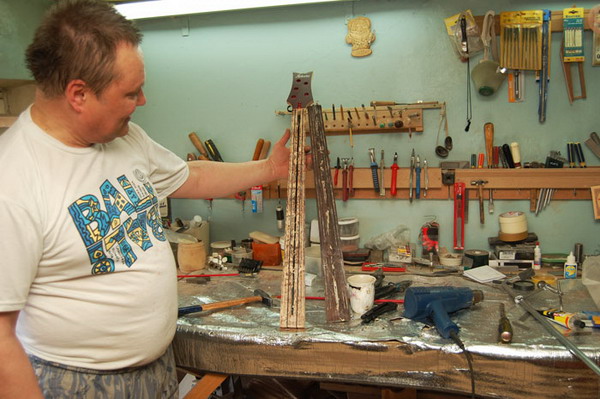
Вот и нам принесли непростого пациента:

Гриф скрутило винтом
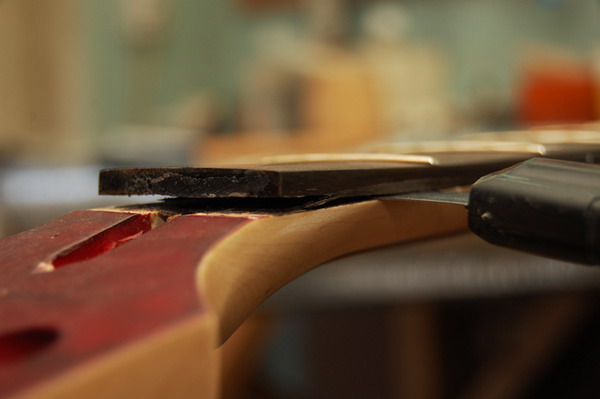
Сразу был заметен винт со стороны тонких струн против часовой стрелки, а после обнаружился еще и горб на 3-6 ладу. Ну и соответственно вот такой прогиб, не корректируемый анкером (да, максимальный на 11 ладу, хотя должен быть на 6-7):

Некорректный прогиб грифа
Как это все поправить?
Шаг 1. Демонтируем лады.
Делаем это аккуратно с использованием специализированного инструмента, чтобы не наделать сколов и заусенцев на накладке.

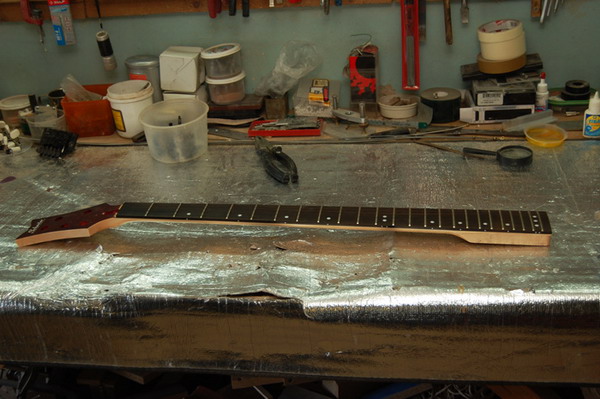
Внешний вид палисандровой накладки после демонтажа ладов
Шаг 2. Шлифуем накладку радиусным бруском, предварительно ослабив анкер.
На словах все просто, казалось бы шкурку наклеил и елозишь туда-сюда. Но даже при простом выравнивании накладки без необходимого опыта есть опасность перешлифовать середину грифа и придать слишком маленький радиус краям накладки, а тут еще надо свести на нет винт и горб. Тут важно каждое движение, которое вы делаете бруском.
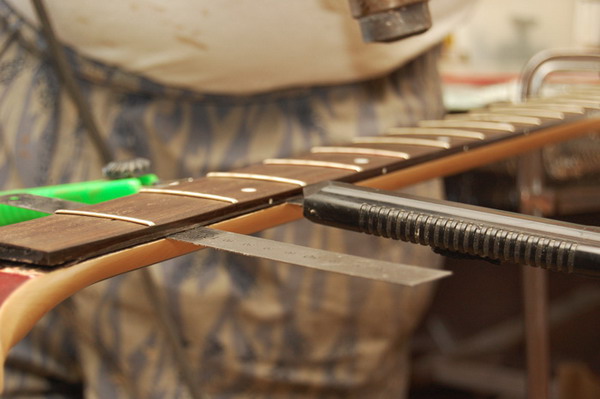
Если все пройдет хорошо, то получается вот так:

Накладка после шлифовки радиусным бруском
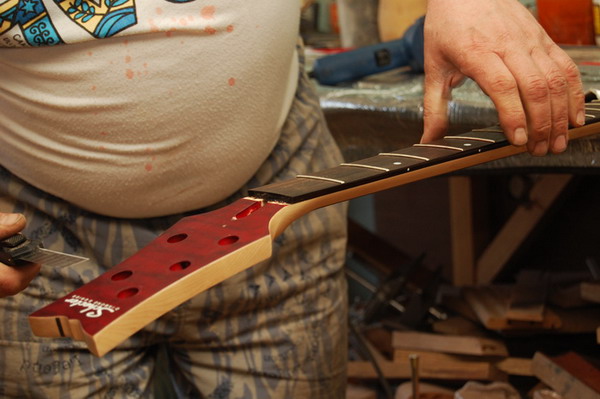
Вот насколько повернута голова относительно выровненной накладки. При выравнивании накладки за базу принимается плоскость пятки грифа, являющаяся посадочной поверхностью.

Поворот головы грифа относительно базовой плоскости
Шаг 3. Подготавливаем лады и устанавливаем их в пазы.
Ну тут все понятно, привычная процедура, занимающая всего каких-то 3-4 часа 
Согнуть проволоку по радиусу, порезать на отрезки, откусить ножки ладов с торца, запрессовать в пазы, сточить торцы под углом, закруглить торцы, шлифануть верхушки, шлифануть верхушки бруском, закругить каждый лад, еще шлифануть, шлифануть торцы, полировать, полировать, полировать…..

Установка нарезанных ладов в пазы
Где-то между шлифовкой и полировкой….

В процессе шлифовки
Результат после полировки:

Внешний вид грифа после шлифовки верхушек и торцев
В результате: винта нет, горба нет, заусенцев нет, скрежета при бэндах и вибрато нет, блестит аки crazy diamond, высота струн запильная.

Высота струн после шлифовки и отстройки: 1,2 мм

Палка индонезийская обыкновенная
Спасибо, что дочитали до конца, постарался кратко, кому интересно поподробнее про любой из этапов, можете спросить в комментариях и написать в группе ВК, в личку, в инсте или на сайте. Мы всегда рады поболтать на тему гитар и помочь нашим клиентам стать более осведомленными. Если у вас есть любые предложения/замечания/пожелания — пишите обязательно, мы тоже им рады, поскольку развитие — бесконечный процесс.
Easy Fix Workshop
Мы просто ремонтируем гитары.
Вы просто наслаждаетесь результатом.
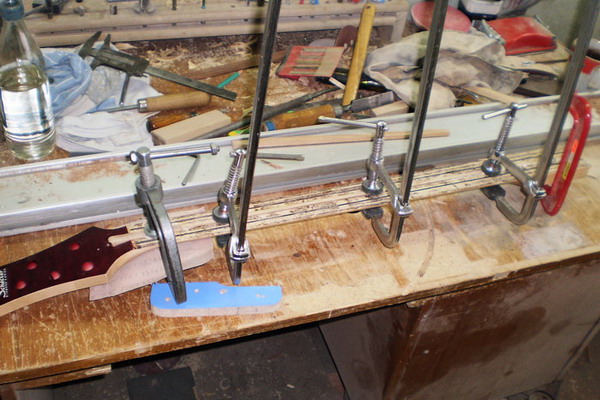
Что делать, если у любимой гитары гриф пошёл винтом? Это может случиться даже с самой дорогой гитарой: смена климата, влажности, неправильный уход и хранение или разнокалиберные струны с различным натяжением — всё это может привести к тому, что гриф скрутит винтом, струны будут звенеть о лады и это не исправишь простой отстройкой анкера. Такое случилось с моим басом Schecter Custom 5 — то ли от смены климата с американского на сибирский, то ли просто клён оказался мягковат, что повело гриф.
Есть несколько способов исправить винт:
- Прогреть гриф строительным феном и раскрутить его обратно
- Снять накладку и отшлифовать поверхность грифа, сделав его снова ровным
- Укрепить гриф двумя анкерами
Давайте рассмотрим каждый из способов подробнее.
1) Прогреть строительным феном гриф несложно, но ничто не гарантирует, что раскрученный гриф не поведёт обратно снова. Более того, не всегда удаётся его раскрутить, т.к., раскручивая, его может начать вести в обратную сторону. Ненадёжно.
2) Снять накладку и отшлифовать — дорого и так же ненадёжно, т.к. гриф может так же повести дальше, и после пары таких операций будет нечего и не на что шлифовать 
3) Укрепление грифа двумя анкерами. Некоторые производители сразу производят гитары, усиленные двумя анкерами, особенно это касается 5-, 6- и более струнных басов с широкими грифами. Два анкера позволяют регулировать прогиб с обоих сторон и тем самым исправлять любой винт, который может появиться. Это стоит вложений и это надёжно.
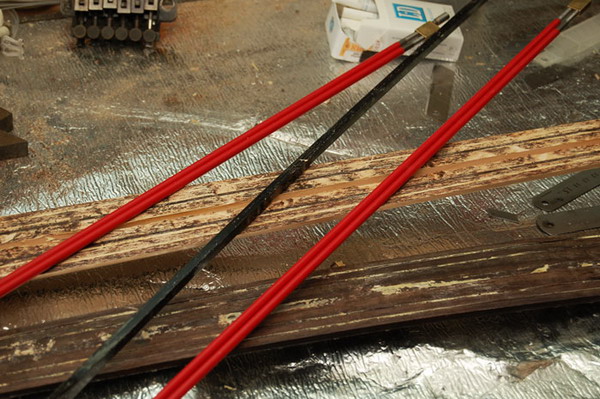
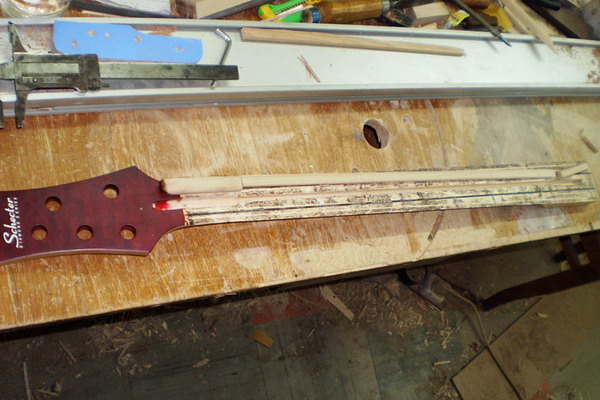
Для установки 2х анкеров необходимо извлечь старый анкер, а для этого придётся снять накладу грифа. При помощи строительного фена разогреваем клей, которым приклеена накладка и сантиметр за сантиметром, аккуратно отклеиваем накладку.
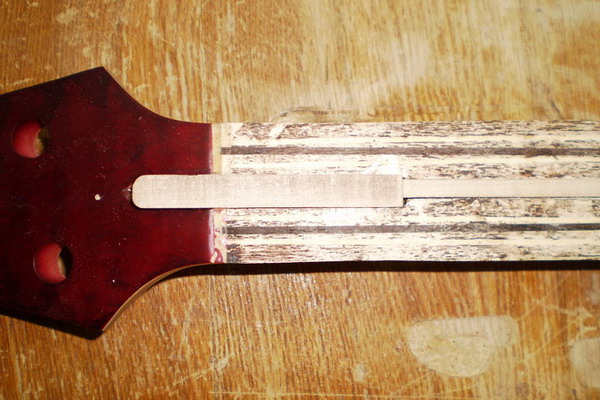
Теперь необходимо вытащить старый анкер, выточить для него заглушку из клёна, вклеиваем, фиксируем и сушим.
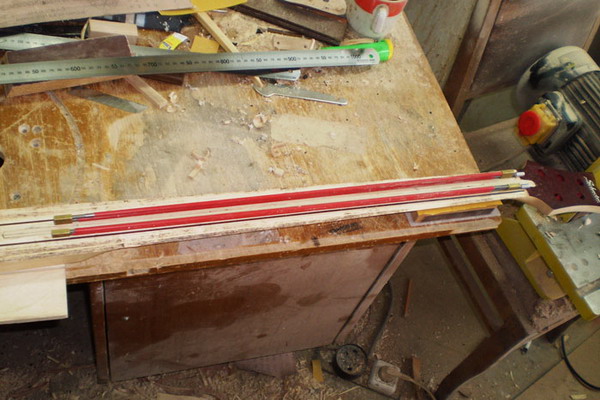
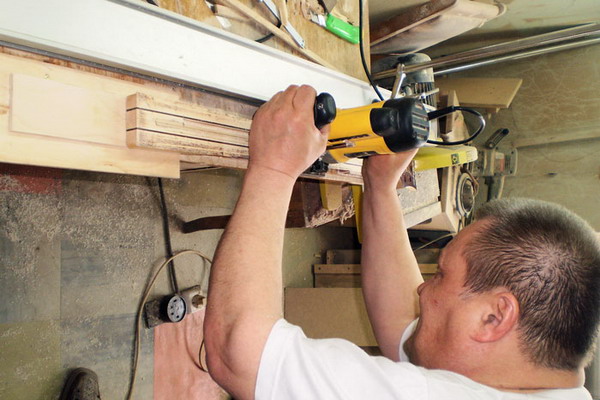
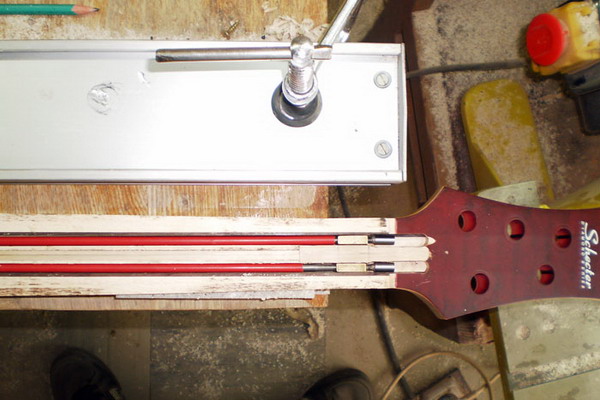
В отличии от обычного анкера новые анкеры позволяют изменять прогиб грифа в обе стороны, что даёт нам почти полный контроль над грифом. Чтобы установить новые анкеры, фрезеруем для них пазы, как правило, толщины грифа должно хватать, чтобы выточить паз нужной глубины.
После успешной установки анкеров, приклеиваем накладку обратно. Шанс, что лады встанут ровно очень мал, потому надо быть готовым сменить лады после приклеивания накладки. Именно так и получилось в нашем случае: лады расшатались в процессе отклеивания накладки и потому их пришлось вынуть и вставить новые.
Результат стоил всех усилий! Теперь прогиб гриф очень легко и точно настраивать и ему больше не страшен никакой винт. Будем рады услышать ваши вопросы в комментариях.
Download Article
Download Article
A warped guitar neck can make your guitar notes out of tune in some positions and may even create buzzing or muddy quality in the tone your guitar produces. This may have been caused by heat, humidity, time and the natural pressure exerted on the neck by your strings, or other factors. But for your guitar to sound the way it’s intended, you’ll need to have its neck straightened. Having this done professionally can cost up to $800, if not more.[1]
Lucky for you there’s a way you can try to repair your guitar neck on your own.
-
1
Eyeball the neck to check for warping. Take your fully strung guitar in your hands and hold it strings up, level with your eyes, and pointed toward a generalized light source. Look from the bridge, where your strings begin under the sound hole, up the neck to the tuning keys. A good light source for this visual check would be a well-lit window. If your guitar isn’t actually warped, you should only notice small dips in the shadow cast by your guitar strings on the fretboard at the fourth, fifth, and sixth bottom frets. Other variances in the shadows cast by your strings on the neck are an indication of warping.
- In some cases the neck might not be warped, but the frets of your guitar may have become somehow misaligned. If this is your case, you should notice one or more frets higher or lower than other surrounding frets.
- Sometimes frets become misaligned because of warping in the neck of your guitar. When you notice misaligned frets, inspect the area carefully.
- The upper frets of your guitar should be almost perfectly straight, if not perfectly straight. Deviations in the top frets are a good indication that you have a warping problem.
- Don’t look to the wood of the neck and fretboard or its edge to determine warp. This part of your guitar can become worn down over time from playing, and can make the neck appeared warped even when it is not.[2]
-
2
Repeat your eye-check from the headstock to the body. Rotate your guitar so that the base is facing away from you and your view begins with the headstock, where the tuning pegs are. Hold your guitar level with your eyes but pointed at a generalized light source. Just as you did previously, use the shadows cast by the strings to evaluate the straightness of the neck. There should only be small dips in the shadows only on the fourth, fifth, and sixth bottom frets.
- Sometimes warping is harder to notice from one end of your guitar than the other. By performing a visual check of the neck of your instrument from both the body and the headstock, you’ll stand the best chance of noticing warping.
- You may want to mark any unnatural variances in the neck you see with a piece of tape. Especially for necks that have severely irregular warping, jotting down or marking where you notice the distortions in the wood will help you make more precise adjustments later.
Advertisement
-
3
Use a straightedge to check the neck precisely. If your visual check of your guitar didn’t reveal any irregularities, this does not mean that your guitar neck isn’t warped, only that there is no obvious warp in your instrument. And even if you noticed warping, a straightedge check can confirm your observations or help you determine the extent of the warp. Place your guitar on a level, stable surface, like a clean workbench or table. You are going to use the strings of your guitar as your straightedge. To do this you should:
- Press the sixth string of your guitar at the first and twelfth (or first and fourteenth for electric/steel guitars). There should only be a tiny gap, about 1/64th of an inch (.4 mm), between your string and fretboard on the sixth fret. No gap is an indication of unnatural back-tilt, which can be fixed by adjusting the truss rod.
- Press the sixth string at the eighth and highest frets. The string should lie flat along the board along the midpoint (approximately the twelfth to fourteenth frets). A gap here indicates a rising warp in the neck of your guitar.
- Press your sixth string along the first and last frets. If there is a small gap between the string sixth fret the warp in the neck is centralized in the upper part of the neck away from the body. This can usually be fixed by adjusting the truss rod. If your string and sixth fret form a gap larger than 1/64th of an inch (.4 mm), the neck is warped.
- Hold the sixth string at the first fret and slowly slide down the fretboard with your other hand. As you slide down the frets, if the gap at your sixth fret decreases, the neck is warped and will need to be straightened.[3]
[4]
-
4
Repeat the straightedge test and use a ruler to check the frets. Now that you’ve performed a straightedge test with the sixth string, you’ll have to repeat the test with the first string. This will ensure both sides of the fretboard are level. If your inspection has not found irregular warping, it may be your frets causing buzzing or other distortions.
- To check your frets, take a straight metal ruler and lie it along the fretboard. A misaligned fret may only be out of alignment by a few thousandths of an inch. This might not be observable with your eyes, but if you lay the metal along the frets, the misaligned fret will cause the ruler to seesaw slightly back and forth.[5]
- To check your frets, take a straight metal ruler and lie it along the fretboard. A misaligned fret may only be out of alignment by a few thousandths of an inch. This might not be observable with your eyes, but if you lay the metal along the frets, the misaligned fret will cause the ruler to seesaw slightly back and forth.[5]
Advertisement
-
1
Prepare your tools and guitar. You’ll want a flat and clear surface to work on while removing frets from the neck of your guitar. You’re going to use the steam from your iron to loosen the glue connecting the frets to the neck, and then with your hammer and scraper, you’ll be chiseling off the frets. To do this, you’ll need to remove the strings from your guitar.
- You may want to hold the neck of your guitar into place with a rubber ended clamp or some other suitable clamp for woodwork. This is not necessary, but can make removing the frets easier.
- Make sure your iron has plenty of water. You’ll need lots of steam to loosen the glue fastening your frets and guitar neck. You may want to bring some extra water in a pitcher in case you run dry mid-steaming.
- It is possible that damage could occur to your guitar during this process. If you have an expensive guitar, you may be better off having a professional repair the neck of your instrument.[6]
-
2
Apply steam to the top of the fretboard. Warm up your iron and set it to its hottest setting. Now you are ready to place the iron on the topmost segment of the fretboard to begin steam-loosening the frets. It should take about five minutes before the frets begin to loosen. At the five minute mark, or shortly before, take your scraper and begin firmly pushing it between the fretboard and the neck from the side of the neck of the guitar.
- Depending on your guitar, you may need to apply more or less steam to the neck to loosen the glue. Test the bond between fret and neck every minute or so be probing it with your scraper.
- The fretboard and neck will become very hot from the heat of your iron. Be careful when touching the neck or handling your guitar. To prevent being burned or scalded, you may want to wear a pair of gloves or wrap the neck of your guitar in a towel after removing your iron.
- When the glue has sufficiently loosened, you should be able to get an inch or two of your scraper (or putty knife) inserted between your fret and neck. This should be enough to hold your scraper in place between the two parts unassisted.[7]
-
3
Chisel free the frets from the neck of your guitar. Take your hammer and gently but firmly tap your scraper on its handle until it pushes through to the other side of the neck of your guitar. When you find stubborn resistance to your hammer tapping/chiseling, you should pause and apply more steam to the frets of your guitar.
- Keep your scraper at a right angle (forming an L-shape with) the neck of your guitar. This way you’ll be able to tap the protruding end and the handle to wedge the fretboard free evenly. This will help prevent damage to the neck due to unequal stress being applied by your scraper.
- Removing frets from the neck of your guitar can be a long an involved process. You should work slowly to prevent the wood from cracking and splintering. Damage to the neck can permanently ruin it.[8]
[9]
-
4
Continue until the fretboard is removed from the neck. Work your way down the fretboard, alternately applying your iron to steam-loosen the glue and your hammer/scraper combination to separate the board from the neck. As you move down the fretboard, you should notice the fretboard come free more easily.
- Even when the fretboard begins coming free more easily, work slowly and methodically. Working too fast can cause damage to the neck or fretboard of your guitar.
- Once the glue has become loosened, try to wiggle your scraper back and forth in the direction of the still-glued segments. You may find this loosens the glue more easily.[10]
[11]
Advertisement
Creating Your Straightening Jig
-
1
Cut cradle block for your guitar neck with your saw. You’ll want your cradle to be made of a hard wood, like oak. This will prevent damage to the neck while providing resistance you need to correct the warp.
- Use your tape measure to find the distance between the area of the neck that is warped and the surface you are working on when the body of your guitar is laying flat. This will be the height of your cradle block.
- The length of the block should be about five inches (12.7 cm), and its width an inch (2.54 cm) wider than the neck of your guitar on both sides.[12]
-
2
Hollow a trough to hold the neck of your guitar in place. Now you are going to notch the cradle block along the top to make a level trough in which your guitar will nest. This will prevent your guitar from irregular forces that could cause the neck to crack, or from the instrument slipping while you are straightening the warp.
- Your trough doesn’t need to be too deep; a ¼ inch (6.35 mm) deep should be sufficient to hold your guitar in place. This will also help prevent stress fractures in the wood of the neck.[13]
- Your trough doesn’t need to be too deep; a ¼ inch (6.35 mm) deep should be sufficient to hold your guitar in place. This will also help prevent stress fractures in the wood of the neck.[13]
-
3
Cut your tension block. Take your 2 by 4 and cut it down to a manageable size — 6 inches long (15.24 cm) should be sufficient. Then lay it on its wide side and make a mark in the middle of the board three inches from either side. To either side of this midpoint mark, measure 2 inches (5 cm) and make a mark in the center of the board.
- The midpoint mark is where the headstock of your guitar will overhang. The marks to either side of the midpoint will be where you add tension rods, which you will use to straighten the warp of your guitar.[14]
- The midpoint mark is where the headstock of your guitar will overhang. The marks to either side of the midpoint will be where you add tension rods, which you will use to straighten the warp of your guitar.[14]
-
4
Add and shape the tension rods. These will be made from nails. With your hammer, pound a nail into the two spots you marked on both sides of your midpoint. The nail will need to protrude through to the other side of your 2 by 4. To shape your tension rods, you should bend the nails with pliers so the protruding nail ends point to the corresponding outside ends of your board.
- Be careful you don’t damage what is below your 2 by 4 when you pound the nails through the board. You’ll want your nail to extend 2 to 3 inches (5 to 7.6 cm) out the opposite side of your 2 by 4.[15]
- Be careful you don’t damage what is below your 2 by 4 when you pound the nails through the board. You’ll want your nail to extend 2 to 3 inches (5 to 7.6 cm) out the opposite side of your 2 by 4.[15]
Advertisement
Repairing the Warp
-
1
Secure all necessary parts to your work space. At one end of your work space, you should clamp your tension block firmly into place. Position your guitar so that the headstock directly overhangs the midpoint mark you’ve made on your tension block. When you have aligned your tension block, lift the neck and place the cradle beneath it, nesting the neck into the cradle where the warp is centralized. Then you should clamp the body of your guitar firmly to your work area at its base.
- You may want to put small pieces of rubber between your clamp and guitar, guitar and work area, and clamp and work area. These small pieces of rubber will prevent damage to your guitar or work area.
- At this point, your guitar should be clamped at the base to your work area, the warped part of the neck should be nested in your cradle, and your tension block should be clamped to the work area with the headstock of your guitar overhanging its midpoint.
-
2
Attach the B and A tuning pegs to your tension rods. Now that your guitar is firmly held in position and supported, you need to insert the thickest guitar string you have into the A and B tuning pegs, which are the middle tuning pegs on either side of the headstock. Wrap the string around the top of the peg several times to affix it in place, then take each loose end around each pegs’ closest edge and down toward the tension rods.
- Place your last two rubber guards in between the string and the headstock so the string does not damage the wood, and then wind the strings tightly around the tension rods.
- Your low E string should work nicely for warp repair purposes. Thicker guitar strings will allow you to apply more tension to the neck to correct the warp.[16]
[17]
-
3
Adjust the tuning pegs to repair the warp in your guitar. By tightening or loosening your A and B tuning pegs, you’ll be applying tension to the neck of your guitar. This tension is how you will correct the warped neck. But before you start applying tension with your tuning pegs, place your straightedges to form right angles ( L-shapes) with the base and the top of the neck.
- Using the straightedges, you’ll be more able to see if the warp has been corrected. If the top of each straightedge is aligned and level, your warp has been corrected.
- You can also lay your straightedge longways down the neck of your guitar. This may make it easier for your to see lengthwise warping.
- You may have to make several small adjustments before your warp is corrected. Be careful not to apply too much tension to the neck of your guitar; this could result in the neck cracking.
- Once the neck is straight, you should add a half turn to each tuning peg to give the slightest backward bowing in the neck of your guitar.[18]
-
4
Apply heat to set the new neck shape. Lay a metal straight edge, like a steel ruler, along the now straightened neck of your guitar. This will act as a buffer between the wood and the direct heat of the iron while helping to evenly distribute the heat. A medium-low setting will help prevent you from applying too much heat too fast, which could do damage to the wood.
- A constant temperature of about 350 to 400 degrees Fahrenheit (176 to 204 degrees Celsius) applied to your guitar neck for about two to three hours should help the neck hold its repaired shape. Afterward, you should allow the wood to cool for about a day.[19]
[20]
[21]
- A constant temperature of about 350 to 400 degrees Fahrenheit (176 to 204 degrees Celsius) applied to your guitar neck for about two to three hours should help the neck hold its repaired shape. Afterward, you should allow the wood to cool for about a day.[19]
-
5
Reattach your fretboard and restring your guitar. The neck of your guitar should now be repaired. All you need to do is re-glue your frets to the neck, restring your guitar, and it should play as good as new!
Advertisement
Add New Question
-
Question
What type of warp specifically is addressed by this tutorial?
This tutorial deals with warp where the neck and fretboard of the guitar are curved away from the strings.
-
Question
Is there anything simpler I can do if I don’t have access to a woodworking shop and can’t afford any of these materials?
There is always the option of taking it to a repair shop, or if you are confident in your repair abilities, you could buy a new neck and put it on.
-
Question
What can I do if I don’t have access to a wood shopvand can’t afford any of these materials, let alone my own luthier?
Funpineapple6
Community Answer
Unfortunately, you cannot do this project if you can’t buy any of the materials.
Ask a Question
200 characters left
Include your email address to get a message when this question is answered.
Submit
Advertisement
-
To prevent damage to your guitar, you should always use a buffer, like a piece of soft rubber or a cloth, to prevent clamps from doing damage to your guitar.
Thanks for submitting a tip for review!
Advertisement
-
Repairing the warp in your guitar neck incorrectly can result in permanent damage to your instrument. For less expensive guitars, a self fix can be a good idea, but you might want to entrust more expensive guitars to a professional.
-
Using a clothes iron to remove frets and set the shape of the neck of your guitar will generate a lot of heat in the iron and your instrument. Exercise care to prevent getting burned.
Advertisement
Things You’ll Need
- Metal ruler
- Tape (optional)
- Clothes iron
- Gloves or towel (optional)
- Hammer
- Putty knife or thin wallpaper scraper
- Woodworking clamps (or some other rubber ended clamp suitable for wood; optional)
- 2 by 4 board
- Clothes iron
- Hammer
- Hard wood (like oak; for neck cradle)
- Metal straightedge (like ruler or level; 2)
- Multimeter with temperature probe/lead (or any temperature gauge that had a probe/lead sensor)
- Nails (long enough to protrude through the width of the 2 by 4)
- Pencil
- Pliers
- Rubber guards (to place beneath your clamps to prevent damage; 5)
- Saw
- Tape measure
- Woodworking clamps (or some other rubber ended clamp suited for wood; 2)
References
About This Article
Article SummaryX
To fix a warped guitar neck, first you’ll need to remove the frets from the neck using a hammer and chisel. Then, cut a notch in a block of wood that’s just big enough to hold the neck of your guitar. Next, lay your guitar down on a flat surface with the neck resting in the notch you cut, and nail a block of wood over the top of it to apply tension to the neck. Once you’ve done that, attach the B and A tuning pegs to your tension rods, and adjust them to apply tension to the neck and fix the warping. Finally, use an iron to apply heat and set the new neck shape, and reattach the frets. For more tips, like how to check the alignment of your guitar neck, read on!
Did this summary help you?
Thanks to all authors for creating a page that has been read 277,396 times.
Did this article help you?
Download Article
Download Article
A warped guitar neck can make your guitar notes out of tune in some positions and may even create buzzing or muddy quality in the tone your guitar produces. This may have been caused by heat, humidity, time and the natural pressure exerted on the neck by your strings, or other factors. But for your guitar to sound the way it’s intended, you’ll need to have its neck straightened. Having this done professionally can cost up to $800, if not more.[1]
Lucky for you there’s a way you can try to repair your guitar neck on your own.
-
1
Eyeball the neck to check for warping. Take your fully strung guitar in your hands and hold it strings up, level with your eyes, and pointed toward a generalized light source. Look from the bridge, where your strings begin under the sound hole, up the neck to the tuning keys. A good light source for this visual check would be a well-lit window. If your guitar isn’t actually warped, you should only notice small dips in the shadow cast by your guitar strings on the fretboard at the fourth, fifth, and sixth bottom frets. Other variances in the shadows cast by your strings on the neck are an indication of warping.
- In some cases the neck might not be warped, but the frets of your guitar may have become somehow misaligned. If this is your case, you should notice one or more frets higher or lower than other surrounding frets.
- Sometimes frets become misaligned because of warping in the neck of your guitar. When you notice misaligned frets, inspect the area carefully.
- The upper frets of your guitar should be almost perfectly straight, if not perfectly straight. Deviations in the top frets are a good indication that you have a warping problem.
- Don’t look to the wood of the neck and fretboard or its edge to determine warp. This part of your guitar can become worn down over time from playing, and can make the neck appeared warped even when it is not.[2]
-
2
Repeat your eye-check from the headstock to the body. Rotate your guitar so that the base is facing away from you and your view begins with the headstock, where the tuning pegs are. Hold your guitar level with your eyes but pointed at a generalized light source. Just as you did previously, use the shadows cast by the strings to evaluate the straightness of the neck. There should only be small dips in the shadows only on the fourth, fifth, and sixth bottom frets.
- Sometimes warping is harder to notice from one end of your guitar than the other. By performing a visual check of the neck of your instrument from both the body and the headstock, you’ll stand the best chance of noticing warping.
- You may want to mark any unnatural variances in the neck you see with a piece of tape. Especially for necks that have severely irregular warping, jotting down or marking where you notice the distortions in the wood will help you make more precise adjustments later.
Advertisement
-
3
Use a straightedge to check the neck precisely. If your visual check of your guitar didn’t reveal any irregularities, this does not mean that your guitar neck isn’t warped, only that there is no obvious warp in your instrument. And even if you noticed warping, a straightedge check can confirm your observations or help you determine the extent of the warp. Place your guitar on a level, stable surface, like a clean workbench or table. You are going to use the strings of your guitar as your straightedge. To do this you should:
- Press the sixth string of your guitar at the first and twelfth (or first and fourteenth for electric/steel guitars). There should only be a tiny gap, about 1/64th of an inch (.4 mm), between your string and fretboard on the sixth fret. No gap is an indication of unnatural back-tilt, which can be fixed by adjusting the truss rod.
- Press the sixth string at the eighth and highest frets. The string should lie flat along the board along the midpoint (approximately the twelfth to fourteenth frets). A gap here indicates a rising warp in the neck of your guitar.
- Press your sixth string along the first and last frets. If there is a small gap between the string sixth fret the warp in the neck is centralized in the upper part of the neck away from the body. This can usually be fixed by adjusting the truss rod. If your string and sixth fret form a gap larger than 1/64th of an inch (.4 mm), the neck is warped.
- Hold the sixth string at the first fret and slowly slide down the fretboard with your other hand. As you slide down the frets, if the gap at your sixth fret decreases, the neck is warped and will need to be straightened.[3]
[4]
-
4
Repeat the straightedge test and use a ruler to check the frets. Now that you’ve performed a straightedge test with the sixth string, you’ll have to repeat the test with the first string. This will ensure both sides of the fretboard are level. If your inspection has not found irregular warping, it may be your frets causing buzzing or other distortions.
- To check your frets, take a straight metal ruler and lie it along the fretboard. A misaligned fret may only be out of alignment by a few thousandths of an inch. This might not be observable with your eyes, but if you lay the metal along the frets, the misaligned fret will cause the ruler to seesaw slightly back and forth.[5]
- To check your frets, take a straight metal ruler and lie it along the fretboard. A misaligned fret may only be out of alignment by a few thousandths of an inch. This might not be observable with your eyes, but if you lay the metal along the frets, the misaligned fret will cause the ruler to seesaw slightly back and forth.[5]
Advertisement
-
1
Prepare your tools and guitar. You’ll want a flat and clear surface to work on while removing frets from the neck of your guitar. You’re going to use the steam from your iron to loosen the glue connecting the frets to the neck, and then with your hammer and scraper, you’ll be chiseling off the frets. To do this, you’ll need to remove the strings from your guitar.
- You may want to hold the neck of your guitar into place with a rubber ended clamp or some other suitable clamp for woodwork. This is not necessary, but can make removing the frets easier.
- Make sure your iron has plenty of water. You’ll need lots of steam to loosen the glue fastening your frets and guitar neck. You may want to bring some extra water in a pitcher in case you run dry mid-steaming.
- It is possible that damage could occur to your guitar during this process. If you have an expensive guitar, you may be better off having a professional repair the neck of your instrument.[6]
-
2
Apply steam to the top of the fretboard. Warm up your iron and set it to its hottest setting. Now you are ready to place the iron on the topmost segment of the fretboard to begin steam-loosening the frets. It should take about five minutes before the frets begin to loosen. At the five minute mark, or shortly before, take your scraper and begin firmly pushing it between the fretboard and the neck from the side of the neck of the guitar.
- Depending on your guitar, you may need to apply more or less steam to the neck to loosen the glue. Test the bond between fret and neck every minute or so be probing it with your scraper.
- The fretboard and neck will become very hot from the heat of your iron. Be careful when touching the neck or handling your guitar. To prevent being burned or scalded, you may want to wear a pair of gloves or wrap the neck of your guitar in a towel after removing your iron.
- When the glue has sufficiently loosened, you should be able to get an inch or two of your scraper (or putty knife) inserted between your fret and neck. This should be enough to hold your scraper in place between the two parts unassisted.[7]
-
3
Chisel free the frets from the neck of your guitar. Take your hammer and gently but firmly tap your scraper on its handle until it pushes through to the other side of the neck of your guitar. When you find stubborn resistance to your hammer tapping/chiseling, you should pause and apply more steam to the frets of your guitar.
- Keep your scraper at a right angle (forming an L-shape with) the neck of your guitar. This way you’ll be able to tap the protruding end and the handle to wedge the fretboard free evenly. This will help prevent damage to the neck due to unequal stress being applied by your scraper.
- Removing frets from the neck of your guitar can be a long an involved process. You should work slowly to prevent the wood from cracking and splintering. Damage to the neck can permanently ruin it.[8]
[9]
-
4
Continue until the fretboard is removed from the neck. Work your way down the fretboard, alternately applying your iron to steam-loosen the glue and your hammer/scraper combination to separate the board from the neck. As you move down the fretboard, you should notice the fretboard come free more easily.
- Even when the fretboard begins coming free more easily, work slowly and methodically. Working too fast can cause damage to the neck or fretboard of your guitar.
- Once the glue has become loosened, try to wiggle your scraper back and forth in the direction of the still-glued segments. You may find this loosens the glue more easily.[10]
[11]
Advertisement
Creating Your Straightening Jig
-
1
Cut cradle block for your guitar neck with your saw. You’ll want your cradle to be made of a hard wood, like oak. This will prevent damage to the neck while providing resistance you need to correct the warp.
- Use your tape measure to find the distance between the area of the neck that is warped and the surface you are working on when the body of your guitar is laying flat. This will be the height of your cradle block.
- The length of the block should be about five inches (12.7 cm), and its width an inch (2.54 cm) wider than the neck of your guitar on both sides.[12]
-
2
Hollow a trough to hold the neck of your guitar in place. Now you are going to notch the cradle block along the top to make a level trough in which your guitar will nest. This will prevent your guitar from irregular forces that could cause the neck to crack, or from the instrument slipping while you are straightening the warp.
- Your trough doesn’t need to be too deep; a ¼ inch (6.35 mm) deep should be sufficient to hold your guitar in place. This will also help prevent stress fractures in the wood of the neck.[13]
- Your trough doesn’t need to be too deep; a ¼ inch (6.35 mm) deep should be sufficient to hold your guitar in place. This will also help prevent stress fractures in the wood of the neck.[13]
-
3
Cut your tension block. Take your 2 by 4 and cut it down to a manageable size — 6 inches long (15.24 cm) should be sufficient. Then lay it on its wide side and make a mark in the middle of the board three inches from either side. To either side of this midpoint mark, measure 2 inches (5 cm) and make a mark in the center of the board.
- The midpoint mark is where the headstock of your guitar will overhang. The marks to either side of the midpoint will be where you add tension rods, which you will use to straighten the warp of your guitar.[14]
- The midpoint mark is where the headstock of your guitar will overhang. The marks to either side of the midpoint will be where you add tension rods, which you will use to straighten the warp of your guitar.[14]
-
4
Add and shape the tension rods. These will be made from nails. With your hammer, pound a nail into the two spots you marked on both sides of your midpoint. The nail will need to protrude through to the other side of your 2 by 4. To shape your tension rods, you should bend the nails with pliers so the protruding nail ends point to the corresponding outside ends of your board.
- Be careful you don’t damage what is below your 2 by 4 when you pound the nails through the board. You’ll want your nail to extend 2 to 3 inches (5 to 7.6 cm) out the opposite side of your 2 by 4.[15]
- Be careful you don’t damage what is below your 2 by 4 when you pound the nails through the board. You’ll want your nail to extend 2 to 3 inches (5 to 7.6 cm) out the opposite side of your 2 by 4.[15]
Advertisement
Repairing the Warp
-
1
Secure all necessary parts to your work space. At one end of your work space, you should clamp your tension block firmly into place. Position your guitar so that the headstock directly overhangs the midpoint mark you’ve made on your tension block. When you have aligned your tension block, lift the neck and place the cradle beneath it, nesting the neck into the cradle where the warp is centralized. Then you should clamp the body of your guitar firmly to your work area at its base.
- You may want to put small pieces of rubber between your clamp and guitar, guitar and work area, and clamp and work area. These small pieces of rubber will prevent damage to your guitar or work area.
- At this point, your guitar should be clamped at the base to your work area, the warped part of the neck should be nested in your cradle, and your tension block should be clamped to the work area with the headstock of your guitar overhanging its midpoint.
-
2
Attach the B and A tuning pegs to your tension rods. Now that your guitar is firmly held in position and supported, you need to insert the thickest guitar string you have into the A and B tuning pegs, which are the middle tuning pegs on either side of the headstock. Wrap the string around the top of the peg several times to affix it in place, then take each loose end around each pegs’ closest edge and down toward the tension rods.
- Place your last two rubber guards in between the string and the headstock so the string does not damage the wood, and then wind the strings tightly around the tension rods.
- Your low E string should work nicely for warp repair purposes. Thicker guitar strings will allow you to apply more tension to the neck to correct the warp.[16]
[17]
-
3
Adjust the tuning pegs to repair the warp in your guitar. By tightening or loosening your A and B tuning pegs, you’ll be applying tension to the neck of your guitar. This tension is how you will correct the warped neck. But before you start applying tension with your tuning pegs, place your straightedges to form right angles ( L-shapes) with the base and the top of the neck.
- Using the straightedges, you’ll be more able to see if the warp has been corrected. If the top of each straightedge is aligned and level, your warp has been corrected.
- You can also lay your straightedge longways down the neck of your guitar. This may make it easier for your to see lengthwise warping.
- You may have to make several small adjustments before your warp is corrected. Be careful not to apply too much tension to the neck of your guitar; this could result in the neck cracking.
- Once the neck is straight, you should add a half turn to each tuning peg to give the slightest backward bowing in the neck of your guitar.[18]
-
4
Apply heat to set the new neck shape. Lay a metal straight edge, like a steel ruler, along the now straightened neck of your guitar. This will act as a buffer between the wood and the direct heat of the iron while helping to evenly distribute the heat. A medium-low setting will help prevent you from applying too much heat too fast, which could do damage to the wood.
- A constant temperature of about 350 to 400 degrees Fahrenheit (176 to 204 degrees Celsius) applied to your guitar neck for about two to three hours should help the neck hold its repaired shape. Afterward, you should allow the wood to cool for about a day.[19]
[20]
[21]
- A constant temperature of about 350 to 400 degrees Fahrenheit (176 to 204 degrees Celsius) applied to your guitar neck for about two to three hours should help the neck hold its repaired shape. Afterward, you should allow the wood to cool for about a day.[19]
-
5
Reattach your fretboard and restring your guitar. The neck of your guitar should now be repaired. All you need to do is re-glue your frets to the neck, restring your guitar, and it should play as good as new!
Advertisement
Add New Question
-
Question
What type of warp specifically is addressed by this tutorial?
This tutorial deals with warp where the neck and fretboard of the guitar are curved away from the strings.
-
Question
Is there anything simpler I can do if I don’t have access to a woodworking shop and can’t afford any of these materials?
There is always the option of taking it to a repair shop, or if you are confident in your repair abilities, you could buy a new neck and put it on.
-
Question
What can I do if I don’t have access to a wood shopvand can’t afford any of these materials, let alone my own luthier?
Funpineapple6
Community Answer
Unfortunately, you cannot do this project if you can’t buy any of the materials.
Ask a Question
200 characters left
Include your email address to get a message when this question is answered.
Submit
Advertisement
-
To prevent damage to your guitar, you should always use a buffer, like a piece of soft rubber or a cloth, to prevent clamps from doing damage to your guitar.
Thanks for submitting a tip for review!
Advertisement
-
Repairing the warp in your guitar neck incorrectly can result in permanent damage to your instrument. For less expensive guitars, a self fix can be a good idea, but you might want to entrust more expensive guitars to a professional.
-
Using a clothes iron to remove frets and set the shape of the neck of your guitar will generate a lot of heat in the iron and your instrument. Exercise care to prevent getting burned.
Advertisement
Things You’ll Need
- Metal ruler
- Tape (optional)
- Clothes iron
- Gloves or towel (optional)
- Hammer
- Putty knife or thin wallpaper scraper
- Woodworking clamps (or some other rubber ended clamp suitable for wood; optional)
- 2 by 4 board
- Clothes iron
- Hammer
- Hard wood (like oak; for neck cradle)
- Metal straightedge (like ruler or level; 2)
- Multimeter with temperature probe/lead (or any temperature gauge that had a probe/lead sensor)
- Nails (long enough to protrude through the width of the 2 by 4)
- Pencil
- Pliers
- Rubber guards (to place beneath your clamps to prevent damage; 5)
- Saw
- Tape measure
- Woodworking clamps (or some other rubber ended clamp suited for wood; 2)
References
About This Article
Article SummaryX
To fix a warped guitar neck, first you’ll need to remove the frets from the neck using a hammer and chisel. Then, cut a notch in a block of wood that’s just big enough to hold the neck of your guitar. Next, lay your guitar down on a flat surface with the neck resting in the notch you cut, and nail a block of wood over the top of it to apply tension to the neck. Once you’ve done that, attach the B and A tuning pegs to your tension rods, and adjust them to apply tension to the neck and fix the warping. Finally, use an iron to apply heat and set the new neck shape, and reattach the frets. For more tips, like how to check the alignment of your guitar neck, read on!
Did this summary help you?
Thanks to all authors for creating a page that has been read 277,396 times.
Did this article help you?
Если вы хотите поддержать проект, поле для донатов в правом нижнем углу в вашем распоряжении
Исправление безнадёжно кривого грифа.
Гриф является, пожалуй, самой важной деталью в конструкции гитары. Именно от его геометрии и стабильности зависит то, насколько гитара пригодна для исполнения музыки. Дефекты любой другой детали не столь критичны, или легко исправимы, но дефект грифа может принести массу неудобств или вообще сделать извлечение нот невозможным.
Связка струны-гриф конструктивно представляет собой лук и тетиву. В идеале гриф должен иметь небольшой прогиб, достаточный для того, чтобы позволить струне совершать колебания свободно, не задевая за ладовые порожки. Величина этого прогиба – вещь сугубо интимная для каждого гитариста. Это компромисс между динамикой исполняемой музыки и удобством звукоизвлечения. Чем больше прогиб, тем выше и дальше от ладов струны, и тем сильнее и экспрессивнее по ним можно лупить, но чем ниже струны, тем легче их прижимать и исполнять приёмы, в которых не участвует щипок, то есть легато и тэппинг. Регулировка прогиба осуществляется анкерным механизмом, если он конечно есть. Кроме того, величина прогиба может меняться под воздействием климатических условий, в частности сезонных перепадов влажности, или перемещения из одного климатического пояса в другой.
Однако не любое изменение геометрии возможно выправить анкером. Под воздействием экстремальных климатических перепадов, или из-за конструктивных дефектов, либо недостаточно высокого качества материалов, гриф может менять свою геометрию нелинейно и совершенно непредсказуемо. Его может повести волнами, у него может загнуть определённый участок, например возникнуть горб в районе первых ладов или пятки, наконец его может повести винтом. Хотя, некоторые производители последнее считают не багом, а фичей. Lace, например, которых больше знают по их звукоснимателям, а не гитарам, производят гитары с грифами винтом, так называемым Helix Neck System, уверяя, что это предохраняет гитаристов от неприличных болезней: тенденита или туннельной невропатии. Не буду с ними спорить, хоть я и не согласен с такой точкой зрения. Те более, что их гитары Cybercaster производит для них легендарный Гроувер Джексон.
Необратимые изменения геометрии грифа, не поддающиеся исправлению анкерным механизмом, лечат весьма радикальным способом, требующим хирургического вмешательства. Это требует исправления кривизны рабочей поверхности рубанком и полной переладовки. Но даже такая процедура не всегда возможна.
Ещё в конце ’90х, в одном из каталогов Aria Pro II я увидел устройство, позволяющее выровнять геометрию грифа путём термической обработки. Долгие годы я пытался разыскать такое устройство, и после долгих тщетных попыток решил сделать его сам.
Для изготовления термического выпрямителя грифа понадобится плоский нагревательный элемент, напоминающий рельсу, достаточной длины и ширины, чтобы она покрывала всю поверхность грифа, набор струбцин и реостат.
Нагреватель я нашёл на eBay, он там называется Strip Heater. Для того чтобы струбцины не повредили тыльную часть грифа, я воспользовался пенистым упаковочным материалом, что используется современными производителями электроники для упаковки вместо пенопласта.
Реостат понадобился для регулировки температуры. Первый мой опыт оказался, блин, комом, я слишком сильно перегрел гриф, в результате чего оплавилась окантовка и повылетали маркеры ладов. Также я пользовался электронным таймером для розетки, периодически отключающим устройство во время термической обработки.
Как показала практика, этот способ действительно работает. Однако недолго. Через полгодика гриф возвращался в своё исходное кривое состояние. Так, что пользоваться им можно лишь для того, чтобы привести гитару в более-менее играбельное состояние, чтобы поскорее от неё избавиться. Лучше всего там, где её можно отправить куда подальше, я, например, слил так пару-тройку гитар на Reverb.com и больше к этой процедуре не возвращался, а устройство подарил мастеру одного из московских музыкальных магазинов, но насколько я знаю, он им так и не пользовался.

