Question
How can I change the color of my line art in Clip Studio Paint?
Answer
You can change the color of the line using a variety of methods, such as the [Convert to drawing color] function, locking transparency, or applying a layer color.
Please find each method below.
Changing the color of the lines on a selected layer
With the [Convert to drawing color] function in the [Edit] menu, you can change the color of the lines on a selected layer.
Example of Use
・Turning black line art into another color
1. Select the line art layer you want to change the color of.
Note: Any areas other than the line art must be transparent.
2. On the color palette, select the desired color for the line art.
3. Select [Edit] menu > [Convert to drawing color].
4. The line art color will change to the color selected.
Note:
If the color of the line is gray or does not change, set the expression color of the layer to [Color] from the [Layer Properties] palette.
Changing only part of the line art’s color
You can use the [Lock Transparent Pixels] function to change the color of the line art to a different color.
This allows you to draw in the area where the image is located without protruding into the transparent area.
Example of Use
・When you want only a part of the line to be a a different color
1. Select the line art layer you want to change the color of.
Note: Any areas other than the line art must be transparent.
2. On the layer palette, select [Lock Transparent Pixels].
3. If you use a drawing tool such as the Airbrush or Pen tool, you can change the color of the line art to the desired color.
Note:
If the color of the line is gray or does not change, set the expression color of the layer to [Color] from the [Layer Property] palette.
Temporarily changing the line art’s color
The [Layer Color] function allows you to temporarily change the color of your line art.
This displays the content on the layer in a different color, and allows you to easily return to its original color, letting you use it as a temporary display.
Example of use
・When you want to temporarily change the color of a lower layer’s line art to a lighter color, such as light blue.
・When you want to change the monotone material to a different color when creating a color manga.
1. Select the layer in which you want to change the line art color, and turn on [Layer Color] in [Layer Property] palette.
2. The [Layer Color] item will display and the color of the line will be changed to light blue, the initial layer color.
Click on the color part of [Layer Color].
Select the desired color from [Color Settings] and click OK.
4. The color of the content on the layer will change to the selected color.
Note: You can restore the layer’s original color by turning off the [Layer Color] icon on the [Layer Property] palette.
Couldn’t find an answer to your problem?
This post may contain affiliate links, which means I may earn a commission if you decide to purchase through my links.
When you need to change the colors in your art, it can be a big pain to do it manually. Luckily, Clip Studio Paint gives you options to change your colors quickly and easily.
To change the color of a layer in Clip Studio Paint, start by selecting your desired layer. Then, confirm you have the correct color selected. Next, click on the “Edit” menu and the “Convert to drawing color” button. This will change anything on your selected layer to the color you’ve selected.
We’re going to walk through the steps you need to know to change the color of your art in Clip Studio Paint.
To begin with, we’ll talk about changing the color of an entire layer. Then, we’ll talk about how to partially change the color of a layer. This is useful if you have multiple objects on a single layer, but only want to change the color of some of them.
To change the color of an entire layer in Clip Studio Paint, make sure you have the correct layer selected in your layers panel. Also confirm you have the correct color selected. Then, click on the “Edit” button and the “Convert to drawing color” button to change everything on your selected layer to your selected color.
If everything you want to change the color of is one a single layer, here are the steps you’ll want to take to do that:
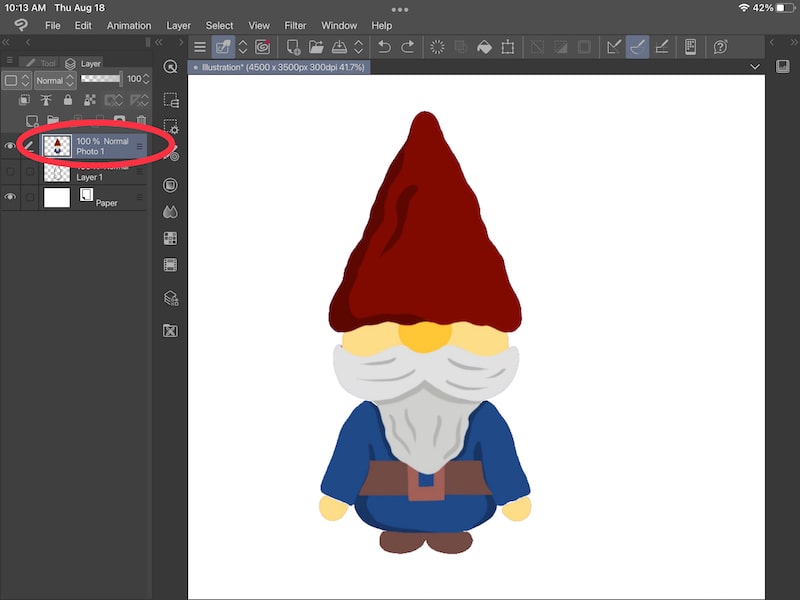
1. Select your desired layer in the layers panel
To begin with, you need to make sure you have the correct layer selected. This is the layer you want to change the color of.
Be aware that EVERYTHING on that layer will change to your new color. With this method, you can’t pick and choose.
This is why layer management is important. You may not know that you’re going to want to change your colors ahead of time. But, keep it in the back of your mind.
Separating your art onto different layers is helpful for a number of reasons; having options when changing your colors is one of them.
For this example, I drew all of my gnome on a single layer, except for the outline. Normally, I would draw the different parts of my gnome on different layers but, I limited my layers to keep things simple for this tutorial. I can’t say I’m always good about remembering to separate things into different layers anyways though!
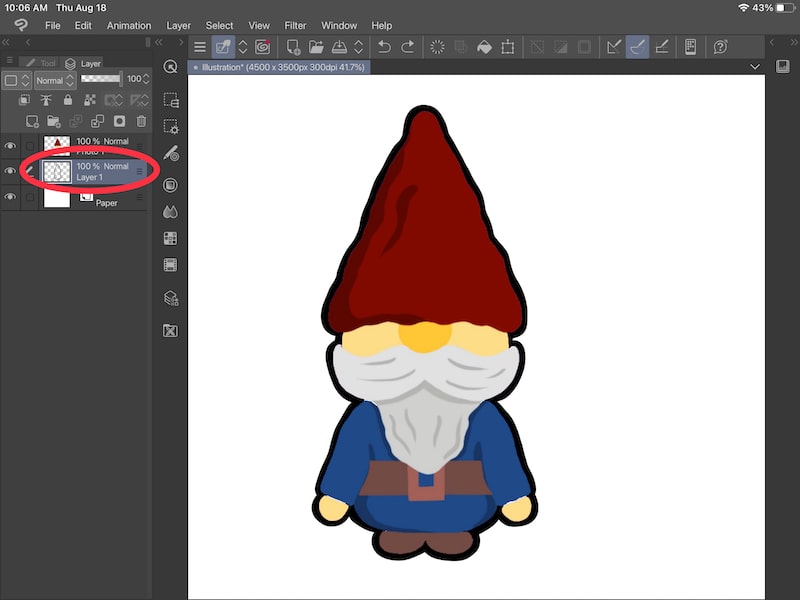
Alright, go ahead and select your layer. You’ll know it’s selected because it will be highlighted in your layers panel. For this example, I’m going to change the color of my outline, which is on a separate layer.
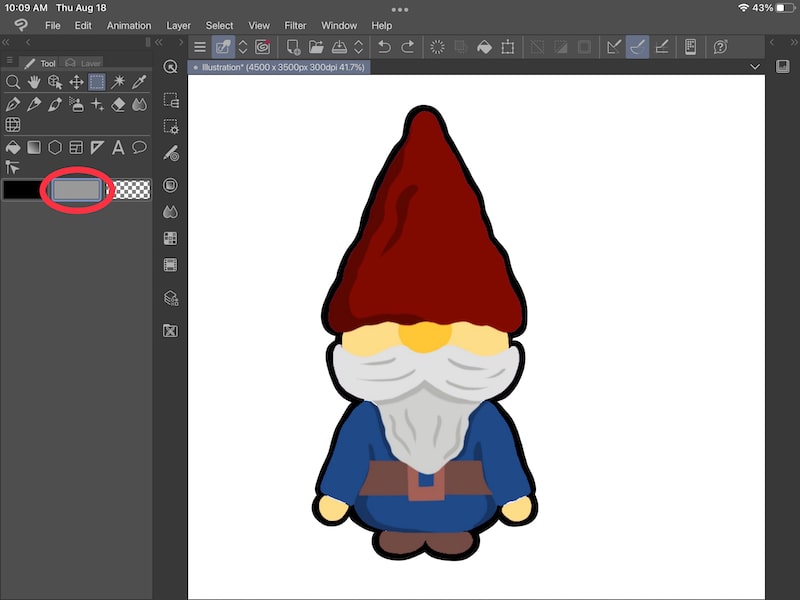
2. Choose your new color
Now you need to choose the new color you want to change your layer to.
Once you’ve chosen your color, make sure it’s your active, selected color. You’ll know it’s selected because it will have a gray outline around it.
3. Open the “Edit” menu and click on the “Convert to drawing color” button
Now it’s time to change the color of your layer. With your desired layer and color selected, open the “Edit” menu. Then, click on the “Convert to drawing color” button.
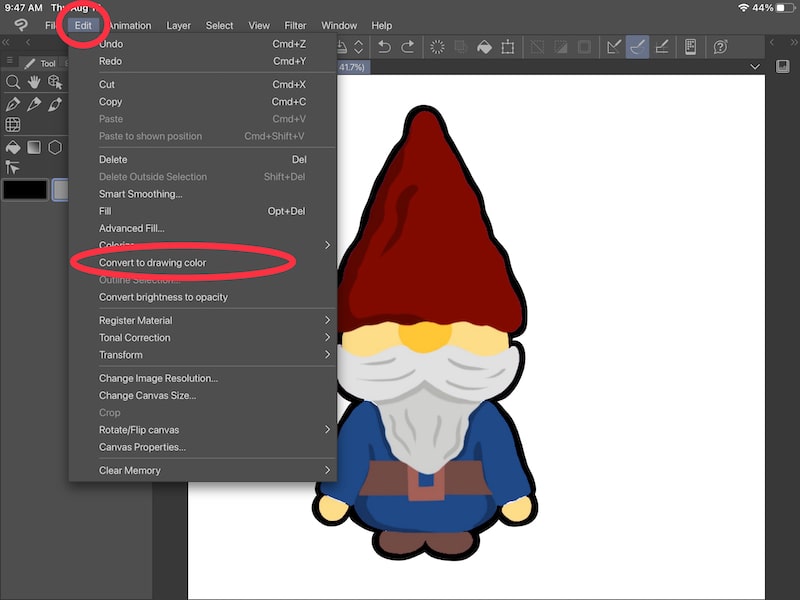
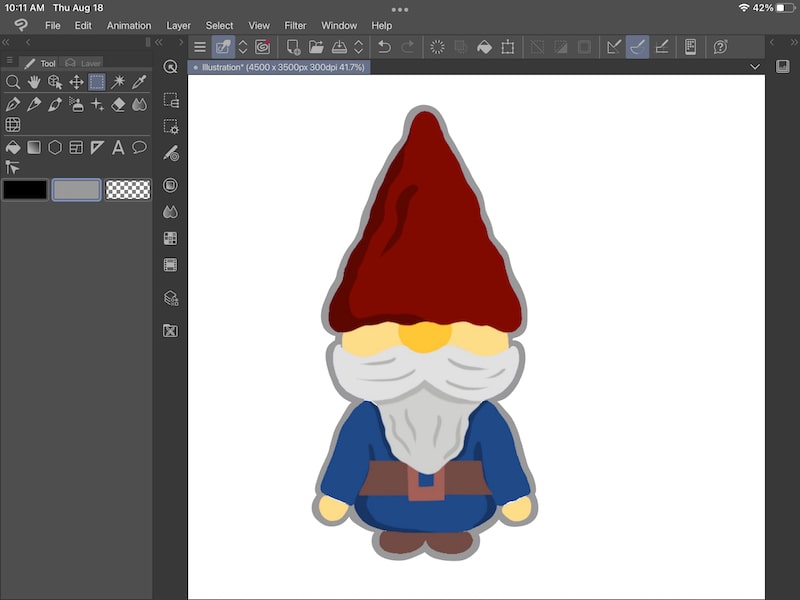
This will change the color of everything on your selected layer to your selected color.
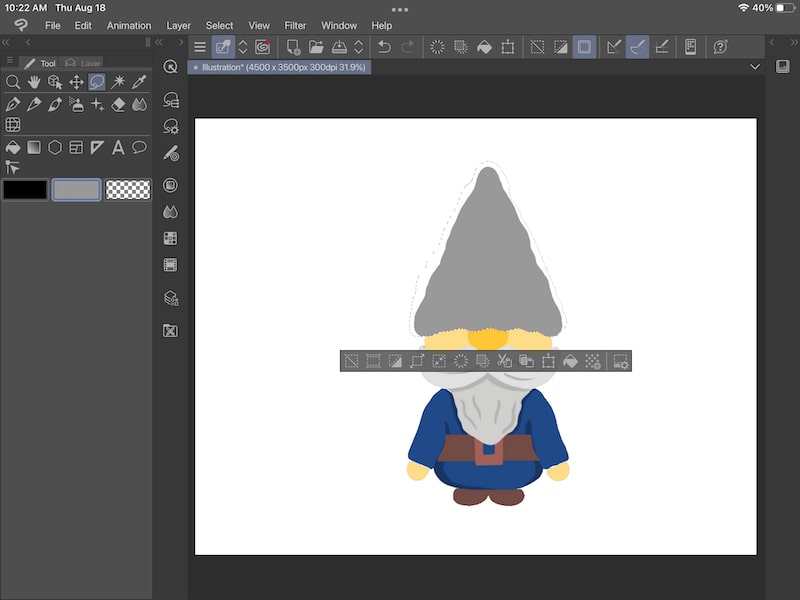
As you can see in my example below, my outline turned gray.
Ok, so maybe you’re like me and you didn’t separate your art into different layers. One way to deal with that is to move the object you want to change the color of to a new layer.
Use the Selection Tool to Put Your Object on a New Layer
Select your desired layer in the layers panel and choose the selection tool that makes sense for your object. Once your object is selected, cut and paste it to a new layer. Since your object is on a new layer, click on the “Edit” menu and the “Convert to drawing color” button to change the color of your object.
This color changing option uses the method we just talked about, but starts off with creating a new layer.
If we’re able to get our desired object onto a new layer, we can then change the color of that layer without impacting the rest of our art. Hooray!
Here’s what to do:
1. Select your desired layer in the layers panel
Make sure the layer you want to change the color of is selected in your layers panel.
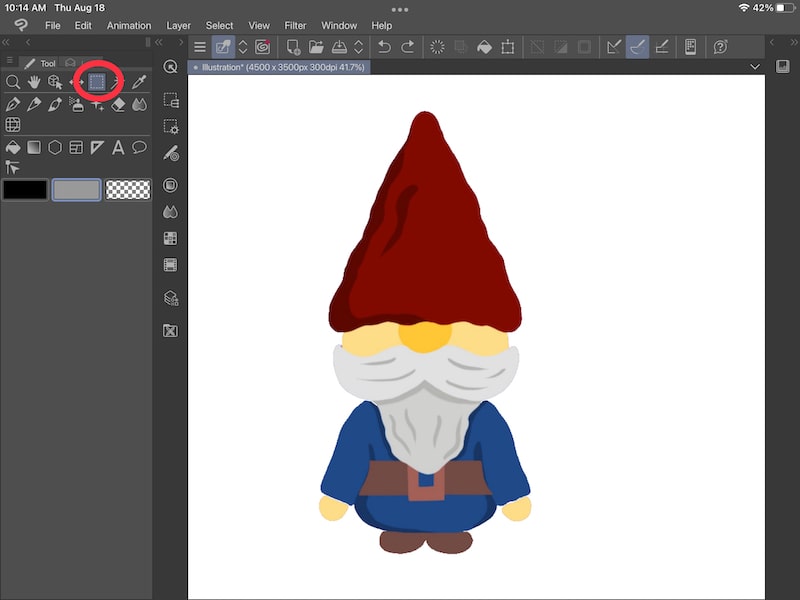
2. Choose the selection tool
The selection tool is in your tool panel and defaults to a square icon. That said, if you’ve used your selection tool recently, the icon will resemble the selection setting you’ve most recently used.
3. Select your object with the selection tool
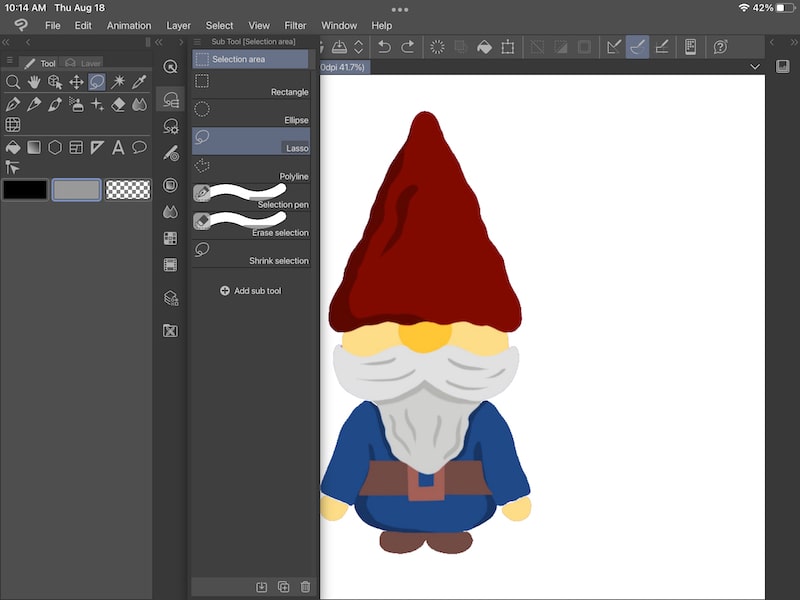
Now you’ll want to select your object. The selection setting you choose will depend on your object. If your object is far away from other objects, you might be able to use the square or ellipse options to quickly select your object.
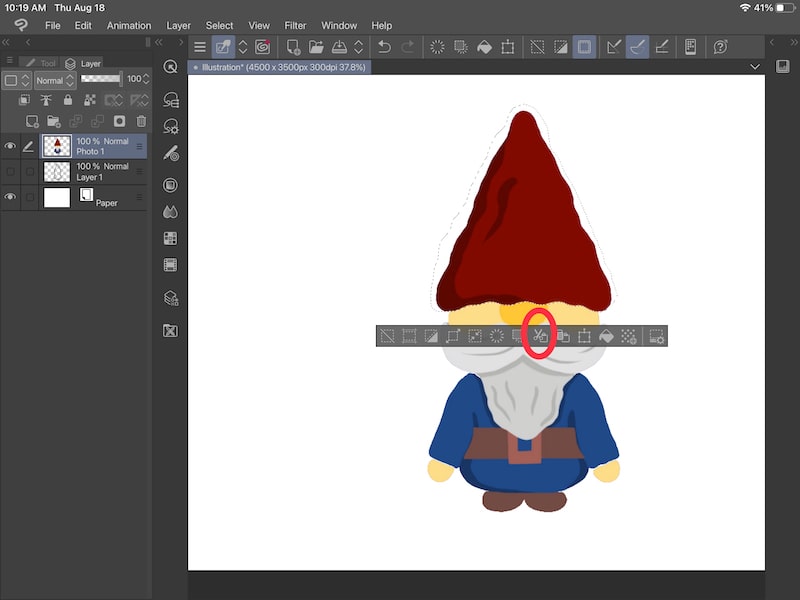
Or, if your objects are touching, like they are in my gnome drawing, you may need to use the lasso option to manually outline and select your object.
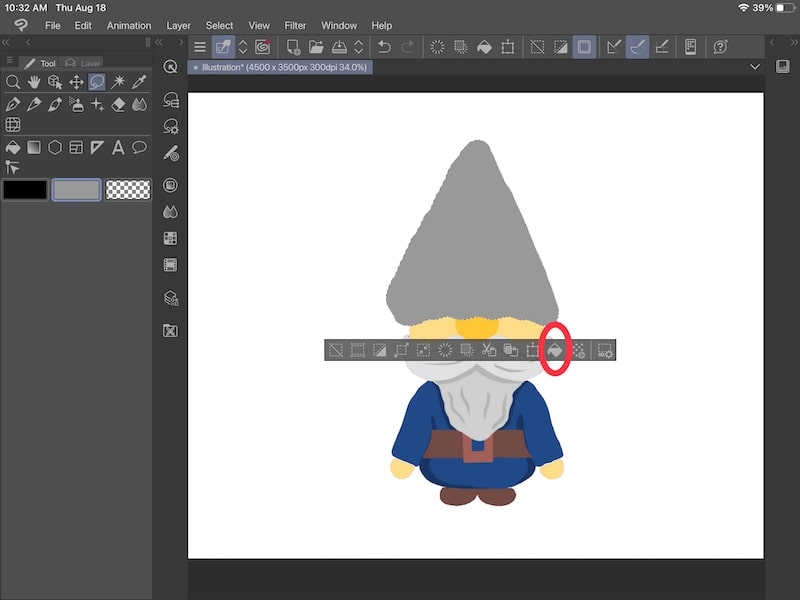
In this example, I’ve selected the gnome’s hat. I’ve turned off the outline layer to make the hat easier to see.
4. Cut and paste your object to a new layer
Once you’ve selected your object, cut and paste it to a new layer. Once you’ve made your selection, you’ll see a list of options appear. The cut and paste button is the one with the scissors and clipboard icon.
Your selection will be cut and paste to a new layer. You can see it if you turn off the visibility of your other layers. It’s important to keep track of these layers in case you suddenly can’t draw on them, draw on the wrong one, or lose track of where your objects are.
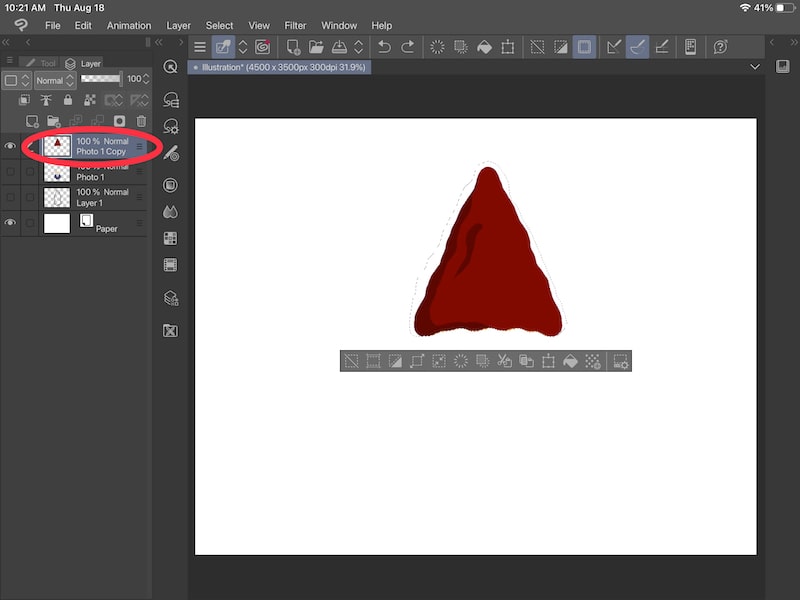
5. Open the “Edit” menu and click on the “Convert to drawing color” button
Now that your object is on a new layer, you can proceed with the color changing method we talked about above! Make sure your layer is selected and choose your color.
Then, open the “Edit” menu and click on the “Convert to drawing” button. Because you copied and pasted your object to a new layer, only this object will have a color change.
How to Change the Color of Part of a Layer in Clip Studio Paint
To change the color of part of a layer in Clip Studio Paint, you have a few options. To have more control over your colors, use the lock transparency option. To make wide sweeping color changes, use the color fill option within the selection tool.
We’re going to talk about 2 different options for changing the color of part of your layer.
Use the Lock Transparency Option
Select your desired layer in the layers panel and choose the “Lock transparent pixels” button. This will let you draw on the objects in your layer without going outside of the lines. This is a great way to change your colors manually without worrying about messing up the rest of your canvas.
Here’s what you need to do:
1. Select your desired layer in the layers panel
Make sure the layer you want to change the color of is selected in your layers panel.
2. Click on the “Lock transparent pixels” button
The “Lock transparent pixels” button can be found within your layer options. It’s the button that has an icon that looks like a checkerboard and a lock.
When you click on the “Lock transparent pixels” button in Clip Studio Paint, it’s similar to turning on Alpha Lock in Procreate.
You’ll be able to color over anything that you’ve already drawn on your canvas.
In the example below, I can color in the gnome’s hat without worrying about it spilling onto the outline or into the rest of the canvas.
That said, I do have to be careful not to color on the gnome’s face because the gnome’s face is on the same layer as his hat.
You can’t add anything new to your canvas when the transparency option is on. You can only draw over what you already have. This is why it’s such a great option for coloring your work without going outside of the lines.
While this method requires you to manually draw over your objects, not having to worry about drawing outside of the lines speeds up the process.
It also gives you more flexibility with changing your colors. Instead of only being able to apply one color to your entire object, you can change your colors anytime you’d like with the transparency option.
Use the Color Fill Selection Tool
Select your desired layer in the layers panel and use the lasso tool to outline your object. Once your object is selected, make sure your desired color is selected and choose the color fill option within the selection settings. This will fill your selection with your new color.
Clip Studio Paint’s selection tool has a neat color fill option. While this might not be the most efficient way to change the color of your objects, it’s still a neat feature that I wanted to highlight.
Here’s what to do:
1. Select your desired layer in the layers panel
Make sure the layer you want to change the color of is selected in your layers panel.
2. Choose the selection tool and pick the lasso option to manually outline your selection
When you choose the selection tool, you’ll want to choose the lasso option and manually outline your selection.
Anything within your selection will change color. This means that you’ll need to be accurate with your selection area to ensure you’re not creating color changes you didn’t intend.
3. Choose the color fill option in the selection settings
Once you’ve created your selection, choose the paint bucket icon within the selection settings. This will change your selection to the active color you’ve chosen.
There are a number of great ways to change the color of a layer in Clip Studio Paint. Get familiar with these options so you can always know how to change the color of your layers in the way that makes the most sense for your art.

Diana has been an artist for over 26 years and has training in drawing, painting, digital drawing and graphic design. Diana’s latest obsession is digitally drawing with Procreate and creating t-shirt designs with Canva. Diana has experience selling her art across a number of platforms and loves helping other artists learn how to make money from their art as well.

Построение формы предметов
Введение в клип студио пэйнт
(для компьютера)
В чем плюсы этой программы?
Для простого скетчинга
- очень гибкая настройка нажатия кисти для каждого параметра каждого инструмента
- хорошая стабилизация линий
- мощные перспективные сетки
- линейки
- манекены и 3Д
- возможность делать трансформирование и копипаст с нескольких слоев сразу
Для чистой отрисовки
/ лайнарта
- векторные слои (но векторную графику делать нельзя)
- возможность корректировать, трансформировать, дублировать линии на векторных слоях
- удалять пересечения векторной резинкой
- референсные слои- выделение с другого слоя во время покраски
- закрытие дырок в выделении и расширение выделенной области
- интерфейс программы очень похож на фотошоп. при переходе туда и обратно не будет больших проблем
- программа сохраняет и открывает psd. Я спокойно работал с компанией, где у всех был фотошоп, а я при этом рисовал в клип студио пэйнт, отправляя им файлы в psd.
- в клип студио пэйнт можно импортировать фотошопные кисти в формате .abr
https://www.clipstudio.net/en/
Если будете покупать, то версии Pro (которая дешевле) для курса достаточно.
В версии EX дополнительно есть разные инструменты для верстки книг, которые нам не понадобятся.
Если будете качать с торрентов, то там скорее всего будет лежать версия EX,
она включает в себя инструментарий Pro версии, и тоже подойдет. Но лучше купить, ибо программа часто обновляется и улучшается.
Примерно 4 раза в год на нее стабильно бывают большие скидки. Нужно следить за их сайтом и подписаться на новости.
- Закрыть все лишние.
- Оставить tool, subtool, tool property, layers, color (поменять на треугольник).
- Если вдруг что-то случайно закрыли — ищите в window.
Pen pressure settings — калибровка нажатия кисти.
- Выбрать pen > pen > G-pen.
- Дублировать ее (кликнуть правой кнопкой, duplicate subtool).
- Перетащить ее в новую группу.
- Переименовать в sketch (кликнуть правой кнопкой, settings of subtool).
- отключить нажатие в панели brush size
- включить pen pressure в панели opacity
На кривой у меня стоит только одна точка, в середине. Если поставились лишние — уберите их, перетащив в угол. Если потянуть за эту точку вверх, то кисть будет более жесткая, если вниз — более мягкая. Я изменяю это по ходу рисования, в зависимости от того, что делаю
- Stabilization 20
Значение стабилизации также можно менять по ходу рисования. Если нужно прорисовать мелочи — поменьше (от 0 до 10). Если нужны длинные ровные линии (10 до 20 и больше).
layer > new raster layer > Alt + A
(обратите внимание на какой ставить, а то будет постоянно появляться всплывающее окно)
layer > duplicate layer > ctrl + J
layer > delete layer > ctrl + backspace
layer > merge selected layers > ctrl + shift + E
view > rotate/ invert> flip horizontal > Ctrl + Shift + A
tool property pallete > reduce brush size > Z
tool property pallete > Increase brush size > X
drawing color > switch main color and sub color > C
удалить все горячие клавиши (к одной клавише могут быть привязаны несколько инструментов)
pen > sketch > S (это наша новая созданная кисть, по умолчанию её там нет)
eraser > hard > R
eraser > soft > E
move layer > move layer> V
selection area > rectangle > M
selection area > lasso > L
operation- select layer > B
figure > straight line > G
Часть 1. Простая иллюстрация
Ctrl + N
1500 x 2000 px, 72 px — разрешение.
Сохраните шаблон, чтобы потом было удобнее.
пробел — перемещаться по холсту
ctrl + пробел — увеличивать/ уменьшать
R — вращать холст (зажав Shift, можно поворачивать ровно на 90 градусов)
Ctrl + Shift + A — отражение экрана
Группы инструментов (tools) > подгруппы инструментов (subtools) > конкретный инструмент.
Горячая клавиша S — наша кисть для рисования, ее можно дублировать с разными параметрами и новым кистям будет тоже присвоена эта
горячая клавиша. Таким образом вы можете выбирать их по очереди, или перенести вверх ту, которая больше нужна в данный момент
Три квадратика — основной цвет, дополнительный и прозрачность, — можно выбирать в квадратиках в панели color.
Аlt — пипетка. Можно брать цвет с холста.
Менять местами основной и дополнительный цвет — C.
Выбрав прозрачность, можно стирать кистью, как резинкой
Горячие клавиши — Z, X
или зажать ctrl + alt и двигать пером по холсту.
Можно переключать в tool property.
Соединить точки прямой линией
Точка > зажать shift > точка.
Вертикальные и горизонтальные линии
С зажатым shift, как в фотошопе не получится =(
Если все таки нужно, можно это сделать с помощью инструмента Figure > straight line или создав сетку одноточечной перспективы с отключенным центром.
Твердая и мягкая резинки — Eraser > soft/ hard
- мягкая — горячая клавиша E
- твердая — горячая клавиша R
У твердой убери brush size > pen pressure, размер изменять теми же клавишами, которые установили для кисти.
ctrl + S или ctrl + shift + S
Сохранить проект, чтобы потом доделывать его
CLIP STUDIO FORMAT (.clip) — формат программы клип студио пэйнт.
PHOTOSHOP DOCUMENT (.psd) — формат программы Фотошоп, его потом можно открыть в фотошопе и работать с ним там. В этом формате не сохраняются векторные слои и перспективные линейки.
Если в будущем при сохранении в PSD у вас будут странные цвета,
то сохраняйте через file > save duplicate > psd
и там в окне psd export settings поставmnt галочку Embed ICC profile.
Сохранить картинку — формат .jpeg
ВНИМАНИЕ!
Если вы активно используете отражение экрана, то может сохранится отраженная версия.
Чтобы это исправить, зайдите в view> rotate/ flip и уберите галочку с flip horizontal.
выделите все слои и edit > transform > flip hotizontal.
Теперь сохраняйте.
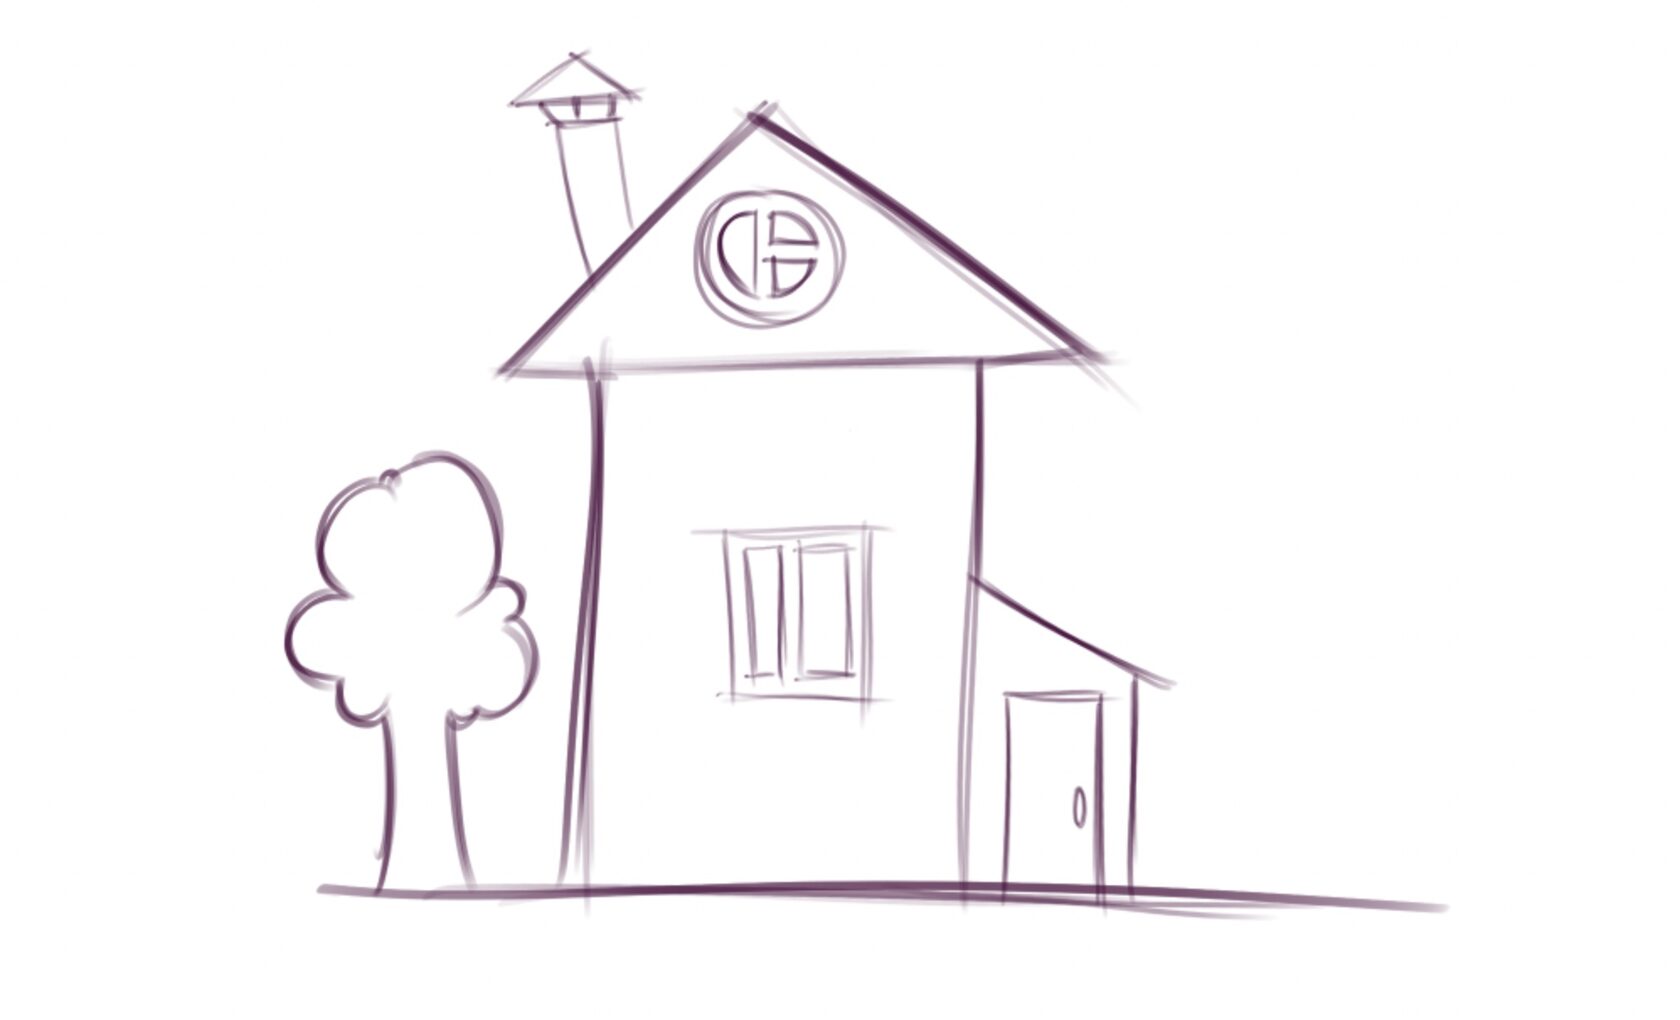
Упражнение 1
Рисуем небольшую иллюстрацию!
Часть 2. Использование слоёв
Картинка состоит из слоев прозрачной кальки — их может быть сколько угодно.
В самом низу находится фон (paper) — можно щелкнуть по нему и менять цвет.
Слои дают возможность рисовать и изменять разные части картинки независимо друг от друга.
- Создать новый слой — ALt + A или иконка в панели слоев
- Переименовать слой
- Переключаться между слоями
- Рисовать на слое
- Скрыть слой — иконка глаза
- Замкнуть слой — иконка замка
- Удалить содержимое слоя— backspace
- Удалить слой — ctrl + backspace
- Дублировать слой — ctrl + J
- Объединять в группы — ctrl + G
- Регулировать прозрачность слоя — ползунок opacity
- Залить слой цветом — alt+ backpace
- Перетаскивать слои в панели
- Выбрать несколько слоев
Зажав ctrl и поочередно щёлкать по слоям
Выбрать один слой, зажать Shift, выбрать другой, — выделятся все слои между ними
- Сливание слоев
Слить выбранный слой с нижним слоем — ctrl + E
Если выделить несколько стоящих рядом слоев, то можно слить их все — ctrl + shift + E
Если нужно слить несколько слоев, которые не стоят рядом, нужно выбрать их с ctrl, собрать в группу ctrl + G и потом слить ctrl + shift + E
- Выбирать слои прямо на холсте — очень полезная штука!
Инструмент select layer — B, можно выбирать рамкой
- Передвигать содержимое слоя
инструмент Move layer V, зажав alt, можно дублировать слой.
Удобно настроить этот инструмент, чтобы можно было выбирать слои прямо на холсте. Для этого нужно выбрать инструмент move layer, зайти в modify key settings > ctrl+ shift > change tool temporary > select layer.
Упражнение 2
Рисуем несколько иллюстраций на разных слоях!
Упражнение 3
Используем слои для поэтапного рисования иллюстрации
Вставить картинку в документ
Принт скрин > ctrl + V
File > import > image
В этом случае может быть нужно растеризовать вставленное изображение: нажать на его слой правой кнопкой мыши и нажать rasterize.
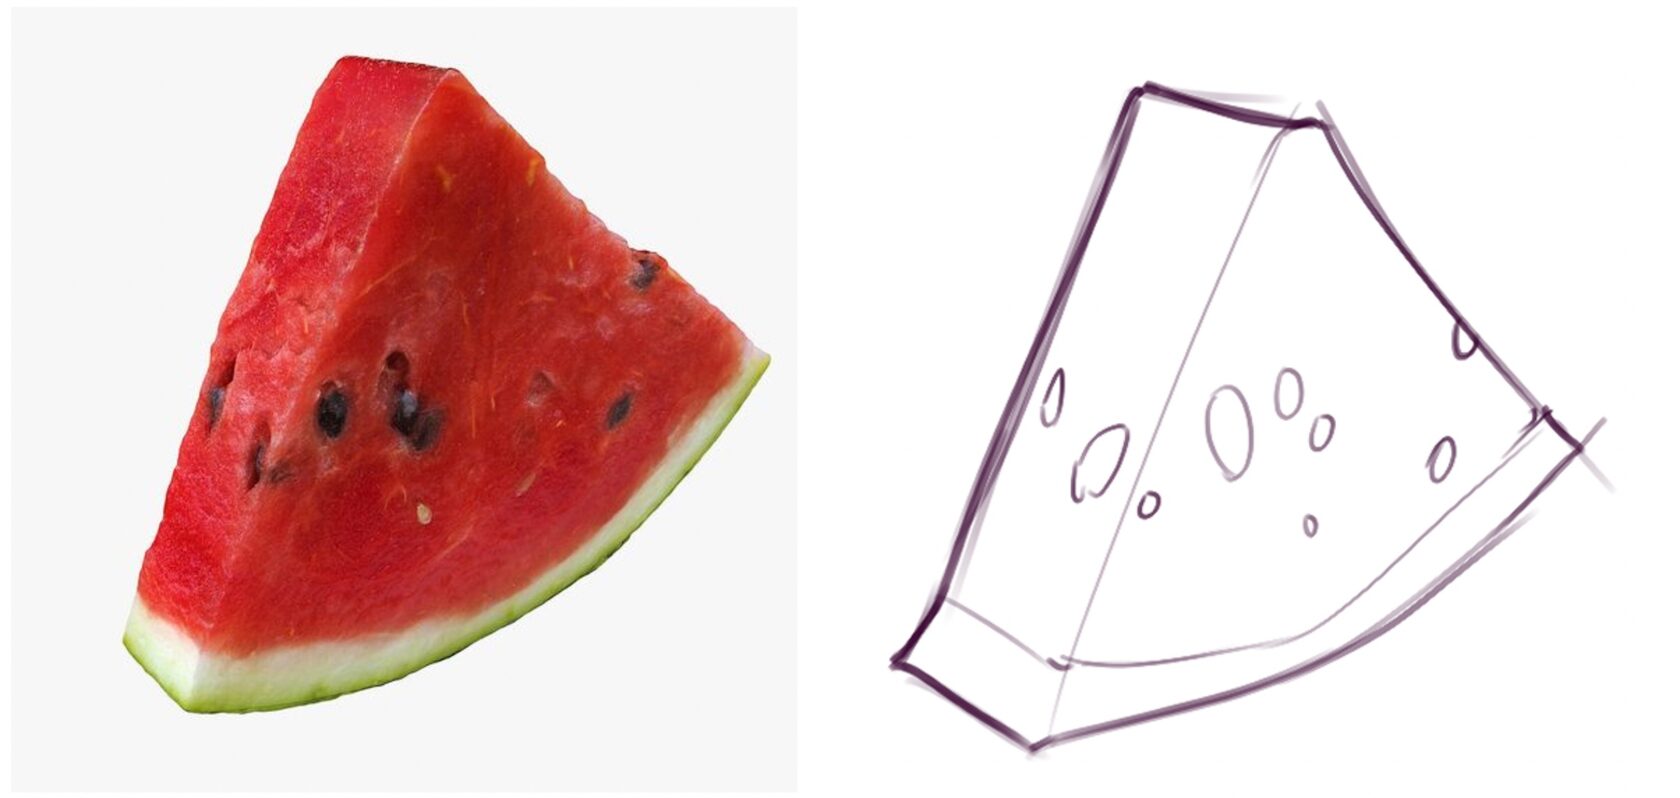
Упражнение 4
Вставляем фотографию в документ и рисуем с неё
Часть 3. Выделение и трансформирование частей рисунка
Прямоугольное выделение — M
Lasso (L)
выделяем,
Cнять выделение- Ctrl + D
Добавить к выделению — зажать Shift
Убрать из выделения — зажать Alt
Что можно делать с выделенной областью
Двигать инструментом move layer — V
Очистить выделенную область — backspace
Копировать часть картинки на новый слой — ctrl + C > ctrl + V
Вырезать часть картинки на новый слой — ctrl + X > ctrl + V
Можно делать это с одним выбранным слоем или сразу с несколькими слоями или группами.
Свободная трансформация — ctrl + T
Если есть выделение — будет трансформироваться выбранная зона (на одном или нескольких слоях), если нет, то — весь слой (или несколько слоёв)
- Увеличивать / уменьшать
Снять галочку keep aspect ratio — чтобы непропорционально
Если зажать alt, то будет относительно центра
- Вращать (зажав Shift — на 90 градусов)
- Отражать вертикально или горизонтально — кнопки в панели tool property
- Distort — выбрать в меню, или зажать ctrl и тянуть за концы рамки
ВНИМАНИЕ! Если у вас вдруг копируется изображение — уберите галочку keep original image
Когда закончили трансформацию — нажать enter или галочку
Warp трансформация — edit > transfrom > mesh transformation (можно задать количество точек)
Упражнение 5
Экспериментируем с пропорциями рисунка с помощью трансформа!

Часть 4. Размер холста и изображения
Edit > Change canvas size
Изменить размер изображения
Edit > Сhange image resolution
Сбросить настройки программы
Это нужно, если вы что то совсем не то наделали и непонятно, как это исправить. При запуске программы зажать и держать shift
?
![]()
Log in
If this type of authorization does not work for you, convert your account using the link
-

-
March 24 2020, 13:02
Я сделала очередное видео, с ответом на вопрос из иллюстраторского чата.
Если кто пропустил — предыдущее такое видео было о том, как там же управлять папками: