Сегодня я хочу вам представить ещё одну статью, посвящённую графическим возможностям издательской системы LaTeX. На сей раз речь пойдёт о цвете. Чаще всего эти возможности LaTeX игнорируются, так как доля цветных публикация довольна мала. К тому же чрезмерное использование цвета может только навредить — пёстрый многоцветный документ трудно читать и смотрится он малопривлекательно. Но умелое использование цвета может очень способствовать восприятию контента: выделение заголовков, подзаголовков, цитат, важных частей текста и даже ячеек таблиц помогает быстро уловить суть, не вчитываясь в подробности.
Так что кому стало интересно, жмём по ссылке:
Цвет в LaTeX
С цветом в системе LaTeX позволяют работать два пакета из коллекции graphics: color и colortbl. Первый позволяет задавать цвет текста и фона, как отдельного блока, так и всего документа, а второй — закрашивать таблицы. Подключим оба пакета в преамбуле документа:
usepackage[usenames]{color}

usepackage{colortbl}
Все команды переключения цвета имеют опцию, в которой указывается цветовая модель и обязательные аргументы, в которых задаётся цвет.
Модель named является цветовой моделью по умолчанию. Цвет задаётся одной из восьми констант:
- black
- red
- blue
- magenta
- white
- green
- cyan
- yellow
Напоминает восьмибитную палитру DOS. Вот небольшой пример:
textcolor{blue}{Синий hbox{$x^2$}}
Синий x2
Цвета именнованные в драйвере dvips. Драйвер dvips содержит определение имён 68 цветов:
- GreenYellow
- Yellow
- Goldenrod
- Dandelion
- Apricot
- Peach
- Melon
- YellowOrange
- Orange
- BurntOrange
- Bittersweet
- RedOrange
- Mahogany
- Maroon
- BrickRed
- Red
- OrangeRed
- RubineRed
- WildStrawberry
- Salmon
- CarnationPink
- Magenta
- VioletRed
- Rhodamine
- Mulberry
- RedViolet
- Fuchsia
- Lavender
- Thistle
- Orchid
- DarkOrchid
- Purple
- Plum
- Violet
- RoyalPurple
- BlueViolet
- Periwinkle
- CadetBlue
- CornflowerBlue
- MidnightBlue
- NavyBlue
- RoyalBlue
- Blue
- Cerulean
- Cyan
- ProcessBlue
- SkyBlue
- Turquoise
- TealBlue
- Aquamarine
- BlueGreen
- Emerald
- JungleGreen
- SeaGreen
- Green
- ForestGreen
- PineGreen
- LimeGreen
- YellowGreen
- SpringGreen
- OliveGreen
- RawSienna
- Sepia
- Brown
- Tan
- Gray
- Black
- White
Тут, как видим, возможности несколько шире. Пример мало отличается от предыдущего:
textcolor{Orange}{Оранжевый $bigcup$.}
Оранжевый ∪
Модель rgb. В модели rgb любой цвет получается в результате смешения лучей света трёх базовых цветов: красного (red), зелёного (green) и синего (blue). Вообще данную модель не применяют в полиграфии, так как она основана на цветных лучах света (как в кинескопе, наших ЖК-мониторах или на фотоплёнке). Для печати традиционно используется модель cmyk, о которой речь пойдёт ниже.
Спецификация цвета в модели rgb задаётся трёмя перечисленными через запятую числами в диапазоне от 0 до 1, которые соответствуют интенсивности базовых составляющих цвета. Например, желтый цвет задаётся как 1, 1, 0, белый — как 1, 1, 1, а 0, 0, 0 — даёт чёрный цвет.
Модель gray. Серый цвет получается при смешении в равных пропорциях базовых цветов из модели rgb с интенсивностью меньше единицы. Спецификация цвета в модели gray задаётся одним числом от 0 до 1, например 0.5 вместо 0.5, 0.5, 0.5 в модели rgb. Чёрному цвету соответсвует 0, белому — 1.
Модель cmyk. Если на лист бумаги нанести красную краску и затем осветить его белым светом, то только красная составляющая света отразится от бумаги. Нанесём теперь на бумагу красную краску густо посаженными точками, а затем заполним все промежутки между красными точками зелёной краской. Теперь от листа бумаги отразится как красный, так и зелёный свет. Издали различить отдельные точки нельзя, поэтому глаз получит смесь красного и зелёного цвета и бумага выглядит жёлтой. [Если краски наносить не точками, а сплошной заливкой, то краска перемешается и получится грязный красноватый цвет.]
На этом основывается цветовая модель cmyk. В этой модели спецификация цвета задаётся четырьмя перечисленными через запятую числами от 0 до 1, которые соответствуют «количеству» голубой (cyan), пурпурной (magenta), жёлтой (yellow) и чёрной (black) краски на белом листе бумаги. Белому цвету соответствует спецификация 0, 0, 0, 0 (на белом листе бумаги нет никакой краски), а чёрному — 0, 0, 0, 1.
Цветной текст
Изменить цвет текста в документе можно либо командой
textcolor[model]{spec}{text}
либо декларацией
{color[model]{spec}text}
Здесь model — цветовая модель, spec — спецификация цвета.
Пример:
textcolor{red}{Красный,} textcolor[cmyk]{0,1,1,0}{опять красный,}

textcolor[rgb]{1,0,0}{и ещё раз красный!}
Красный, опять красный, и ещё раз красный!
Цветные боксы
Команда
colorbox[model]{spec}{lr-text}
помещает, подобно команде mbox, текст lr-text в бокс, у которого цвет фона задан аргументами model и spec. Здесь model — цветовая модель, spec — спецификация цвета. Команда
fcolorbox[model]{fr-spec}{spec}{lr-text}
дополнительно обводит этот бокс рамкой цвета fr-spec. Пример:
fcolorbox{red}{yellow}{Текстdots}
Текст…
Цветной фон страницы
Изменить цвет страницы можно декларацией
pagecolor[model]{spec}
Здесь model — цветовая модель, spec — спецификация цвета. Область действия декларации не ограничевается никакими скобками. Чтобы вернуть белый цвет страниц, надо вызвать команду pagecolor{white}.
Цветные таблицы
Пакет colortbl, используя пакеты color и array, позволяет раскрашивать таблицы. Цвета задаются также, как в пакете color.
Команда
columncolor[model]{spec}[left-overhang][right-overhang]
задаёт цвет столбца таблицы цветом, заданным первыми двумя аргументами. Опции left-overhang и right-overhang задают расстояния слева и справа между краями окрашенной области и текстом. Если указан только один аргумент, то он задаёт оба расстояния.
Команда
rowcolor[model]{spec}[left-overhang][right-overhang]
окрашивает строку таблицы. Её место в начале строки.
Следующие примеры помогут во всём разобраться.
begin{tabular}{%

|>{color{white}columncolor{black}}l|

>{columncolor{yellow}[.6tabcolsep]}c|

>{columncolor[gray]{.8}}r|}

один & два & три \ четыре & пять & шесть

end{tabular}

begin{tabular}{|l|c|}

rowcolor[gray]{.9} один & два \

rowcolor[gray]{.6} три & четыре

end{tabular}

newcolumntype{H}{>{columncolor{magenta}}c}

begin{tabular}{%

|>{columncolor{yellow}}l|

>{color{white}columncolor{black}}l|}

multicolumn{2}{|H|}{один} \

два & три \ четыре & пять

end{tabular}

deftabrowsep{noalign{vskip 2pt}}

newcolumntype{H}{%

>{columncolor[gray]{.9}}p{1.7cm}}

begin{tabular}[t]{*2H}

rowcolor[gray]{.6}один & два\tabrowsep три & четыре \tabrowsep

пять & шесть

end{tabular}

setlengtharrayrulewidth{2pt}arrayrulecolor{blue}

setlengthdoublerulesep{2pt}doublerulesepcolor{yellow}

begin{tabular}{||l||c||}

hlinehline

один & два \ три & четыре \

hlinehline

end{tabular}

begin{tabular}{||l|c||}

hhline{|t:=:t:=:t|}

один & два \ три & четыре \

hhline{|b:=:b:=:b|}

end{tabular}

newcommandrgbline[1]{hhline{>{arrayrulecolor{red}}|#1:=%

>{arrayrulecolor{green}}=>{arrayrulecolor{blue}}=:#1|}}

arrayrulecolor{red}

begin{tabular}{||*3c||}rgbline{t}

red & green & multicolumn{1}{c||}{blue}\

rgbline{b}end{tabular}

Ну вот собственно и всё. Для написания статьи использовалась книга Владимира Сюткина «Цвет в LaTeX2e». Надеюсь, кому-нибудь будет полезной эта статья. Тут лежит оригинал статьи. Спасибо.
![]()
Download Article
![]()
Download Article
Painting latex can be tricky, as regular paint may crack, ripple, or rub off of latex surfaces. Start by mixing rubber cement and a solvent like turpentine or mineral spirits together to create paint that will adhere well to latex. You can use a paint brush or an airbrush to apply the paint, and then put on a sealer so the latex is durable and looks great. With the right approach and a bit of creativity, you can paint a latex mask or prosthetic in no time.
-

1
Set up a workspace and wear safety gear. Lay down tarps or newspaper and arrange a work table where you can mix the paint. Wear gloves to protect your hands and ensure the space has good ventilation, such as open windows or an open garage door.[1]
You should also wear a respiratory mask so you are protected from the paint fumes.- You should also wear safety goggles to protect your eyes.
-
2
Use paint formulated for latex for an easy option. If you do not want to have to mix your own paint, you can look for paint made for use on latex at your local craft store or online. You can buy the paint in a variety of colors and shades.[2]
- The latex paint will likely contain a binder like rubber cement and a solvent as well as pigment, which provides the color. It is safe to apply with a paint brush or an airbrush.
- Paint for latex can be expensive so you may opt for making your own if you are on a budget.
Advertisement
-
3
Pour 1⁄2 cup (120 ml) of rubber cement into a jar or cup. If you want to make your own paint, use rubber cement, as it will act as a binder and adhere well to the latex. It is often sold in small and large cans.[3]
- You can get rubber cement at your local craft store or online.
-
4
Add 1⁄4 cup (59 ml) of turpentine or mineral spirits to the rubber cement. Use a plastic spoon to mix the rubber cement and solvent together. Make sure the cement is thin and runny.[4]
- Common paint solvents like turpentine or mineral spirits can be found at your local craft store or online. These solvents are very strong chemical so you should wear gloves when handling them.
-
5
Combine the mixture with 3 to 4 US tbsp (44 to 59 ml) of oil-based paint. Put 3 to 4 tablespoons (44 to 59 ml) of oil-based paint in a plastic cup with a wide rim. Then, pour 1 to 2 teaspoons (4.9 to 9.9 ml) of the rubber cement and solvent mixture into the oil-based paint. Use a spoon to mix the 2 together to form paint that will stick to the latex.[5]
- You can then keep the rubber cement and solvent mixture on hand and add it to different oil-based paint colors to create paint for latex. It should be stored in a cool, dark place and should last for several weeks.


Advertisement
-
1
Connect the airbrush to a compressor at 60 psi. Airbrushing the paint onto the latex will ensure it appears even and smooth. Make sure the tip of the airbrush is clean and dry. Attach the back connector in the airbrush to the hose that connects to the compressor.[6]
- Wear respiratory equipment and gloves to protect yourself while using the airbrush.
- You can rent an airbrush and a compressor from a hardware store or buy them online.
-
2
Pour paint into the holder and attach it to the airbrush. Put 1 to 2 US tbsp (15 to 30 ml) of paint (or the rubber cement, solvent, and oil-based paint mixture) into the small cup or jar that comes with the airbrush. Slide the metal cap on the jar into the slot on the bottom of the airbrush. Make sure the jar clicks into place so it is secure.[7]
-
3
Spray the paint onto the latex in a side to side motion. Turn the airbrush on and hold it 1 to 2 feet (0.30 to 0.61 m) above the latex. Spray the paint onto the latex, pressing down on the button on the airbrush in short bursts. Make sure the paint sprays out of the airbrush in a fluid, even motion. Move the airbrush back and forth as you spray to cover the latex in 1 even layer of paint.[8]
- If you are painting a mask or a smaller item, you may find it easier to place it on a stand that spins so you can rotate the mask as you spray it with the paint.
-
4
Allow the paint to dry for 1-2 hours between coats. Only apply 1 thin layer at a time so the paint does not become clumpy. This will also ensure the colors do not mix or blend together on the latex.
-
5
Clean the airbrush tip before switching colors. If you are planning to apply several different colors to the latex, remove the paint holder from the airbrush. Place the airbrush tip into an airbrush cleaner. Then, press down on the button on the airbrush a few times to cycle water through the brush and clean it.[9]
- Rinse out the paint holder with warm water and soap to clean it as well so you can use it again.
- Most airbrush kits will come with an airbrush cleaner, which is a large container filled with water with a metal tip that fits the airbrush tip. You can also rent an airbrush cleaner when you rent the airbrush as part of a kit.
- If you do not have access to an airbrush cleaner, you can submerge the tip in a bowl of warm water. Pull and release the trigger on the airbrush a few times to circulate the water and clean the airbrush.[10]
-
6
Add details to the latex using different colors. Use the airbrush to add details to the latex using different colors, such as red for the lips on a latex mask or beige for the skin on a latex prosthetic. You can also add shading and dimension to the latex using darker shades of the same color.


Advertisement
-
1
Create a base with a light coat of paint. Apply the paint with a medium-sized paint brush (3 to 4 centimetres (1.2 to 1.6 in) wide) with flat, thick bristles. Coat the latex item in a thin layer. Use a cloth to wipe off any excess paint so the base color appears as a light wash on the latex.[11]
- Using a paint brush and wiping it off with a cloth allows the paint to get into any cracks or crevices in the latex, such as the details carved in a latex mask.
-
2
Let the paint dry for 1-2 hours between layers. Once you apply a layer of color on the latex with the paint brush, give it time to dry. This will ensure the paint colors do not blend or mix and that they have time to adhere to the latex.
-
3
Use a small paint brush to outline fine lines and details on the latex. Go for a paint brush that has a small head (1 to 2 centimetres (0.39 to 0.79 in) wide) and thick bristles to make applying the paint easier. Outline fine lines on the face of a latex mask. Or, add fake bruises or cuts with the paint brush to a latex prop for a costume.[12]
- Work with the paint a little at a time to avoid creating a layer that is too thick or clumpy.
- Clean the paint brushes in a cup of water before switching colors.
-
4
Apply the paint with a sponge to add texture and dimension. Use small, clean paint sponges with rounded sides. Dip the sponge in the paint and dab it on the latex item on any spots that you want to appear rough, jagged, or raised. Layer the paint with the sponge for a rougher look or dab it on lightly to create dimension on the latex.[13]
- Clean the sponges with water before switching colors, or use a different sponge for each color.


Advertisement
-
1
Avoid using a sealer if you used paint formulated for latex. Some paint made for latex already contains a sealer in it. Check the label on the paint to see if there is sealer already it, and if this is the case, you do not need to apply sealer to the paint.
- For example, the paint may say, «sealer included» or «sealer added» on the label to indicate it already has sealer in it.
-
2
Apply a gloss rubber cement sealer for a shiny look. Look for gloss sealer made for rubber cement at your local hardware store or online. Use a small paint brush with thick bristles to apply the sealer all over the latex in 1 even layer. Spread the sealer over the latex using smooth, even strokes.[14]
- Use a paint brush that you do not plan to use again, such as a cheap decorating brush, as the sealer will stick to the bristles and be hard to remove.
- The sealer will prevent the rubber cement from rubbing off and help it to dry properly.
-
3
Use a matte rubber cement sealer for a less shiny look. If you want the latex to appear less shiny, you can use a matte sealer made for rubber cement. Apply the sealer with a paint brush in 1 even layer, spreading it using smooth, even strokes. A matte sealer may be ideal if you want the latex to look subtle and natural, rather than glossy.
- A matte sealer can be found at your local hardware store or online.
- Apply the matte sealer with a paint brush that is cheap and disposable, such as an inexpensive decorating brush, as the sealer will stick to the bristles and be hard to get out.
-
4
Allow the sealer to dry for 12 hours. Make sure you do not touch or move the painted latex before it has time to dry properly.


Advertisement
Ask a Question
200 characters left
Include your email address to get a message when this question is answered.
Submit
Advertisement
Things You’ll Need
- Rubber cement
- Turpentine or mineral spirits
- Paint for latex
- Oil-based paints
- Airbrush
- Compressor
- Airbrush cleaner
- Paint Brushes
- Sponges
- Cup of water
- Rubber cement sealer
- Paint Brush
- Clean cloth
References
About This Article
Thanks to all authors for creating a page that has been read 40,574 times.
Did this article help you?
Get all the best how-tos!
Sign up for wikiHow’s weekly email newsletter
Subscribe
You’re all set!
![]()
Download Article
![]()
Download Article
Painting latex can be tricky, as regular paint may crack, ripple, or rub off of latex surfaces. Start by mixing rubber cement and a solvent like turpentine or mineral spirits together to create paint that will adhere well to latex. You can use a paint brush or an airbrush to apply the paint, and then put on a sealer so the latex is durable and looks great. With the right approach and a bit of creativity, you can paint a latex mask or prosthetic in no time.
-
1
Set up a workspace and wear safety gear. Lay down tarps or newspaper and arrange a work table where you can mix the paint. Wear gloves to protect your hands and ensure the space has good ventilation, such as open windows or an open garage door.[1]
You should also wear a respiratory mask so you are protected from the paint fumes.- You should also wear safety goggles to protect your eyes.
-
2
Use paint formulated for latex for an easy option. If you do not want to have to mix your own paint, you can look for paint made for use on latex at your local craft store or online. You can buy the paint in a variety of colors and shades.[2]
- The latex paint will likely contain a binder like rubber cement and a solvent as well as pigment, which provides the color. It is safe to apply with a paint brush or an airbrush.
- Paint for latex can be expensive so you may opt for making your own if you are on a budget.
Advertisement
-
3
Pour 1⁄2 cup (120 ml) of rubber cement into a jar or cup. If you want to make your own paint, use rubber cement, as it will act as a binder and adhere well to the latex. It is often sold in small and large cans.[3]
- You can get rubber cement at your local craft store or online.
-
4
Add 1⁄4 cup (59 ml) of turpentine or mineral spirits to the rubber cement. Use a plastic spoon to mix the rubber cement and solvent together. Make sure the cement is thin and runny.[4]
- Common paint solvents like turpentine or mineral spirits can be found at your local craft store or online. These solvents are very strong chemical so you should wear gloves when handling them.
-
5
Combine the mixture with 3 to 4 US tbsp (44 to 59 ml) of oil-based paint. Put 3 to 4 tablespoons (44 to 59 ml) of oil-based paint in a plastic cup with a wide rim. Then, pour 1 to 2 teaspoons (4.9 to 9.9 ml) of the rubber cement and solvent mixture into the oil-based paint. Use a spoon to mix the 2 together to form paint that will stick to the latex.[5]
- You can then keep the rubber cement and solvent mixture on hand and add it to different oil-based paint colors to create paint for latex. It should be stored in a cool, dark place and should last for several weeks.
Advertisement
-
1
Connect the airbrush to a compressor at 60 psi. Airbrushing the paint onto the latex will ensure it appears even and smooth. Make sure the tip of the airbrush is clean and dry. Attach the back connector in the airbrush to the hose that connects to the compressor.[6]
- Wear respiratory equipment and gloves to protect yourself while using the airbrush.
- You can rent an airbrush and a compressor from a hardware store or buy them online.
-
2
Pour paint into the holder and attach it to the airbrush. Put 1 to 2 US tbsp (15 to 30 ml) of paint (or the rubber cement, solvent, and oil-based paint mixture) into the small cup or jar that comes with the airbrush. Slide the metal cap on the jar into the slot on the bottom of the airbrush. Make sure the jar clicks into place so it is secure.[7]
-
3
Spray the paint onto the latex in a side to side motion. Turn the airbrush on and hold it 1 to 2 feet (0.30 to 0.61 m) above the latex. Spray the paint onto the latex, pressing down on the button on the airbrush in short bursts. Make sure the paint sprays out of the airbrush in a fluid, even motion. Move the airbrush back and forth as you spray to cover the latex in 1 even layer of paint.[8]
- If you are painting a mask or a smaller item, you may find it easier to place it on a stand that spins so you can rotate the mask as you spray it with the paint.
-
4
Allow the paint to dry for 1-2 hours between coats. Only apply 1 thin layer at a time so the paint does not become clumpy. This will also ensure the colors do not mix or blend together on the latex.
-
5
Clean the airbrush tip before switching colors. If you are planning to apply several different colors to the latex, remove the paint holder from the airbrush. Place the airbrush tip into an airbrush cleaner. Then, press down on the button on the airbrush a few times to cycle water through the brush and clean it.[9]
- Rinse out the paint holder with warm water and soap to clean it as well so you can use it again.
- Most airbrush kits will come with an airbrush cleaner, which is a large container filled with water with a metal tip that fits the airbrush tip. You can also rent an airbrush cleaner when you rent the airbrush as part of a kit.
- If you do not have access to an airbrush cleaner, you can submerge the tip in a bowl of warm water. Pull and release the trigger on the airbrush a few times to circulate the water and clean the airbrush.[10]
-
6
Add details to the latex using different colors. Use the airbrush to add details to the latex using different colors, such as red for the lips on a latex mask or beige for the skin on a latex prosthetic. You can also add shading and dimension to the latex using darker shades of the same color.
Advertisement
-
1
Create a base with a light coat of paint. Apply the paint with a medium-sized paint brush (3 to 4 centimetres (1.2 to 1.6 in) wide) with flat, thick bristles. Coat the latex item in a thin layer. Use a cloth to wipe off any excess paint so the base color appears as a light wash on the latex.[11]
- Using a paint brush and wiping it off with a cloth allows the paint to get into any cracks or crevices in the latex, such as the details carved in a latex mask.
-
2
Let the paint dry for 1-2 hours between layers. Once you apply a layer of color on the latex with the paint brush, give it time to dry. This will ensure the paint colors do not blend or mix and that they have time to adhere to the latex.
-
3
Use a small paint brush to outline fine lines and details on the latex. Go for a paint brush that has a small head (1 to 2 centimetres (0.39 to 0.79 in) wide) and thick bristles to make applying the paint easier. Outline fine lines on the face of a latex mask. Or, add fake bruises or cuts with the paint brush to a latex prop for a costume.[12]
- Work with the paint a little at a time to avoid creating a layer that is too thick or clumpy.
- Clean the paint brushes in a cup of water before switching colors.
-
4
Apply the paint with a sponge to add texture and dimension. Use small, clean paint sponges with rounded sides. Dip the sponge in the paint and dab it on the latex item on any spots that you want to appear rough, jagged, or raised. Layer the paint with the sponge for a rougher look or dab it on lightly to create dimension on the latex.[13]
- Clean the sponges with water before switching colors, or use a different sponge for each color.
Advertisement
-
1
Avoid using a sealer if you used paint formulated for latex. Some paint made for latex already contains a sealer in it. Check the label on the paint to see if there is sealer already it, and if this is the case, you do not need to apply sealer to the paint.
- For example, the paint may say, «sealer included» or «sealer added» on the label to indicate it already has sealer in it.
-
2
Apply a gloss rubber cement sealer for a shiny look. Look for gloss sealer made for rubber cement at your local hardware store or online. Use a small paint brush with thick bristles to apply the sealer all over the latex in 1 even layer. Spread the sealer over the latex using smooth, even strokes.[14]
- Use a paint brush that you do not plan to use again, such as a cheap decorating brush, as the sealer will stick to the bristles and be hard to remove.
- The sealer will prevent the rubber cement from rubbing off and help it to dry properly.
-
3
Use a matte rubber cement sealer for a less shiny look. If you want the latex to appear less shiny, you can use a matte sealer made for rubber cement. Apply the sealer with a paint brush in 1 even layer, spreading it using smooth, even strokes. A matte sealer may be ideal if you want the latex to look subtle and natural, rather than glossy.
- A matte sealer can be found at your local hardware store or online.
- Apply the matte sealer with a paint brush that is cheap and disposable, such as an inexpensive decorating brush, as the sealer will stick to the bristles and be hard to get out.
-
4
Allow the sealer to dry for 12 hours. Make sure you do not touch or move the painted latex before it has time to dry properly.
Advertisement
Ask a Question
200 characters left
Include your email address to get a message when this question is answered.
Submit
Advertisement
Things You’ll Need
- Rubber cement
- Turpentine or mineral spirits
- Paint for latex
- Oil-based paints
- Airbrush
- Compressor
- Airbrush cleaner
- Paint Brushes
- Sponges
- Cup of water
- Rubber cement sealer
- Paint Brush
- Clean cloth
References
About This Article
Thanks to all authors for creating a page that has been read 40,574 times.
Did this article help you?
Get all the best how-tos!
Sign up for wikiHow’s weekly email newsletter
Subscribe
You’re all set!
Contents
- 1 Introduction
- 2 Named colours provided by the xcolor package
- 2.1 Accessing additional named colours
- 2.2 Example usage
- 3 Loading and using named colours in the color package
- 4 Drivers and colour
- 4.1 Drivers for color and xcolor
- 4.2 Automatic colour driver detection
- 4.3 More advanced example using the dvisvgm driver to create an SVG file
- 5 Creating your own colours
- 5.1 xcolor-only colour models
- 6 Setting the page background colour
- 7 Further reading
Introduction
This article explains how to use colour in your LaTeX document via the color or xcolor packages. Note that user-level documentation of the color package is contained in The LaTeX standard graphics bundle.
Both packages provide a common set of commands for colour manipulation, but xcolor is more flexible and supports a larger number of colour models, so is the recommended approach.
We’ll start with the following example:
documentclass{article}
usepackage{xcolor}
begin{document}
This example shows some instances of using the texttt{xcolor} package
to change the colour of elements in LaTeX.

begin{itemize}
color{blue}
item First item
item Second item
end{itemize}

noindent
{color{red} rule{linewidth}{0.5mm}}
end{document}
Open this xcolor example in Overleaf
This example produces the following output:
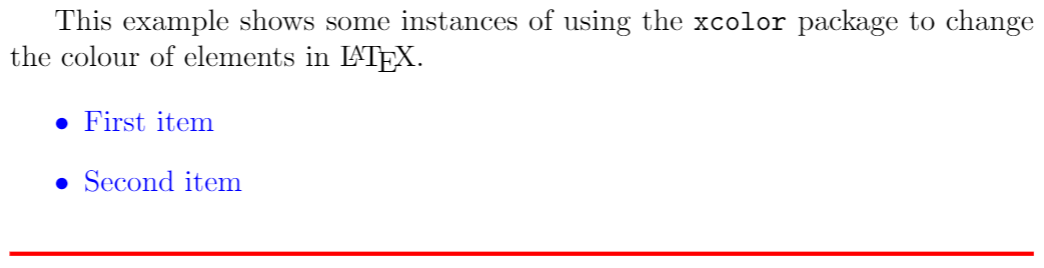
In this example, the package xcolor is imported with
then the command color{blue} sets the blue colour for the current block of text. In this case for the itemize environment.
The code to typeset the horizontal line created by rule{linewidth}{0.5mm} is contained in a group, delimited by { and }, in order to keep the effects of the color{red} local to that group.
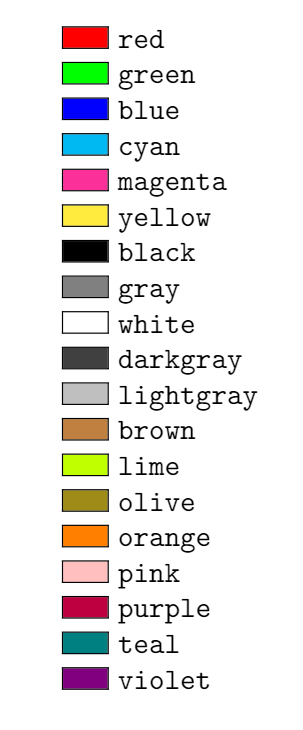
Named colours provided by the xcolor package
As noted in the xcolor package documentation, the following named colours are always available without needing to load any package options:
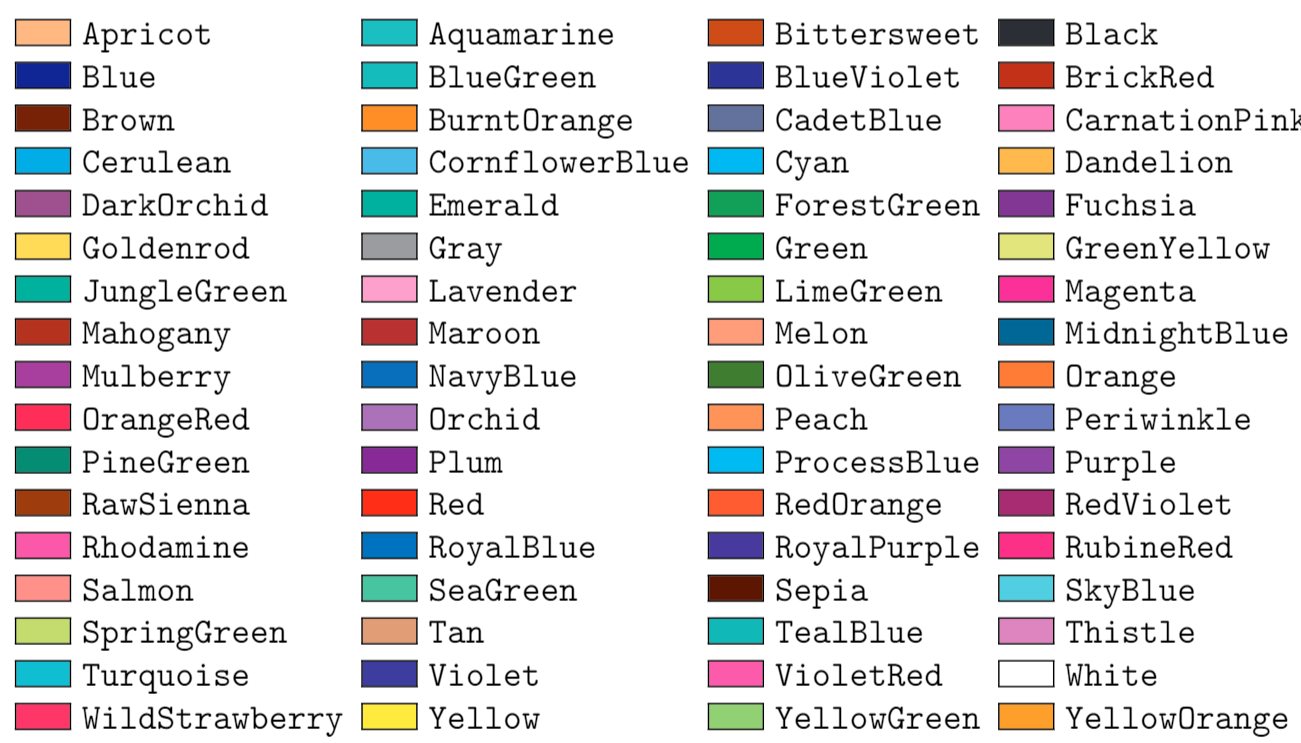
Accessing additional named colours
Additional named colours can be accessed via the following xcolor package options:
dvipsnames: loads 68 named colours (CMYK)svgnames: loads 151 named colours (RGB)x11names: loads 317 named colours (RGB)
For example, if you write
usepackage[dvipsnames]{xcolor}
you can access the following named colours:
Refer to the xcolor package documentation for tabulated lists of colours provided by the svgnames and x11names options.
Example usage
The following example uses named colours loaded via the dvipsnames option.
documentclass{article}
usepackage[dvipsnames]{xcolor}
begin{document}
This example shows how to use the texttt{xcolor} package
to change the colour of LaTeX{} page elements.

begin{itemize}
color{ForestGreen}
item First item
item Second item
end{itemize}

noindent
{color{RubineRed} rule{linewidth}{0.5mm}}

The background colour of text can also be textcolor{red}{easily} set. For
instance, you can change use an colorbox{BurntOrange}{orange background} and then continue typing.
end{document}
Open this xcolor example in Overleaf
This example produces the following output:

Two new commands are also used in the example:
textcolor{red}{easily}: Changes the colour of inline text. This command takes two parameters, the colour to use and the text whose colour is changed. In the example the wordeasilyis printed inred
colorbox{BurntOrange}{orange background}: Changes the background colour of the text passed in as the second argument. In the example above, the wordsorange backgroundare typeset on a background colour ofBurntOrange.
Loading and using named colours in the color package
You can also use the color package and load named colours via its usenames and dvipsnames package options:
usepackage[usenames,dvipsnames]{color}
The following code uses the color package to apply the same named colours used in the previous xcolor package example.
documentclass{article}
usepackage[usenames,dvipsnames]{color} %using the color package, not xcolor
begin{document}
This example shows how to use the texttt{bfseries color} package
to change the colour of LaTeX{} page elements.

begin{itemize}
color{ForestGreen}
item First item
item Second item
end{itemize}

noindent
{color{RubineRed} rule{linewidth}{0.5mm}}

The background colour of text can also be textcolor{red}{easily} set. For
instance, you can change use an colorbox{BurntOrange}{orange background} and then continue typing.
end{document}
Open this color example in Overleaf
This example produces the same output as the previous xcolor version:

Drivers and colour
Use of colour when typesetting text or math was not part of the original design of TeX; instead, use/application of colour was delegated to external “drivers” which converted TeX’s original output file format (DVI) into PostScript or PDF. In order for colour to work, driver-specific instructions had to be “injected” into TeX’s output by using a built-in TeX command called special whose job is simply to allow code/data to pass through the typesetting process and become embedded into the output file. When the chosen driver (software) processed the typeset output it would detect the embedded code/data and act upon it to achieve whatever the user intended—such as the use of colour.
Times have changed, and PDF is now by far the most common output format used by TeX engines, long supplanting the use of legacy DVI drivers and creation of PostScript. Users also have a greater choice of TeX engine to use for typesetting their LaTeX documents, most notably pdfTeX, XeTeX or LuaTeX/LuaHBTeX, so it is still important to take account of differences in those TeX engines—ensuring the correct mechanisms are used to insert colour data (PDF instructions) into their PDF files. To support and accommodate the legacy DVI output format and the wider environment of TeX engines and workflows in use, you can, if required, configure the color or xcolor packages to use a particular “driver” so that LaTeX will generate colour data using using the appropriate method.
Drivers for color and xcolor
The color package provides out-of-the-box support for the following driver options:
dvipdfmx,dvips,dvisvgm,luatex,pdftexandxetex
There are other options as described in the color package documentation.
The xcolor package provides the following driver options:
dvips,xdvi,dvipdf,dvipdfm,dvipdfmx,luatex,pdftex,dvipsone,dviwindo,emtex,dviwin,oztex,textures,pctexps,pctexwin,pctexhp,pctex32,truetex,tcidvi,vtexandxetex.
Automatic colour driver detection
When typesetting your document LaTeX reads a configuration file called color.cfg which contains code that can determine if you are running pdfTeX, XeTeX or LuaTeX and automatically loads the appropriate driver (.def file) for you, so you don’t need to specify the driver package option for those engines.
More advanced example using the dvisvgm driver to create an SVG file
The following example uses the color package with options that load named colours and the dvisvgm driver to output colour definitions/data using SVG code:
usepackage[dvisvgm, usenames, dvipsnames]{color}
Specifically, the output file typeset by Overleaf is converted to SVG using a program called dvisvgm, which is part of TeX Live and available on our servers. To run dvisvgm, after the page is typeset, we use a latexmkrc file which is created when you open the following code in Overleaf:
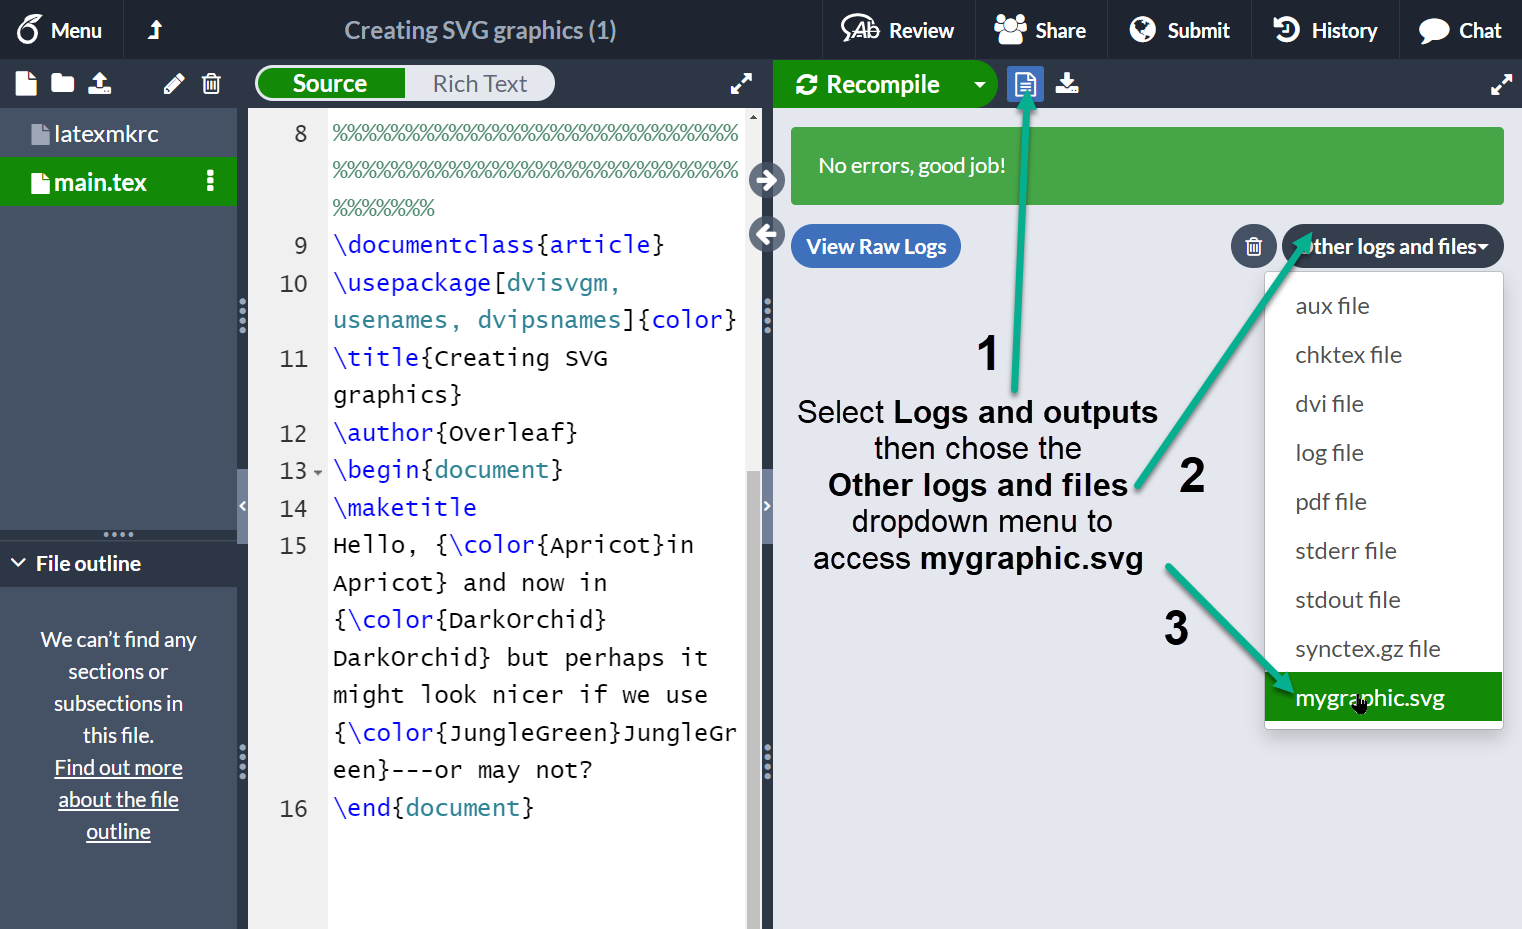
documentclass{article}
usepackage[dvisvgm, usenames, dvipsnames]{color}
title{Creating SVG graphics}
author{Overleaf}
begin{document}
maketitle
Hello, {color{Apricot}in Apricot} and now in {color{DarkOrchid} DarkOrchid} but perhaps it might look nicer if we use {color{JungleGreen}JungleGreen}---or may not?
end{document}
Open this example to create an SVG file
Once Overleaf has finished compiling you can access the SVG graphic, called mygraphic.svg, by selecting Logs and outputs and choosing the Other logs and files dropdown list:
Creating your own colours
It is possible to define your own colours, the manner in which the colour is defined depends on the preferred colour model. The following example uses 4 colour models.
documentclass{article}
usepackage[dvipsnames]{xcolor}

definecolor{mypink1}{rgb}{0.858, 0.188, 0.478}
definecolor{mypink2}{RGB}{219, 48, 122}
definecolor{mypink3}{cmyk}{0, 0.7808, 0.4429, 0.1412}
definecolor{mygray}{gray}{0.6}

begin{document}
User-defined colours with different colour models:

begin{enumerate}
item textcolor{mypink1}{Pink with rgb}
item textcolor{mypink2}{Pink with RGB}
item textcolor{mypink3}{Pink with cmyk}
item textcolor{mygray}{Gray with gray}
end{enumerate}
end{document}
Open this example in Overleaf
This example produces the following output:

The command definecolor takes three parameters: the name of the new colour, the model, and the colour definition. Roughly speaking, each number represent how much of each colour you add to the mix that makes up the final colour.
rgb: Red, Green, Blue. Three comma-separated values between 0 and 1 define the components of the colour.RGB: The same asrgb, but the numbers are integers between 0 and 255.cmyk: Cyan, Magenta, Yellow and blacK. Comma-separated list of four numbers between 0 and 1 that determine the colour according to the subtractive CMYK model used by commercial printers.gray: Grey scale. A single number between 0 and 1.
In the example, mypink1, mypink2 and mypink3 define the same colour but for different models. You can actually see that the one defined by cmyk is slightly different.
Colours defined by either model can later be used within your document not only to set the colour of the text, but for any other element that takes a colour as parameter, for instance tables (you must add the table option to xcolor), graphic elements created with TikZ, plots, vertical rulers in multicolumn documents and code listings.
xcolor-only colour models
The xcolor package provides additional commands which provide support for more colour models and friendly colour mixing, as demonstrated in the following example:
documentclass{article}
usepackage[dvipsnames]{xcolor}
colorlet{LightRubineRed}{RubineRed!70}
colorlet{Mycolor1}{green!10!orange}
definecolor{Mycolor2}{HTML}{00F9DE}
begin{document}
This document presents several examples showing how to use the texttt{xcolor} package
to change the colour of LaTeX{} page elements.

begin{itemize}
item textcolor{Mycolor1}{First item}
item textcolor{Mycolor2}{Second item}
end{itemize}

noindent
{color{LightRubineRed} rule{linewidth}{1mm}}

noindent
{color{RubineRed} rule{linewidth}{1mm}}
end{document}
Open this example in Overleaf
This example produces the following output:
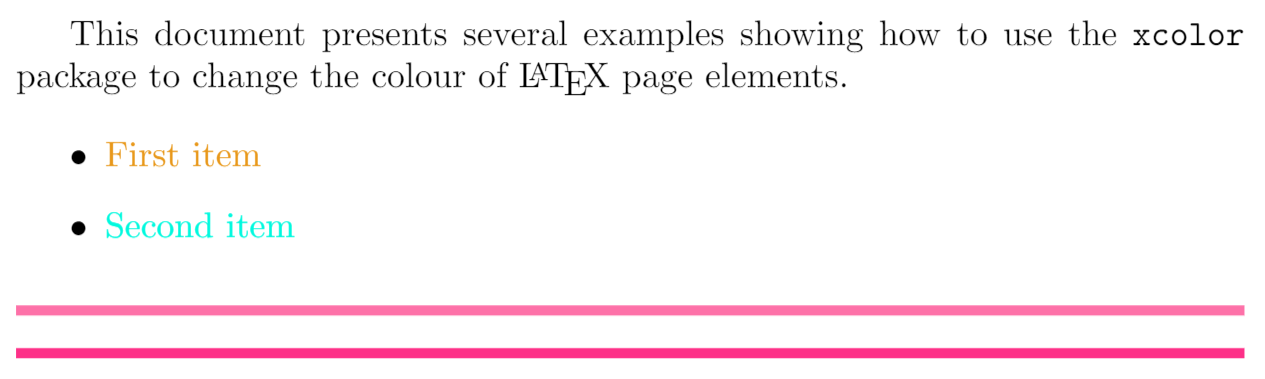
Three new colours are defined in this example, each one in a different manner.
colorlet{LightRubineRed}{RubineRed!70}: A new colour namedLightRubineRedis created, this colour has 70% the intensity of the originalRubineRedcolour. You can think of it as a mixture of 70% RubineRed and 30% white. Defining colours like this lets you derive different tints of a main colour—common practice in corporate branding. In the example, you can see the originalRubineRedand the newLightRubineRedused in two consecutive horizontal rules.colorlet{Mycolor1}{green!10!orange}: A colour namedMycolor1is created with 10% green and 90% orange.definecolor{Mycolor2}{HTML}{00F9DE}: The colourMycolor2is created using theHTMLmodel. Colours in this model must be created with 6 hexadecimal digits, the characters A, B,C, D, E and F must be in upper-case.
The colour models that only xcolor supports are:
cmy: cyan, magenta, yellowhsb: hue, saturation, brightnessHTML: RRGGBBGray: Grayscale, a number between 1 and 15.wave: Wavelength, a number between 363 and 814. The number represents the wavelength of light, in nanometres (nm)
Setting the page background colour
The background colour of the entire page can be easily changed with pagecolor. The following code demonstrates this, using the text of an earlier example::
documentclass{article}
usepackage[dvipsnames]{xcolor}
colorlet{LightRubineRed}{RubineRed!70}
colorlet{Mycolor1}{green!10!orange}
definecolor{Mycolor2}{HTML}{00F9DE}
begin{document}
pagecolor{black}
color{white}% set the default colour to white
This document presents several examples showing how to use the texttt{xcolor} package
to change the colour of LaTeX{} page elements.

begin{itemize}
item textcolor{Mycolor1}{First item}
item textcolor{Mycolor2}{Second item}
end{itemize}

noindent
{color{LightRubineRed} rule{linewidth}{1mm}}

noindent
{color{RubineRed} rule{linewidth}{1mm}}
end{document}
Open this example in Overleaf
This example produces the following output:
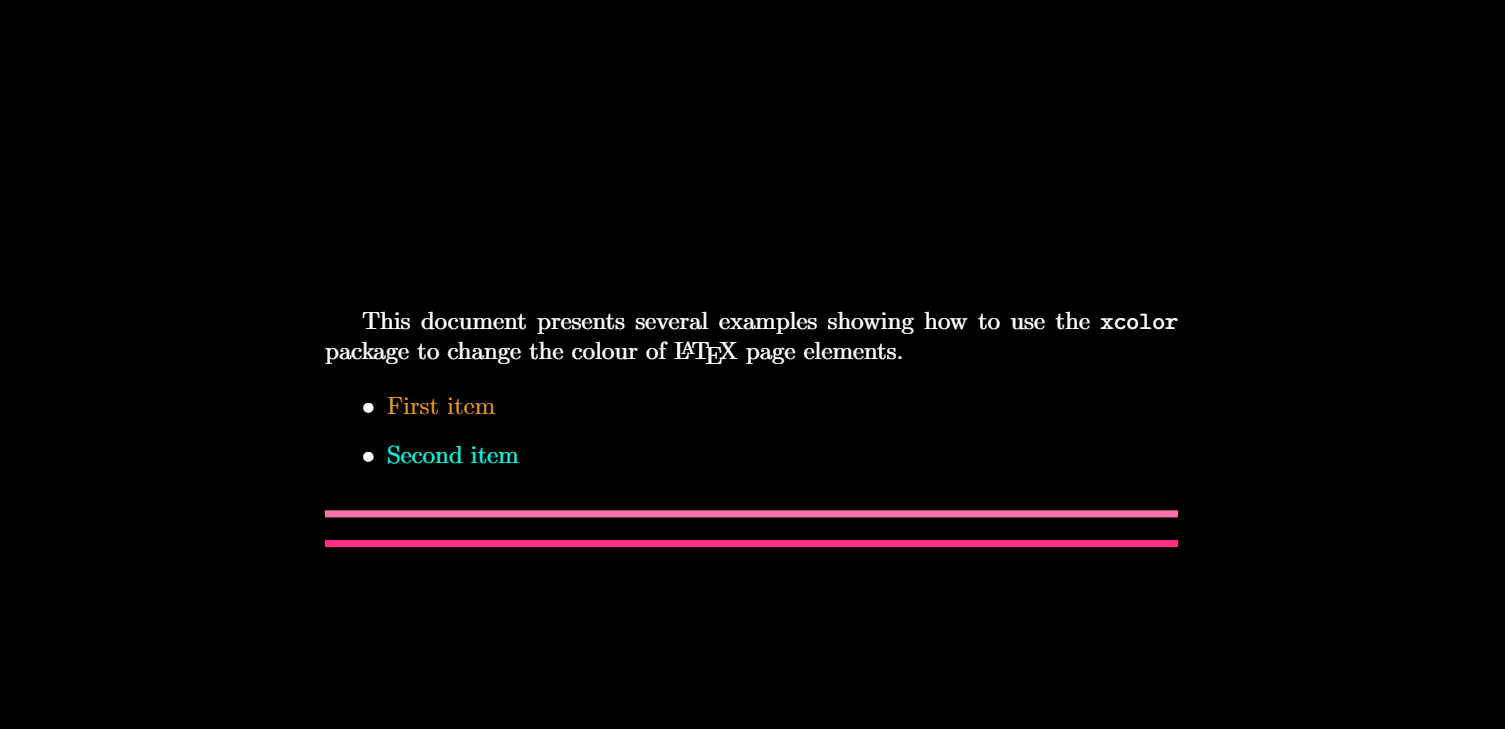
The command pagecolor{black} set the page colour to black. This is a switch command, meaning it will take effect in the entire document unless another switch command is used to revert it. nopagecolor will change the background back to normal.
Further reading
For more information see:
- The color package documentation
- The xcolor package documentation
- Lengths in LaTeX
- Font sizes, families, and styles
- Font typefaces
- Supporting modern fonts with XeLaTeX
- Tables
- Inserting Images
- Beamer
- Powerdot
- Posters
При работе с документами LaTeX вам нужен способ изменить способ отображения текста. Вы можете добиться этого, изменив семейства шрифтов, стили шрифтов или размер.
Вы также можете изменить способ отображения информации, изменив цвет текста. Изменение цвета текста позволяет добавлять информацию, такую как предупреждения, гиперссылки и т. Д.
В этом руководстве будет обсуждаться, как использовать пакет LaTeX xcolor для изменения цвета текста в документах LaTeX.
Базовое использование пакета LaTeX xcolor
Прежде чем мы сможем изменить цвет текста в LaTex, нам нужно импортировать пакет xcolor. Сделайте это, добавив следующую запись в преамбулу документа LaTeX.
Стоит отметить, что вы также можете использовать цветной пакет. Однако его заменяет пакет xcolor, поскольку он предлагает большую гибкость и цветовые форматы.
Чтобы изменить цвет текста, используйте команду color {}, за которой следует название цвета, который вы хотите использовать.
Например:
класс документов{статья}
usepackage[utf8]{inputenc}
usepackage{xcolor}
начинать{документ}
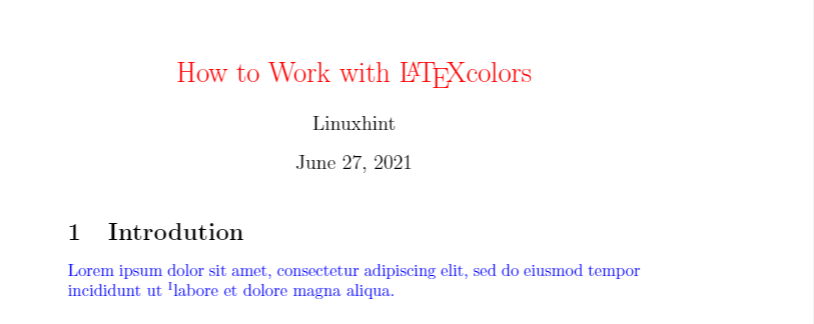
заглавие{цвет{красный}Как работать с Латекс цвета}
автор{Linuxhint}
maketitle
раздел{Введение}
цвет{синий}Lorem ipsum dolor sit amet, conctetur adipiscing elit, sed do eiusmod tempor incididunt ut сноска{Это пример сноски}labore et dolore magna aliqua.
конец{документ}
Приведенный выше код LaTeX установит цвет заголовка на красный, а основной текст на синий. Ниже приведен приведенный выше код.
Как установить цвет текста по среде в LaTeX
Вы также можете установить цвета текста для конкретной среды. Например, мы можем отобразить математический блок определенным цветом:
класс документов{статья}
usepackage[utf8]{inputenc}
usepackage{xcolor}
usepackage{амсмат}
начинать{документ}
заглавие{цвет{красный}Как работать с Латекс цвета}
автор{Linuxhint}
maketitle
раздел{Как создать матрицу}
начинать{уравнение}
цвет{голубой}
y = начинать{pmatrix}
а & б & c \
0 & 1 & 0 \
Икс & у & я
конец{pmatrix}
конец{уравнение}
конец{документ}
В приведенном выше примере кода мы устанавливаем для всего блока уравнений голубой цвет. Таким образом, весь текст внутри окружения принимает определенный цвет.
Ниже приведен результат приведенного выше кода.

Как изменить цвет одного слова в LaTeX
Если вы хотите изменить только один текст на определенный цвет внутри абзаца, вы можете сделать это с помощью команды textcolor.
Например:
класс документов{статья}
usepackage[utf8]{inputenc}
usepackage{xcolor}
начинать{документ}
заглавие{цвет{красный}Как работать с Латекс цвета}
автор{Linuxhint}
maketitle
раздел{установить цвет для отдельного текста}
Lorem ipsum dolor sit amet, textcolor {orange} {consctetur} adipiscing elit, sed do eiusmod textcolor {magenta} {tempor incididunt} ut labore et dolore magna aliqua. Molestie nunc non blandit massa enim nec dui nunc mattis
конец{документ}
В приведенном выше примере мы установили определенные цвета для одного слова, заключив его в фигурные скобки.
Приведенный выше пример кода дает нам следующий результат:

Как установить цвет фона в LaTeX
Чтобы установить цвет фона для блока текста, мы используем команду colorbox {}. Например:
класс документов{статья}
usepackage[utf8]{inputenc}
usepackage[dvipsnames]{xcolor}
начинать{документ}
заглавие{цвет{красный}Как работать с Латекс цвета}
автор{Linuxhint}
maketitle
раздел{установить цвет для отдельного текста}
цветная коробка{Красное дерево}{Lorem ipsum dolor sit amet, orangeconsectetur adipiscing elit}
конец{документ}
В приведенном выше примере мы устанавливаем текстовый блок с цветом фона Махагони.
ПРИМЕЧАНИЕ: Мы используем имя пакета как ( usepackage [dvipsames] {xcolor}). Это позволяет нам использовать 68 стандартных цветов, определенных в пакете.
Цвета Dvips следующие:

Источник изображения — https://en.wikibooks.org/wiki/LaTeX/Colors
Как определить собственные цвета в LaTeX
Пакет LaTeX xcolor также позволяет вам определять собственные цвета. Общий синтаксис определения цвета:
definecolor{name} {model} {color-spec}
Приведенная выше команда принимает три аргумента: имя, модель и спецификацию цвета.
Имя может быть любым, если оно включает команду LaTeX.
Вы можете использовать следующие поддерживаемые цветовые модели:
- rgb — Красный, Зеленый, Синий и имеет значения, разделенные запятыми, от 0 до 1.
- RGB — Это похоже на rgb, но значения варьируются от 0 до 255.
- cmyk — Голубой, пурпурный, желтый и черный. Эта модель представляет собой список, разделенный запятыми, с четырьмя значениями от 0 до 1. Обычно используется в моделях принтеров.
- серый — Оттенки серого. Одно целое значение от 0 до 1.
Рассмотрим следующий код, который показывает, как определять пользовательские цвета с использованием вышеуказанных моделей.
класс документов{статья}
usepackage[utf8]{inputenc}
usepackage[dvipsnames]{xcolor}
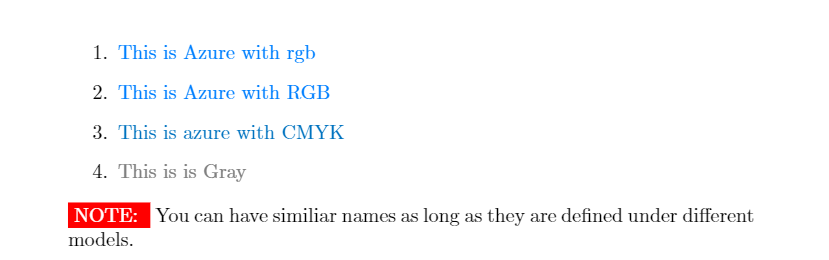
definecolor{лазурный}{rgb}{0.00, 0.50, 1.00}
definecolor{Лазурь}{RGB}{0, 127, 255}
definecolor{ЛАЗУРНЫЙ}{cmyk}{1, 0.502, 0, 0}
definecolor{серый}{серый}{0.3}
начинать{документ}
возобновитькоманда{ labelenumii}{Роман{enumii}}
начинать{перечислять}
элементцвет текста{лазурный}{Это Azure с rgb}
элементцвет текста{Лазурь}{Это лазурь с RGB}
элементцвет текста{ЛАЗУРНЫЙ}{Это лазурь с CMYK}
элементцвет текста{серый}{Это серый}
конец{перечислять}
цветная коробка{красный}{цвет{белый}ПРИМЕЧАНИЕ: } У вас могут быть похожие имена, если они определены в разных моделях.
конец{документ}
конец{документ}
В приведенном выше коде мы определяем четыре пользовательских цвета, используя четыре типа моделей. Результат следующий.
Вывод
В этом руководстве показано, как работать с пакетом LaTeX xcolor, особенно для изменения цвета текста в LaTeX и определения пользовательских цветов.
Чтобы узнать больше о том, как работает пакет, рассмотрите документацию.
Настройки цвета латекса …
Mark:
Ссылаться на: Нажмите, чтобы открыть ссылку
https://www.sharelatex.com/learn/Using_colours_in_LaTeX
usepackage{color}
1. Добавьте цвет в текст
Textcolor {color} {content}
2. Добавьте нижнюю цветную маркировку
Colorbox {color} {content}
3. Линия живописи
noindent
{ Color {color} rule { linewidth} {width}}}
4. Текст установите цвет фона;
pagecolor{black}
The command pagecolor{black} set the page colour to black.


Интеллектуальная рекомендация

Java Learning 8 2020-02-13
содержание 1. Одиночный режим 2.super 1. Одиночный режим Одно режим режима — 23 шаблона проектированиясамый легкийШаблон дизайна. 1. Цель Чтобы убедиться, что класс в JVM имеет только один объект, цел…

Введение в Python и практика Глава 7 на практике
7-5 билетов в кино: некоторые кинотеатры взимают разные тарифы в зависимости от возраста аудитории: бесплатно для зрителей до 3 лет; 10 долларов для зрителей от 3 до 12 лет; 15 долларов для зрителей с…
Вам также может понравиться

Mybatis2
1. Глубокий SQL-Динамический SQL [ключевые моменты] В процессе обучения впереди, операторы SQL, которые мы используем, очень просты. В реальной разработке бизнеса наше заявление SQL обычно является ди…

Теория управления K8S Kubectl + Реализация
Каталог статьи KUBECTL ВВЕДЕНИЕ Ubectl операция KUBECTL ВВЕДЕНИЕ KUBECTL — это манифест для управления инструментом командной строки для кластера K8S, переданный в Apiserver для создания, просмотра и …

Режим шаблона режима дизайна Java (шаблон)
Во-первых, режим шаблона В первых нескольких моделях, таких как режим политики, является упакованным алгоритмом (поведение), заводской режим инкапсулирует создание объекта, командный режим инкапсулиру…

Основы фляги (2)
1 Базовая структура программы 1.1 Инициализация Все программы Flask должны создавать экземпляр программы. Веб-сервер использует протокол, называемый интерфейсом веб-сервера (WSGI), для пересылки всех …
Chapter06_Rendering Web View_1_Create JSP View
Обычно помещают файл JSP в каталог / WEB-INF, чтобы предотвратить прямой доступ к нему. InternalResourceViewResolver — это преобразователь представлений для JSP. Он следует соглашению, согласно которо…