Содержание
- Приложения для переформатирования
- Способ 1: Фабрика Форматов
- Способ 2: Фотоконвертер Стандарт
- Способ 3: Gimp
- Способ 4: Adobe Photoshop
- Способ 5: XnView
- Вопросы и ответы

Формат ICO чаще всего применяется для изготовления фавиконов – иконок сайтов, которые отображаются при переходе на веб-страницы на вкладке браузера. Чтобы изготовить этот значок, часто приходится преобразовывать картинку с расширением PNG в ICO.
Приложения для переформатирования
Чтобы выполнить преобразование PNG в ICO, можно использовать онлайн-сервисы или применять программы, инсталлированные на ПК. Последний вариант мы рассмотрим более подробно. Для конвертирования в указанном направлении можно использовать следующие виды приложений:
- Редакторы графики;
- Конвертеры;
- Просмотрщики рисунков.
Далее мы рассмотрим процедуру преобразования PNG в ICO на примерах отдельных программ из вышеназванных групп.
Способ 1: Фабрика Форматов
Вначале рассмотрим алгоритм переформатирования в ICO из PNG при помощи конвертера Формат Фактори.
- Запустите приложение. Щелкните по наименованию раздела «Фото».
- Открывается перечень направлений преобразования, представленный в виде иконок. Кликните по значку «ICO».
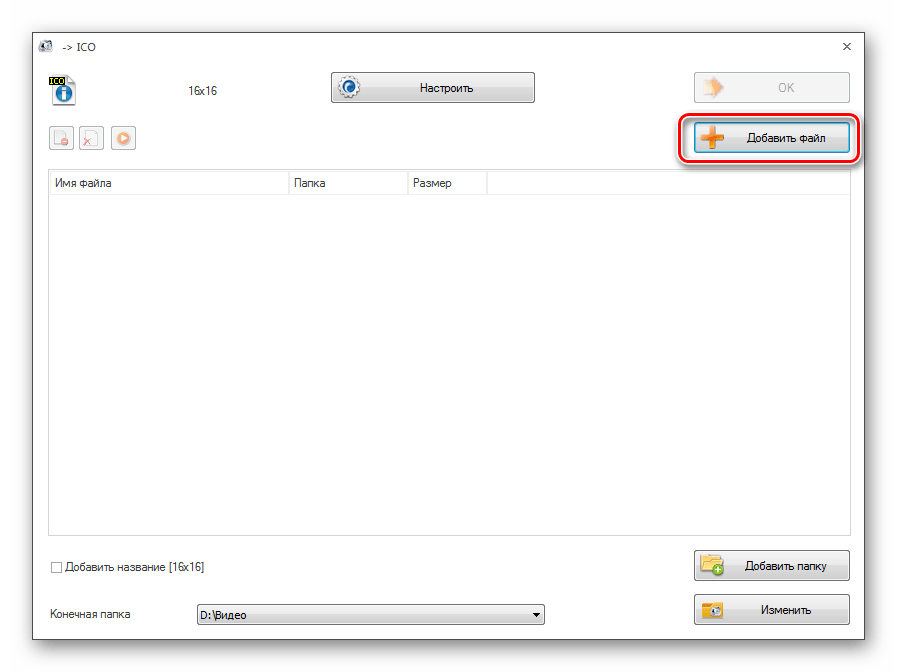
- Открывается окно настроек конвертирования в ICO. Прежде всего, требуется добавить исходник. Жмите «Добавить файл».
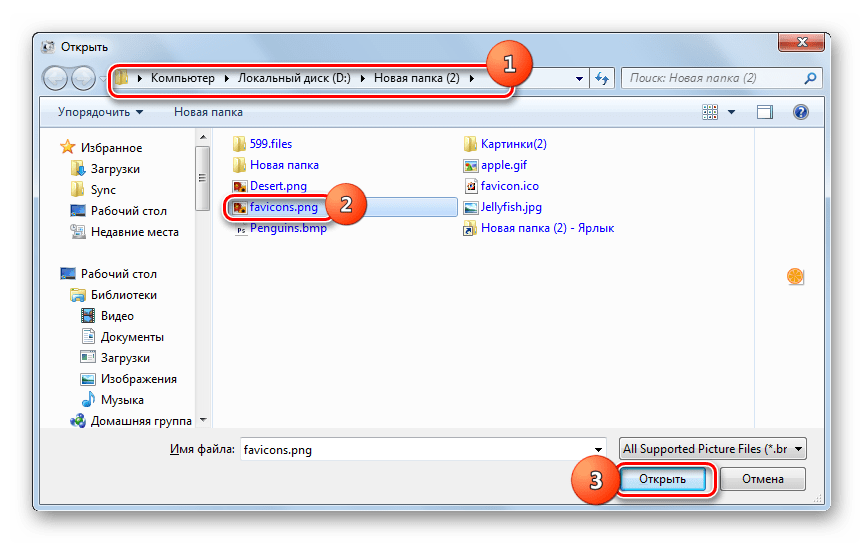
- В открывшемся окне выбора картинки войдите в месторасположение исходного PNG. Обозначив указанный объект, используйте «Открыть».
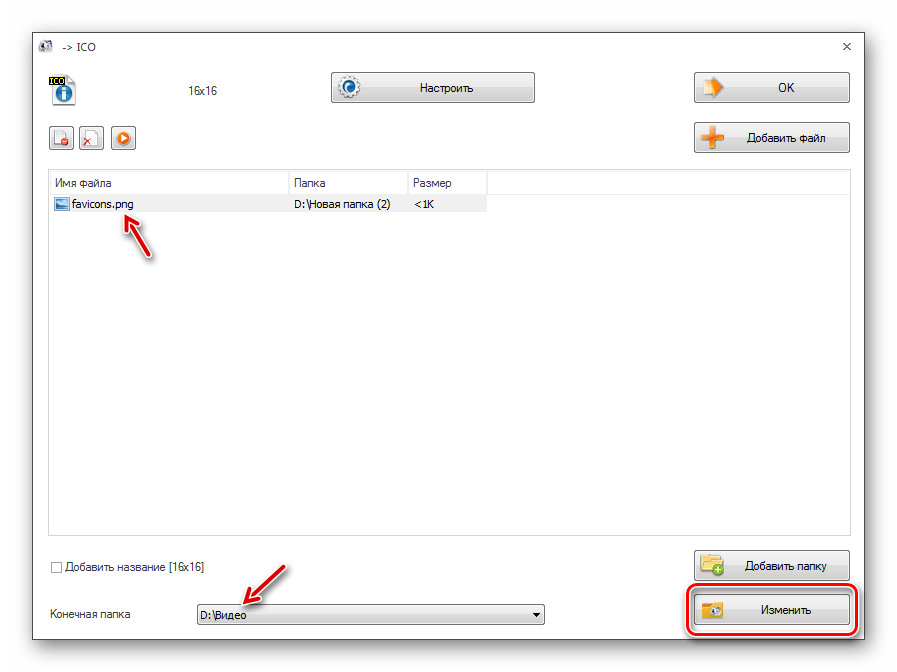
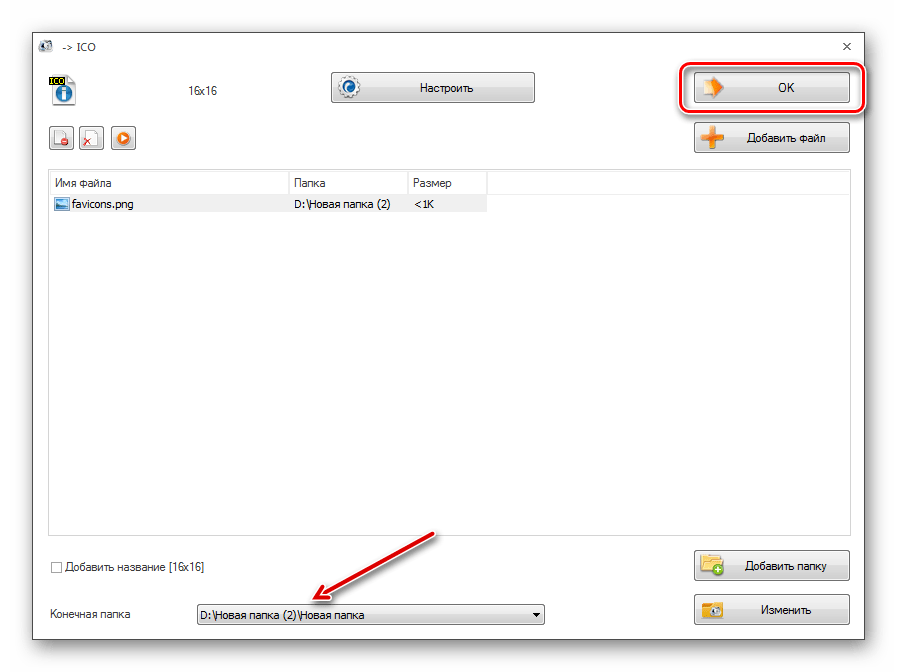
- Название выбранного объекта отобразится в перечне в окне параметров. В поле «Конечная папка» вписан адрес каталога, в который будет отправлен преобразованный фавикон. Но при надобности можете изменить эту директорию, достаточно щелкнуть «Изменить».
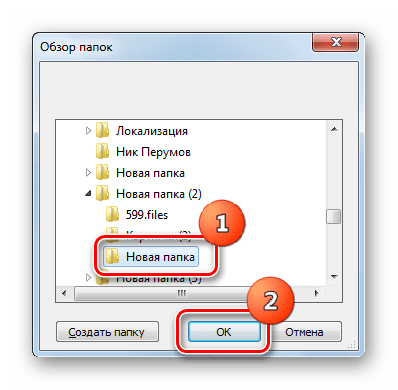
- Перейдя с помощью инструмента «Обзор папок» к каталогу, где вы желаете хранить фавикон, выделите его и кликните «OK».
- После появления нового адреса в элементе «Конечная папка» щелкайте «OK».
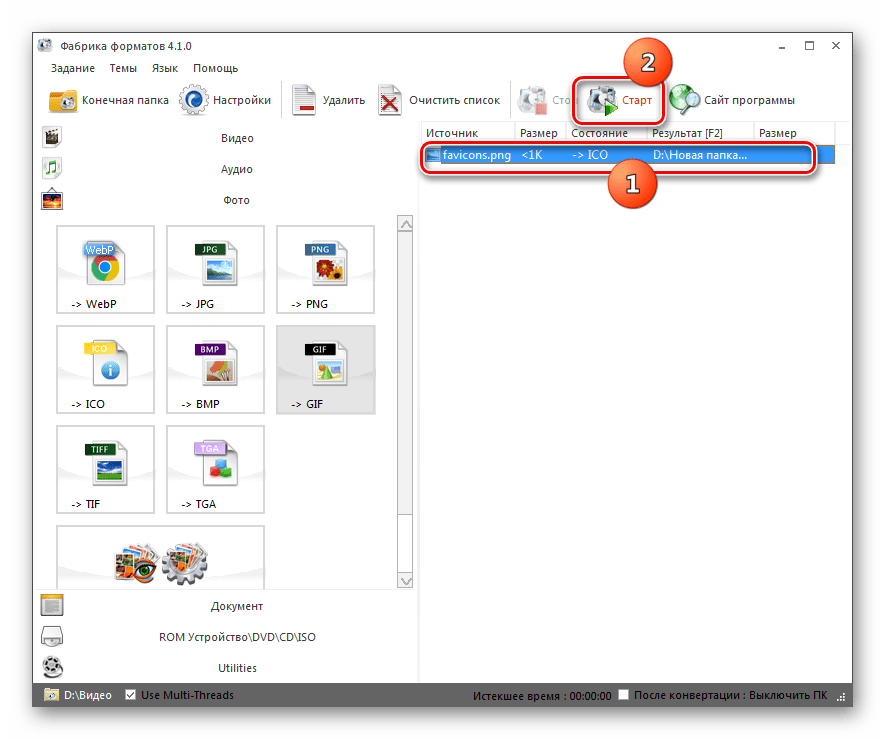
- Происходит возврат в главное окно программы. Как видим, настройки поставленной задачи отображаются в отдельной строке. Для запуска преобразования выделите данную строку и кликните «Старт».
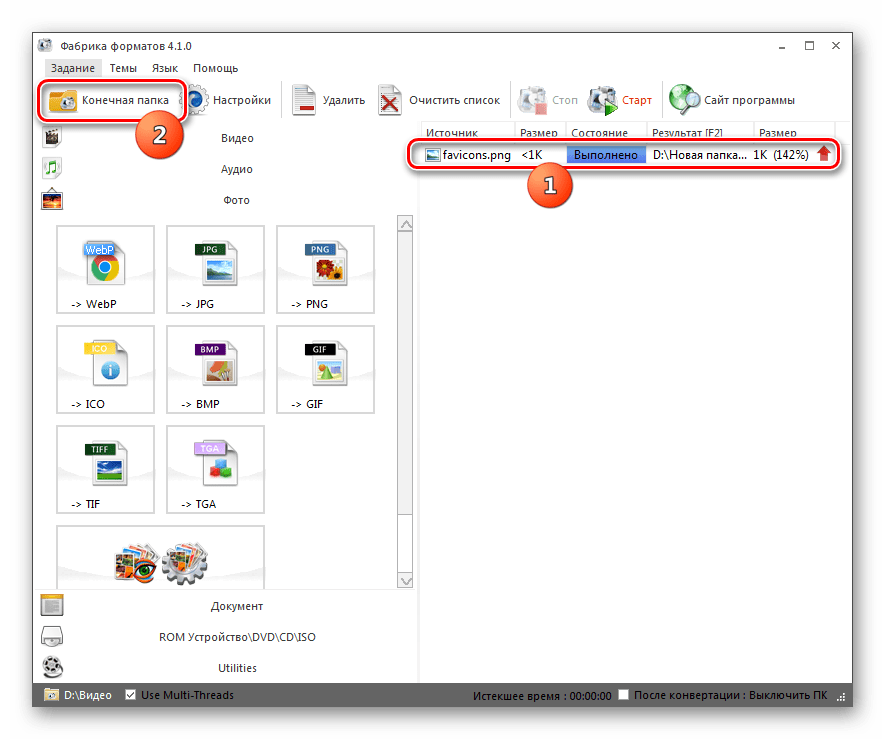
- Происходит переформатирование изображения в ICO. После завершения задачи в поле «Состояние» будет установлен статус «Выполнено».
- Чтобы перейти в директорию месторасположения фавикона, выделите строку с задачей и кликните по значку, размещенному на панели – «Конечная папка».
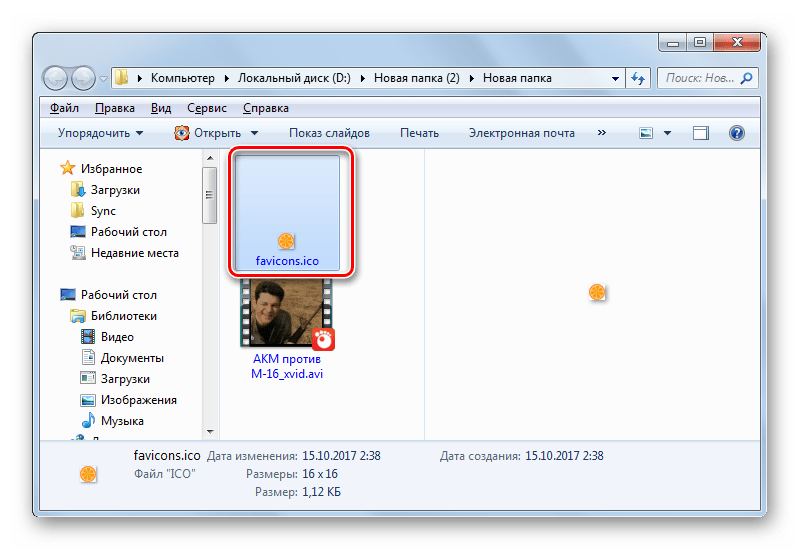
- Запустится «Проводник» в той области, где размещен готовый фавикон.


Способ 2: Фотоконвертер Стандарт
Далее мы рассмотрим пример выполнения изучаемой процедуры с помощью специализированной программы для преобразования картинок Фотоконвертер Стандарт.
Скачать Фотоконвертер Стандарт
- Запустите Фотоконвертер Стандарт. Во вкладке «Выбрать файлы» щелкните по значку «+» с надписью «Файлы». В раскрывшемся перечне жмите «Добавить файлы».
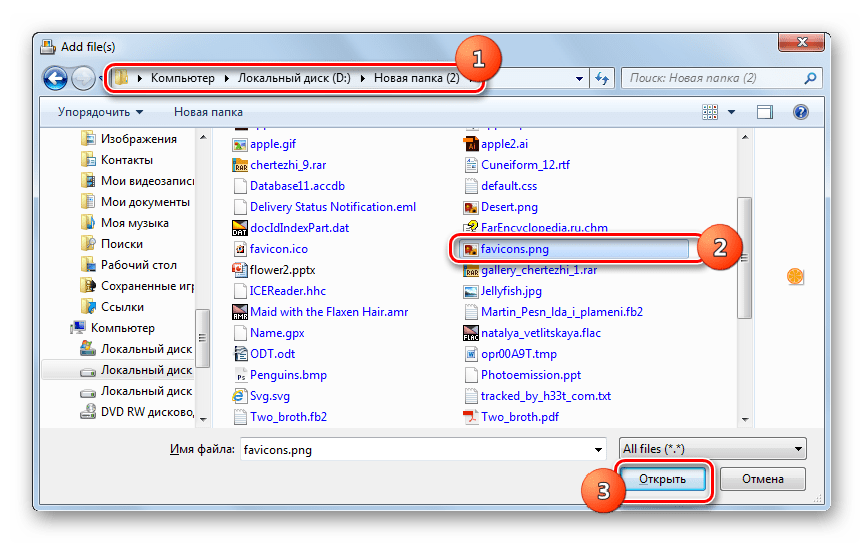
- Открывается окно выбора рисунка. Зайдите в месторасположение PNG. Обозначив объект, применяйте «Открыть».
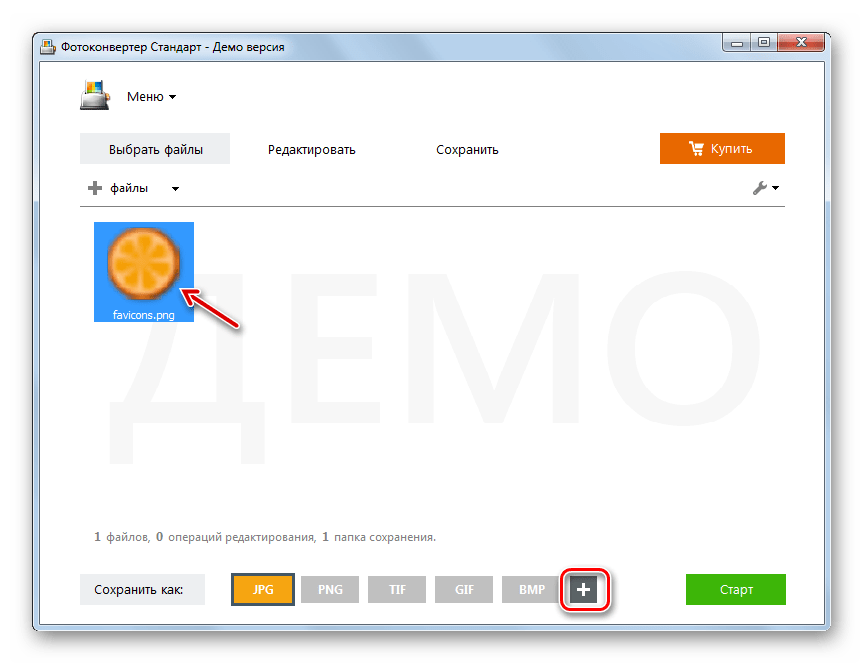
- Выбранный рисунок отобразится в основном окне программы. Теперь нужно указать конечный формат преобразования. Для этого справа от группы значков «Сохранить как» в нижней части окна щелкните по значку в форме знака «+».
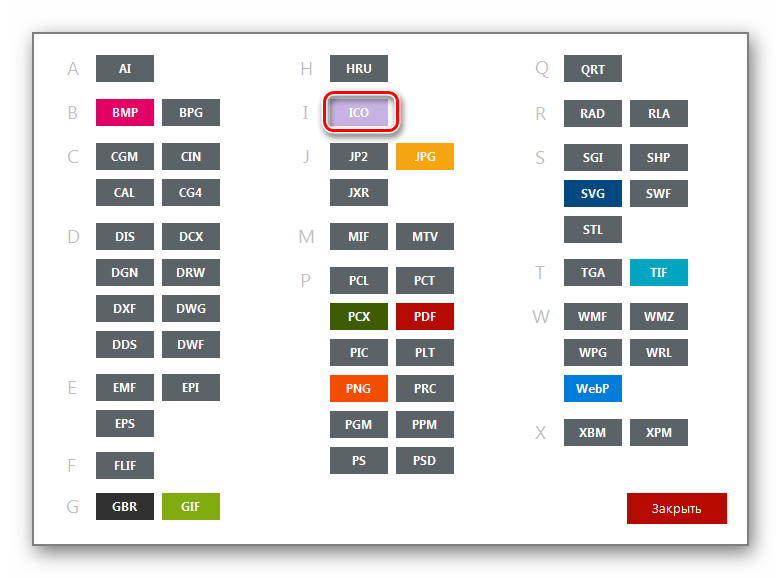
- Открывается дополнительное окно с огромным перечнем графических форматов. Жмите «ICO».
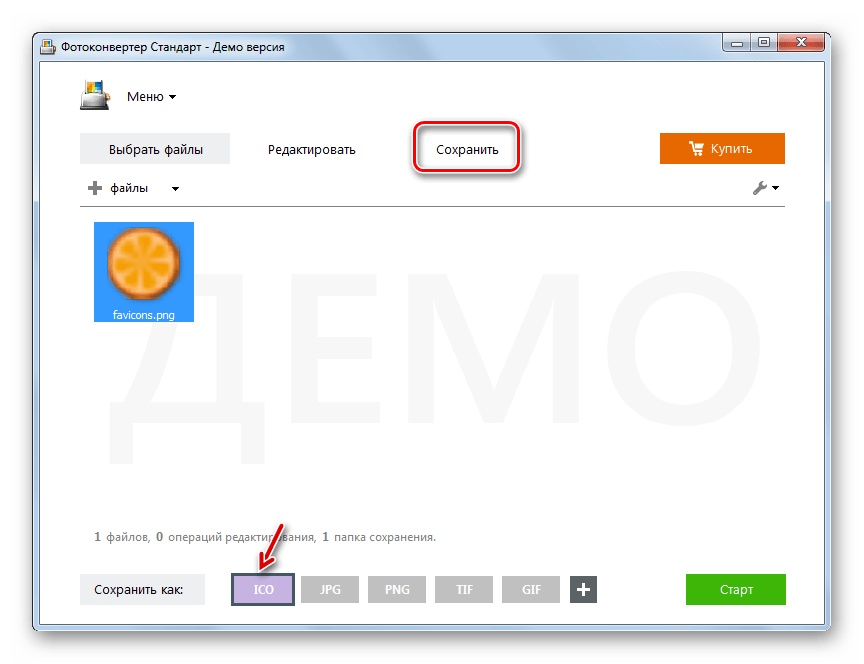
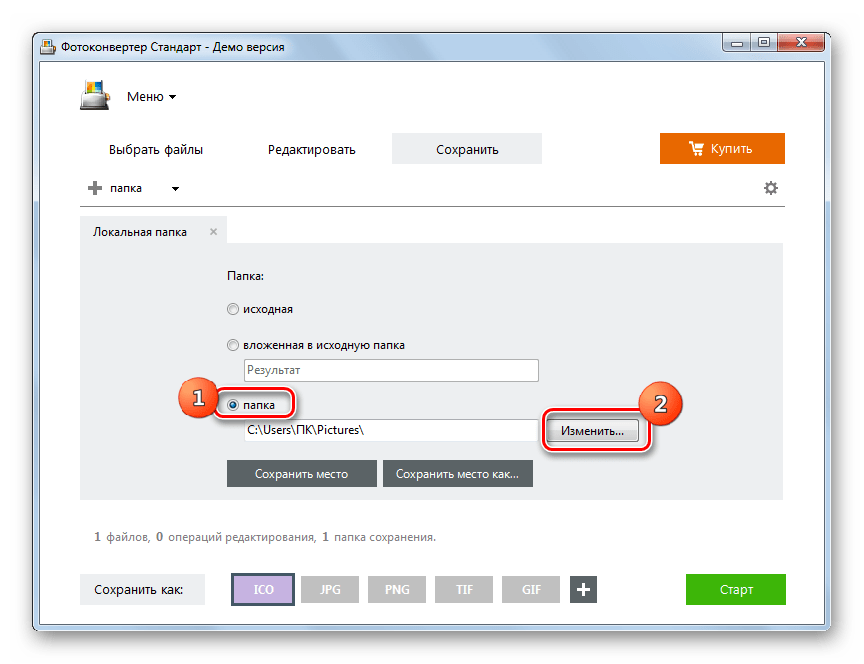
- Теперь в блоке элементов «Сохранить как» появился значок «ICO». Он активный, а это означает, что именно в объект с этим расширением будет производиться преобразование. Чтобы указать конечную папку хранения фавикона, щелкайте по названию раздела «Сохранить».
- Открывается раздел, в котором можно указать каталог сохранения преобразованного фавикона. Переставляя положение радиокнопки можно выбрать, где именно будет сохраняться файл:
- В той же папке, что и исходник;
- Во вложенном в исходную директорию каталоге;
- Произвольный выбор каталога.
При выборе последнего пункта существует возможность указать любую папку на диске или подключенном носителе. Щелкайте «Изменить».
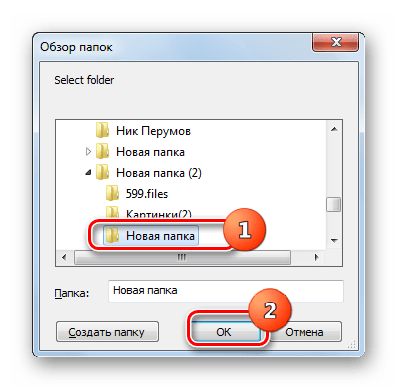
- Открывается «Обзор папок». Укажите каталог, где желаете хранить фавикон, и жмите «OK».
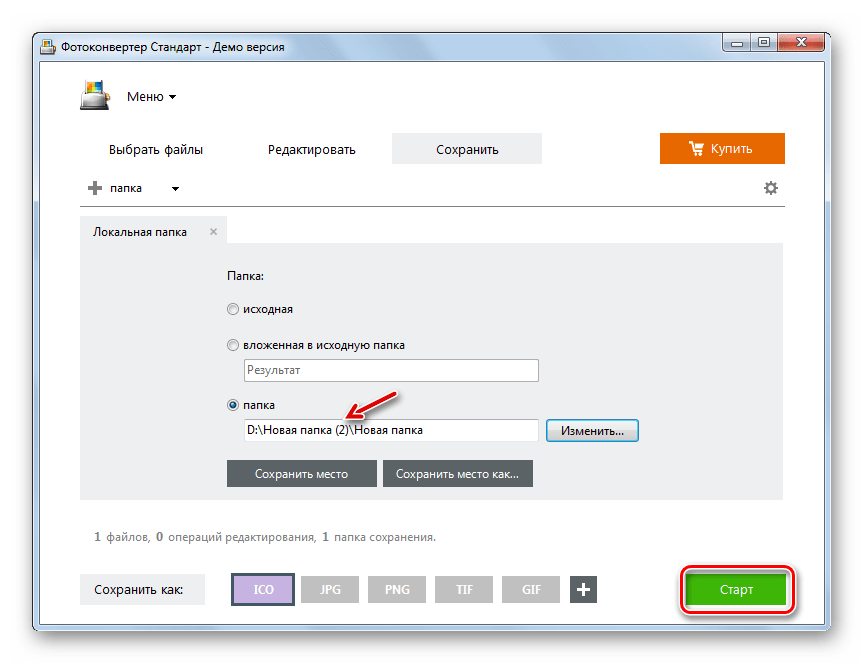
- После того, как путь к выбранной директории отобразился в соответствующем поле, можно запускать преобразование. Жмите для этого «Старт».
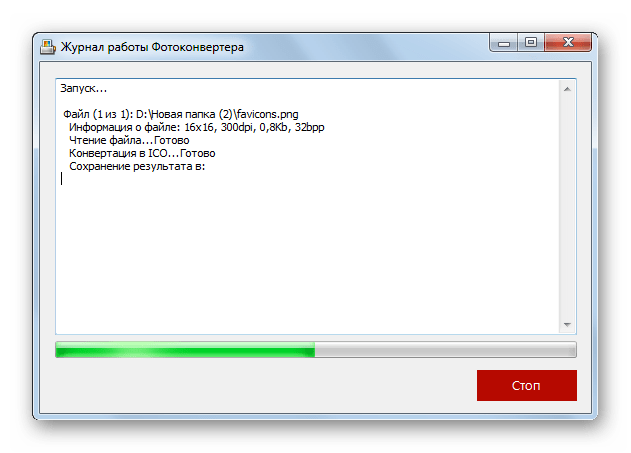
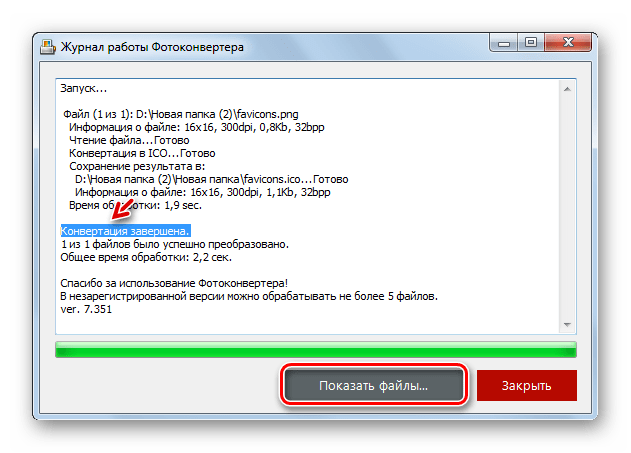
- Выполняется переформатирование изображения.
- После его окончания в окошке трансформации отобразится информация — «Конвертация завершена». Чтобы перейти в папку размещения фавикона, жмите «Показать файлы…».
- Запустится «Проводник» в том месте, где расположен фавикон.


Способ 3: Gimp
Переформатировать в ICO из PNG умеют не только конвертеры, но и большинство графических редакторов, среди которых выделяется Gimp.
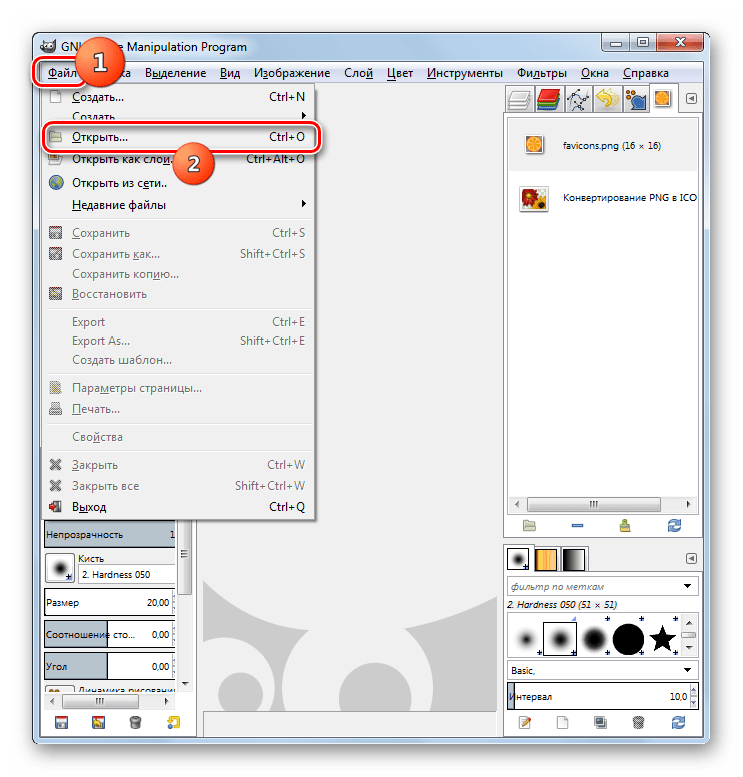
- Откройте Гимп. Щелкайте «Файл» и выбирайте «Открыть».
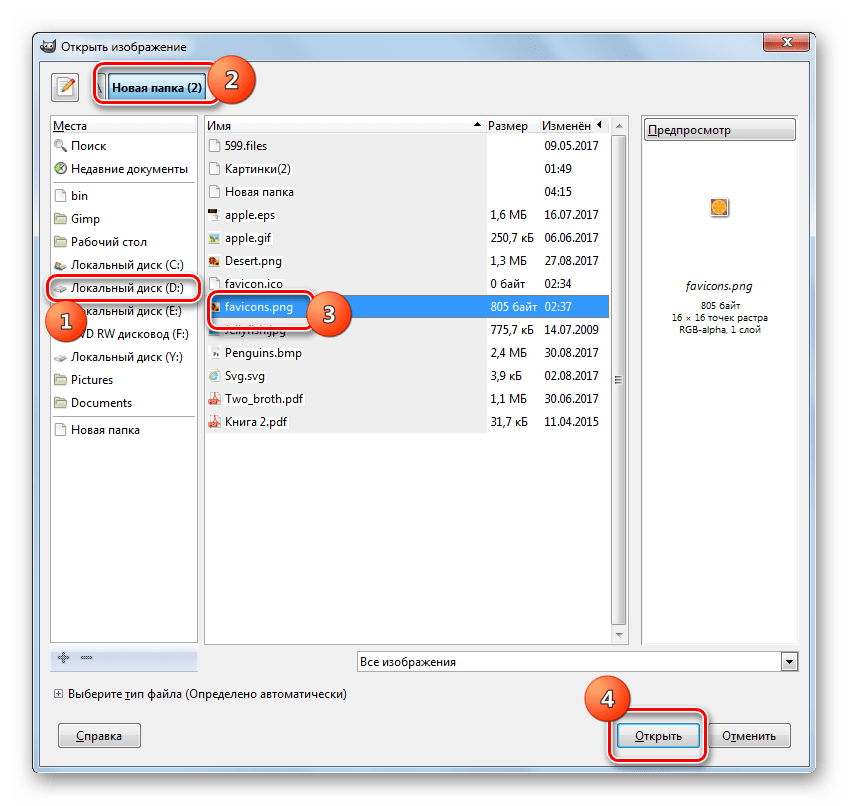
- Запускается окно выбора картинки. В боковом меню отметьте диск расположения файла. Далее перейдите в каталог его местонахождения. Выделив объект PNG, применяйте «Открыть».
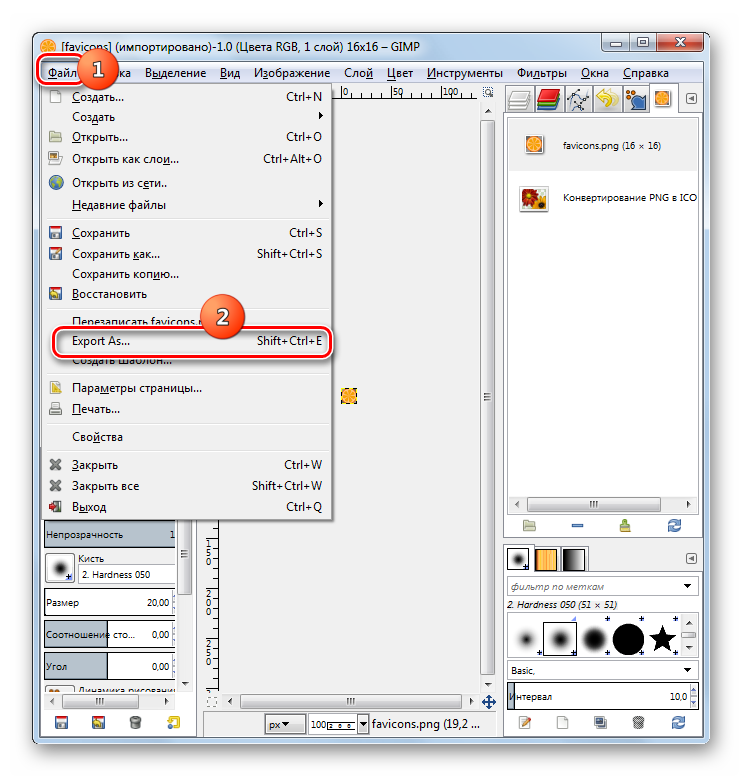
- Картинка появится в оболочке программы. Для того чтобы её преобразовать, щелкайте «Файл», а затем «Export As…».
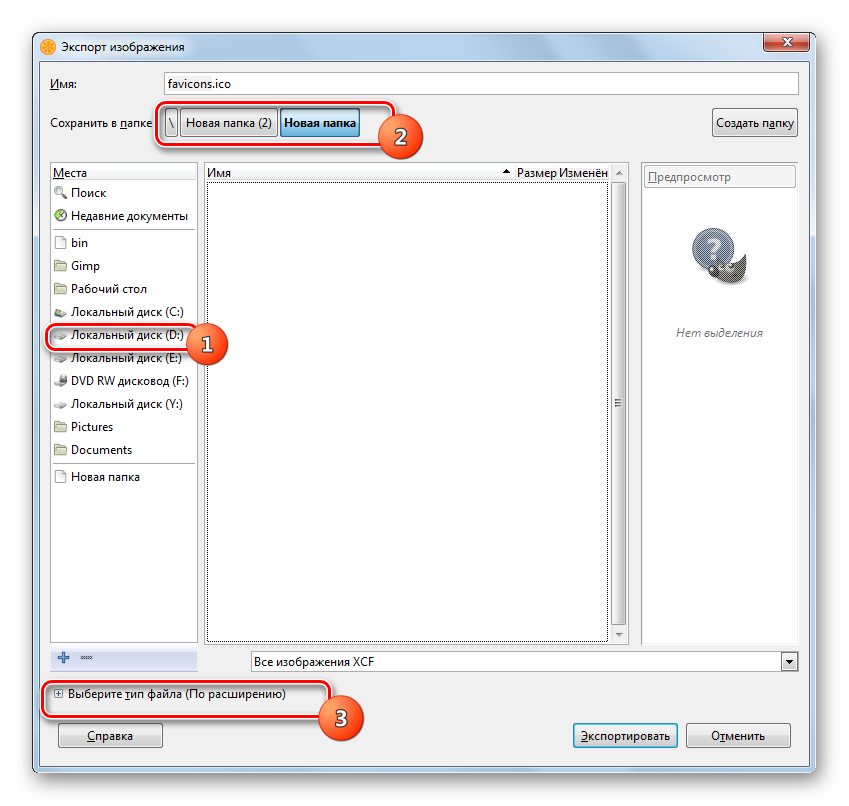
- В левой части открывшегося окна укажите диск, на котором хотите хранить получившееся изображение. Далее перейдите в желаемую папку. Щелкайте по пункту «Выберите тип файла».
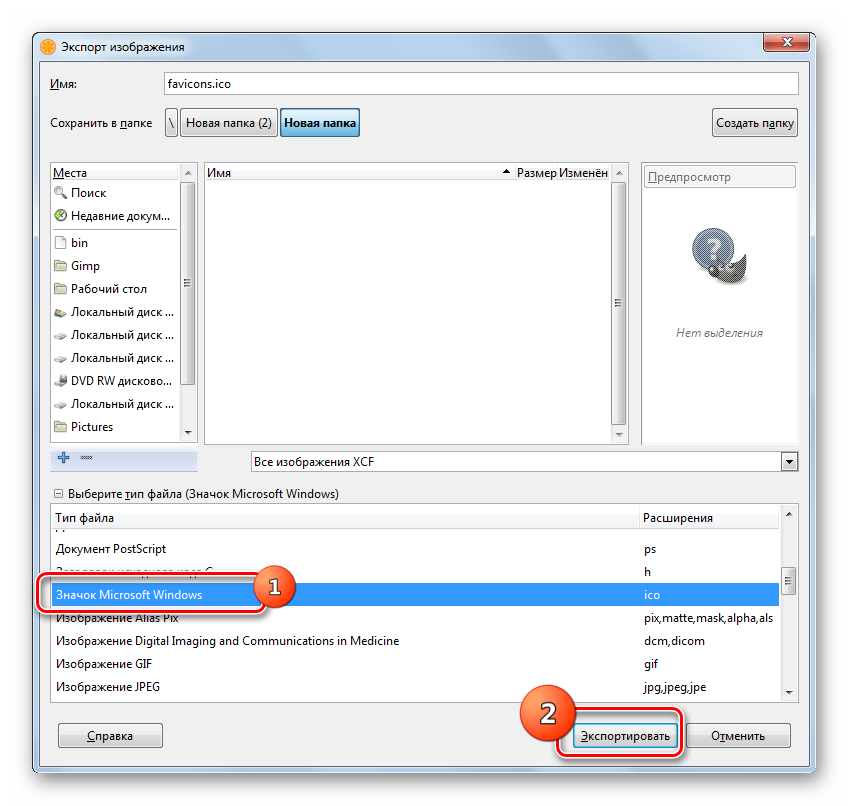
- Из раскрывшегося перечня форматов выбирайте «Значок Microsoft Windows» и жмите «Экспортировать».
- В появившемся окошке просто жмите «Экспорт».
- Картинка будет преобразована в ICO и разместится в той области файловой системы, которую пользователь указал ранее при настройке преобразования.

Способ 4: Adobe Photoshop
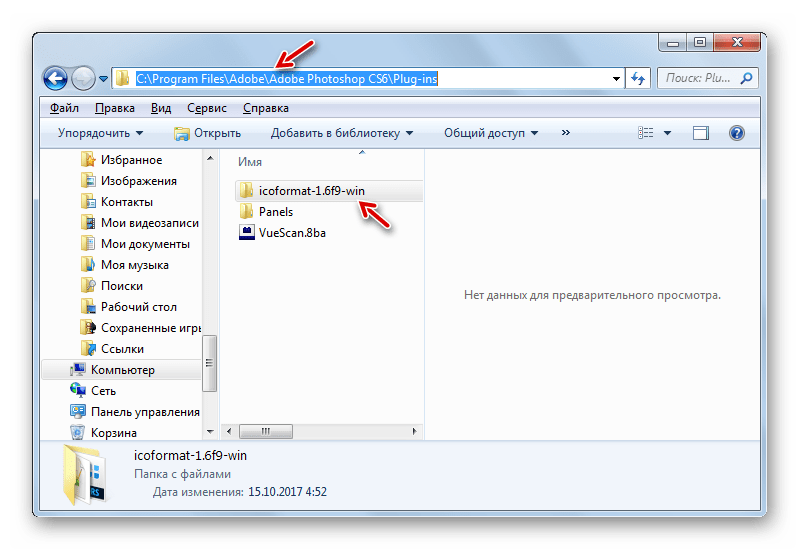
Следующий графический редактор, умеющий преобразовывать PNG в ICO, называется Photoshop от компании Adobe. Но дело в том, что в стандартной сборке возможность сохранения файлов в нужном нам формате у Фотошопа не предусмотрена. Для того чтобы получить данную функцию, нужно установить плагин ICOFormat-1.6f9-win.zip. После загрузки плагина следует распаковать его в папку с таким шаблоном адреса:
C:Program FilesAdobeAdobe Photoshop CS№Plug-ins
Вместо значения «№» необходимо ввести номер версии вашего Фотошопа.
Скачать плагин ICOFormat-1.6f9-win.zip
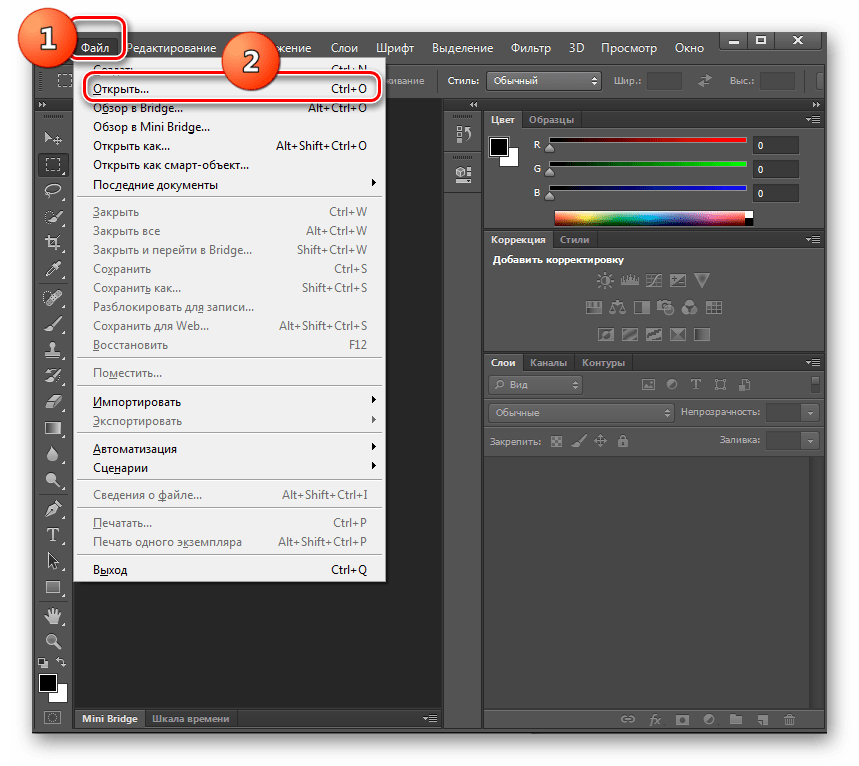
- После установки плагина откройте Фотошоп. Кликните «Файл» и затем «Открыть».
- Запускается окошко выбора. Заходите в месторасположение PNG. Выделив рисунок, применяйте «Открыть».
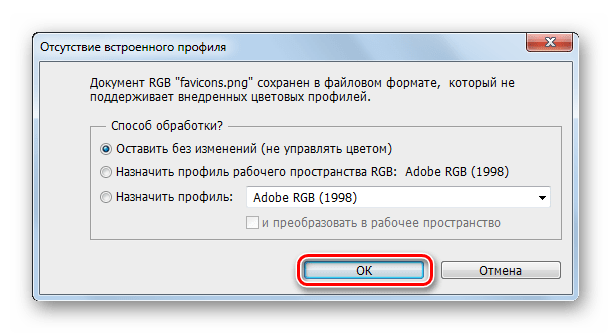
- Запустится окошко, предупреждающие об отсутствии встроенного профиля. Жмите «OK».
- Картинка открыта в Фотошопе.
- Теперь нужно произвести переформатирование PNG в нужный нам формат. Снова щелкайте «Файл», но на этот раз кликните «Сохранить как…».
- Запускается окошко сохранения файла. Переместитесь в каталог, где желаете хранить фавикон. В поле «Тип файлов» выберите «ICO». Жмите «Сохранить».
- Фавикон сохранен в формате ICO в указанном месте.


Способ 5: XnView
Переформатировать в ICO из PNG умеет ряд многофункциональных просмотрщиков картинок, среди которых выделяется XnView.
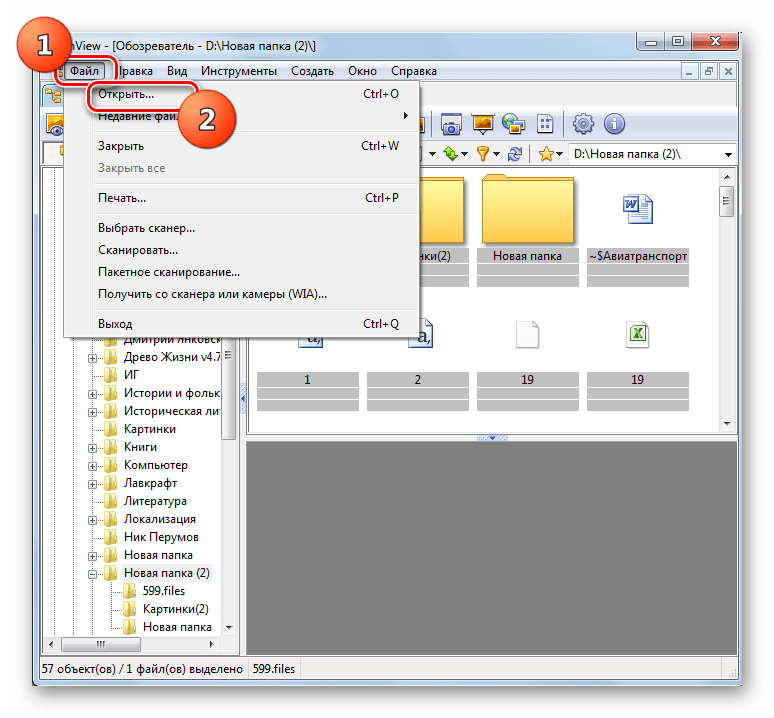
- Запустите XnView. Кликните «Файл» и выбирайте «Открыть».
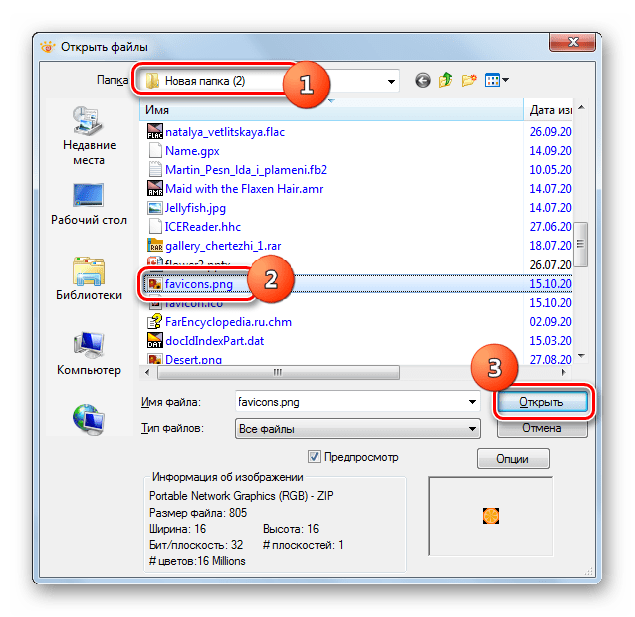
- Появляется окошко выбора рисунка. Переместитесь в папку месторасположения PNG. Обозначив этот объект, используйте «Открыть».
- Картинка откроется.
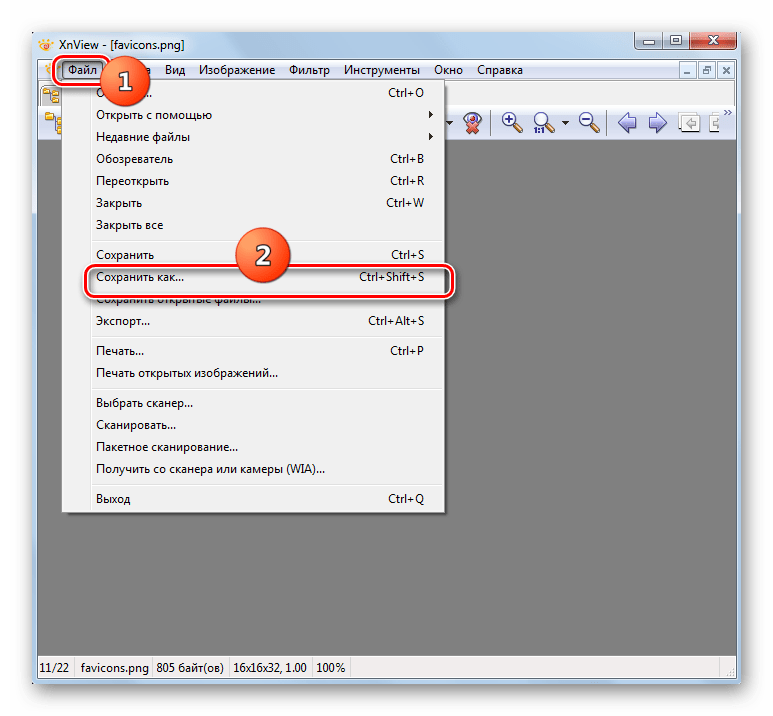
- Теперь снова жмите «Файл», но в данном случае выбирайте позицию «Сохранить как…».
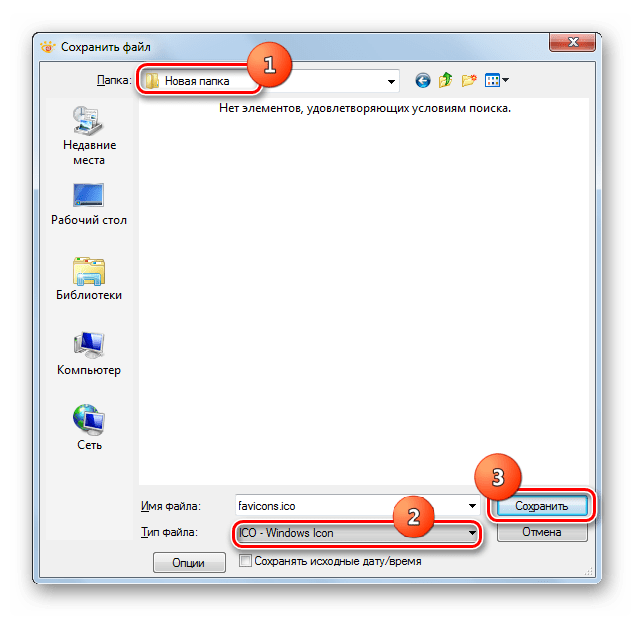
- Открывается окошко сохранения. С его помощью перейдите в место, где планируете хранить фавикон. Затем в поле «Тип файла» выберите пункт «ICO — Windows Icon». Жмите «Сохранить».
- Картинка сохранена с назначенным расширением и в указанном месте.


Как видим, существует несколько видов программ, с помощью которых можно преобразовать в ICO из PNG. Выбор конкретного варианта зависит от личных предпочтений и условий преобразования. Для массового конвертирования файлов больше всего подойдут конвертеры. Если вам нужно произвести одиночное преобразование с редактированием исходника, то для этого пригодится графический редактор. А для простого одиночного конвертирования вполне подойдет и продвинутый просмотрщик картинок.
Еще статьи по данной теме:
Помогла ли Вам статья?
![]()
Download Article
![]()
Download Article
- Online File Converter
- MS Paint on Windows
- Preview on Mac
- Photoshop
- Renaming a File
|
|
|
|
Need to make an icon in the Windows ICO icon format? If you are designing an application for Windows, a website, or just want to personalize your Windows desktop, you can create ICO files using an image converter website, MS Paint, Mac Preview, or a Photoshop plugin. We’ll show you the easiest ways to create Windows icon files on your PC or Mac.
-

1
Open https://www.icoconvert.com in your internet browser. Icoconvert is a free online image converter that allows you to upload images and convert them to ICO files. It also has options for creating a style for the ICO image as well as allowing you to save the image as multiple sizes in one file. This allows the image to scale to different sizes depending on its use.
- Other image converter sites that work similarly include ICOConverter (https://www.icoconverter.com) and Online-Convert (https://image.online-convert.com/convert-to-ico).
- You can use online file converters in all desktop and mobile internet browsers.
-
2
Click the Choose File button and select an image. This button is under the «Step 1: Upload an Image» heading at the top. It will open your file navigator window, and allow you to select your image. Use the navigation window to navigate to the image file you want to select. Then click Open.
Advertisement
-
3
Click Upload. It’s the large file below the «Choose File» button. This uploads the file to the website. Allow a few minutes for it to complete.
-
4
Crop the image (optional). You will see a preview of the image below the «Step 2. Crop your image» header. Cropping your image allows you to trim the excess areas around the image that you don’t want to use. If you want to crop your image, click and drag a square around the area of the image you want to keep. You will see a dotted line around the area you want to keep.
-
5
Select a style (optional). Icoconvert.com now allows you to select different styles for your ICO images. These styles are different image shapes and borders. To select a style, scroll down and click the styles you want to use below the «Step 3. Apply Styles» header. You can select more than one style.
-
6
Select an icon format. Click one of the radio options below «Step 4. Select the icon format» to select a file format. Your options are as follows:
- PNG: Select this option if you want to convert the image to a PNG file (not an ICO file).
- ICO for Windows 7, Windows 8, Vista, and XP: Select this option if you want to convert the image to an ICO file for Windows applications.
- Favicon for your website: Select this option if you want to convert the image to an ICO file to be used in web browser tabs for a website.
- Custom sizes: Select this option to create a custom-size ICO image file. ICO files can be multiple sizes that scale to fit their use. If you want to keep the ICO file the same size as the image you uploaded, select «Custom sizes» and then click the radio option next to «Original Size.» If you want to adjust the file size or create a scalable ICO file, click the radio option next to «Multi-size in one icon» and then click the checkbox next to all the sizes you want the ICO file to be able to take.
-
7
Click Convert ICO. It’s the first button below «Steps 5. Convert and Download.» This converts the file you uploaded to the image file that you selected.
- Alternatively, you can click PNG to ICO to convert a PNG file to an ICO file. Click Resize image to change the image size. Click Compress image to make the image file size smaller, and click PNG to SVG to convert a PNG file to a scalable vector graphic file.
-
8
Click Download your icon(s). It’s the blue text that appears below the «Convert ICO» button when you click it. This downloads your image files in the file format you selected. You can find your image files in your «Downloads» folder.


Advertisement
-
1
Open MS Paint. MS Paint is a basic graphics editing program that comes preinstalled on Windows. You can use MS Paint to create ICO files. Use the following steps to open MS Paint.
- Click the Windows Start menu.
- Type Paint.
- Click the Paint icon.
-
2
Open an image you want to use as an ICO file. Alternatively, you can use the MS Paint tools to draw your own image. Use the following steps to open an image file in MS Paint.
- Click File in the menu bar at the top.
- Click Open.
- Select a file you want to use.
- Click Open.
-
3
Resize the image so that is the size of an icon. Most ICO files are typically square images that are 32×32 pixels. They can be as large as 256×256 pixels, or as smalls as 16×16 pixels. Larger files can scale down to smaller sizes, but small files cannot be enlarged without looking pixelated and distorted. Use the following steps to resize the image:
- Click Resize in the box that says «Image» in the menu bar at the top.
- Click the radio option next to Pixels.
- Enter the height and width of the file in pixels (i.e. 32×32) next to «Vertical» and «Horizontal.»
- Click Ok.
-
4
Save the File as an ICO file. To save the file as an ICO file, all you need to do is replace the file extension (i.e «.jpg,» «.png,» etc) to «.ico.» Use the following steps to save the file as an ICO file:[1]
- Click File in the menu bar at the top.
- Click Save as.
- Delete the file extension at the end of the file name.
- Replace the file extension with «.ico».
- Click Save.


Advertisement
-
1
Locate an image you want to use as an ICO file. Use Finder to navigate to an image file you want to use as an ICO file. Finder has an icon that resembles a blue and white smiley face. Click the Finder icon in the Dock at the bottom of your desktop to open Finder.
-
2
Open the image in Preview. Preview is the default image viewer on Mac. Typically, you can open an image in Preview by simply double-clicking the file. If Preview is not your default image viewer, you can use the following steps to open an image in Preview.
- Right-click (or Command-click) the image.
- Select Open with.
- Click Preview.app.
-
3
Resize the image so that is the size of an icon. Most ICO files are typically square images that are 32×32 pixels. They can be as large as 256×256 pixels, or as smalls as 16×16 pixels. Larger files can scale down to smaller sizes, but small files cannot be enlarged without looking pixelated and distorted. Use the following steps to resize the image:
- Click the Markup icon at the top, which resembles a circle with a marker tip inside.
- Click the Resize button, which resembles a square with two arrows pointing to the corners.
- Select «Pixels» in the drop-down menu to the right in the «Images Dimensions» window.
- Enter the image resolution in the boxes next to «Height» and «Width.»
- Click Ok.
-
4
Export the image as an ICO file. When you export an image, the drop-down menu next to «Format» gives you a selection of a few different file formats to export the image as. If you hold Option and click the drop-down menu, it gives you an extended list of file formats, including the option to export the image as an ICO file. Use the following steps to export the image as an ICO file:[2]
- Click File in the menu bar at the top.
- Click Export.
- Enter a file name next to «Export as».
- Hold the Option key and click the drop-down menu next to Format.
- Select Microsoft Icon.
- Click Save.


Advertisement
-
1
Go to http://www.telegraphics.com.au/sw/product/ICOFormat in a web browser. This website contains a free plug in that allows Photoshop to save images as ICO files. Photoshop is not able to save images in ICO format on it’s own. You need a plug-in to do that.
-
2
Scroll down and click the link for your operating system. All download links are below the header that says «ICO (Windows Icon) Format». Click the download link that is appropriate for your operating system and/or version of Photoshop. This downloads the plug-in as a zip file.
- If you are using a newer version of Photoshop on a Mac, click the link that says Mac CS5/CS6. It should work for newer versions of Photoshop CC.[3]
- If you are using a newer version of Photoshop on a Mac, click the link that says Mac CS5/CS6. It should work for newer versions of Photoshop CC.[3]
-
3
Extract the zip file to the «File Formats» folder in the Adobe «Plug-ins» folder. If the «File Formats» folder does not already exist in the Plug-ins folder, go ahead and create a new folder in the Plug-ins folder and call it «File Formats.» Then copy and paste the contents of the zip file to the File Formats folder. You can generally find the «File Formats» folder at one of the following locations:[4]
- Windows: C:/ Program Files/ Common Files/Adobe/Plug-ins/CC /File Formats
- Windows (CC 2013 and earlier): C:/Program Files/Adobe/Adobe Photoshop CC (year)/ Plug-ins/File Formats
- Mac: Applications/ Adobe Photoshop CC (year)/ Plug-ins/ File Formats
- Mac (Alternate): /Library/ Application Support/ Adobe/ Plug-ins/(Photoshop Version)/File Formats
-
4
Open Photoshop. Photoshop has an icon that resembles a blue square with a blue «Ps» in the middle. Click the Photoshop icon on your desktop, Windows Start menu, Applications folder (Mac), or Dock (Mac) to open Photoshop.
-
5
Open or create a new image file. You can open or create a new file at any time in Photoshop by clicking File in the menu bar at the top, followed by New or Open. You can also click New or Open on the title screen to open or create a new file. Click Open to open an existing file you want to convert into an ICO file. Click New to create a new file. Use the Photoshop tools to create an image for the ICO file.
- If you are creating a new image file in Photoshop you will be asked to select the dimensions of your Photoshop file.. The dimensions of an ICO file are typically 32×32 pixels. They can be as large as 256×256 or as small as 16×16. Larger images can scale down to smaller image sizes, but small images sizes cannot be enlarged without the image looking pixelated and distorted.
- Make sure you are using RGB color mode in Photoshop and not CMYK.
-
6
Resize the image to the size of an icon (if needed). If you opened an existing file, you may need to resize the image so that it is the size of a icon. Icons are typically 32×32, but they can range in size from 16×16 to 256×256. Use the following steps to resize the image if needed:
- Click Image in the menu bar at the top.
- Select «Pixels» in drop-down menus next to «Width» and «Height.»
- Enter the size of the image in the boxes next to «Width» and «Height.»
- Click Ok.
-
7
Save the images as an ICO file. Once you are satisfied with how the image looks, use the following steps to save the image as an ICO file:
- Click File in the menu bar at the top.
- Click Save as.
- Enter a name for the image next to «File name.»
- Select «ICO Windows Icon/Favicon (.ico)» next to «Format.»
- Click Save.


Advertisement
-
1
Open File Explorer
on Windows or Finder
on Mac. On Windows, you can use File Explorer to navigate Windows and locate your files. On Mac, you can use Finder. File Explorer has an icon that resembles a folder with a blue clip. Finder has an icon that resembles blue and white smiley face. Click the File Explorer or Finder icon to open the app or press Windows Key + E to open File Explorer on Windows.
-
2
Ensure file extensions are visible. In order to change the file extension of file, you need to be able to see the file extension. Use one of the following steps to ensure file extensions are showing in File Explorer or Finder:
- Windows: Click View in the menu bar at the top of File Explorer. Then ensure the checkbox next to «File name extensions» is checked in the panel at the top.
- Mac: Click Finder in the menu bar at the top. Then click Preferences. Ensure the checkbox next to «Show file name extensions» is checked.
-
3
Find the image file you want to use as an ICO file. Use File Explorer or Finder to navigate to the image file you want to use as an ICO file.
- You can change any file to ICO format, but files that are not image formats will produce an error when you open them
-
4
Right-click the image file you want to use. This displays a context menu next to the file..
- If you are using a mouse or trackpad on Mac that does not have a right mouse button, hold Command and click the file instead.
-
5
Click Rename. It’s in the context menu that appears when you right-click an icon. This will allow you to change the selected image file’s name, and convert it to a different format.
-
6
Delete the current file extension at the end of the file name. The image file should have an image format extension like «.png» or «.jpg» at the end of the file name. Place the text cursor at the end of the file extension and press Backspace to delete the file extension.
-
7
Type .ico at the end of the file name. This will prompt a pop-up asking if you are sure you want to change the file format.
-
8
Click Yes (on Windows) or Use .ico (on Mac) to confirm you want to change the file format. This confirms that you want to change the file format and immediately changes the file extension. This changes the file format to an ICO file.


Advertisement
Ask a Question
200 characters left
Include your email address to get a message when this question is answered.
Submit
Advertisement
Thanks for submitting a tip for review!
References
About This Article
Article SummaryX
1. Open https://www.icoconverter.com.
2. Click Choose File.
3. Select an image.
4. Drag over the image preview to crop the image.
5. Click a style(s) to select that style for the image.
6. Select the image format you want to use (i.e Icon for Windows, Favicon for websites, multi-size file).
7. Click Convert ICO.
8. Click Download your icon(s).
Did this summary help you?
Thanks to all authors for creating a page that has been read 94,512 times.
Is this article up to date?
![]()
Download Article
![]()
Download Article
- Online File Converter
- MS Paint on Windows
- Preview on Mac
- Photoshop
- Renaming a File
|
|
|
|
Need to make an icon in the Windows ICO icon format? If you are designing an application for Windows, a website, or just want to personalize your Windows desktop, you can create ICO files using an image converter website, MS Paint, Mac Preview, or a Photoshop plugin. We’ll show you the easiest ways to create Windows icon files on your PC or Mac.
-
1
Open https://www.icoconvert.com in your internet browser. Icoconvert is a free online image converter that allows you to upload images and convert them to ICO files. It also has options for creating a style for the ICO image as well as allowing you to save the image as multiple sizes in one file. This allows the image to scale to different sizes depending on its use.
- Other image converter sites that work similarly include ICOConverter (https://www.icoconverter.com) and Online-Convert (https://image.online-convert.com/convert-to-ico).
- You can use online file converters in all desktop and mobile internet browsers.
-
2
Click the Choose File button and select an image. This button is under the «Step 1: Upload an Image» heading at the top. It will open your file navigator window, and allow you to select your image. Use the navigation window to navigate to the image file you want to select. Then click Open.
Advertisement
-
3
Click Upload. It’s the large file below the «Choose File» button. This uploads the file to the website. Allow a few minutes for it to complete.
-
4
Crop the image (optional). You will see a preview of the image below the «Step 2. Crop your image» header. Cropping your image allows you to trim the excess areas around the image that you don’t want to use. If you want to crop your image, click and drag a square around the area of the image you want to keep. You will see a dotted line around the area you want to keep.
-
5
Select a style (optional). Icoconvert.com now allows you to select different styles for your ICO images. These styles are different image shapes and borders. To select a style, scroll down and click the styles you want to use below the «Step 3. Apply Styles» header. You can select more than one style.
-
6
Select an icon format. Click one of the radio options below «Step 4. Select the icon format» to select a file format. Your options are as follows:
- PNG: Select this option if you want to convert the image to a PNG file (not an ICO file).
- ICO for Windows 7, Windows 8, Vista, and XP: Select this option if you want to convert the image to an ICO file for Windows applications.
- Favicon for your website: Select this option if you want to convert the image to an ICO file to be used in web browser tabs for a website.
- Custom sizes: Select this option to create a custom-size ICO image file. ICO files can be multiple sizes that scale to fit their use. If you want to keep the ICO file the same size as the image you uploaded, select «Custom sizes» and then click the radio option next to «Original Size.» If you want to adjust the file size or create a scalable ICO file, click the radio option next to «Multi-size in one icon» and then click the checkbox next to all the sizes you want the ICO file to be able to take.
-
7
Click Convert ICO. It’s the first button below «Steps 5. Convert and Download.» This converts the file you uploaded to the image file that you selected.
- Alternatively, you can click PNG to ICO to convert a PNG file to an ICO file. Click Resize image to change the image size. Click Compress image to make the image file size smaller, and click PNG to SVG to convert a PNG file to a scalable vector graphic file.
-
8
Click Download your icon(s). It’s the blue text that appears below the «Convert ICO» button when you click it. This downloads your image files in the file format you selected. You can find your image files in your «Downloads» folder.
Advertisement
-
1
Open MS Paint. MS Paint is a basic graphics editing program that comes preinstalled on Windows. You can use MS Paint to create ICO files. Use the following steps to open MS Paint.
- Click the Windows Start menu.
- Type Paint.
- Click the Paint icon.
-
2
Open an image you want to use as an ICO file. Alternatively, you can use the MS Paint tools to draw your own image. Use the following steps to open an image file in MS Paint.
- Click File in the menu bar at the top.
- Click Open.
- Select a file you want to use.
- Click Open.
-
3
Resize the image so that is the size of an icon. Most ICO files are typically square images that are 32×32 pixels. They can be as large as 256×256 pixels, or as smalls as 16×16 pixels. Larger files can scale down to smaller sizes, but small files cannot be enlarged without looking pixelated and distorted. Use the following steps to resize the image:
- Click Resize in the box that says «Image» in the menu bar at the top.
- Click the radio option next to Pixels.
- Enter the height and width of the file in pixels (i.e. 32×32) next to «Vertical» and «Horizontal.»
- Click Ok.
-
4
Save the File as an ICO file. To save the file as an ICO file, all you need to do is replace the file extension (i.e «.jpg,» «.png,» etc) to «.ico.» Use the following steps to save the file as an ICO file:[1]
- Click File in the menu bar at the top.
- Click Save as.
- Delete the file extension at the end of the file name.
- Replace the file extension with «.ico».
- Click Save.
Advertisement
-
1
Locate an image you want to use as an ICO file. Use Finder to navigate to an image file you want to use as an ICO file. Finder has an icon that resembles a blue and white smiley face. Click the Finder icon in the Dock at the bottom of your desktop to open Finder.
-
2
Open the image in Preview. Preview is the default image viewer on Mac. Typically, you can open an image in Preview by simply double-clicking the file. If Preview is not your default image viewer, you can use the following steps to open an image in Preview.
- Right-click (or Command-click) the image.
- Select Open with.
- Click Preview.app.
-
3
Resize the image so that is the size of an icon. Most ICO files are typically square images that are 32×32 pixels. They can be as large as 256×256 pixels, or as smalls as 16×16 pixels. Larger files can scale down to smaller sizes, but small files cannot be enlarged without looking pixelated and distorted. Use the following steps to resize the image:
- Click the Markup icon at the top, which resembles a circle with a marker tip inside.
- Click the Resize button, which resembles a square with two arrows pointing to the corners.
- Select «Pixels» in the drop-down menu to the right in the «Images Dimensions» window.
- Enter the image resolution in the boxes next to «Height» and «Width.»
- Click Ok.
-
4
Export the image as an ICO file. When you export an image, the drop-down menu next to «Format» gives you a selection of a few different file formats to export the image as. If you hold Option and click the drop-down menu, it gives you an extended list of file formats, including the option to export the image as an ICO file. Use the following steps to export the image as an ICO file:[2]
- Click File in the menu bar at the top.
- Click Export.
- Enter a file name next to «Export as».
- Hold the Option key and click the drop-down menu next to Format.
- Select Microsoft Icon.
- Click Save.
Advertisement
-
1
Go to http://www.telegraphics.com.au/sw/product/ICOFormat in a web browser. This website contains a free plug in that allows Photoshop to save images as ICO files. Photoshop is not able to save images in ICO format on it’s own. You need a plug-in to do that.
-
2
Scroll down and click the link for your operating system. All download links are below the header that says «ICO (Windows Icon) Format». Click the download link that is appropriate for your operating system and/or version of Photoshop. This downloads the plug-in as a zip file.
- If you are using a newer version of Photoshop on a Mac, click the link that says Mac CS5/CS6. It should work for newer versions of Photoshop CC.[3]
- If you are using a newer version of Photoshop on a Mac, click the link that says Mac CS5/CS6. It should work for newer versions of Photoshop CC.[3]
-
3
Extract the zip file to the «File Formats» folder in the Adobe «Plug-ins» folder. If the «File Formats» folder does not already exist in the Plug-ins folder, go ahead and create a new folder in the Plug-ins folder and call it «File Formats.» Then copy and paste the contents of the zip file to the File Formats folder. You can generally find the «File Formats» folder at one of the following locations:[4]
- Windows: C:/ Program Files/ Common Files/Adobe/Plug-ins/CC /File Formats
- Windows (CC 2013 and earlier): C:/Program Files/Adobe/Adobe Photoshop CC (year)/ Plug-ins/File Formats
- Mac: Applications/ Adobe Photoshop CC (year)/ Plug-ins/ File Formats
- Mac (Alternate): /Library/ Application Support/ Adobe/ Plug-ins/(Photoshop Version)/File Formats
-
4
Open Photoshop. Photoshop has an icon that resembles a blue square with a blue «Ps» in the middle. Click the Photoshop icon on your desktop, Windows Start menu, Applications folder (Mac), or Dock (Mac) to open Photoshop.
-
5
Open or create a new image file. You can open or create a new file at any time in Photoshop by clicking File in the menu bar at the top, followed by New or Open. You can also click New or Open on the title screen to open or create a new file. Click Open to open an existing file you want to convert into an ICO file. Click New to create a new file. Use the Photoshop tools to create an image for the ICO file.
- If you are creating a new image file in Photoshop you will be asked to select the dimensions of your Photoshop file.. The dimensions of an ICO file are typically 32×32 pixels. They can be as large as 256×256 or as small as 16×16. Larger images can scale down to smaller image sizes, but small images sizes cannot be enlarged without the image looking pixelated and distorted.
- Make sure you are using RGB color mode in Photoshop and not CMYK.
-
6
Resize the image to the size of an icon (if needed). If you opened an existing file, you may need to resize the image so that it is the size of a icon. Icons are typically 32×32, but they can range in size from 16×16 to 256×256. Use the following steps to resize the image if needed:
- Click Image in the menu bar at the top.
- Select «Pixels» in drop-down menus next to «Width» and «Height.»
- Enter the size of the image in the boxes next to «Width» and «Height.»
- Click Ok.
-
7
Save the images as an ICO file. Once you are satisfied with how the image looks, use the following steps to save the image as an ICO file:
- Click File in the menu bar at the top.
- Click Save as.
- Enter a name for the image next to «File name.»
- Select «ICO Windows Icon/Favicon (.ico)» next to «Format.»
- Click Save.
Advertisement
-
1
Open File Explorer
on Windows or Finder
on Mac. On Windows, you can use File Explorer to navigate Windows and locate your files. On Mac, you can use Finder. File Explorer has an icon that resembles a folder with a blue clip. Finder has an icon that resembles blue and white smiley face. Click the File Explorer or Finder icon to open the app or press Windows Key + E to open File Explorer on Windows.
-
2
Ensure file extensions are visible. In order to change the file extension of file, you need to be able to see the file extension. Use one of the following steps to ensure file extensions are showing in File Explorer or Finder:
- Windows: Click View in the menu bar at the top of File Explorer. Then ensure the checkbox next to «File name extensions» is checked in the panel at the top.
- Mac: Click Finder in the menu bar at the top. Then click Preferences. Ensure the checkbox next to «Show file name extensions» is checked.
-
3
Find the image file you want to use as an ICO file. Use File Explorer or Finder to navigate to the image file you want to use as an ICO file.
- You can change any file to ICO format, but files that are not image formats will produce an error when you open them
-
4
Right-click the image file you want to use. This displays a context menu next to the file..
- If you are using a mouse or trackpad on Mac that does not have a right mouse button, hold Command and click the file instead.
-
5
Click Rename. It’s in the context menu that appears when you right-click an icon. This will allow you to change the selected image file’s name, and convert it to a different format.
-
6
Delete the current file extension at the end of the file name. The image file should have an image format extension like «.png» or «.jpg» at the end of the file name. Place the text cursor at the end of the file extension and press Backspace to delete the file extension.
-
7
Type .ico at the end of the file name. This will prompt a pop-up asking if you are sure you want to change the file format.
-
8
Click Yes (on Windows) or Use .ico (on Mac) to confirm you want to change the file format. This confirms that you want to change the file format and immediately changes the file extension. This changes the file format to an ICO file.
Advertisement
Ask a Question
200 characters left
Include your email address to get a message when this question is answered.
Submit
Advertisement
Thanks for submitting a tip for review!
References
About This Article
Article SummaryX
1. Open https://www.icoconverter.com.
2. Click Choose File.
3. Select an image.
4. Drag over the image preview to crop the image.
5. Click a style(s) to select that style for the image.
6. Select the image format you want to use (i.e Icon for Windows, Favicon for websites, multi-size file).
7. Click Convert ICO.
8. Click Download your icon(s).
Did this summary help you?
Thanks to all authors for creating a page that has been read 94,512 times.