| stage | group | info | type |
|---|---|---|---|
|
Manage |
Authentication and Authorization |
To determine the technical writer assigned to the Stage/Group associated with this page, see https://about.gitlab.com/handbook/product/ux/technical-writing/#assignments |
howto |
Reset a user’s password (FREE SELF)
You can reset user passwords by using the UI, a Rake task, a Rails console, or the
Users API.
Prerequisites
To reset a user password, you must be an administrator of a self-managed GitLab instance.
The user’s new password must meet all password requirements.
Use the UI
To reset a user’s password in the UI:
- On the top bar, select Main menu > Admin.
- On the left sidebar, select Overview > Users.
- For the user whose password you want to update, select Edit ({pencil-square}).
- In the Password area, type a password and password confirmation.
- Select Save changes.
A confirmation is displayed.
Use a Rake task
Introduced in GitLab 13.9.
Use the following Rake task to reset a user’s password:
-
For Omnibus installations
sudo gitlab-rake "gitlab:password:reset" -
For installations from source
bundle exec rake "gitlab:password:reset"
GitLab requests a username, a password, and confirmation of the password. When complete, the user’s password is updated.
The Rake task can take a username as an argument. For example, to reset the password for the user with username
sidneyjones:
-
For Omnibus installations
sudo gitlab-rake "gitlab:password:reset[sidneyjones]" -
For installations from source
bundle exec rake "gitlab:password:reset[sidneyjones]"
Use a Rails console
If you know the username, user ID, or email address, you can use the Rails console to reset their password:
-
Open a Rails console.
-
Find the user:
-
By username:
user = User.find_by_username 'exampleuser'
-
By user ID:
-
By email address:
user = User.find_by(email: 'user@example.com')
-
-
Reset the password by setting a value for
user.passwordanduser.password_confirmation. For example, to set a new random
password:new_password = ::User.random_password user.password = new_password user.password_confirmation = new_password
To set a specific value for the new password:
new_password = 'examplepassword'
user.password = new_password
user.password_confirmation = new_password
-
Optional. Notify the user that an administrator changed their password:
user.send_only_admin_changed_your_password_notification!
-
Save the changes:
-
Exit the console:
Reset the root password
To reset the root password, follow the steps listed previously.
- If the root account name hasn’t changed, use the username
root. - If the root account name has changed and you don’t know the new username,
you might be able to use a Rails console with user ID1. In almost all
cases, the first user is the default administrator account.
Troubleshooting
Use the following information to troubleshoot issues when resetting a
user’s password.
Email confirmation issues
If the new password doesn’t work, it might be an email confirmation issue. You can
attempt to fix this issue in a Rails console. For example, if a new root password isn’t working:
-
Start a Rails console.
-
Find the user and skip reconfirmation:
user = User.find(1)
user.skip_reconfirmation!
-
Attempt to sign in again.
Unmet password requirements
The password might be too short, too weak, or not meet complexity
requirements. Ensure the password you are attempting to set meets all
password requirements.
Reset a user’s password (FREE SELF)
You can reset user passwords by using a Rake task, a Rails console, or the
Users API.
Prerequisites
To reset a user password, you must be an administrator of a self-managed GitLab instance.
Use a Rake task
Introduced in GitLab 13.9.
Use the following Rake task to reset a user’s password:
-
For Omnibus installations
sudo gitlab-rake "gitlab:password:reset" -
For installations from source
bundle exec rake "gitlab:password:reset"
GitLab requests a username, a password, and confirmation of the password. When complete, the user’s password is updated.
The Rake task can take a username as an argument. For example, to reset the password for the user with username
sidneyjones:
-
For Omnibus installations
sudo gitlab-rake "gitlab:password:reset[sidneyjones]" -
For installations from source
bundle exec rake "gitlab:password:reset[sidneyjones]"
Use a Rails console
If you know the username, user ID, or email address, you can use the Rails console to reset their password:
-
Open a Rails console.
-
Find the user:
-
By username:
user = User.find_by_username 'exampleuser' -
By user ID:
-
By email address:
user = User.find_by(email: 'user@example.com')
-
-
Reset the password by setting a value for
user.passwordanduser.password_confirmation. For example, to set a new random
password:new_password = ::User.random_password user.password = new_password user.password_confirmation = new_passwordTo set a specific value for the new password:
new_password = 'examplepassword' user.password = new_password user.password_confirmation = new_password -
Optional. Notify the user that an administrator changed their password:
user.send_only_admin_changed_your_password_notification! -
Save the changes:
-
Exit the console:
Reset the root password
To reset the root password, follow the steps listed previously.
- If the root account name hasn’t changed, use the username
root. - If the root account name has changed and you don’t know the new username,
you might be able to use a Rails console with user ID1. In almost all
cases, the first user is the default administrator account.
Troubleshooting
If the new password doesn’t work, it might be an email confirmation issue. You can
attempt to fix this issue in a Rails console. For example, if a new root password isn’t working:
-
Start a Rails console.
-
Find the user and skip reconfirmation:
user = User.find(1) user.skip_reconfirmation! -
Attempt to sign in again.
 Обновлено: 13.12.2022
Опубликовано: 29.11.2020
Используемые термины: GitLab, CentOS.
Рассмотрим процесс установки и настройки веб-инструмента жизненного цикла DevOps на Linux CentOS на примере версии 8. За основу взята официальная инструкция с сайта GitLab. В нашей инструкции приведен пример установки как платной. так и бесплатной версий программы.
Подготовка системы
Настройка времени
Порты в брандмауэре
Зависимые компоненты
Установка
GitLab
Настройка
Вход на портал
Настройка GitLab
Создание проекта и отправка на него файла из Linux
Использование https
Сброс пароля для пользователя root
Подготовка сервера
В качестве предварительный настроек, мы обновим список пакетов в репозиториях, настроим правильное время и откроем порты в брандмауэре.
1. Время
Установим часовой пояс:
timedatectl set-timezone Europe/Moscow
* данная команда задаст настройки для московского времени. Все файлы с временными зонами находятся в каталоге /usr/share/zoneinfo.
Для автоматической синхронизации времени ставим пакет:
yum install chrony
Разрешаем автозапуск сервиса и стартуем его:
systemctl enable chronyd —now
2. Настройка брандмауэра
Нам нужно добавить порты 80 и 443.
firewall-cmd —permanent —add-service=http{,s}
Применяем настройки:
firewall-cmd —reload
3. Необходимые компоненты
Для работы
dnf install curl policycoreutils openssh-server
Для отправки уведомлений, установим также postfix:
dnf install postfix
Установка GitLab
1. Установка и настройка сервиса
Установим репозиторий.
а) для бесплатной:
curl https://packages.gitlab.com/install/repositories/gitlab/gitlab-ce/script.rpm.sh | sudo bash
б) для платной версии:
curl https://packages.gitlab.com/install/repositories/gitlab/gitlab-ee/script.rpm.sh | sudo bash
После установки репозитория, устанавливаем сам GitLab.
а) бесплатную:
dnf install gitlab-ce
б) платную версию:
dnf install gitlab-ee
Если установка прошла успешно, мы должны увидеть:
It looks like GitLab has not been configured yet; skipping the upgrade script.
*. *.
*** ***
***** *****
.****** *******
******** ********
,,,,,,,,,***********,,,,,,,,,
,,,,,,,,,,,*********,,,,,,,,,,,
.,,,,,,,,,,,*******,,,,,,,,,,,,
,,,,,,,,,*****,,,,,,,,,.
,,,,,,,****,,,,,,
.,,,***,,,,
,*,.
_______ __ __ __
/ ____(_) /_/ / ____ _/ /_
/ / __/ / __/ / / __ `/ __
/ /_/ / / /_/ /___/ /_/ / /_/ /
____/_/__/_____/__,_/_.___/
Thank you for installing GitLab!
2. Конфигурируем веб-адрес
Для запуска и корректной работы портала мы должны задать external_url. Для этого открываем файл:
vi /etc/gitlab/gitlab.rb
Нам нужно только изменить параметр external_url:
external_url ‘http://gitlab.dmosk.ru’
* данная настройка говорит, что наш веб-инструмент будет отвечать на запросы, которые пришли на узел gitlab.dmosk.ru — это значит, что данное имя должно быть зарегистрирована в DNS или прописано в локальный файл hosts.
Выполняем конфигурирование:
gitlab-ctl reconfigure
Данная операция займет какое-то время.
Вход в веб-интерфейс
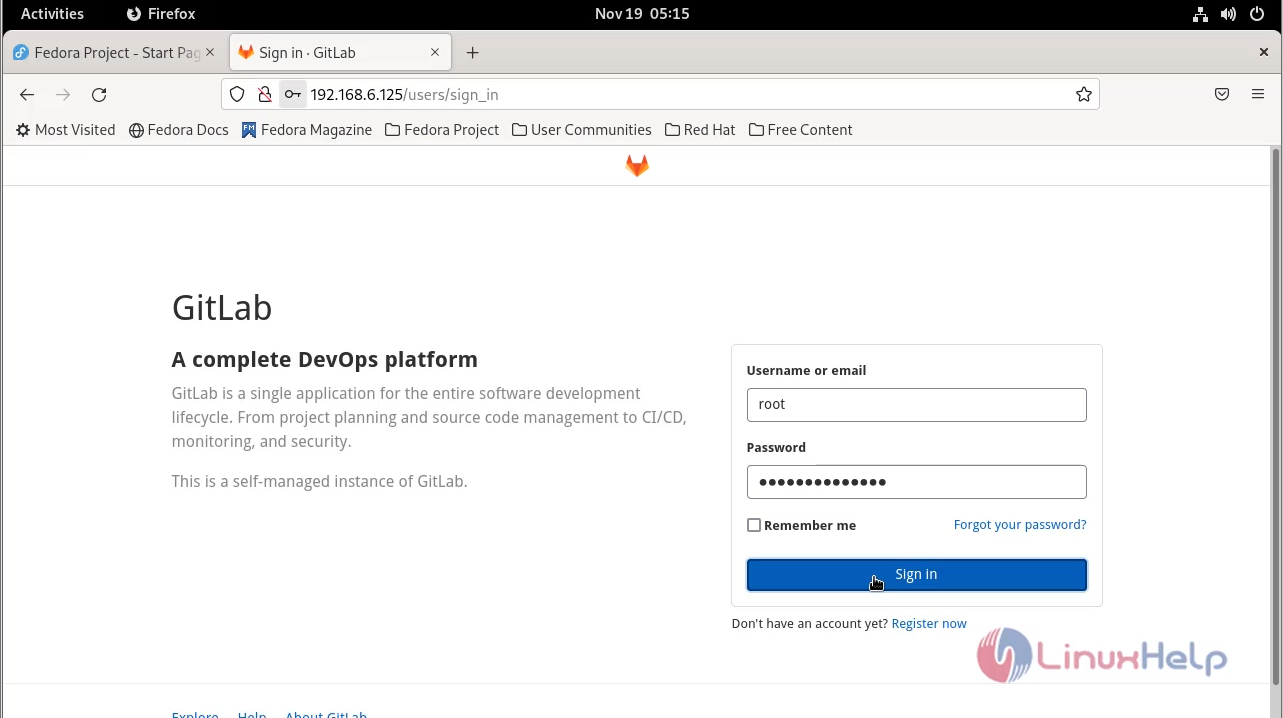
Открываем браузер и вводим наш адрес, который мы указали в настройках в опции external_url — в данном примере, http://gitlab.dmosk.ru. Мы должны увидеть страницу авторизации, на которой нас запросят сменить пароль для администратора. Вводим его дважды:

После система попросит ввести логин и пароль — вводим логин root и пароль, который только-что придумали.
Настройка GitLab
Приведем некоторые примеры настроек, которые могут оказаться полезными.
Русский интерфейс
По умолчанию, портал устанавливается с интерфейсом на английском. Для смены языка, кликаем по иконке в правом верхнем углу и выбираем Settings:

В меню слева нажимаем по Preferences:

В подразделе Localization выбираем нужный нам язык и первый день недели:

Сохранияем настройки и перезапускаем страницу для применения нового языка.
Создание репозитория и подключение к нему
Попробуем создать проект и подключиться к нему из Linux. Также для теста мы создадим файл и закинем его в наш репозиторий.
В веб-интерфейсе GitLab создаем новый проект:

Задаем имя проекта, оставляем или редактируем URL, выбираем уровень доступа. После кликаем по кнопке Создать проект:

* в данном примере мы создаем проект с названием Test, url до него будет http://gitlab.dmosk.ru/root/test. Уровень доступа мы задаем «Приватный» — доступ к репозиторию будет только у авторизованного пользователя.
Для примера попробуем подключиться с компьютера Linux к нашему репозиторию и закинуть на него тестовый файл.
Для начала установим git на компьютер с Linux:
а) Если используем CentOS / Red Hat:
yum install git-core
б) Если используем Ubuntu / Debian:
apt-get install git
Создаем папку для тестового проекта:
mkdir -p /projects/test
Переходим в нее:
cd /projects/test
Создаем репозиторий:
git init
Создаем файл:
vi testfile.txt
Добавляем в него все файлы (то есть, наш единственный файл):
git add .
Делаем коммит:
git commit -m «Очередное изменение проекта» -a
Подключаемся к созданному репозиторию:
git remote add origin http://gitlab.dmosk.ru/root/test.git
Заливаем в него закоммиченный файл:
git push origin master
Переходим на веб-страницу нашего проекта — мы должны увидеть наш файл:

Настройка SSL
В данном примере мы сконфигурируем наш сервер для возможности работы по https и получения сертификата от Let’s Encrypt. Все настройки выполняются в конфигурационном файле:
vi /etc/gitlab/gitlab.rb
Меняем настройку:
external_url ‘http://gitlab.dmosk.ru’
* где gitlab.dmosk.ru — url для нашего портала, который мы задали при первом конфигурировании.
на:
external_url ‘https://gitlab.dmosk.ru’
* мы просто добавили s к http.
Также настраиваем получение сертификата от Let’s Encrypt:
letsencrypt[‘enable’] = true
И задаем опции для автоматического обновления сертификата:
letsencrypt[‘auto_renew’] = true
letsencrypt[‘auto_renew_hour’] = «22»
letsencrypt[‘auto_renew_minute’] = «50»
letsencrypt[‘auto_renew_day_of_month’] = «*/7»
* где:
- auto_renew — разрешает автоматическое обновление.
- auto_renew_hour — время в часах, когда нужно запускать задание на обновление сертификата.
- auto_renew_minute — время в минутах, когда нужно запускать задание на обновление сертификата.
- auto_renew_day_of_month — день месяца. В данном примере, раз в 7 дней.
Применяем новую конфигурацию:
gitlab-ctl reconfigure
В процессе переконфигурирования мы можем получить ошибку получения сертификата. Пробуем запустить команду:
gitlab-ctl renew-le-certs
Сброс пароля root
Если мы забыли пароль для пользователя root, можно его сбросить через командную строку.
Подключаемся к консоли управления gitlab с помощью команды:
gitlab-rails console -e production
Создаем переменную, которая будет вести на ссылку с учетной записью root (идентификатор 1):
user = User.where(id: 1).first
Найти идентификатор для определенного пользователя можно командой:
User.find_by(username: ‘dmosk’)
* где dmosk — логин пользователя, для которого мы найдем идентификатор.
Задаем пароль для пользователя root дважды:
user.password = ‘password123’
user.password_confirmation = ‘password123’
где password123 — созданный для пользователя root новый пароль.
Созраняем изменения для пользователя:
user.save!
Готово.
{{postValue.id}}
To Change admin password on Gitlab.
Introduction:
Gitlab admin password can be changed easily by using GitLab-rails command.
We may have chance of forgetting GitLab admin password, so if we do we actually don’t
need to reinstall GitLab just follow the simple steps to reset your GitLab admin password.
This tutorial covers the ground on resetting the admin password on Gitlab.
Configuration Steps:
Step 1: To check the os version.
[[email protected] ~]# cat /etc/os-release
NAME=Fedora
VERSION="34 (Workstation Edition)"
ID=fedora
VERSION_ID=34
PLATFORM_ID="platform:f34"
PRETTY_NAME="Fedora 34 (Workstation Edition)"
ANSI_COLOR="0;38;2;60;110;180"
LOGO=fedora-logo-icon
CPE_NAME="cpe:/o:fedoraproject:fedora:34"
HOME_URL="https://fedoraproject.org/"
DOCUMENTATION_URL="https://docs.fedoraproject.org/en-US/fedora/f34/system-administrators-guide/"
SUPPORT_URL="https://fedoraproject.org/wiki/Communicating_and_getting_help"
BUG_REPORT_URL="https://bugzilla.redhat.com/"
REDHAT_BUGZILLA_PRODUCT="Fedora"
REDHAT_BUGZILLA_PRODUCT_VERSION=34
REDHAT_SUPPORT_PRODUCT="Fedora"
REDHAT_SUPPORT_PRODUCT_VERSION=34
PRIVACY_POLICY_URL="https://fedoraproject.org/wiki/Legal:PrivacyPolicy"
VARIANT="Workstation Edition"
VARIANT_ID=workstation
Step 2: To execute this gitlab password rest command.
[[email protected] ~]# gitlab-rails console -e production
--------------------------------------------------------------------------------
 Ruby:         ruby 2.7.4p191 (2021-07-07 revision a21a3b7d23) [x86_64-linux]
 GitLab:       14.4.2 (1ce86e92f81) FOSS
 GitLab Shell: 13.21.1
 PostgreSQL:   12.7
--------------------------------------------------------------------------------
Loading production environment (Rails 6.1.4.1)
irb(main):001:0> u = User.where(id:1).first
=> #<User id:1 @root>
irb(main):002:0> u.password = '[email protected]#$%^&*'
=> "[email protected]#$%^&*"
irb(main):003:0> u.password_confirmation = '[email protected]#$%^&*'
=> "[email protected]#$%^&*"
irb(main):004:0> u.save!
Enqueued ActionMailer::MailDeliveryJob (Job ID: 58f04156-cf5e-4d90-aadb-6bae885105d3) to Sidekiq(mailers) with arguments: "DeviseMailer", "password_change", "deliver_now", {:args=>[#<GlobalID:0x00007fe19c8682d0 @uri=#<URI::GID gid://gitlab/User/1>>]}
=> true
irb(main):005:0>exit
Step 3: Then go to the browser search your gitlab and enter login details.
with This Gitlab admin password reset process comes to an End


User account (FREE)
Each GitLab account has a user profile, which contains information about you and your GitLab activity.
Your profile also includes settings, which you use to customize your GitLab experience.
Access your user profile
To access your profile:
- On the top bar, in the top-right corner, select your avatar.
- Select your name or username.
Access your user settings
To access your user settings:
- On the top bar, in the top-right corner, select your avatar.
- Select Edit profile.
Change your username
Your username has a unique namespace,
which is updated when you change your username. Before you change your username, read about
how redirects behave.
If you do not want to update the namespace, you can create a new user or group and transfer projects to it instead.
Prerequisites:
- Your namespace cannot contain a project with Container Registry tags.
- Your namespace cannot have a project that hosts GitLab Pages. For more information,
see this procedure in the GitLab Team Handbook.
To change your username:
- On the top bar, in the top-right corner, select your avatar.
- Select Edit profile.
- On the left sidebar, select Account.
- In the Change username section, enter a new username as the path.
- Select Update username.
Add emails to your user profile
To add new email to your account:
- On the top bar, in the top-right corner, select your avatar.
- Select Edit profile.
- On the left sidebar, select Emails.
- In the Email text box, enter the new email.
- Select Add email address.
- Verify your email address with the verification email received.
Make your user profile page private
You can make your user profile visible to only you and GitLab administrators.
To make your profile private:
- On the top bar, in the top-right corner, select your avatar.
- Select Edit profile.
- Select the Private profile checkbox.
- Select Update profile settings.
The following is hidden from your user profile page (https://gitlab.example.com/username):
- Atom feed
- Date when account was created
- Tabs for activity, groups, contributed projects, personal projects, starred projects, snippets
NOTE:
Making your user profile page private does not hide all your public resources from
the REST or GraphQL APIs. For example, the email address associated with your commit
signature is accessible unless you use an automatically-generated private commit email.
User visibility
The public page of a user, located at /username, is always visible whether you are signed-in or
not.
When visiting the public page of a user, you can only see the projects which you have privileges to.
If the public level is restricted,
user profiles are only visible to authenticated users.
Add details to your profile with a README
Introduced in GitLab 14.5.
You can add more information to your profile page with a README file. When you populate
the README file with information, it’s included on your profile page.
From a new project
To create a new project and add its README to your profile:
- On the top bar, select Main menu > Projects > View all projects.
- On the right of the page, select New project.
- Select Create blank project.
- Enter the project details:
- In the Project name field, enter the name for your new project.
- In the Project URL field, select your GitLab username.
- In the Project slug field, enter your GitLab username.
- For Visibility Level, select Public.

- For Project Configuration, ensure Initialize repository with a README is selected.
- Select Create project.
- Create a README file inside this project. The file can be any valid README or index file.
- Populate the README file with Markdown, or another supported markup language.

GitLab displays the contents of your README below your contribution graph.
From an existing project
To add the README from an existing project to your profile,
update the path of the project
to match your username.
Add external accounts to your user profile page
You can add links to certain other external accounts you might have, like Skype and Twitter.
They can help other users connect with you on other platforms.
To add links to other accounts:
- On the top bar, in the top-right corner, select your avatar.
- Select Edit profile.
- In the Main settings section, add your information from:
- Skype
- Select Update profile settings.
Show private contributions on your user profile page
In the user contribution calendar graph and recent activity list, you can see your contribution actions to private projects.
To show private contributions:
- On the top bar, in the top-right corner, select your avatar.
- Select Edit profile.
- In the Main settings section, select the Include private contributions on my profile checkbox.
- Select Update profile settings.
Add your gender pronouns
Introduced in GitLab 14.0.
You can add your gender pronouns to your GitLab account to be displayed next to
your name in your profile.
To specify your pronouns:
- On the top bar, in the top-right corner, select your avatar.
- Select Edit profile.
- In the Pronouns text box, enter your pronouns.
- Select Update profile settings.
Add your name pronunciation
Introduced in GitLab 14.2.
You can add your name pronunciation to your GitLab account. This is displayed in your profile, below
your name.
To add your name pronunciation:
- On the top bar, in the top-right corner, select your avatar.
- Select Edit profile.
- In the Pronunciation text box, enter how your name is pronounced.
- Select Update profile settings.
Set your current status
Introduced in GitLab 13.10, users can schedule the clearing of their status.
You can provide a custom status message for your user profile along with an emoji that describes it.
This may be helpful when you are out of office or otherwise not available.
Your status is publicly visible even if your profile is private.
To set your current status:
- On the top bar, in the top-right corner, select your avatar.
- Select Set status or, if you have already set a status, Edit status.
- Set the desired emoji and status message. Status messages must be plain text and 100 characters or less.
They can also contain emoji codes like,I'm on vacation :palm_tree:. - Select a value from the Clear status after dropdown list.
- Select Set status. Alternatively, you can select Remove status to remove your user status entirely.
You can also set your current status from your user settings or by using the API.
If you select the Busy checkbox, remember to clear it when you become available again.
Set a busy status indicator
- Introduced in GitLab 13.6.
- It was deployed behind a feature flag, disabled by default.
- Became enabled by default in GitLab 13.8.
- Feature flag removed in GitLab 13.12.
To indicate to others that you are busy, you can set an indicator.
To set the busy status indicator, either:
-
Set it directly:
- On the top bar, in the top-right corner, select your avatar.
- Select Set status or, if you have already set a status, Edit status.
- Select the Set yourself as busy checkbox.
-
Set it on your profile:
- On the top bar, in the top-right corner, select your avatar.
- Select Edit profile.
- In the Current status section, select the Set yourself as busy checkbox.
The busy status is displayed in the user interface.
Username:
Profile page Settings menu User popovers Issue and merge request sidebar:
Sidebar Collapsed sidebar Notes:
Notes Note headers


Set your time zone
You can set your local time zone to:
- Display your local time on your profile, and in places where hovering over your name shows information about you.
- Align your contribution calendar with your local time to better reflect when your contributions were made
(introduced in GitLab 14.5).
To set your time zone:
- On the top bar, in the top-right corner, select your avatar.
- Select Edit profile.
- In the Time settings section, select your time zone from the dropdown list.
Change the email displayed on your commits
A commit email is an email address displayed in every Git-related action carried out through the GitLab interface.
Any of your own verified email addresses can be used as the commit email.
Your primary email is used by default.
To change your commit email:
- In the top-right corner, select your avatar.
- Select Edit profile.
- In the Commit email dropdown list, select an email address.
- Select Update profile settings.
Change your primary email
Your primary email:
- Is the default email address for your login, commit email, and notification email.
- Must be already linked to your user profile.
To change your primary email:
- In the top-right corner, select your avatar.
- Select Edit profile.
- In the Email field, enter your new email address.
- Select Update profile settings.
Set your public email
You can select one of your configured email addresses to be displayed on your public profile:
- In the top-right corner, select your avatar.
- Select Edit profile.
- In the Public email field, select one of the available email addresses.
- Select Update profile settings.
Use an automatically-generated private commit email
GitLab provides an automatically-generated private commit email address,
so you can keep your email information private.
To use a private commit email:
- On the top bar, in the top-right corner, select your avatar.
- Select Edit profile.
- In the Commit email dropdown list, select Use a private email.
- Select Update profile settings.
Every Git-related action uses the private commit email.
To stay fully anonymous, you can also copy the private commit email
and configure it on your local machine by using the following command:
git config --global user.email <your email address>User activity
GitLab tracks user contribution activity. You can follow or unfollow other users from either:
- Their user profiles.
- The small popover that appears when you hover over a user’s name (introduced
in GitLab 15.0).
In GitLab 15.5 and later,
the maximum number of users you can follow is 300.
To view a user’s activity in a top-level Activity view:
- From a user’s profile, select Follow.
- In the GitLab menu, select Activity.
- Select the Followed users tab.
Troubleshooting
Why do you keep getting signed out?
When you sign in to the main GitLab application, a _gitlab_session cookie is
set. When you close your browser, the cookie is cleared client-side
and it expires after a set duration. GitLab administrators can determine the duration:
- On the top bar, select Main menu > Admin.
- On the left sidebar, select Settings > General.
- Expand Account and limit. The set duration is in Session duration (minutes).
The default is 10080, which equals 7 days.
When you sign in to the main GitLab application, you can also check the
Remember me option. This sets the remember_user_token
cookie via devise.
The remember_user_token cookie expires after
config/initializers/devise.rb -> config.remember_for. The default is 2 weeks.
When the _gitlab_session expires or isn’t available, GitLab uses the remember_user_token
to get you a new _gitlab_session and keep you signed in through browser restarts.
After your remember_user_token expires and your _gitlab_session is cleared/expired,
you are asked to sign in again to verify your identity for security reasons.
NOTE:
When any session is signed out, or when a session is revoked
via Active Sessions, all Remember me tokens are revoked.
While other sessions remain active, the Remember me feature doesn’t restore
a session if the browser is closed or the existing session expires.
Increased sign-in time
Introduced in GitLab 13.1.
The remember_user_token lifetime of a cookie can now extend beyond the deadline set by config.remember_for, as the config.extend_remember_period flag is now set to true.
GitLab uses both session and persistent cookies:
- Session cookie: Session cookies are normally removed at the end of the browser session when
the browser is closed. The_gitlab_sessioncookie has no fixed expiration date. However,
it expires based on itssession_expire_delay. - Persistent cookie: The
remember_user_tokenis a cookie with an expiration date of two weeks.
GitLab activates this cookie if you select Remember Me when you sign in.
By default, the server sets a time-to-live (TTL) of 1-week on any session that is used.
When you close a browser, the session cookie may still remain. For example, Chrome has the «Continue where you left off» option that restores session cookies.
In other words, as long as you access GitLab at least once every 2 weeks, you could remain signed in with GitLab, as long as your browser tab is open.
The server continues to reset the TTL for that session, independent of whether 2FA is installed,
If you close your browser and open it up again, the remember_user_token cookie allows your user to reauthenticate itself.
Without the config.extend_remember_period flag, you would be forced to sign in again after two weeks.
Related topics
- Create users
- Sign in to your GitLab account
- Change your password
- Receive emails for:
- Sign-ins from unknown IP addresses or devices
- Attempted sign-ins using wrong two-factor authentication codes
- Manage applications that can use GitLab as an OAuth provider
- Manage personal access tokens to access your account via API and authorized applications
- Manage SSH keys to access your account via SSH
- Change your syntax highlighting theme
- View your active sessions and revoke any of them if necessary
There are a few ways to reset the password of a user.
Rake Task
Introduced in GitLab 13.9.
GitLab provides a Rake Task to reset passwords of users using their usernames,
which can be invoked by the following command:
sudo gitlab-rake "gitlab:password:reset"GitLab asks for a username, a password, and a password confirmation. Upon giving
proper values for them, the password of the specified user is updated.
The Rake task also takes the username as an argument, as shown in the example
below:
sudo gitlab-rake "gitlab:password:reset[johndoe]"NOTE:
To reset the default admin password, run this Rake task with the username
root, which is the default username of that admin account.
Rails console
The Rake task is capable of finding users via their usernames. However, if only
user ID or email ID of the user is known, Rails console can be used to find user
using user ID and then change password of the user manually.
-
Start a Rails console
-
Find the user either by username, user ID or email ID:
user = User.find_by_username 'exampleuser' #or user = User.find(123) #or user = User.find_by(email: 'user@example.com') -
Reset the password
user.password = 'secret_pass' user.password_confirmation = 'secret_pass' -
When using this method instead of the Users API,
GitLab sends an email to the user stating that the user changed their
password. If the password was changed by an administrator, execute the
following command to notify the user by email:user.send_only_admin_changed_your_password_notification! -
Save the changes:
user.save! -
Exit the console, and then try to sign in with your new password.
NOTE:
You can also reset passwords by using the Users API.
Password reset does not appear to work
If you can’t sign on with the new password, it might be because of the reconfirmation feature.
Try fixing this on the rails console. For example, if your new root password isn’t working:
-
Start a Rails console.
-
Find the user and skip reconfirmation, using any of the methods above:
user = User.find(1) user.skip_reconfirmation! -
Try to sign in again.
Reset your root password
The previously described steps can also be used to reset the root password.
In normal installations where the username of root account hasn’t been changed
manually, the Rake task can be used with username root to reset the root
password.
If the username was changed to something else and has been forgotten, one
possible way is to reset the password using Rails console with user ID 1 (in
almost all the cases, the first user is the default admin account).