
- Меценат
-
#2
помощь редактировать во фразах — Редактировать фразу: terms_rules_text
/admin.php?help-pages/ политика конфиденциальности
Последнее редактирование: 23 Авг 2018

-
#3
forum/admin.php?help-pages/terms/edit

-
#4
![]()
Это я знаю, а где изменить сам текст?
-
#5
Здесь. Где еще?
Я же дал линк
-

1535018774727.png
90.7 KB
· Просмотры: 150
-
#6
Это я знаю, а где изменить сам текст?
Во фразах — terms_rules_text.
Здесь. Где еще?
Я же дал линк
Линк, а написать, что это фраза? =)
-
#7
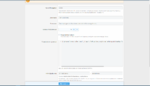
Я не могу найти эту фразу
-
#8
Правда.

![]()
-
#9
forum/admin.php?phrases/terms_rules_text.10172/edit&language_id=2
))
-
#10
Спасибо, можно закрывать)
-
#11
forum/admin.php?phrases/terms_rules_text.10172/edit&language_id=2
))
Но-но, ссылка у гождого может быть своя, тут уже проще скринами было.

-
#2
Всех приветствую! Подскажите,как сделать в пункте «Правила» , чтобы открывалась новая страница и там были расписаны правила. Ничего не нашел, либо так искал на форумах. Предполагаю что в раздел Внешний вид-Шаблоны-Добавить шаблон. Если так, то что дальше делать?
внизу в «подвале» сайта у вас есть меню условия и правила. Перепишите их под свои и нажав туда у вас будет открываться отдельная страница с правилами
-

_.png
36,2 KB
· Просмотры: 25

Последнее редактирование: 09.08.19
-
#3
при создании отдельной страницы (темы) необходимо будет указать ссылку на нее в разделе «Основная информация о форуме»,

выбрав пункт собственный url адрес.


-
#4
Вообще, чтоб было красиво(пример наши правила), создаём в узлах страницу, оформляем в html, и ставим ссылку как сказала Not
-
#5
будет открываться отдельная страница с правилами
Её ещё создать надо…
-
#6
Предполагаю что в раздел Внешний вид-Шаблоны-Добавить шаблон. Если так, то что дальше делать?
При чём тут шапка с навигацией, к правилам?
чтобы открывалась новая страница
Сами себе и ответили в вопросе.
Последнее редактирование: 09.08.19

-
#8
В чём? Вы тему назвали- Шапка и навигация. Но к странице правил, это вообще не относится, никаким боком.
-
#9
Как страницу создать в узлах. Что-то не то делаю
-
#10
Как страницу создать в узлах. Что-то не то делаю
Добавить узел- страница.
-
#12
Это понял. Дальше я туплю!
-

_.png
20,2 KB
· Просмотры: 28

-
#13
Это понял. Дальше я туплю!
У вас поле описание не заполнено,которое желательно заполнять используя html (что бы получить красивый и выделенный текст) как на скрине


в случае если не использовать html правила будут выглядеть серо и невзрачно

Последнее редактирование: 09.08.19
-
#14
Также не забудьте сменить ссылку в разделе «Основная информация о форуме», как это показано выше на скрине
-
#15
Скачать — Rules 1.0.0-Страница помощи «Правила»
Аддон позволяет создавать правила (название + пояснения) и объединять их в группы (название + иконка). Эти правила отображаются на красивой и удобочитаемой странице помощи «Правила». Пользователи могут одним кликом ссылаться на нужное правило. При этом, правило, на которое ссылаются, будет…

trinixy.org
XenForo includes a wide range of options to allow you to configure your forum to fit your needs.
Most of these options are straightforward, so they are not detailed here. Specific information about more complex options can be found below.
Additionally, some options may be available only when activating Advanced mode.
The options system
The main XenForo options system can be found in the Setup section of the admin control panel, under Options.
Closing the forums
One of the most important options controls whether or not the forums are open to visitors.
The Board is active option in the Board active option group toggles this.
When the board is not active, all visitors apart from those administrators with admin control panel access will be shown the message you enter in the Inactive board message box.
Visitors will not be able to view or post any content while the board is not active, so don’t forget to reactivate the board once you’ve finished doing whatever necessitated their closure!
It’s usually a good idea to close the forums for essential maintenance operations, like running XenForo upgrades, importing data and installing large or complex add-ons.
Censoring
Site administrators will commonly want to censor certain words or phrases so they do not appear on their sites when posted by visting users.
XenForo has a comprehensive system for censoring content in this way, which is accessed through the Censoring section of the main XenForo options system.
To censor a word or a word fragment, enter your term in an empty Words to censor box. You may use a * wildcard character to match any text:
dogmatchesdogonlydog*matchesdog,dogsanddogmaticetc.d*gmatchesdoganddugetc.d*g*matchesdog,dug,dogs,dogmaticandduggeryetc.
Note
The censor words are not case-sensitive, so any combination of DoG, dOG, doG etc. will match dog.
Each censor word will normally be replaced by a repeating string of the Censor character, which is an asterisk * by default. A three-letter censored word will be replaced with three asterisks ***, while dogmatic, having been matched by dog* will be replaced with eight asterisks ********.
Special replacements
Alternatively, each censor word can have a replacement word, so you could have dog replaced with canine by entering the replacement word into the Replacement box next to dog.
CAPTCHA
Included within XenForo is a bespoke CAPTCHA system which can be used as an additional spam prevention measure.
If enabled, it requires questions to be answered correctly for new registrations and, if allowed, guests posting messages. This helps to prevent robots from registering and creating content.
Selecting a CAPTCHA Type
XenForo includes support for reCAPTCHA and custom CAPTCHA questions. You may select your CAPTCHA type from the options:
- Log in to the admin control panel.
- Select Options.
- Select Basic board information.
- Locate the Enable CAPTCHA for guests section and select the CAPTCHA type.
Creating custom questions and answers
- Log into the admin control panel.
- Select the Setup section.
- Click on Q&A CAPTCHA from the list.
Once at the main screen, click on the Add question button.
Note
It is imperative that you do not make the list of questions and answers public, as that will compromise the integrity of the system.
Questions can be created with as many answers as you wish, any one of which will be accepted as the correct response.
Visiting users who need to complete a CAPTCHA will be presented with a random item from the list of active questions.
Email
Immediately after installation, XenForo will be able to send email on most servers using PHP’s default mailing settings. However, if you wish to control more aspects of the mail sent by XenForo, log into your admin control panel, go to Options and into the Email options group.
Transport configuration
The Email transport method controls the approach to sending mail. The two methods supported by XenForo are:
- PHP built-in mail – This uses the default configuration of PHP to send email. In general, this is the preferred option as it offloads the actual act of sending the mail to a dedicated program on the server, giving you better performance.
- SMTP – This uses an outside server to send emails. In some situations, this can reduce the likelihood of your mails been seen as spam. While this option does give you a lot of flexibility when sending email, sending emails with this method will be slower than in the default method. This is because each mail is sent by XenForo, rather than handing it off to a dedicated program.
- Google OAuth — Google are moving towards a time when they will not accept standard SMTP credentials for their mail servers, and will instead expect an OAuth token as a security measure. To use this, you will need to navigate to Google’s Developer Console and set up a new project with OAuth 2.0 credentials for a web application. Step-by-step instructions are available on-screen as part of the OAuth setup process within XenForo.
More info regarding OAuth options
Additional options
There are several additional email options that you should consider setting.
- Default email address – Most emails sent from your XenForo installation appear to be sent by this account. This must be a valid email address.
- Bounced email address – When an email cannot be delivered, a message indicating this will be sent to the address you specify here. If you don’t specify anything, it will go to your Default email address.
- Default email sender name – Normally emails sent via XenForo will have a sender name of your Board title. This option can override that with a more reasonable name.
Friendly URLs
Friendly URLs (also called SEO URLs) are web page addresses that are more readable and convenient for humans. Without friendly URLs enabled, a thread may have a URL like this:
http://www.example.com/index.php?threads/thread-title-here.12345/
With friendly URLs enabled, that URL would become:
http://www.example.com/threads/thread-title-here.12345/
Note that to enable friendly URLs, configuration of the web server may be required. This is discussed below.
Configuring friendly URLs
By default, XenForo does not enable friendly URLs due to the web server configuration requirements. To enable friendly URLs, log in to your admin control panel, and go to Options and then Search engine optimization (SEO). There are several options here which you may wish to configure:
- Use full friendly URLs — Enabling this will change the structure of the URLs as mentioned at the beginning of this section. The requirements for this vary based on your web server and are discussed below.
- Include content title in URLs — Disabling this option will make your URLs much shorter, but less friendly to humans as no keywords will be included in them. For example, with this option disabled, the example URL at the beginning of this section would become:
http://www.example.com/threads/12345/
Note
If you enable friendly URLs but your web server can’t support them, your admin control panel will still be accessible.
Friendly URL web server requirements and setup
Enabling the Use full friendly URLs option requires some web server configuration or additional files. Find your web server software in the list below for more details.
Apache
Apache is the most common web server available. If you are unsure what web server you are running, it is likely Apache. Therefore, XenForo includes the necessary configuration file in the root directory.
If after uploading XenForo, you do not see an .htaccess file in your XenForo root directory, rename htaccess.txt to .htaccess (be sure to include the . prefix). You should now be able to enable friendly URLs. If, after enabling friendly URLs your XenForo installation does not function correctly, please contact your host to confirm that they have mod_rewrite installed and allow overrides via an .htaccess file.
LiteSpeed web server
LiteSpeed Web Server reads and uses Apache configurations (including .htaccess files) and will work using the above Apache documentation.
IIS 7
To enable friendly URLs in IIS 7, put the following code into a web.config file in your XenForo root directory:
<?xml version="1.0" encoding="UTF-8"?>
<configuration>
    <system.webServer>
        <rewrite>
            <rules>
                <rule name="Imported Rule 1" stopProcessing="true">
                    <match url="^.*$" />
                    <conditions logicalGrouping="MatchAny">
                        <add input="{REQUEST_FILENAME}" matchType="IsFile" ignoreCase="false" />
                        <add input="{REQUEST_FILENAME}" matchType="IsDirectory" ignoreCase="false" />
                    </conditions>
                    <action type="None" />
                </rule>
                <rule name="Imported Rule 2" stopProcessing="true">
                    <match url="^(data|js|styles|install)" />
                    <action type="None" />
                </rule>
                <rule name="Imported Rule 3" stopProcessing="true">
                    <match url="^.*$" />
                    <action type="Rewrite" url="index.php" />
                </rule>
            </rules>
        </rewrite>
        <httpErrors existingResponse="PassThrough" />
    </system.webServer>
</configuration>
Nginx
To enable friendly URLs in Nginx, you must put the following in your server configuration:
location /xf/ {
    try_files $uri $uri/ /xf/index.php?$uri&$args;
    index index.php index.html;
}

location /xf/install/data/ {
    internal;
}
location /xf/install/templates/ {
    internal;
}
location /xf/internal_data/ {
    internal;
}
location /xf/library/ { #legacy
    internal;
}
location /xf/src/ {
    internal;
}

location ~ .php$ {
    try_files $uri =404;
    fastcgi_pass    127.0.0.1:9000;
    fastcgi_param   SCRIPT_FILENAME $document_root$fastcgi_script_name;
    include         fastcgi_params;
}
The /xf/ paths must be changed to match your XenForo installation path.
This configuration also helps protect web-based access to directories that aren’t normally accessible.
Lighttpd
To enable friendly URLs in Lighttpd, ensure that you have the mod_rewrite module loaded and add the following to your server configuration:
url.rewrite = (
    "^/(data|install|js|styles)/(.*)$" => "$0",
    "^/(.*.php)(.*)$" => "$0",
    "^/.*(?.*)" => "/index.php$1",
    "" => "/index.php"
)
Setting the index page
Assume that you’ve installed XenForo into http://example.com/community/. When you access this URL or http://example.com/community/index.php, a specific page in the XenForo system must be loaded.
By default, this is the list of forums, or an overview of new posts (controlled by the Forums default page option). However, you can change this to a page of your choosing. This may be a portal that you’ve installed, the resource manager, or even a custom page node.
This is controlled by the Index page route option in the Basic board information group. This defaults to forums/. When you change this value, whatever used to be at the index will now be accessible by its default URL. Any links that point to the new index route will simply point to the http://example.com/community/ or http://example.com/community/index.php URL instead.
To change this, you must first identify the route of the page you want to set as the index. This is discussed in the Route filters section. Here are a few examples:
- Forum list:
forums/ - A page node:
pages/page-name/(change page-name as necessary) - The recent activity list:
recent-activity/ - The resource manager:
resources/(only applies with the necessary add-on) - A custom portal:
portal/(you may need to change this route depending on the portal add-on)
After changing the index route, you should check that the index URL displays the content you expect.
Image and link proxy
It may be advantageous for your site to act as a proxy for any hot-linked images and links posted in user messages.
Proxying images can have several benefits, including the assurance that the image will remain available to your visitors even if the original image is removed from its source site, and allowing you to track metrics of how many times images have been viewed by your visitors.
Note
Acting as an image proxy will incur an increase in the amount of bandwidth used by your site, as your own server will be responsible for fetching the original image, and then serving it to any visitors who request it.
To enable the image and or link proxying service, visit the Image and link proxy section of the options system.
Here, you can set parameters for your proxy, including how often your server will check for updates of the original source image and how large images can be before your site will opt to keep them hot-linked instead of proxying them.
Advanced options
While the majority of XenForo’s options are visible and editable at all times, there are some options that are kept behind the curtain of ‘advanced mode’ in order to prevent accidental editing of important settings, and to keep page clutter to a minimum and show only options that are commonly edited.
To access advanced options, either click the Show advanced options option in the footer of the gears menu in the header of the Admin control panel, or click the Show advanced options button on the main option groups listing page.
Это так сказать своеобразная, маленькая шпаргалка для всех, кто впервые столкнулся с настройкой прав в XenForo, я даже так думаю и не только для новичков.
Так как была замечена тенденция, что часто задаются вопросы о проблемах, которые возникают из-за не верного понимания концепции распределения прав в XenForо.
Ну, что же, постараемся заполнить этот пробел.
Вот несколько советов, которых нужно придерживаться, при настройке прав.
1) Все пользователи, должны находится в группе Зарегистрированные (Registered) в качестве основной, это так же касается Модераторов, Супер-модераторов, Администраторов и Супер-администраторов. Не зависимо как Вы могли переименовать эту группу из дефолтной — Зарегистрированные (Registered), ид этой группы остается неизменным, это 2.
2) Установите группе пользователей Зарегистрированные (Registered), минимальные права доступа, которыми должны на Ваш взгляд, обладать все пользователи.
Выставьте эти значения в правах на «Разрешено«, для нужных на Ваш взгляд пунктов, остальные оставьте в значении «Не установлено (Нет)«.
Важно, не используйте значение «Никогда», это может привести к не предсказуемым последствиям.
3) Для всех дополнительных групп для пользователей, достаточно только изменить определённые разрешения, которыми на Ваш взгляд, будут отличатся от основной группы Зарегистрированные (Registered), все остальные разрешения можно опять же оставить в «Не установлено (Нет)«.
Важное замечание, все остальные группы для пользователей, прибавляются к основной в качестве дополнительной (вторичной).
Почему именно так, причина в том, что такая система, позволяет с лёгкостью управлять правами, изменив всего одно разрешение.
К примеру, давайте предположим, что возможности — «Редактирование своих сообщений», у обычных пользователей нет, соответственно в настройках прав для группы Зарегистрированные (Registered), тогда оставим данный пункт в положении «Не установлено (Нет)«.
Тогда соответственно, у Вас есть группа пользователей, для которой Вы хотите разрешить «Редактирование своих сообщений», тогда создадим группу (к примеру «Проверенные») и установим данный пункт прав в положении «Разрешено«, а все остальные так и оставим в «Не установлено (Нет)«.
И соответственно, добавим в эту группу доверенных пользователей, просто добавив дополнительную (вторичную) группу (в нашем случае «Проверенные»).
Как видим, по сути, это всего лишь одно маленькое разрешение, которое отличает группы.
Но, зато теперь, если мы хотим предоставить кому-то из пользователей, возможность редактировать свои сообщения, просто добавляем этого пользователя в дополнительную группу (в нашем случае «Проверенные»).
Тем не менее, давайте рассмотрим ещё один пример.
Допустим, у Вас было разрешено пользователям «Удаление своих сообщений», но по какой-то причине, Вы решили убрать данную возможность.
Так как все пользователи входят в основную группу Зарегистрированные (Registered) и данный пункт прав «Удаление своих сообщений» установлен в положении «Разрешено«, то для того что бы запретить данную возможность для всех пользователей, Вам достаточно установить в положение «Не установлено (Нет)«.
А теперь представим, что у Вас пользователи находятся в нескольких группах и эти группы у Вас основные и у каждой данный пункт прав «Удаление своих сообщений» установлен в положении «Разрешено«.
Представьте сколько придётся редактировать, что бы изменить одно значение, по сравнению с выше приведённым примером.
Вот реальный пример правильной настройки прав, используемый на одном форуме.
Зарегистрированные пользователи не могут редактировать или удалять свои сообщения.

Те же, кто находятся в доверенной группе (в нашем примере «Участники») могут.

Общий вид, если объединить правила для пользователей находящихся в двух группах, буде выглядеть так.

Как видно, нет нужды устанавливать все права в положение «Разрешено«, для доверенной группы (в нашем примере «Участники»), так как эти права уже установлены для группы Зарегистрированные (Registered).
Тот же принцип применяется к любым дополнительным правам ( после установки дополнений ), а так же группам пользователей, которые Вы можете создать.
Это также относится и к категориям и разделам, Вам просто нужно устанавливать в положение «Разрешено» или «Не установлено (Нет)«, определённые права для конкретных групп, как Вам нужно, но придерживая принципа наследования прав.
Чем больше у Вас групп пользователей, тем более становиться понятно, выгодность такого подхода к распределению прав.