Содержание
- Способ 1: Настройка локальной политики
- Способ 2: Переустановка RSAT
- Способ 3: Перерегистрация библиотеки wups2
- Вопросы и ответы
Столкнуться с ошибкой с кодом 0x8024001d можно при установке или обновлении компонента Remote Server Administration Tools (RSAT), позволяющего управлять Windows 10 с удаленного клиентского компьютера. Сбой установки может быть вызван повреждением файлов RSAT, некоторых ключей реестра, а также некорректных настроек политик Windows.
Способ 1: Настройка локальной политики
Наиболее вероятной причиной описываемой ошибки является недоступность необходимых пакетов компонента при попытке его установки через доменный WSUS. Чтобы Windows 10 смогла скачать RSAT непосредственно из «Центра обновлений», в локальных политиках нужно включить и настроить один параметр.
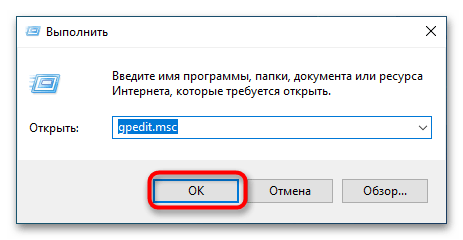
- Откройте «Редактор локальных групповых политик», для чего выполните в вызванном нажатием комбинации Win + R окошке команду
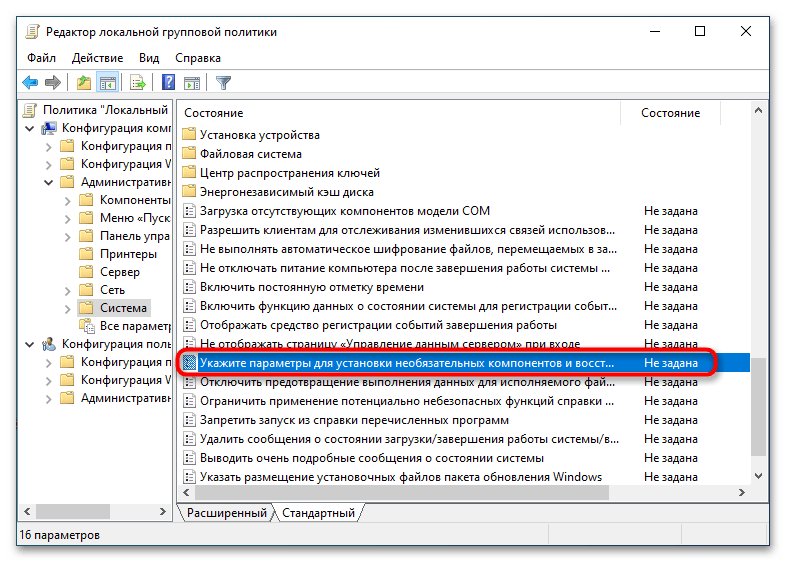
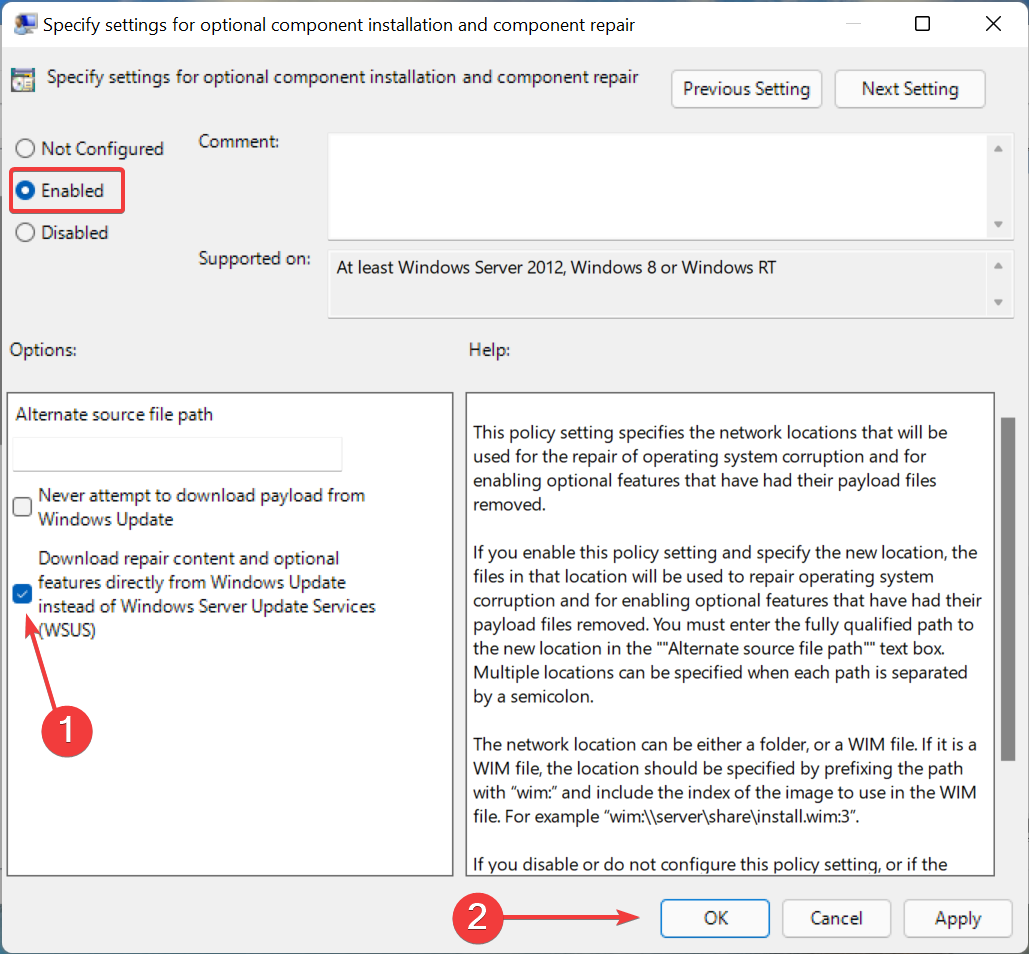
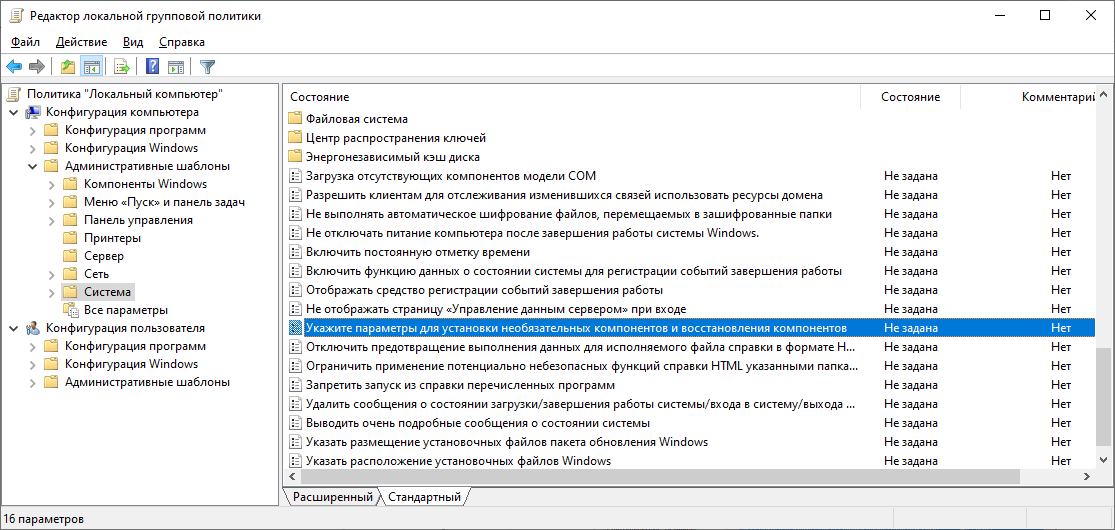
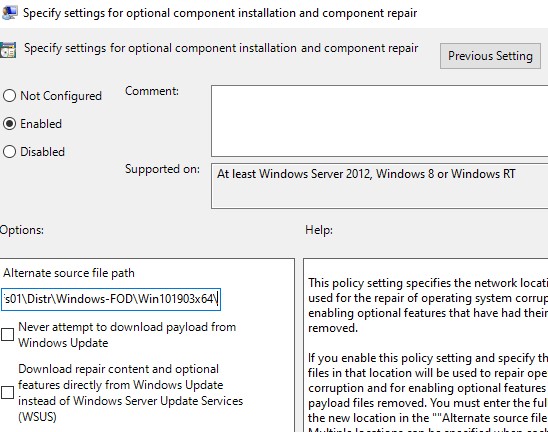
gpedit.msc. - В левой колонке открывшейся оснастке перейдите по цепочке «Конфигурация компьютера» → «Административные шаблоны» → «Система» и дважды кликните по политике «Укажите параметры для установки необязательных компонентов и восстановления компонентов» в правой колонке, чтобы открыть ее настройки.
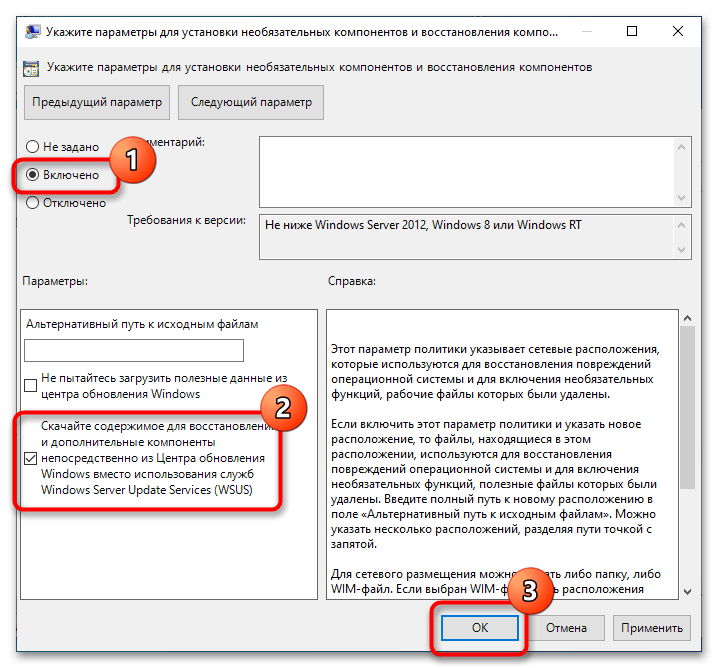
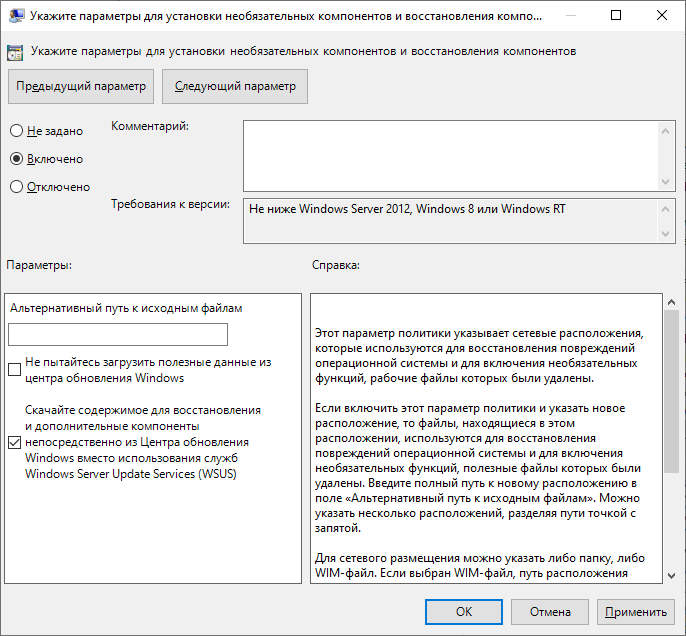
- Включив политику, отметьте флажком опцию «Скачайте содержимое для восстановления и дополнительные компоненты непосредственно из Центра обновления Windows вместо использования служб Windows Server Update Services (WSUS)». Сохраните настройки.
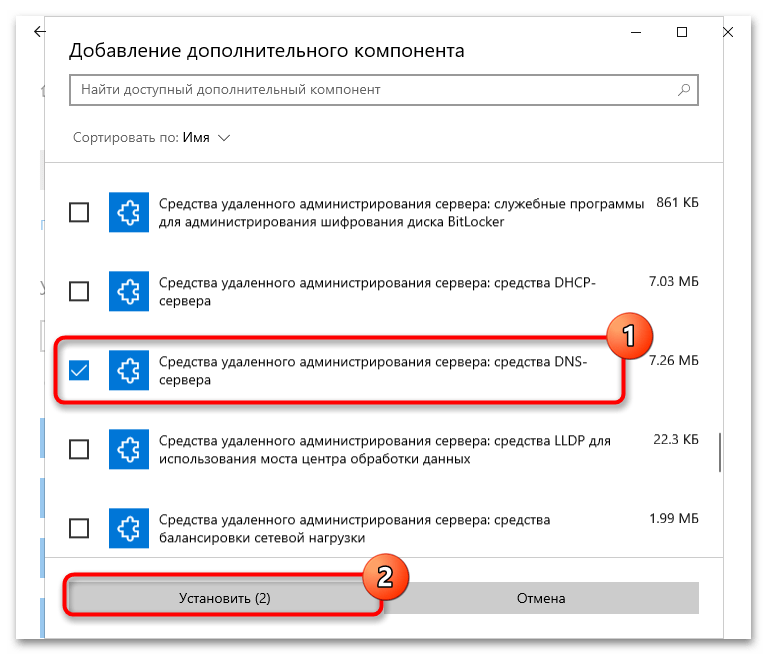
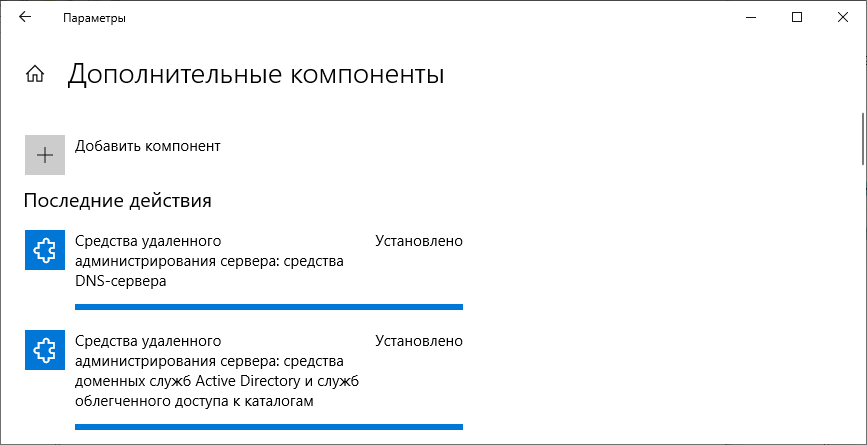
Готово, можете устанавливать RSAT через приложение «Параметры», перейдя в раздел «Приложения и возможности» → «Добавить компонент» → «Дополнительные компоненты».
Поскольку ошибка также может быть вызвана повреждением файлов компонента, стоит попробовать выполнить переустановку средства удаленного администрирования сервера.
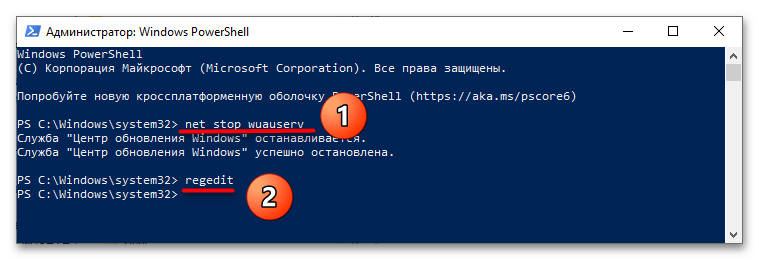
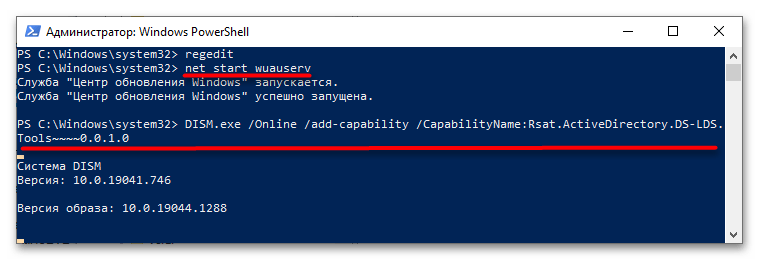
- Запустите от имени администратора «Командную строку» или «Windows PowerShell».
- Выполните в ней команду
net stop wuauserv, чтобы остановить службу компонента обновления. - Откройте «Редактор реестра», для чего тут же в консоли выполните команду
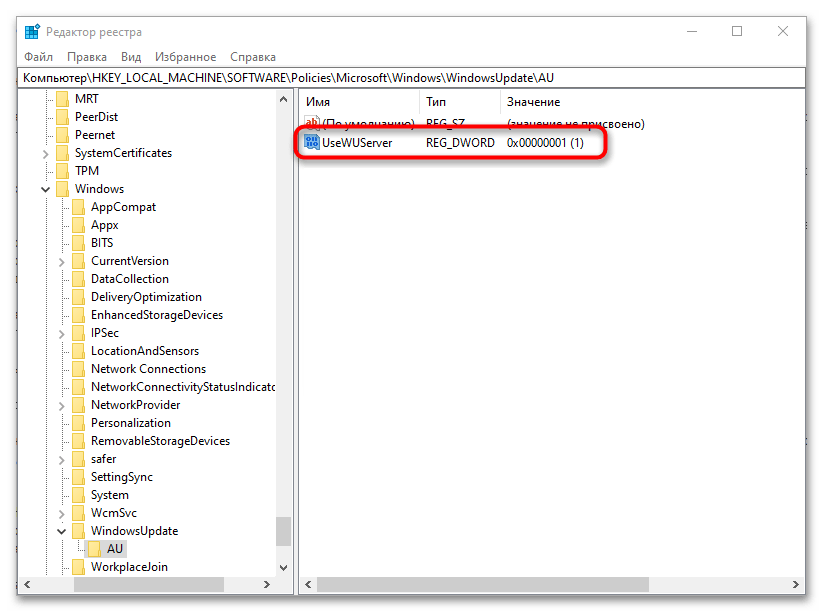
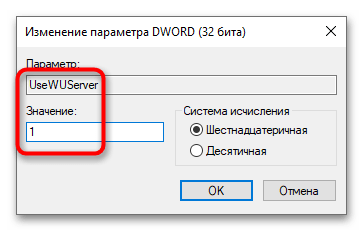
regedit. - Разверните в левой колонке ветку
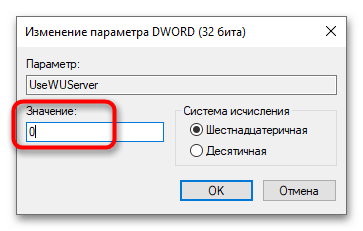
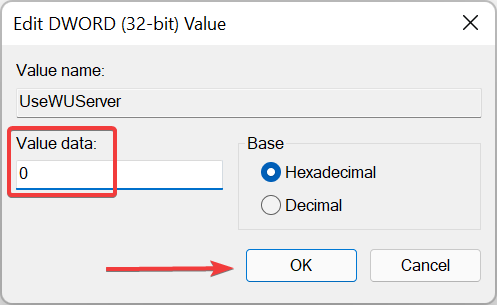
HKLMSOFTWAREPoliciesMicrosoftWindowsWindowsUpdateAUи дважды кликните по параметру «UseWUServer» в правой колонке. - В открывшемся диалоговом окошке измените его значение с «1» на «0». Не закрывайте окно редактора.
- Вернитесь в «Командную строку» и выполните одну за другой две эти команды:
net start wuauserv
DISM.exe /Online /add-capability /CapabilityName:Rsat.ActiveDirectory.DS-LDS.Tools~~~~0.0.1.0 - Вернитесь в «Редактор реестра» и восстановите исходное значение «UseWUServer», то есть «1».

Перезагрузите компьютер. В результате RSAT будет переустановлен.
Способ 3: Перерегистрация библиотеки wups2
Менее трудоемким, но и менее надежным решением является перерегистрация системной библиотеки wups2.dll. Воспользоваться этим способом вы можете, если модули RSAT не устанавливаются в разделе «Дополнительные компоненты» приложения «Параметры».

- Откройте «Редактор реестра» командой
regeditкак было показано выше. - Перейдите к ключу
HKLMSOFTWAREPoliciesMicrosoftWindowsWindowsUpdateAUи измените значение параметра UseWUServer с «1» на «0» (см. шаги 4-5 в предыдущем способе). - Откройте от имени администратора «Командную строку» или «Windows PowerShell» и последовательно выполните три эти команды:
net stop wuauserv
regsvr32 %windir%system32wups2.dll
net start wuauserv - Восстановите исходное значение параметра «UseWUServer» (см. шаг 7 в предыдущем способе).

Перезагрузите компьютер и попробуйте установить RSAT через «Дополнительные компоненты» (как это сделать, написано в конце Способа 1).
Если избавиться от ошибки 0x8024001d не получается, можно решиться на радикальную меру — сброс Windows 10 к исходному состоянию.
Подробнее: Возвращаем Windows 10 к заводскому состоянию
Еще статьи по данной теме:
Помогла ли Вам статья?
by Kazim Ali Alvi
Kazim has always been fond of technology, be it scrolling through the settings on his iPhone, Android device, or Windows. And at times, unscrewing the device to take… read more
Updated on February 5, 2023
- RSAT is an important component for IT administrators but many couldn’t install it in Windows 11 due to some error.
- It’s only available on the Pro and Enterprise edition of Windows 11.
- If you couldn’t install RSAT, use the PowerShell command, modify the Registry, or try the other methods.
RSAT or Remote Server Administration Tools is a component that allows administrators to remotely manage the other computers running the same OS. But, if things are not right, you might not be able to install RSAT in Windows 11.
There are a bunch of errors that you encounter here, for instance, the RSAT installer encountered an error 0x8024001d. No matter the cause, there are a bunch of methods that prove effective in every situation.
So, if you couldn’t install RSAT in Windows 11 yet, execute the fixes listed in the next section.
What can I do if I couldn’t install RSAT in Windows 11?

NOTE
Remember that RSAT is only available for the Pro and Enterprise edition of Windows 11. If you are running the Home edition, first make the upgrade and then proceed with the installation.
1. Use the PowerShell command
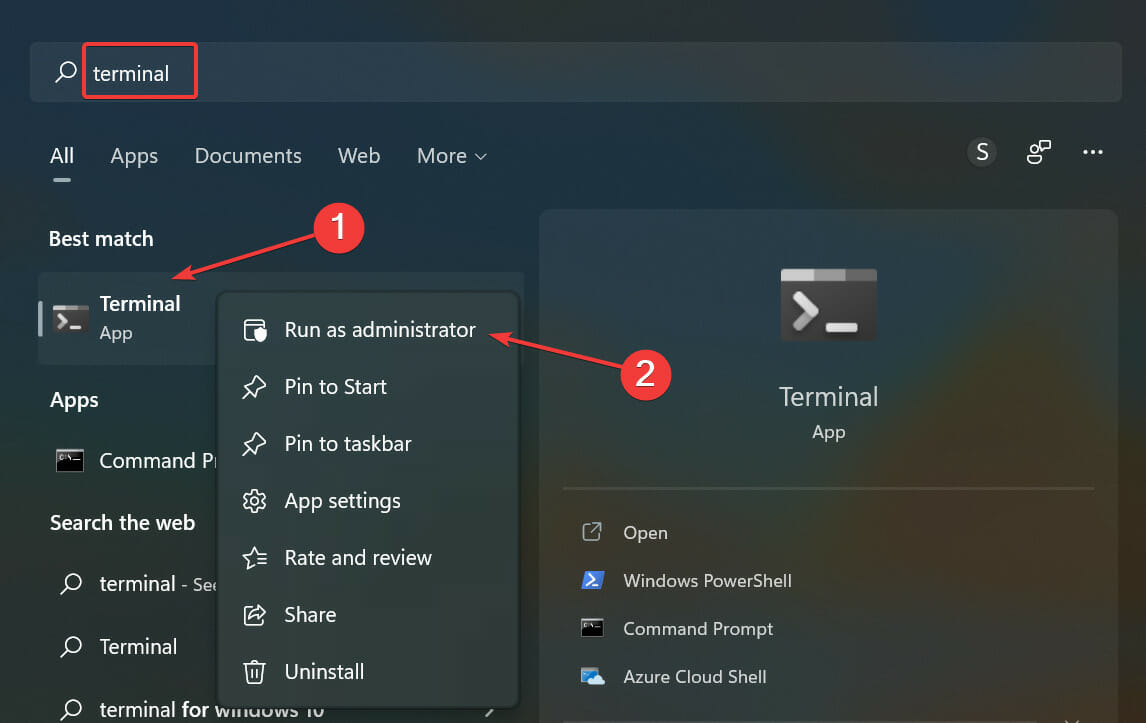
- Press Windows + S to launch the Search menu, enter Terminal in the text field, right-click on the relevant search result and select Run as administrator.

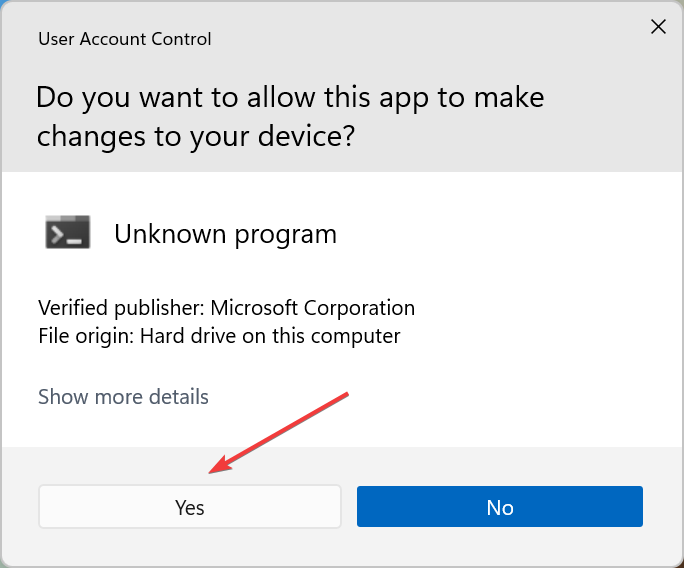
- Click Yes on the UAC (User Account Control) prompt that pops up.

- Now, paste the following command in PowerShell and hit Enter to install RSAT:
Get-WindowsCapability -Name RSAT* -Online | Add-Windows Capability -Online
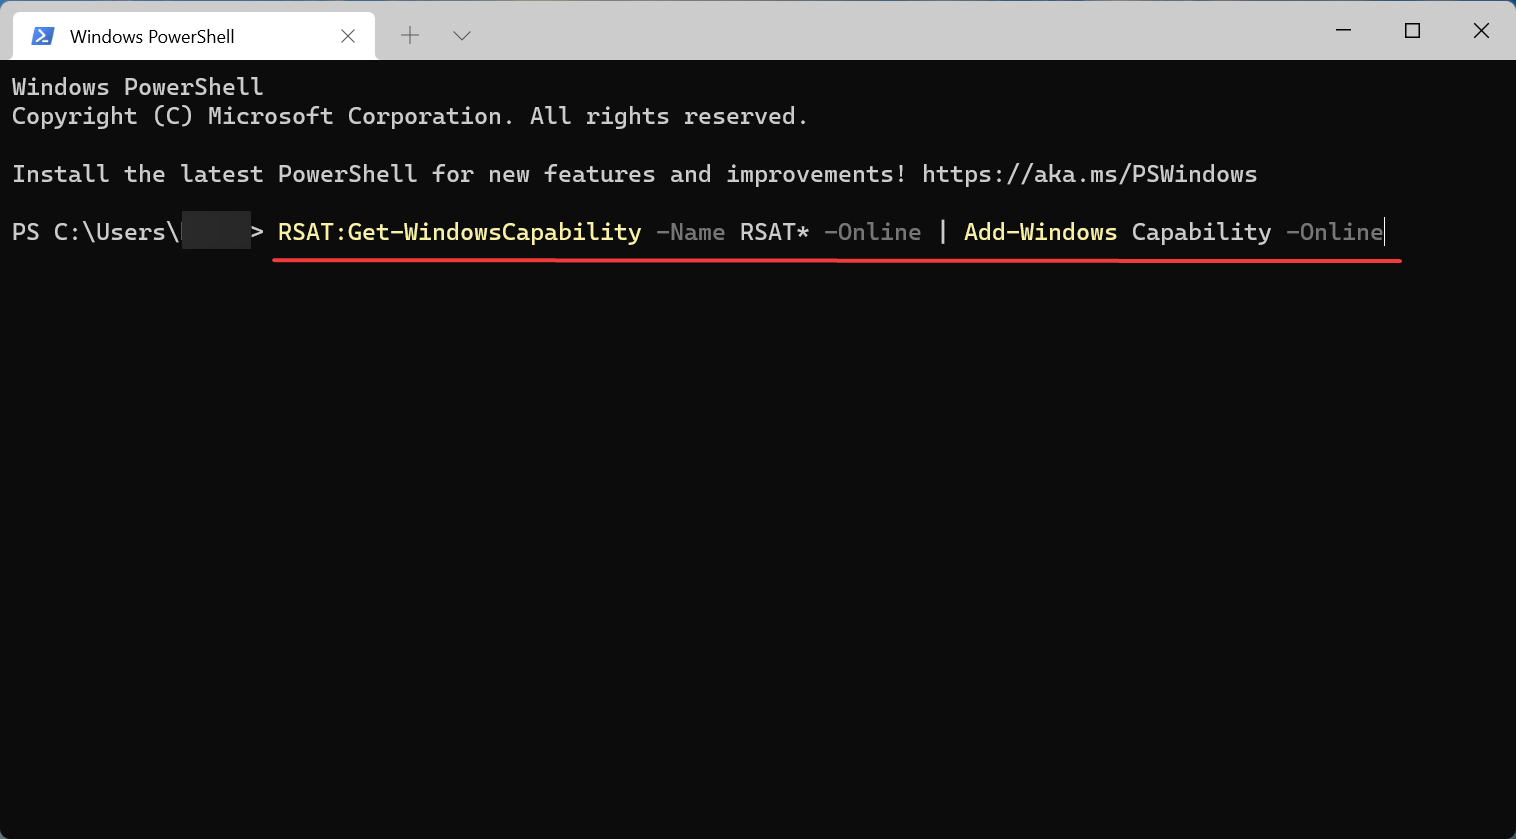
This is probably the quickest way to install RSAT but is not known to many. Also, the chances of encountering an error while installing RSAT in Windows 11 using PowerShell are minimum. So, make sure to try this method, and if it doesn’t work, head to the next one.
2. Modify the Registry
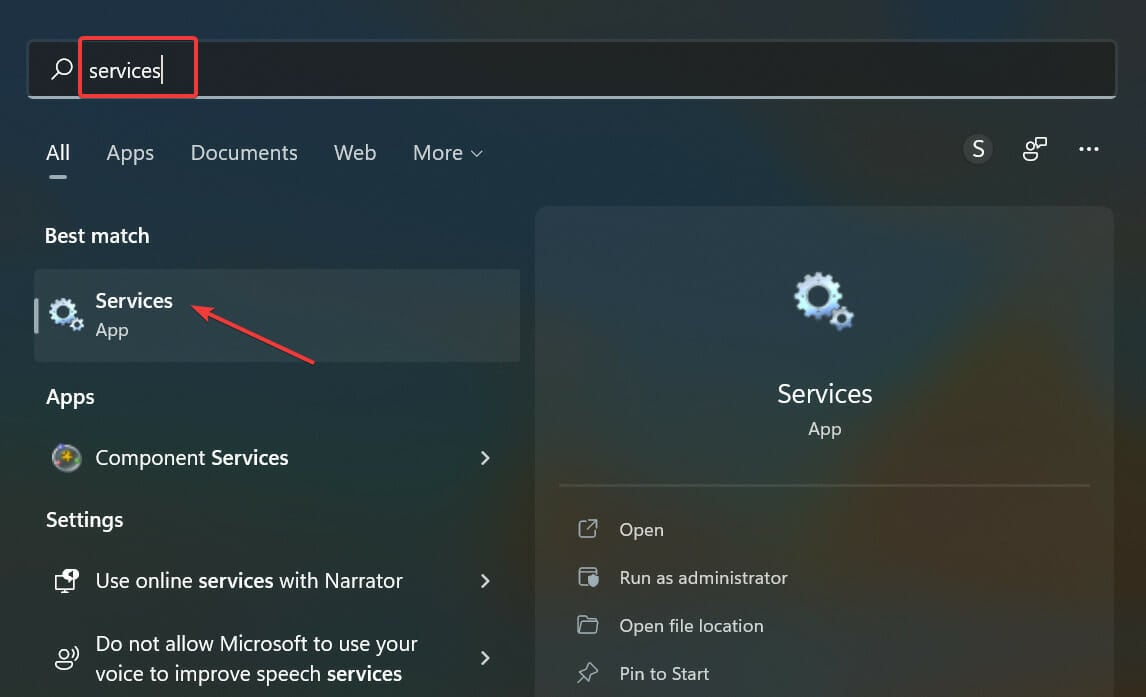
- Press Windows + S to launch the Search menu, enter Services in the text field at the top, and click on the relevant search result.

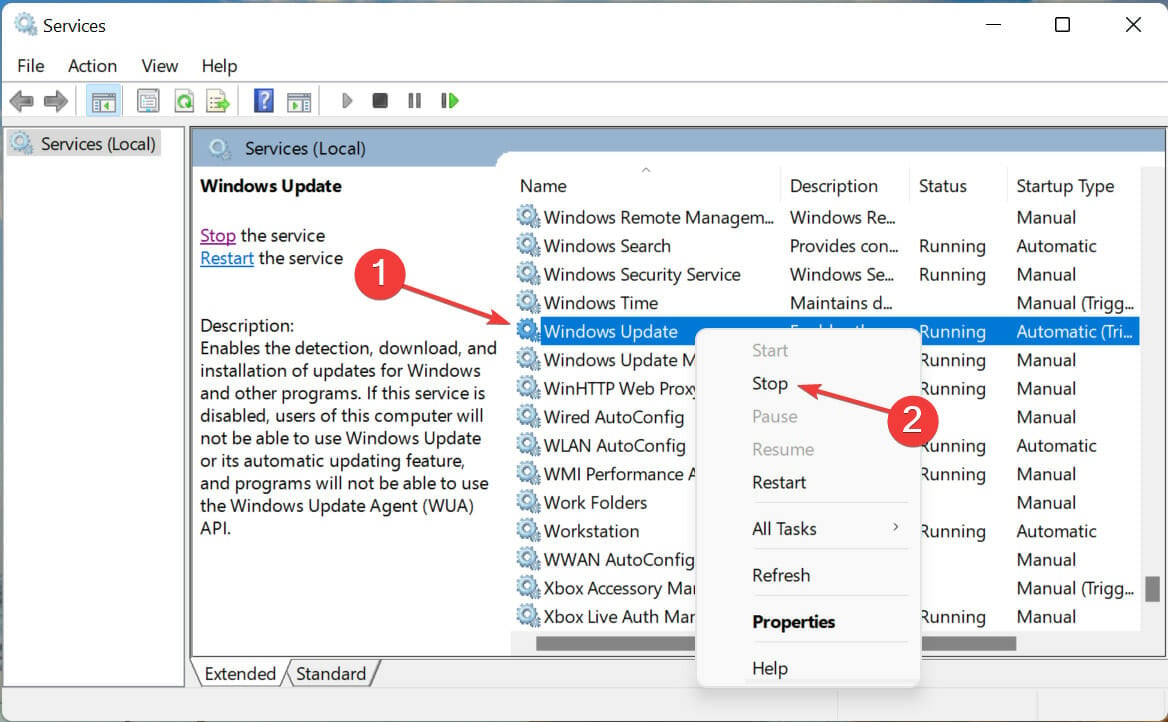
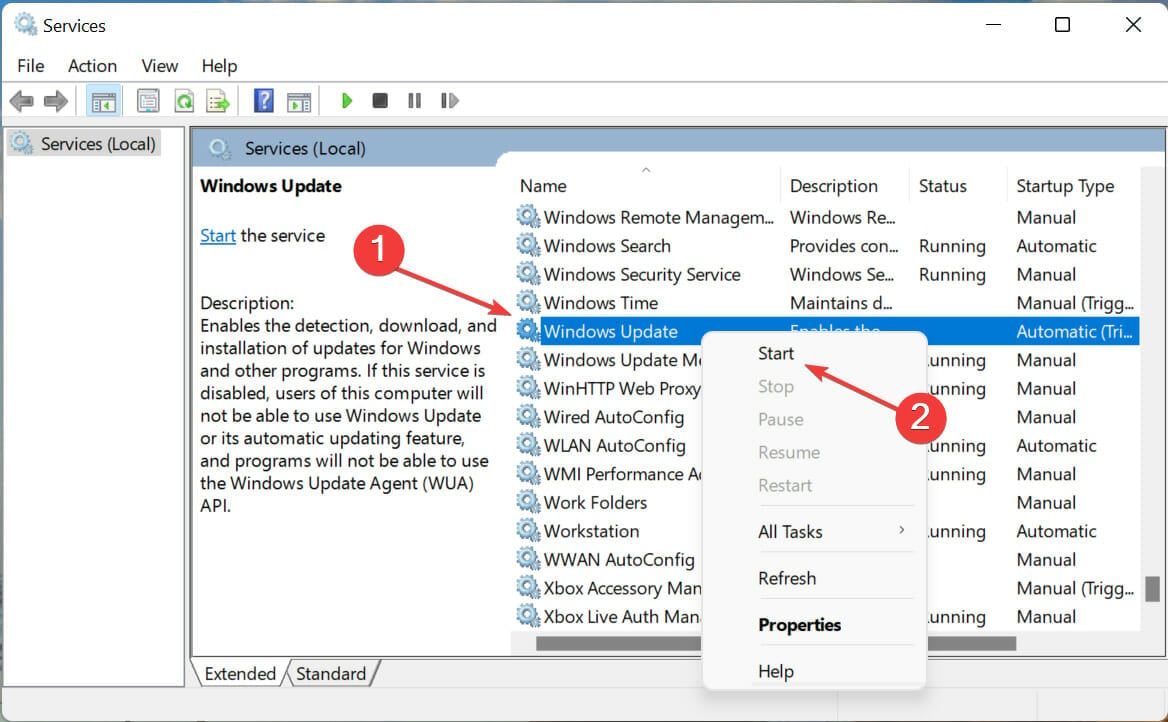
- Locate the Windows Update service, right-click on it, and select Stop from the context menu.

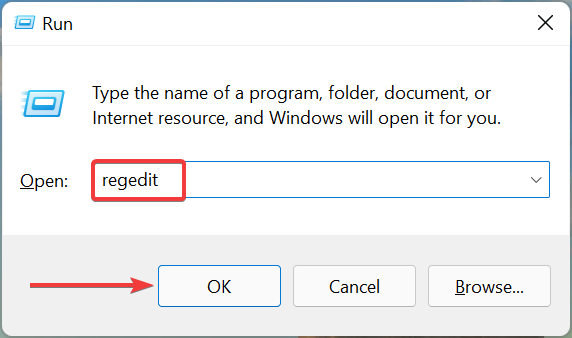
- Now, press Windows + R to launch the Run command dialog box, type/paste regedit in the text field, and either click on OK or hit Enter to launch the Registry Editor.

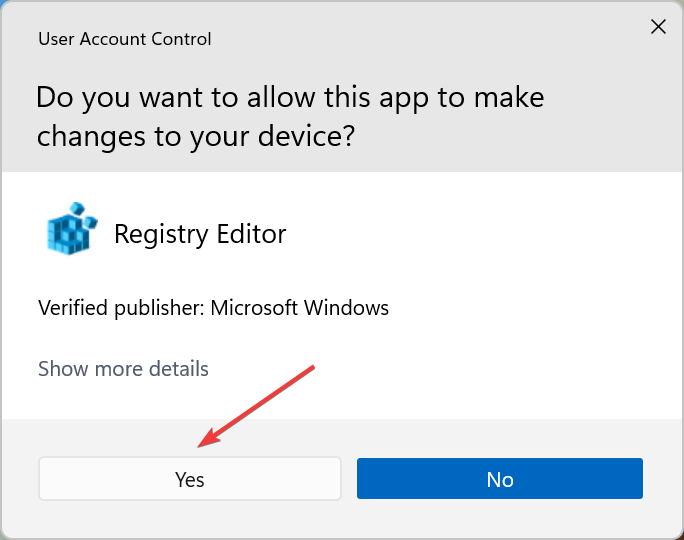
- Click Yes on the UAC prompt that appears.

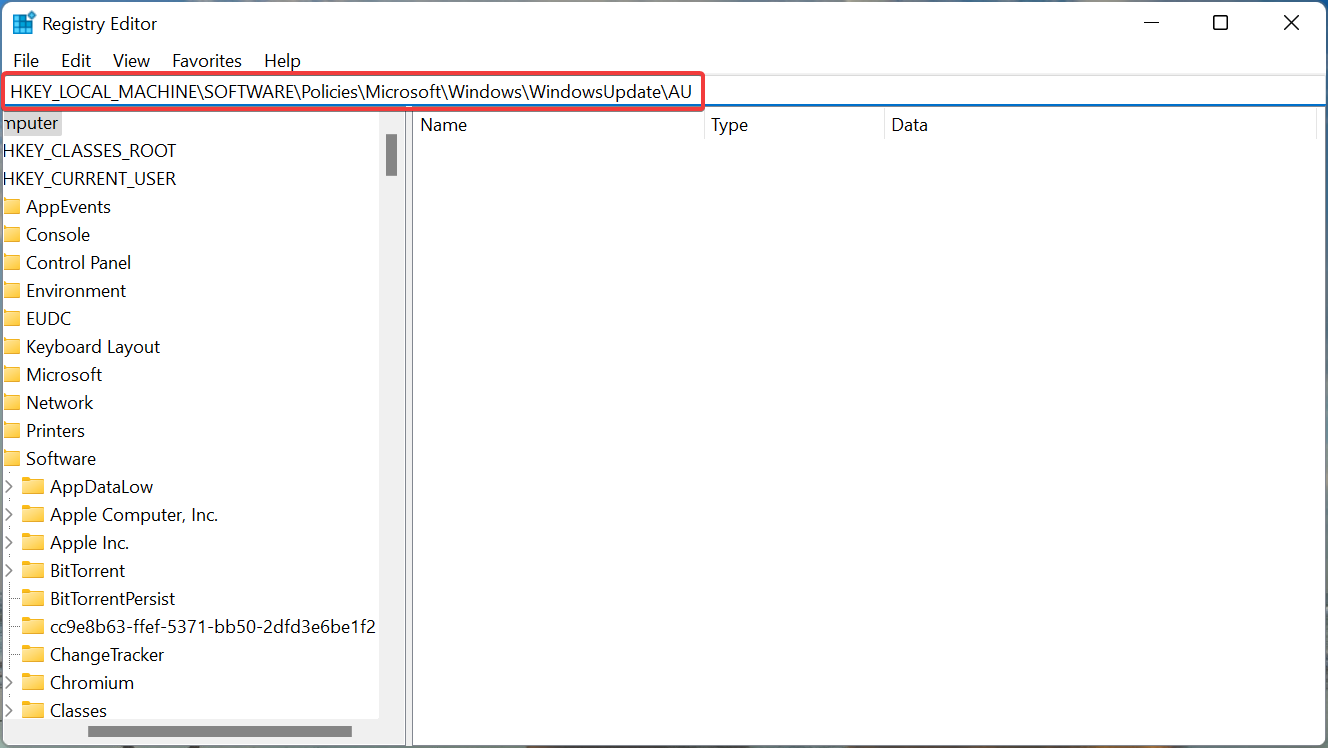
- Paste the following path in the address bar at the top, and hit Enter:
HKEY_LOCAL_MACHINESOFTWAREPoliciesMicrosoftWindowsWindowsUpdateAU
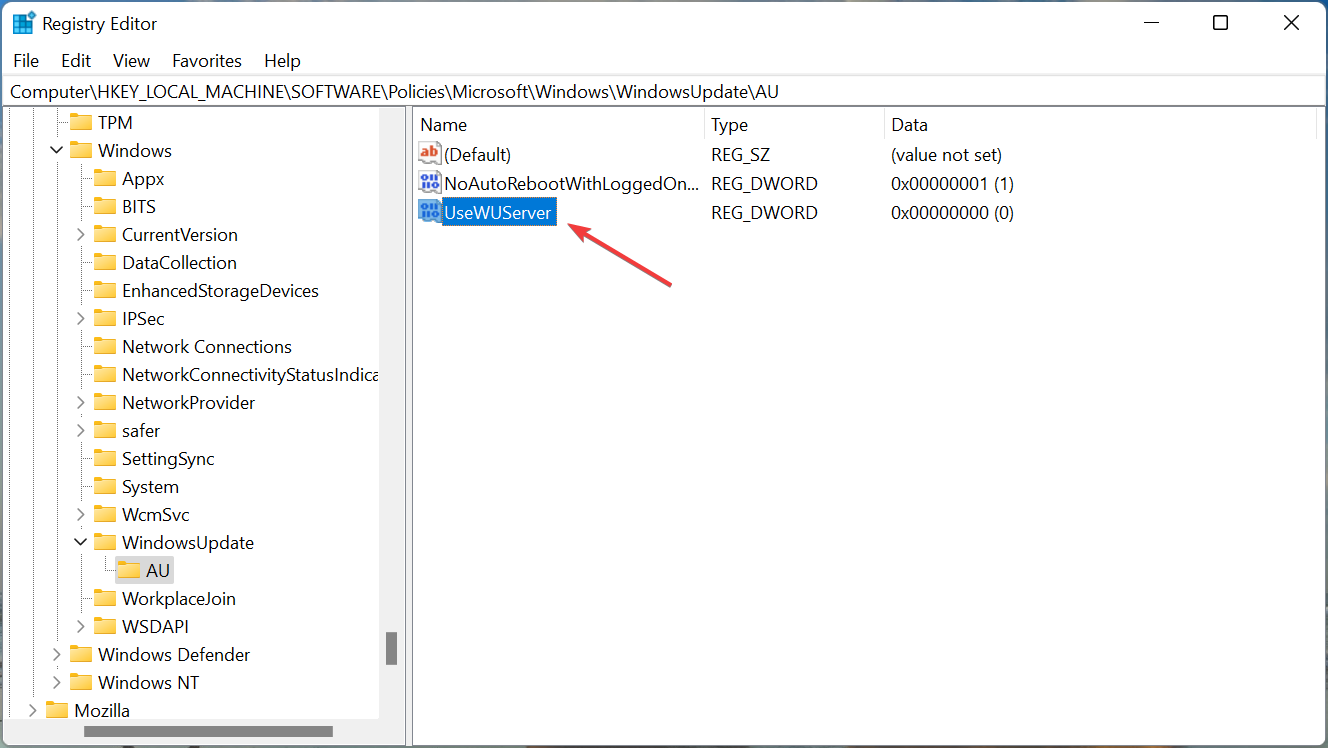
- Double-click on the UseWUServer key.
- Next, enter 0 under Value Data and click on OK to save the changes.

- Once done, again go to the Services app, right-click on Windows Update, and select Start from the context menu.
Restart the computer for the changes to come into effect and check if you are able to install RSAT in Windows 11.
- Windows 11 Advanced Options Missing: How to Get Them Back
- How to Quickly Change the Drive Letter in Windows 11: 5 Ways
3. Make changes to the group policy
- Press Windows + R to launch the Run command, type gpedit in the text field, and either click OK or hit Enter to launch the Local Group Policy Editor.
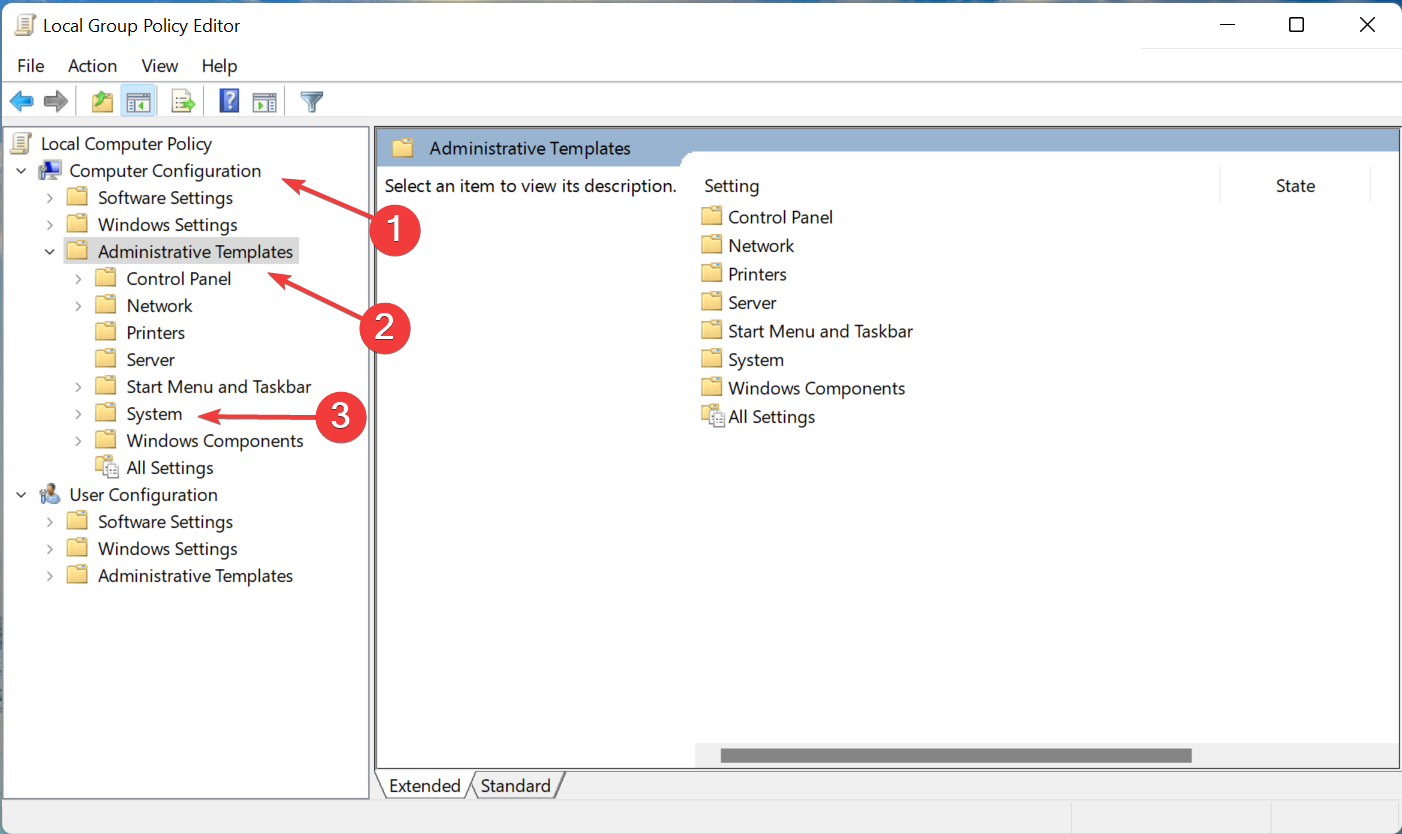
- Now, double-click on Administrative Templates under Computer Configuration and then on System from the options under it.

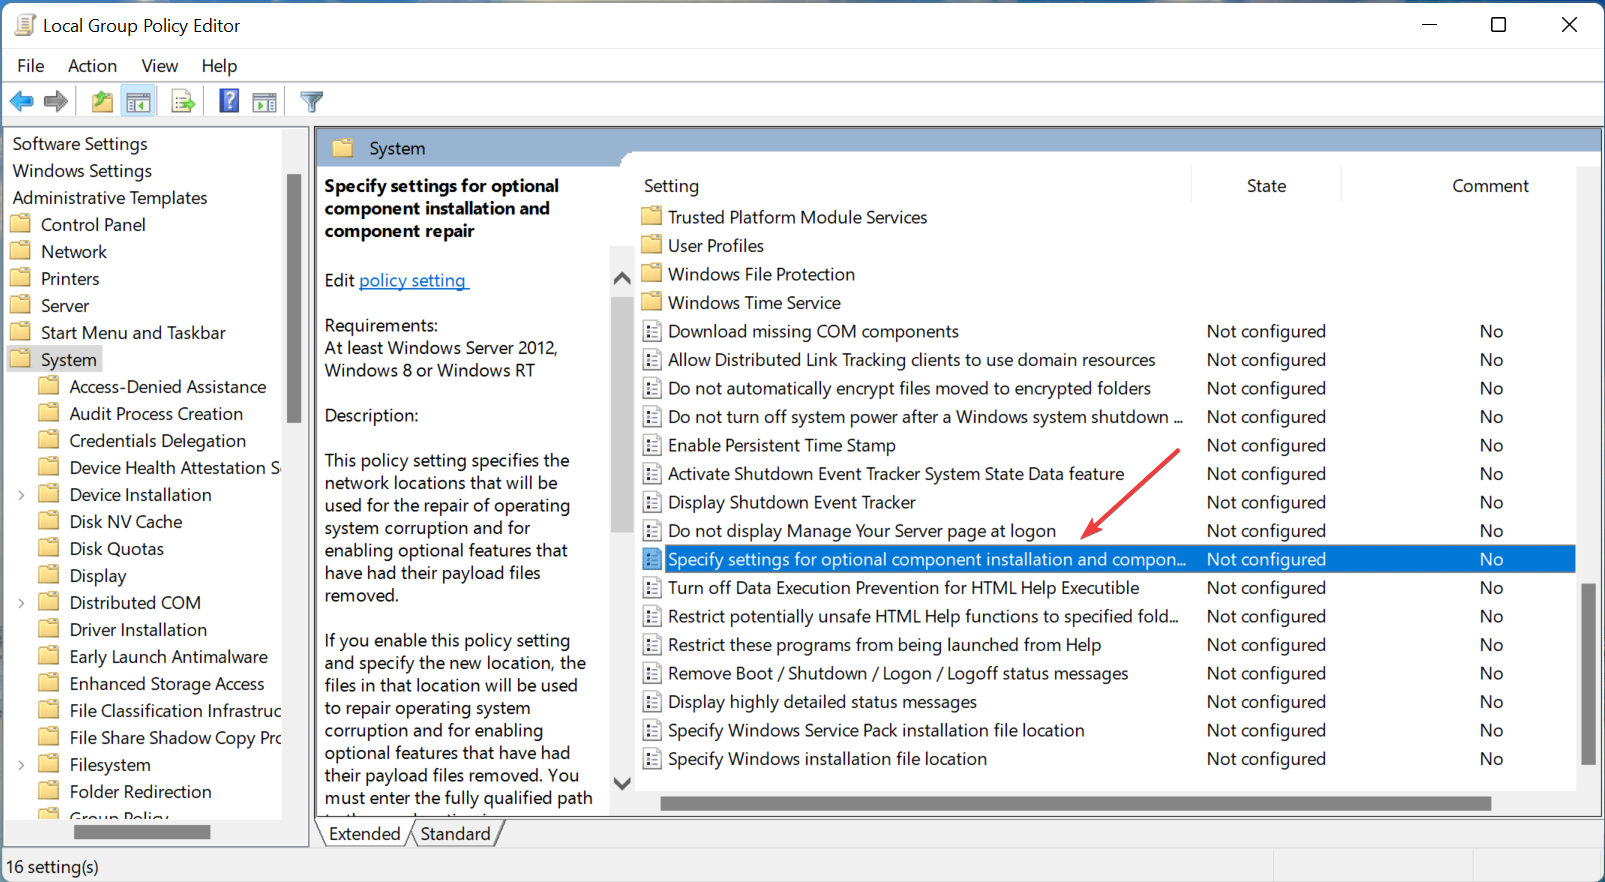
- Double-click on the Specify settings for optional component installation and component repair policy on the right.

- Next, select Enabled from the top, tick the checkbox for Download repair content and optional features directly from Windows Update instead of Windows Server Update Services (WSUS), and then click on OK at the bottom to save the changes.

- Once done, restart the computer for the changes to come into effect.

The three methods listed here should have helped you install RSAT in Windows 11, and prevented or bypassed any error.
Also, if RSAT crashes frequently, learn how to fix it because this indicates compatibility issues and can lead to problems. Besides, learn all the ways to get RSAT in Windows 11.
Tell us which fix worked for you in the comments section below.
![]()
Newsletter
by Kazim Ali Alvi
Kazim has always been fond of technology, be it scrolling through the settings on his iPhone, Android device, or Windows. And at times, unscrewing the device to take… read more
Updated on February 5, 2023
- RSAT is an important component for IT administrators but many couldn’t install it in Windows 11 due to some error.
- It’s only available on the Pro and Enterprise edition of Windows 11.
- If you couldn’t install RSAT, use the PowerShell command, modify the Registry, or try the other methods.
RSAT or Remote Server Administration Tools is a component that allows administrators to remotely manage the other computers running the same OS. But, if things are not right, you might not be able to install RSAT in Windows 11.
There are a bunch of errors that you encounter here, for instance, the RSAT installer encountered an error 0x8024001d. No matter the cause, there are a bunch of methods that prove effective in every situation.
So, if you couldn’t install RSAT in Windows 11 yet, execute the fixes listed in the next section.
What can I do if I couldn’t install RSAT in Windows 11?
NOTE
Remember that RSAT is only available for the Pro and Enterprise edition of Windows 11. If you are running the Home edition, first make the upgrade and then proceed with the installation.
1. Use the PowerShell command
- Press Windows + S to launch the Search menu, enter Terminal in the text field, right-click on the relevant search result and select Run as administrator.
- Click Yes on the UAC (User Account Control) prompt that pops up.
- Now, paste the following command in PowerShell and hit Enter to install RSAT:
Get-WindowsCapability -Name RSAT* -Online | Add-Windows Capability -Online
This is probably the quickest way to install RSAT but is not known to many. Also, the chances of encountering an error while installing RSAT in Windows 11 using PowerShell are minimum. So, make sure to try this method, and if it doesn’t work, head to the next one.
2. Modify the Registry
- Press Windows + S to launch the Search menu, enter Services in the text field at the top, and click on the relevant search result.
- Locate the Windows Update service, right-click on it, and select Stop from the context menu.
- Now, press Windows + R to launch the Run command dialog box, type/paste regedit in the text field, and either click on OK or hit Enter to launch the Registry Editor.
- Click Yes on the UAC prompt that appears.
- Paste the following path in the address bar at the top, and hit Enter:
HKEY_LOCAL_MACHINESOFTWAREPoliciesMicrosoftWindowsWindowsUpdateAU - Double-click on the UseWUServer key.
- Next, enter 0 under Value Data and click on OK to save the changes.
- Once done, again go to the Services app, right-click on Windows Update, and select Start from the context menu.
Restart the computer for the changes to come into effect and check if you are able to install RSAT in Windows 11.
- Windows 11 Advanced Options Missing: How to Get Them Back
- How to Quickly Change the Drive Letter in Windows 11: 5 Ways
- How to Disable Guest Mode in Chrome on Windows 11
- How to Fix the Parameter Is Incorrect Error on Windows 11
- How to Merge Folders in Windows 11: 3 Simple Methods
3. Make changes to the group policy
- Press Windows + R to launch the Run command, type gpedit in the text field, and either click OK or hit Enter to launch the Local Group Policy Editor.
- Now, double-click on Administrative Templates under Computer Configuration and then on System from the options under it.
- Double-click on the Specify settings for optional component installation and component repair policy on the right.
- Next, select Enabled from the top, tick the checkbox for Download repair content and optional features directly from Windows Update instead of Windows Server Update Services (WSUS), and then click on OK at the bottom to save the changes.
- Once done, restart the computer for the changes to come into effect.
The three methods listed here should have helped you install RSAT in Windows 11, and prevented or bypassed any error.
Also, if RSAT crashes frequently, learn how to fix it because this indicates compatibility issues and can lead to problems. Besides, learn all the ways to get RSAT in Windows 11.
Tell us which fix worked for you in the comments section below.
![]()
Newsletter


Remote Server Administration Tools — позволяет администрировать контроллер домена со своего рабочего компа. В моём случае с Windows 10.
RSAT — Remote Server Administration Tools
Есть три способа установки:
- Общий вариант, когда мы качаем пакет и устанавливаем его вручную.
- Через дополнительные компоненты.
- Через PowerShell.
Ошибка 0x8024001d
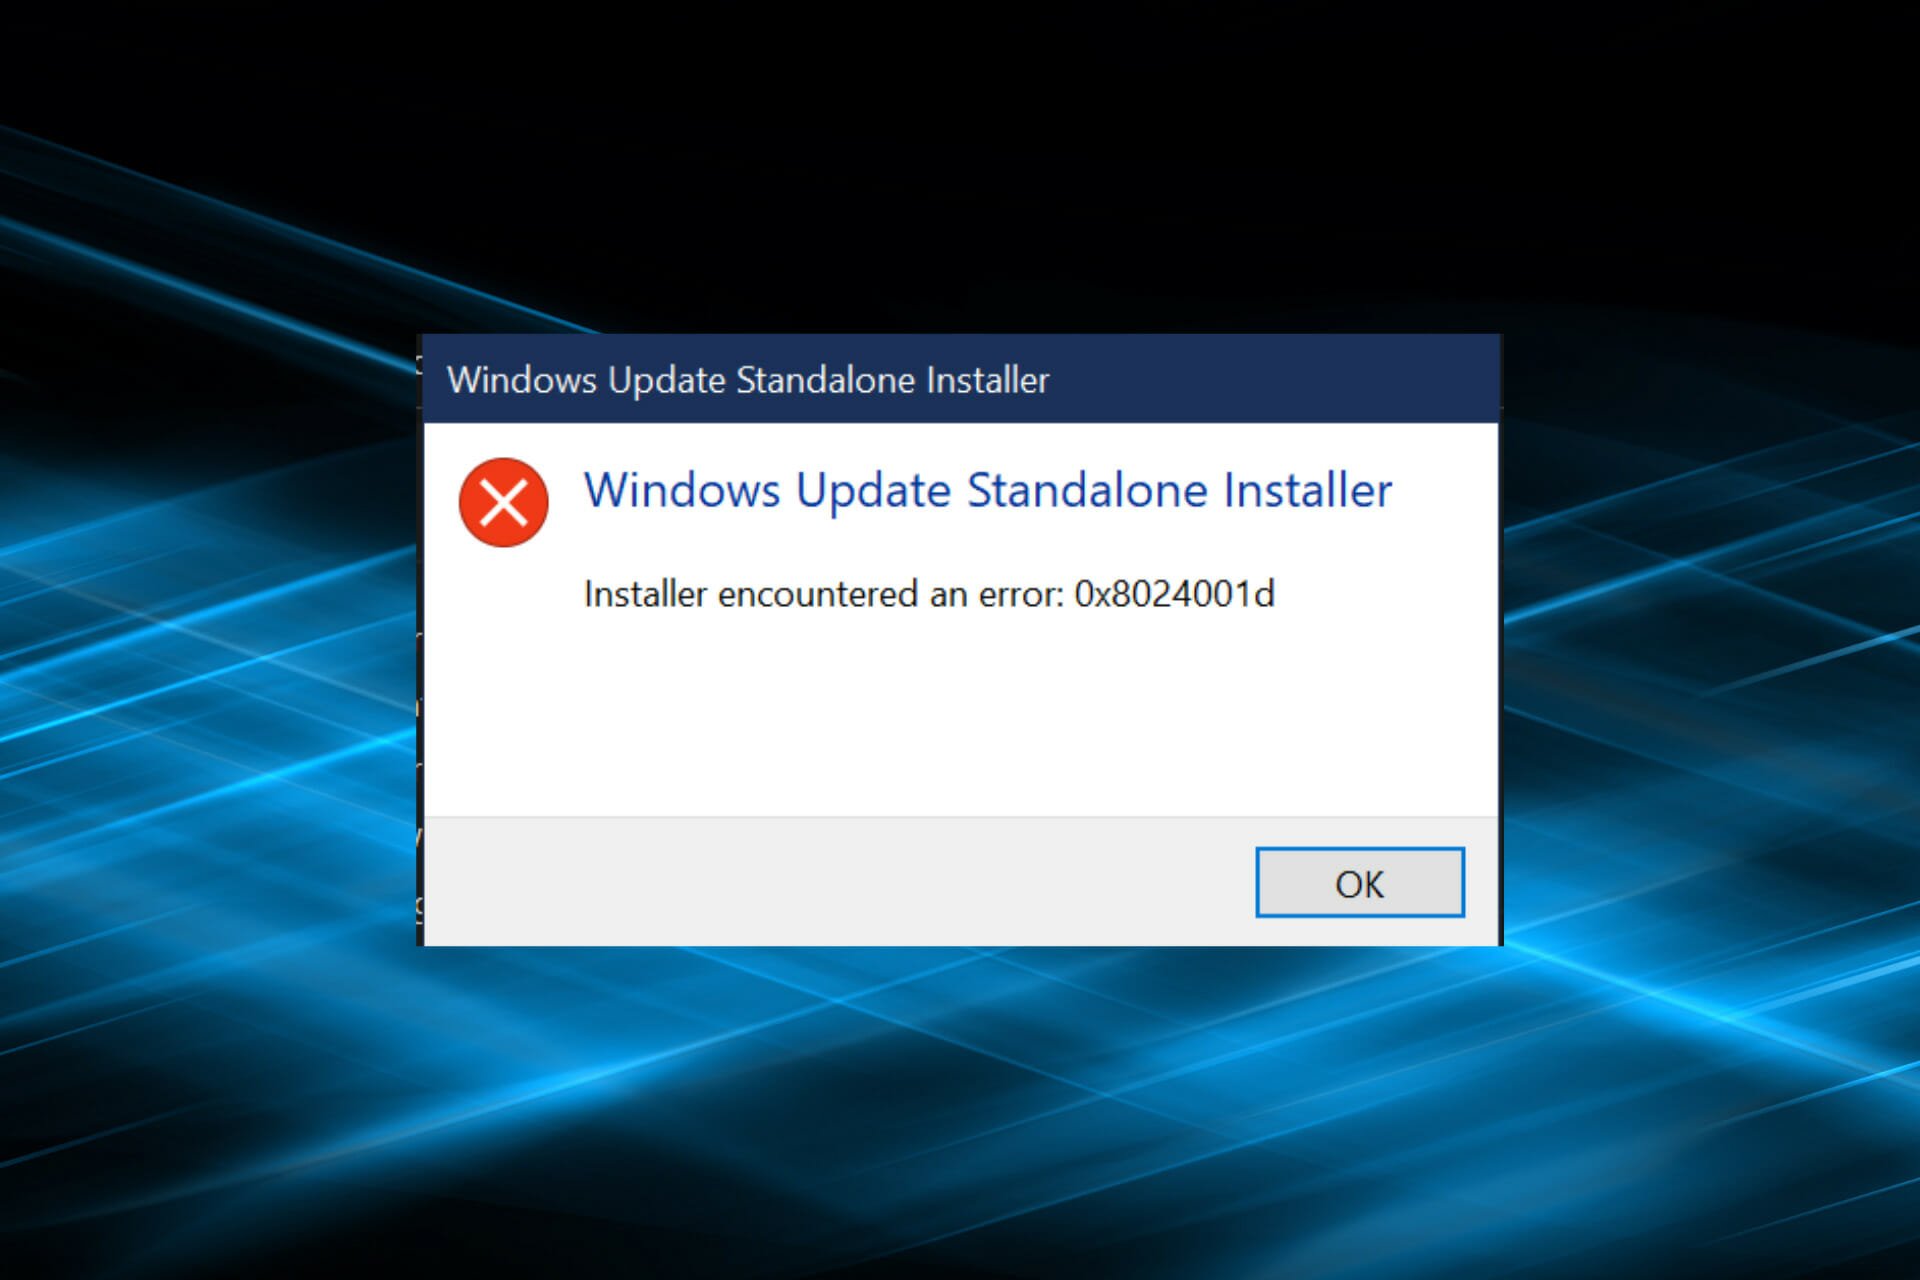
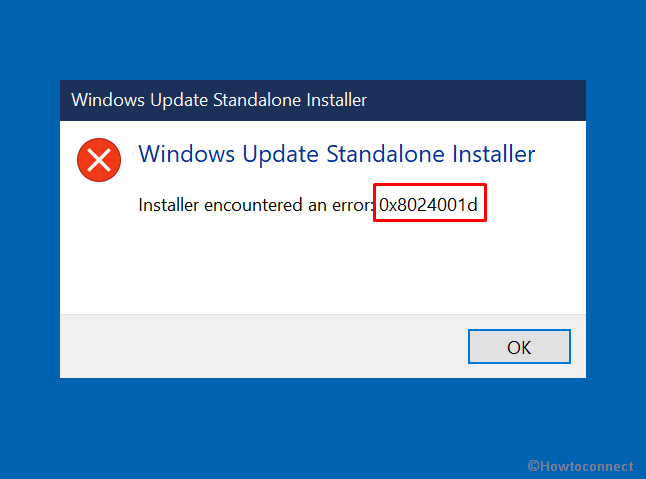
При общем варианте установки вы можете увидеть ошибку:
Установщик обнаружил ошибку 0x8024001d
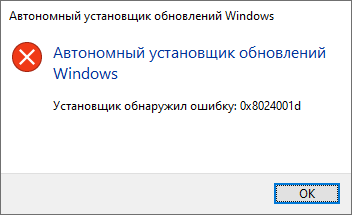
Это означает, что ваша версия Windows больше не поддерживает общий вариант установки RSAT. Устанавливайте через дополнительные компоненты или через PowerShell.
Ошибка 0x800f0954
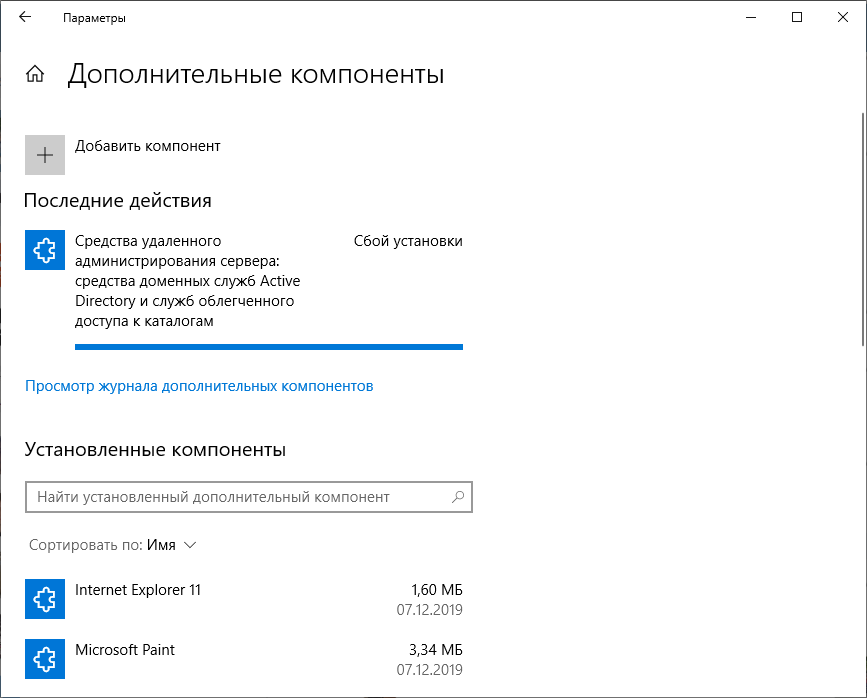
При попытке установить RSAT через дополнительные компоненты вы можете столкнуться с ошибкой «сбой установки».
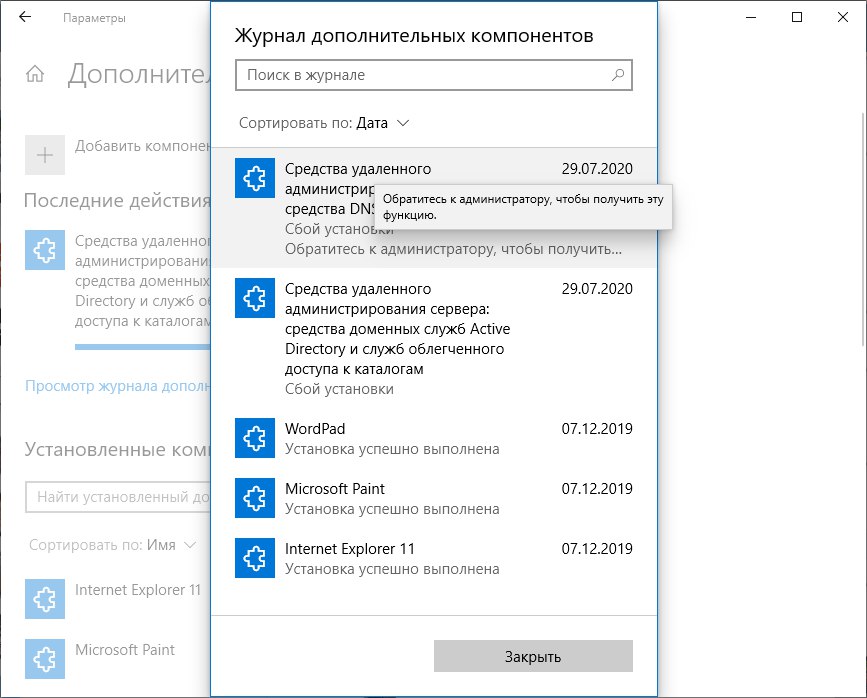
В журнале при этом ничего вразумительного не написано.
При попытке установить RSAT через PowerShell та же ошибка выглядит несколько иначе.
Get-WindowsCapability -Name RSAT* -Online | Add-WindowsCapability -OnlineСбой Add-WindowsCapability. Код ошибки: 0x800f0954
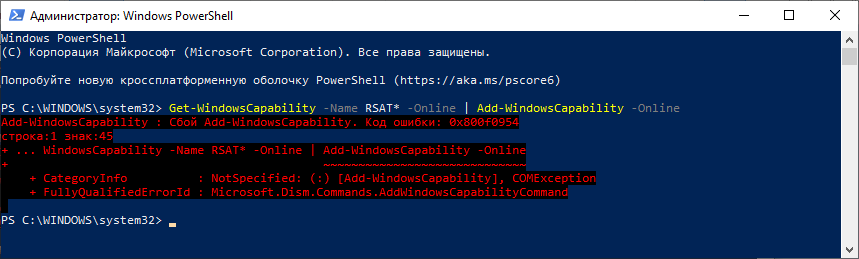
Покопавшись я понял, что проблема кроется в политиках домена, скорее всего, дополнительные компоненты пытаются установиться через доменный WSUS, а нужных пакетов там нет. С одной стороны это и не плохо, нечего юзерам ставить всякое админское ПО. С другой стороны, мне-то оно нужно.
Решим проблему через локальные политики. Запускаем gpedit.msc:
gpedit.msc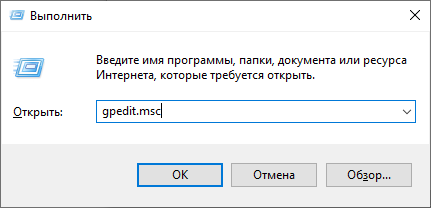
Открывается редактор локальной групповой политики. Нам нужен раздел Конфигурация компьютера > Административные шаблоны > Система > Укажите параметры для установки необязательных компонентов и восстановления компонентов. Или Computer Configuration > Administrative Templates > System > Specify settings for optional component installation and component repair.
Редактируем политику. Включаем и ставим галку «Скачайте содержимое для восстановления и дополнительные компоненты непосредственно из Центра обновления Windows вместо использования служб Windows Server Update Services (WSUS)».
OK.
Теперь, если доступ в Интернет есть, всё установится. Проверяем установку RSAT через дополнительные компоненты.
Проверяем установку RSAT через PowerShell.
Get-WindowsCapability -Name RSAT* -Online | Add-WindowsCapability -Online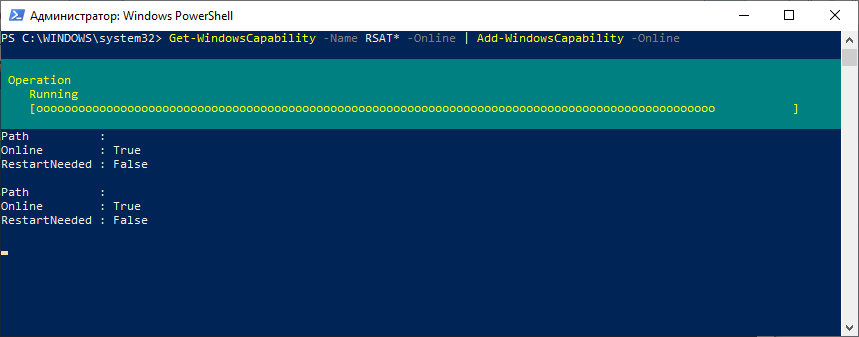
Всё устанавливается.
Набор компонентов RSAT (Remote Server Administration Tools / Средства удаленного администрирования сервера) позволяет удаленно управлять серверными ролями и компонентами на серверах Windows Server с обычной рабочей станции . В RSAT входят как графические MMC оснастки, так и утилиты командной строки, и модули PowerShell. Вы можете установить RSAT как на десктопных версиях Windows 10 или 11, так и на платформе Windows Server. В этой статье мы покажем, как установить RSAT в Windows 10 и Windows 11, и в Windows Server 2022/2019/2022 в онлайн и в офлайн режиме через Feature on Demand из графического интерфейса Windows и через консоль PowerShell.
Содержание:
- Установка RSAT из графического интерфейса Windows 10 через Features on Demand (FoD)
- Установка RSAT в Windows 10 с помощью PowerShell
- Установка RSAT в Windows 11
- Как установить Remote Server Administration Tools в Windows Server 2022,2019,2016?
- Ошибка 0x800f0954 при установке RSAT в Windows 10
- Установка RSAT в Windows 10 в офлайн режиме
- Частые ошибки установки Remote Server Administration Tools в Windows
Установка RSAT из графического интерфейса Windows 10 через Features on Demand (FoD)
До версии Windows 10 1809 пакет удаленного администрирования серверов RSAT (Remote Server Administration Tools) устанавливался в виде MSU обновления, которое нужно было вручную скачивать с серверов Microsoft и устанавливать на компьютерах. При каждом обновлении билда Windows 10 нужно было устанавливать новую версию RSAT. Сейчас на странице загрузки RSAT сайте Microsoft висит следующая надпись:
IMPORTANT: Starting with Windows 10 October 2018 Update, RSAT is included as a set of “Features on Demand” in Windows 10 itself.
Дело в том, что в современных билдах Windows 10 пакет Remote Server Administration Tools не нужно скачивать вручную. Средства его установки уже встроены в образ Windows 10 и доступны через опцию Функции по требованию / Features on Demand.
Дистрибутив Windows 10 не включает в себя установочные файлы RSAT. Для их установки вашему компьютеру нужен прямой доступ в Интернет. Кроме того установить RSAT можно Professional и Enterprise редакциях в Windows 10, но не в Windows 10 Home.
Чтобы установить RSAT в Windows 10 нужно перейти в раздел Settings -> Apps -> Optionla Features -> Add a feature (Параметры Windows -> Приложения -> Дополнительные возможности -> Добавить компонент).
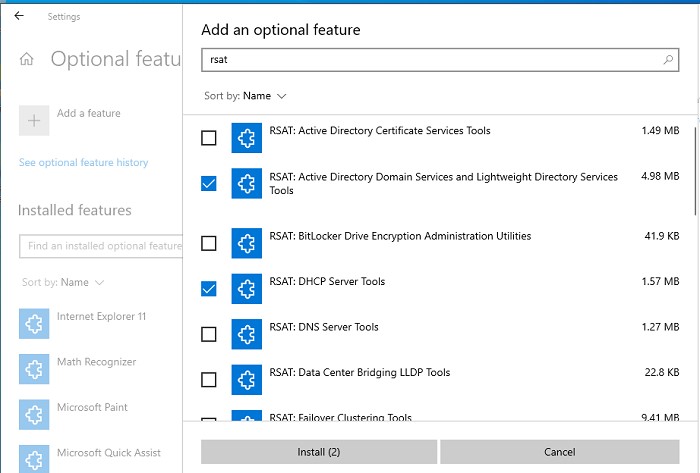
Выберите нужные компоненты RSAT и нажмите Install.
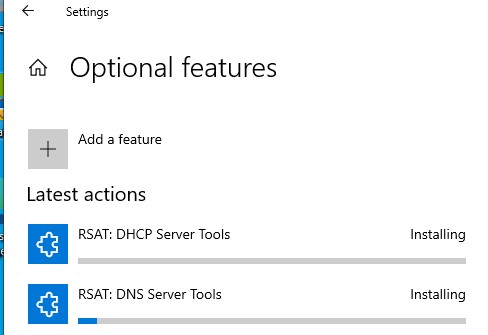
Для установки некоторых компонентов RSAT может потребоваться перезагрузка.
Для Windows 10 доступны следующие инструменты администрирования RSAT:
- RSAT: Active Directory Domain Services and Lightweight Directory Services Tools
- RSAT: BitLocker Drive Encryption Administration Utilities
- RSAT: Active Directory Certificate Services Tools
- RSAT: DHCP Server Tools (настройка и управление DHCP сервером на Windows Server)
- RSAT: DNS Server Tools
- RSAT: Failover Clustering Tools
- RSAT: File Services Tools
- RSAT: Group Policy Management Tools
- RSAT: IP Address Management (IPAM) Client
- RSAT: Data Center Bridging LLDP Tools
- RSAT: Network Controller Management Tools
- RSAT: Network Load Balancing Tools
- RSAT: Remote Access Management Tools
- RSAT: Remote Desktop Services Tools
- RSAT: Server Manager
- RSAT: Shielded VM Tools
- RSAT: Storage Migration Service Management Tools
- RSAT: Storage Replica Module for Windows PowerShell
- RSAT: System Insights Module for Windows PowerShell
- RSAT: Volume Activation Tools (консоль активации KMS сервера)
- RSAT: Windows Server Update Services Tools
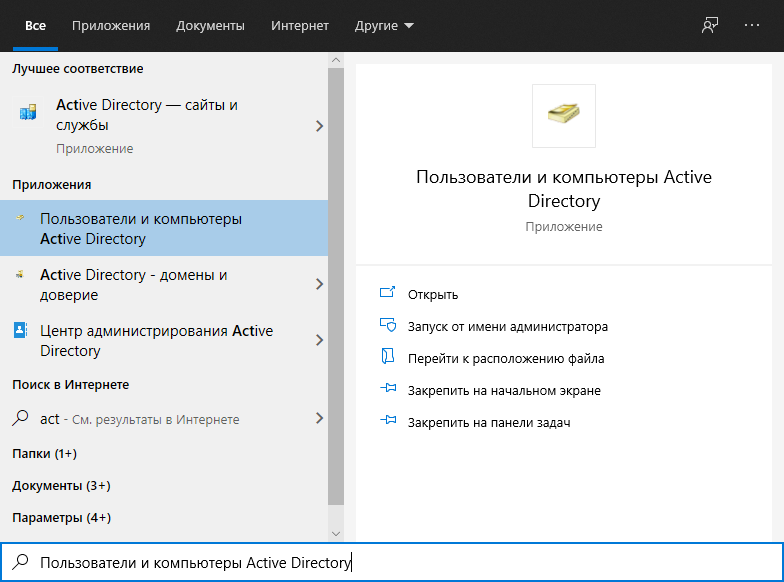
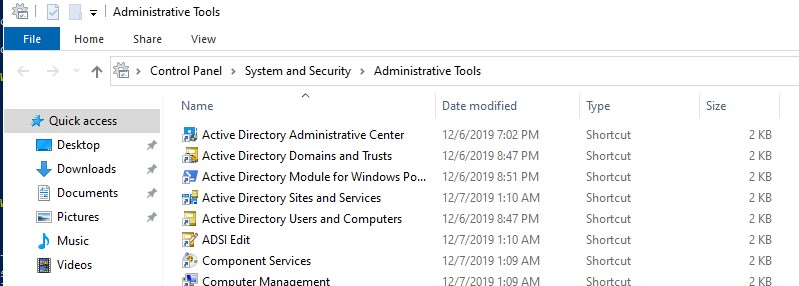
После установки, графические mmc оснастки RSAT доступны в панели управления в секции Administrative Tools (Control PanelSystem and SecurityAdministrative Tools).
Установка RSAT в Windows 10 с помощью PowerShell
Вы можете установить компоненты администрирования RSAT с помощью PowerShell. В этом примере мы покажем, как управлять компонентами RSAT в Windows 10 20H2.
С помощью следующей PowerShell команды можно вывести список компонентов RSAT, установленных на вашем компьютере:
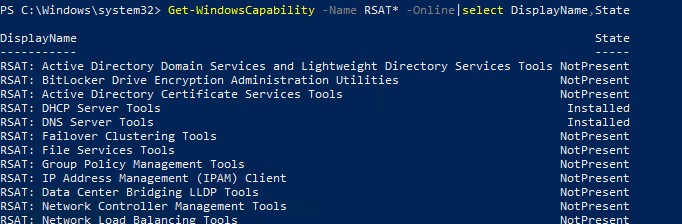
Можно представить статус установленных компонентов RSAT в более удобной таблице:
Get-WindowsCapability -Name RSAT* -Online | Select-Object -Property DisplayName, State
В нашем примере инструменты управления DHCP и DNS установлены (
Installed
), а все остальные модуль RSAT отсутствуют (
NotPresent
).
Для установки RSAT в Windows используется PowerShell командлет Add-WindowsCapability.
Чтобы установить конкретный инструмент RSAT, например инструменты управления AD (в том числе консоль ADUC из модуль Active Directory для Windows Powershell), выполните команду:
Add-WindowsCapability –online –Name Rsat.ActiveDirectory.DS-LDS.Tools~~~~0.0.1.0
Для установки консоли управления DNS и модуля PowerShell DNSServer, выполните:
Add-WindowsCapability –online –Name Rsat.Dns.Tools~~~~0.0.1.0
И т.д.
Add-WindowsCapability -Online -Name Rsat.BitLocker.Recovery.Tools~~~~0.0.1.0
Add-WindowsCapability -Online -Name Rsat.CertificateServices.Tools~~~~0.0.1.0
Add-WindowsCapability -Online -Name Rsat.DHCP.Tools~~~~0.0.1.0
Add-WindowsCapability -Online -Name Rsat.FailoverCluster.Management.Tools~~~~0.0.1.0
 Add-WindowsCapability -Online -Name Rsat.FileServices.Tools~~~~0.0.1.0
Add-WindowsCapability -Online -Name Rsat.GroupPolicy.Management.Tools~~~~0.0.1.0
Add-WindowsCapability -Online -Name Rsat.IPAM.Client.Tools~~~~0.0.1.0
Add-WindowsCapability -Online -Name Rsat.LLDP.Tools~~~~0.0.1.0
Add-WindowsCapability -Online -Name Rsat.NetworkController.Tools~~~~0.0.1.0
Add-WindowsCapability -Online -Name Rsat.NetworkLoadBalancing.Tools~~~~0.0.1.0
Add-WindowsCapability -Online -Name Rsat.RemoteAccess.Management.Tools~~~~0.0.1.0
Add-WindowsCapability -Online -Name Rsat.RemoteDesktop.Services.Tools~~~~0.0.1.0
Add-WindowsCapability -Online -Name Rsat.ServerManager.Tools~~~~0.0.1.0
Add-WindowsCapability -Online -Name Rsat.Shielded.VM.Tools~~~~0.0.1.0
Add-WindowsCapability -Online -Name Rsat.StorageMigrationService.Management.Tools~~~~0.0.1.0
Add-WindowsCapability -Online -Name Rsat.StorageReplica.Tools~~~~0.0.1.0
Add-WindowsCapability -Online -Name Rsat.SystemInsights.Management.Tools~~~~0.0.1.0
Add-WindowsCapability -Online -Name Rsat.VolumeActivation.Tools~~~~0.0.1.0
Add-WindowsCapability -Online -Name Rsat.WSUS.Tools~~~~0.0.1.0
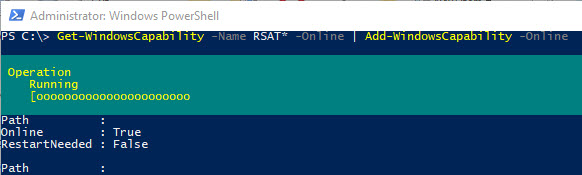
Чтобы установить сразу все доступные инструменты RSAT, выполните:
Get-WindowsCapability -Name RSAT* -Online | Add-WindowsCapability –Online
Также вы можете установить компоненты RSAT с помощью утилиты управления образом DISM. Например:
DISM.exe /Online /add-capability /CapabilityName:Rsat.ActiveDirectory.DS-LDS.Tools~~~~0.0.1.0 /CapabilityName:Rsat.GroupPolicy.Management.Tools~~~~0.0.1.0 /CapabilityName:Rsat.WSUS.Tools~~~~0.0.1.0
Чтобы установить только отсутствующие компоненты RSAT, выполните:
Get-WindowsCapability -Name RSAT* -Online | where State -EQ NotPresent | Add-WindowsCapability –Online
Теперь убедитесь, что инструменты RSAT установлены (статус Installed);

После этого установленные инструменты RSAT отобразятся в панели Manage Optional Features.
Установка RSAT в Windows 11
RSAT в Windows 11 также можно установить через панель Settings -> Apps -> Optional Features -> Add an optional feature (View features).
Наберите
RSAT
в поисковой строке и выберите компоненты для установки.

Также вы можете использовать PowerShell для установки RSAT в Windows 11:
Add-WindowsCapability –online –Name Rsat.ActiveDirectory.DS-LDS.Tools~~~~0.0.1.0

Как установить Remote Server Administration Tools в Windows Server 2022,2019,2016?
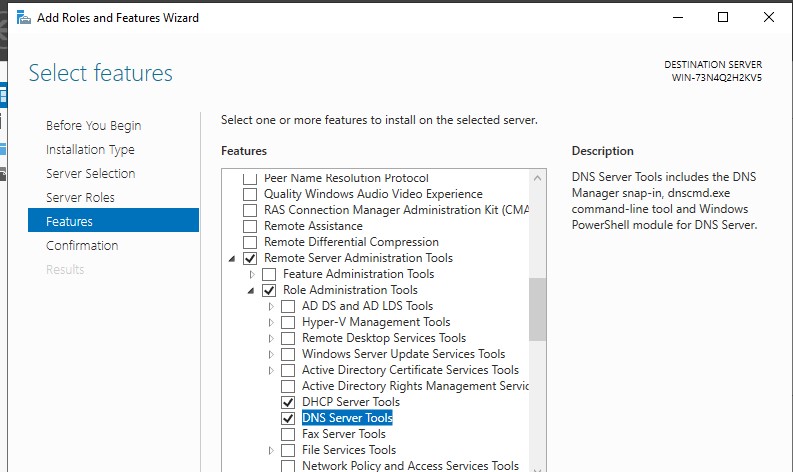
В Windows Server для установки RSAT не нужен доступ в интернет. Компоненты RSAT можно устанавливать при установке соответствующих ролей или фич Windows Server, либо можно установить их через Server Manager (Add roles and Features -> Features -> Remote Server Administration Tools). Все компоненты RSAT разбиты на две секции: Feature Administration Tools и Role Administration Tools. Выберите необходимые компоненты и нажмите Next -> Next.
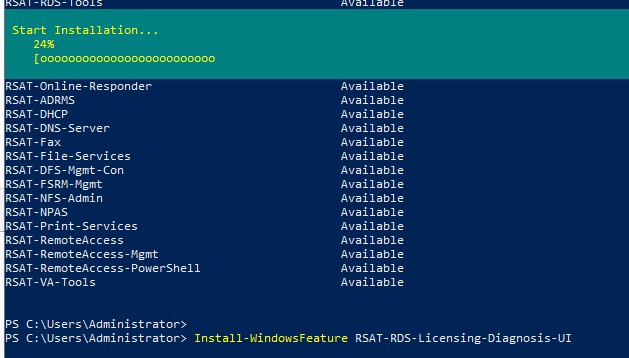
Для установки RSAT в Windows Server используется командлет установки компонентов и ролей — Install-WindowsFeature. Вывести список доступных компонентов RSAT в Windows Server 2022, 2019 и 2016:
Get-WindowsFeature| Where-Object {$_.name -like "*RSAT*"}| ft Name,Installstate
Для установки выбранного компонента RSAT, укажите его имя. Например, установим консоль диагностики лицензирования RDS:
Install-WindowsFeature RSAT-RDS-Licensing-Diagnosis-UI
Установленные графические консоли RSAT доступны из Server Manager или через панель управления.
Ошибка 0x800f0954 при установке RSAT в Windows 10
Если ваш компьютер Windows 10 с помощью групповой политики настроен на получение обновлений с локального сервера обновлений WSUS или SCCM SUP, то при установке RSAT через Add-WindowsCapability или DISM вы получите ошибку 0x800f0954.
Для корректной установки компонентов RSAT в Windows 10 вы можете временно отключить обновление со WSUS сервера в реестре (HKLMSOFTWAREPoliciesMicrosoftWindowsWindowsUpdateAU параметр UseWUServer= 0) и перезапустить службу обновления. Воспользуйтесь таким скриптом PowerShell:
$val = Get-ItemProperty -Path "HKLM:SOFTWAREPoliciesMicrosoftWindowsWindowsUpdateAU" -Name "UseWUServer" | select -ExpandProperty UseWUServer
Set-ItemProperty -Path "HKLM:SOFTWAREPoliciesMicrosoftWindowsWindowsUpdateAU" -Name "UseWUServer" -Value 0
Restart-Service wuauserv
Get-WindowsCapability -Name RSAT* -Online | Add-WindowsCapability –Online
Set-ItemProperty -Path "HKLM:SOFTWAREPoliciesMicrosoftWindowsWindowsUpdateAU" -Name "UseWUServer" -Value $val
Restart-Service wuauserv -Force
Либо вы можете настроить новый параметр GPO, который позволяет настраивать параметры установки дополнительных компонентов Windows и Feature On Demand (в том числе RSAT).
- Откройте редактор локальной GPO –
gpedit.msc
или используйте доменную консоль управления GPO –
gpmc.msc
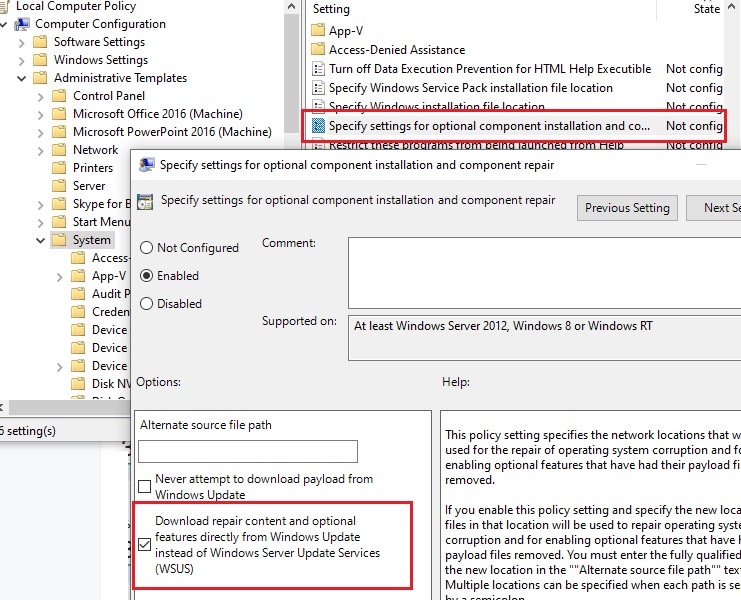
); - Перейдите в раздел Computer Configuration -> Administrative Templates -> System;
- Включите политику Specify settings for optional component installation and component repair, и включите опцию Download repair content and optional features directly from Windows Updates instead of Windows Server Updates Services (WSUS) (опция “Скачайте содержимое для восстановления и дополнительные компненты непосредственно из Центра обновления Windows вместо использования службы WSUS”);

- Сохраните изменения и обновите настройки групповых политик (
gpupdate /force
).
Теперь установка RSAT через PowerShell или Dism должна выполняться без ошибок.
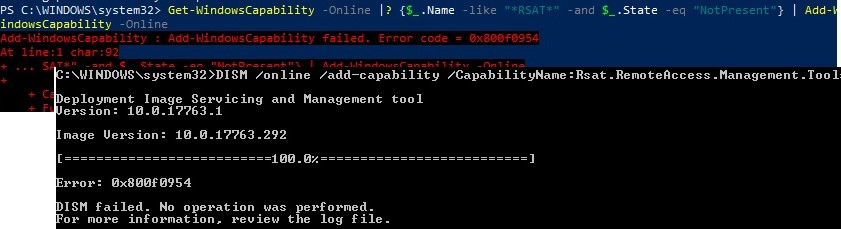
Установка RSAT в Windows 10 в офлайн режиме
Если при установке RSAT вы столкнетесь с ошибкой Add-WindowsCapability failed. Error code = 0x800f0954, или в списке дополнительных компонентов вы не видите RSAT (Компоненты для установки отсутствуют), скорее всего ваш компьютер настроен на получение обновлений со внутреннего WSUS/SCCM SUP сервера. Если вы не можете открыть прямой доступ с рабочей станции к серверам Windows Update, вы можете воспользоваться офлайн установкой RSAT (рекомендуется для корпоративных сетей без прямого доступа в Интернет).

Для офлайн установки RSAT нужно скачать ISO образ диска с компонентами FoD для вашей версии Windows 10 из вашего личного кабинета на сайте лицензирования Microsoft — Volume Licensing Service Center (VLSC). Образ называется примерно так: Windows 10 Features on Demand, version 1903.
Например, для Windows 10 1903 x64 нужно скачать образ SW_DVD9_NTRL_Win_10_1903_64Bit_MultiLang_FOD_.ISO (около 5 Гб). Распакуйте образ в сетевую папку. У вас получится набор из множества *.cab файлов, среди которых есть компоненты RSAT.
Теперь для установки компонентов RSAT на десктопе Windows 10 нужно указывать путь к данному сетевому каталогу с FoD. Например:
Add-WindowsCapability -Online -Name Rsat.ActiveDirectory.DS-LDS.Tools~~~~0.0.1.0 -LimitAccess -Source \msk-fs01DistrWindows-FODWin101903x64

Также вы можете указать путь к каталогу с компонентами FoD с помощью рассмотренной выше групповой политики. Для этого в параметре Alternative source file path нужно указать UNC путь к каталогу.
Или можете задать этот параметр через реестр отдельной политикой, указав путь к каталогу в параметр LocalSourcePath (тип REG_Expand_SZ) в ветке реестра HKLMSOFTWAREMicrosoftWindowsCurrentVersionPoliciesServicing.
После этого, пользователи смогут самостоятельно устанавливать компоненты RSAT через графический интерфейс добавления компонент Windows 10.
В изолированной среде, если вы не можете получить образ FoD, можно также скачать обновление
WindowsTH-RSAT_WS2016-x64.msu
из каталога Microsoft Update , извлечь содержимое MSU файла обновления и с помощью DISM установит компонент KB2693643-x64.cab (протестировано на Windows 10 2004):
expand -f:* c:WindowsTH-RSAT_WS2016-x64.msu C:RSAT
dism.exe /online /add-package /packagepath:C:RSATWindowsTH-KB2693643-x64.cab
Частые ошибки установки Remote Server Administration Tools в Windows
- 0x8024402c, 0x80072f8f – Windows не может поучить доступ к серверам обновления Windows для получения компонентов RSAT. Проверьте доступ в интернет или установите компоненты из локального образа FoD:
Add-WindowsCapability -Online -Name Rsat.Dns.Tools~~~~0.0.1.0 -LimitAccess -Source E:RSAT - 0x800f081f – проверьте путь к каталогу с компонентами RSAT, указанному в параметре –Source;
- 0x800f0950 – ошибка аналогична 0x800f0954;
- 0x80070490 –проверьте целостность образа Windows с помощью DISM:
DISM /Online /Cleanup-Image /RestoreHealth
Содержание
- RSAT — ошибка при установке
- Ошибка 0x8024001d
- Ошибка 0x800f0954
- How to Fix Windows update Error 0x8024001d
- Windows Update Error 0x8024001d
- 1] Prepare Windows 10 for successful RSAT installation
- 2] Run System File checker
- 3] Set correct the Date & Time
- 4] Reconnect internet connection
- 5] Reset Windows Update Service
- 6] Start Windows in Clean Boot to fix 0x8024001d RSAT
- 7] Unplug USB devices
- 8] Run Windows Update Troubleshooter
- 9] Fix the hard Disk corruption
- 10] Uninstall third-Party anti-virus
- 11] Disable Default Windows Firewall
- 12] Download the update from Windows Update Catalog
RSAT — ошибка при установке


Remote Server Administration Tools — позволяет администрировать контроллер домена со своего рабочего компа. В моём случае с Windows 10.
Есть три способа установки:
- Общий вариант, когда мы качаем пакет и устанавливаем его вручную.
- Через дополнительные компоненты.
- Через PowerShell.
Ошибка 0x8024001d
При общем варианте установки вы можете увидеть ошибку:
Установщик обнаружил ошибку 0x8024001d
Это означает, что ваша версия Windows больше не поддерживает общий вариант установки RSAT. Устанавливайте через дополнительные компоненты или через PowerShell.
Ошибка 0x800f0954
При попытке установить RSAT через дополнительные компоненты вы можете столкнуться с ошибкой «сбой установки».
В журнале при этом ничего вразумительного не написано.
При попытке установить RSAT через PowerShell та же ошибка выглядит несколько иначе.
Сбой Add-WindowsCapability. Код ошибки: 0x800f0954
Покопавшись я понял, что проблема кроется в политиках домена, скорее всего, дополнительные компоненты пытаются установиться через доменный WSUS, а нужных пакетов там нет. С одной стороны это и не плохо, нечего юзерам ставить всякое админское ПО. С другой стороны, мне-то оно нужно.
Решим проблему через локальные политики. Запускаем gpedit.msc:
Открывается редактор локальной групповой политики. Нам нужен раздел Конфигурация компьютера > Административные шаблоны > Система > Укажите параметры для установки необязательных компонентов и восстановления компонентов. Или Computer Configuration > Administrative Templates > System > Specify settings for optional component installation and component repair.
Редактируем политику. Включаем и ставим галку «Скачайте содержимое для восстановления и дополнительные компоненты непосредственно из Центра обновления Windows вместо использования служб Windows Server Update Services (WSUS)».
Теперь, если доступ в Интернет есть, всё установится. Проверяем установку RSAT через дополнительные компоненты.
Источник
How to Fix Windows update Error 0x8024001d
12 ways to Fix 0x8024001d RSAT or Windows update in Windows 10.
Windows 10 offers automatic method for the users to install a new rollout through Settings app. However, the process is not as smooth as it seems always rather; you might end up encountering errors and complications. Some error codes may appear preventing the system from looking for the new patches or even installing them after downloading. 0x8024001d is such an annoying error code responsible for the failure to install an update. Furthermore, “RSAT installer encountered an error: 0x8024001d” may occur when you attempt to re-install the tool after the successful installation of a patch.
It’s hard to assume truly from where error 0x8024001d is generated and forbidding the update installation to the system. Generally, such issues occur from wrongly configured Windows Registry entries, invalid Date & Time, corrupted Windows file system, and internet access problems. Besides, defective Windows Update services, misconfigured hard disk, malware infection can bring forth the same. Although, some common fixes might rectify the error.
Windows Update Error 0x8024001d
Here is how to Fix Windows update Error 0x8024001d –
1] Prepare Windows 10 for successful RSAT installation
After upgrading Windows 10, you find Remote Server Administration Tools missing from your system. Once you download RSAT tool manually and try to install it, the process throws error 0x8024001d. If the same happens to you, go through the below steps for a successful installation.
- Press – Windows + S.
- Type – cmd.
- Right-click on Command Prompt and choose – Run as administrator.
- To allow User Account Control, click – Yes.
- In the black pane, insert – net stop wuauserv .
- Hit – Enter.
- Minimize Command Prompt.
- Now, Open Registry Editor.
- Navigate to –
- From right-pane, double-click – UseWUServer.
- Put in the Value data box.
- Click – OK.
- Go back to Command Prompt.
- Run – net start wuauserv command.
- Thereafter, copy the following command-line and paste the same in elevated Command Prompt –
- Press – Enter.
- Now, revert the UseWUServer value to 1 that you changed through Registry Editor.
- Reboot Windows 10.
- When the system powers up, try installing RSAT again.
- This will fix 0x8024001d RSAT error.
2] Run System File checker
Oftentimes, the system finds it complicated to read the files necessary to complete an installing process. Hence, some unexpected errors might show up one of which is Windows update Error 0x8024001d. To obliterate these error codes, fixing the system files is only the option.
Some errors are too associated with missing system components or corrupted ones. The one tool that can fix all of these torments is System File Checker. But if the found corruption is too much complicated, you might need to run DISM tool to make the System File checker work. Therefore, we will run the DISM command-line prior to SFC scan in order to save some time.
- Click search icon present on taskbar.
- Type – cmd.
- Press – Ctrl+ Shift+ Enter.
- Permit User Account Control by hitting – Yes.
- Copy-paste the following commands in the black pane one by one and hit Enter after each–
dism /online /cleanup-image /scanhealth
dism /online /cleanup-image /checkhealth
dism /online /cleanup-image /restorehealth
- Once you are done running the above commands, type in sfc /scannow and then press – Enter.
- Wait and let the scanning process ends fully.
- If the found corruption gets fixed, close Command Prompt and reboot the PC.
3] Set correct the Date & Time
Windows update process often fails to initiate if the Date & Time settings are incorrect. This happens when someone changes time zone and the automatic syncing of time is not toggled on. However, this can be easily settled by adjusting Date & Time Settings. Here are the steps to follow –
- Press – Windows + R.
- In the Run command, type – control.
- Click – OK.
- Set the View by option to Category.
- Click – Clock and Region.
- From the right pane of the subsequent page, hit – Date and Time.
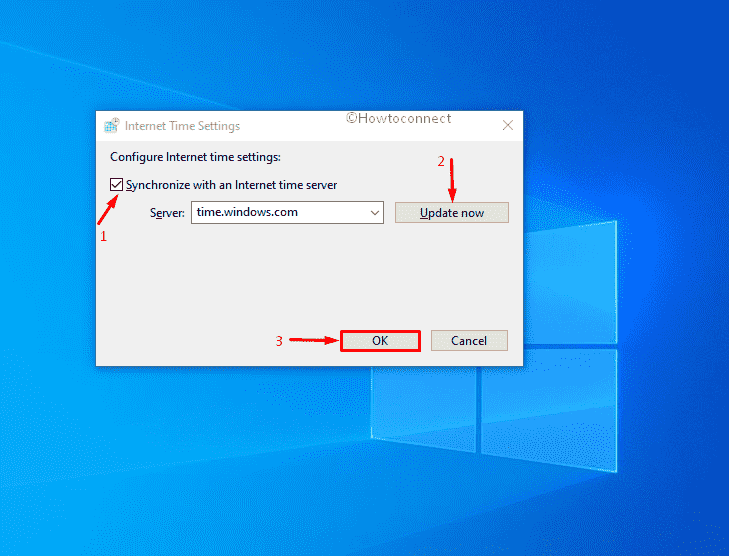
- Shift to Internet Time tab.
- Click – Change settings.
- Check the box set before Synchronize with an Internet time server.
- Hit – Update now.
- Finally, click – OK.
4] Reconnect internet connection
The autonomous Windows updating process starts only when a stable internet connection is available. If you have encountered Windows update Error 0x8024001d unexpectedly, check the internet connection first for proper connectivity.
When everything seems alright, disconnect the computer from Wi-Fi connection or remove the ethernet cable for the time being. After some time, reconnect the connections and try updating Windows again. This will possibly resolve the issue.
5] Reset Windows Update Service
In order to function Windows updating Process properly, number of services work together. If accidentally any of these services are unavailable in Windows, the updating process will end up in trouble and may bring forth error 0x8024001d. Resetting the Windows Update Service and other associate components may help in such a case.
- Click the Start button.
- Type in – cmd.exe.
- Press – Ctrl + Shift + Enter.
- When User Account Control prompts, click – Yes.
- Copy the following commands in turn and paste them into the appearing black pane. Don’t forget to press Enter after each line –
net stop wuauserv
net stop cryptSvc
net stop bits
net stop msiserver
ren C:WindowsSoftwareDistribution SoftwareDistribution.old
ren C:WindowsSystem32catroot2 Catroot2.old
net start wuauserv
net start cryptSvc
net start bits
net start msiserver
- Close Command Prompt.
- Restart your Windows machine.
- After signing back in, check whether the error shows up anymore.
6] Start Windows in Clean Boot to fix 0x8024001d RSAT
Clean Boot is a specialized startup process where Windows negates all third-party services, applications, and settings and runs with default setup only. Quite often detrimental third-party suits, services are too responsible to block the Windows updating process hence you can see Error 0x8024001d on screen. To eliminate this issue, boot Windows in Clean Boot and see if it helps. Guidelines are as following –
- Press – Windows key.
- Type – msconfig.exe.
- Hit – Enter to launch System Configuration.
- Select the radio button present before Selective startup.
- Uncheck – Load startup items.
- Shift to Services tab.
- Tick the checkbox set for Hide all Microsoft services.
- Click – Disable all.
- Move to the Startup tab.
- Click the link – Open Task Manager.
- When the dedicated window turns up, disable all startup programs.
- For that, right-click on each application individually and choose – Disable.
- Go back to System Configuration window.
- Click Apply and then OK.
- Restart the PC.
- When PC starts in clean boot mode, try updating Windows.
7] Unplug USB devices
USB peripherals like speaker, mouse, keyboard, scanner/printers are also found to be causing trouble in Windows updating process hence you can experience Error 0x8024001d. This might seem strange and the exact reason behind this is yet to be known. There is no official explanation from Microsoft as well to settle down the matter.
For instance, you can unplug the USB device that is causing trouble until the Windows updating process ends up smoothly. If you don’t know which specific accessory is at fault, pull out cords of all peripherals gently. Reconnect necessary peripherals when the system finishes installing updates successfully.
8] Run Windows Update Troubleshooter
This is quite normal that the Windows update entangled with numerous bugs and issues from time to time. Starting from searching the latest patches to installing them to Windows, you may come across error codes obstructing the process. Hence, Microsoft came up with a suitable utility so that users can fix the associated issues and have the latest patches installed smoothly. Windows Update Troubleshooter exists in every version of the Operating System and makes sure you utilize this in case of problems.
- Press – Windows+ I.
- Click – Update & Security.
- From the left sidebar, choose – Troubleshoot.
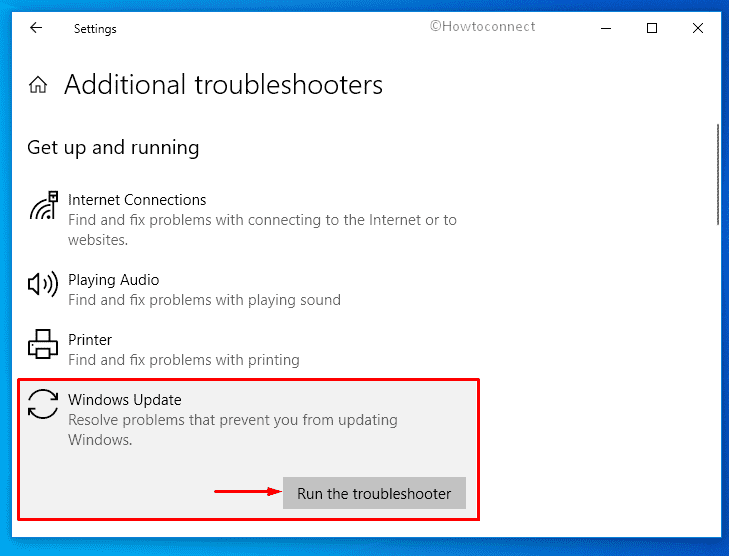
- Move to right-pane and then click – Additional troubleshooters.
- Select – Windows update.
- From the expanded tray, click – Run the troubleshooter.
- Comply with on-screen instructions to continue the process.
- After scanning the system; if the utility comes with a resolution, click – Apply this fix.
9] Fix the hard Disk corruption
Check disk tool is an amazing utility that can bring forward hard disk defective areas and resolve them automatically. Since error 0x8024001d is often caused by poor portions in the Hard Disk, running the tool may help to resolve the issue. Follow the below steps to run the utility in Windows –
- Open Command Prompt as administrator.
- In the command prompt, insert – chkdsk C: /f /r /x
- Hit – Enter.
- If the volume is currently in use, press Y to initiate the scanning process at the next startup.
10] Uninstall third-Party anti-virus
Anti-malware programs often misinterpret the update components as malware and block them eventually. This doesn’t only obstruct the Windows Update but also generates error codes like 0x8024001d. You can uninstall the third-party anti-malware programs straightway following the below instructions –
- Right-click Start button and choose – Run.
- In the dialog box, type – appwiz.cpl.
- Click – OK.
- When the ‘Programs and Features’ window shows up, look for the third-party antivirus program installed on your system.
- Right-click the same and then select – Uninstall.
- Comply with on-screen instructions to finish the removal process.
11] Disable Default Windows Firewall
Disabling the Firewall is not recommended at all since malware is always looking for a sleek chance to break into the system. However, we have found some update files might have issues with the Windows Firewall. Keeping the service enabled, you cannot accomplish the installation process and therefore, disable Firewall temporarily using the below steps –
- Press – Windows key.
- In the search bar, type – firewall.cpl.
- Hit – Enter.
- From the left sidebar of the newly appeared window, click – Turn Windows Defender Firewall on or off.
- Select the checkboxes of Turn off Windows Defender Firewall (not recommended) for both Private network settings and Public network settings.
- Click – OK.
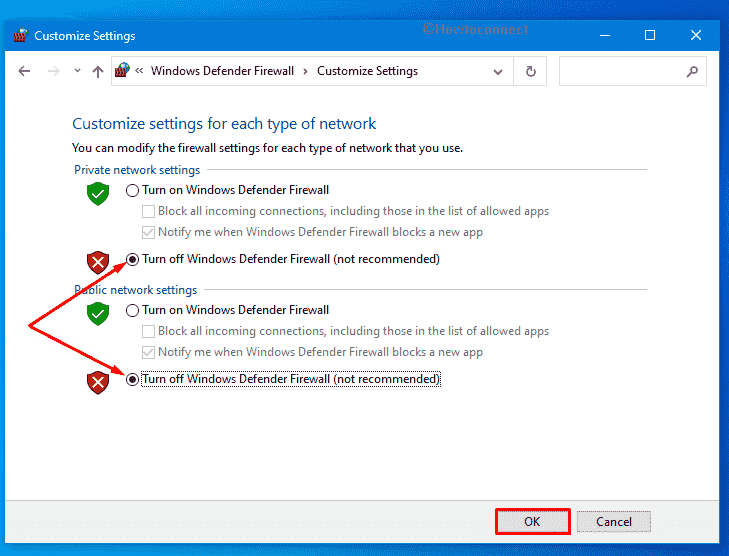
Note – Don’t forget to enable Windows Firewall after resolving the update error.
12] Download the update from Windows Update Catalog
Windows Update Error 0x8024001d mostly arises when the system tries to install updates through an autonomous process. And most of the time, it gets fixed when you initiate the process manually. Doing so is quite simple if you follow the below steps precisely –
- Visit the webpage of Windows Update Catalog.
- Click the search bar of the website.
- Type KB number you want to get.
- Click – Search.
- When the result appears, look for the version that matches your PC specs.
- Click Download present next to the suitable package.
- Doing so will bring forth a new window.
- Click the link available there.
- If prompted, opt for Save File and then click – OK.
- Double-click the msu file you downloaded.
- Allow User Account Control by clicking – Yes.
- Comply with on-screen instructions to finish the process.
Источник
На чтение 5 мин. Просмотров 2k. Опубликовано 03.09.2019
Любой, кто работал администратором сервера Windows в предыдущих версиях Windows (Win2003, 7, 8, 8.1), обнаружит, что обработка пакета Средства удаленного администрирования сервера (RSAT) не является проблемой.
И очень вероятно, что у такого пользователя должны быть сбои RSAT Windows 10 .
Для тех, кто новичок в RSAT или никогда не слышал о нем, введение может быть просто необходимо.
Содержание
- Что такое RSAT?
- Что вызывает сбой RSAT в Windows 10?
- Вот как исправить сбои RSAT
- 1. Убедитесь, что клиент-сервер совместим
- 2.Как загрузить последнее обновление RSAT
- 3. Советы по выбору языка для обновления RSAT
Что такое RSAT ?

Средства удаленного администрирования сервера (rsat) – это компонент Windows Server, который предлагает удаленное управление для клиентских операционных систем Windows.
Он предоставляет администраторам возможность удаленного управления установленными функциями и ролями пользователей на компьютере с Windows 10 с другого компьютера с полной версией операционной системы Windows 10.
Это программное обеспечение предлагает средства администрирования функций (инструменты управления групповыми политиками и средства обновления Cluster-Aware).
Кроме того, есть преимущество инструментов администрирования сервера (диспетчер сервера) и инструментов ролевого администрирования (центр администрирования Active Directory (ADAC)).
Другие основные моменты включают службы сертификации Active Directory (ADCS), клиент управления IP-адресами (IPMA) и инструменты Hyper-V).
RSAT зависит от ОС (клиентская ОС должна соответствовать серверной ОС), и он был впервые встроен в Windows Server 2008 R2 . Он доступен в Windows 10, 8, 8.1, 7, Windows Server 2012, 2008 и 2008 R2.
Что вызывает сбой RSAT в Windows 10?
RSAT может аварийно завершить работу в Windows 10 по нескольким причинам, включая неудачную установку обновления (ошибка: 0x80070011) или поврежденный установочный файл «iso» или «msu», несовместимость клиент-серверной операционной системы.
Неудачное обновление средств удаленного администрирования сервера может быть вызвано использованием поврежденного флэш-носителя во время начальной установки.
Обновление до более новой версии сборки Windows 10 также может быть причиной сбоев RSAT в Windows 10. Сбой инструментов удаленного администрирования сервера может произойти всякий раз, когда администратор сервера пытается изменить/изменить какой-либо атрибут своих инструментов администрирования (ADAC, ADCS или IPMA).
Наиболее часто сообщаемый случай сбоя – компонент Центра администрирования Active Directory программного обеспечения RSAT.
Эта статья содержит полезные советы, которые помогут устранить сбои RSAT Windows 10.
Вот как исправить сбои RSAT
1. Убедитесь, что клиент-сервер совместим
Во-первых, пользователи должны учитывать, что инструменты RSAT не работают при всех обновлениях (специфика операционной системы), поскольку существуют разные версии для разных обновлений операционной системы.
Для правильной работы компонентов RSAT в Windows 10 требуется обновление операционной системы Windows Server. Компьютер с операционной системой Windows 10, скорее всего, будет поддерживать самую последнюю версию программного обеспечения RSAT.
В большинстве случаев системный администратор может обнаружить, что установлена последняя версия средств удаленного администрирования сервера, несовместимая со сборкой Windows 10. Если это так, и всякий раз, когда запуск RSAT приводит к сбою, вам, возможно, придется выполнить следующий шаг.
Удалите предыдущую версию rsat и установите совместимую версию

rsat Отображение установленных обновлений
В некоторых случаях полное удаление предыдущей версии и установка новой совместимой версии решает проблемы сбоев.
Следует отметить, что пакет RSAT доступен на клиентских компьютерах Windows 10 build 1607 (SKU для учебных заведений, Professional и Enterprise) и некоторых других сборках.
Пользователи могут узнать, какая сборка Windows 10 имеет поддерживаемую версию пакета RSAT.
Чтобы удалить существующую версию программного обеспечения RSAT, установленную на вашем компьютере, выполните следующие действия:
- Нажмите WinKey + R , чтобы открыть диалоговое окно «Выполнить» , затем введите « панель управления » и нажмите ОК .
- Нажмите Удалить программу в меню Программы .

- Нажмите на Просмотр установленных обновлений
- Нажмите «Обновление для Microsoft Windows (KB2693643)» один раз и выберите «Удалить программу», чтобы удалить программное обеспечение и его функции.
- Нажмите Да , чтобы подтвердить действие, и существующая версия RSAT на компьютере с Windows 10 должна быть полностью удалена.

2.Как загрузить последнее обновление RSAT
Чтобы загрузить и установить новейшие средства удаленного администрирования сервера, доступные для вашего компьютера с Windows 10, нажмите здесь и следуйте этим инструкциям:
- Перейдите по ссылке в описании выше
- Выберите ваш язык как английский из раскрывающегося списка и нажмите Загрузить .

-
Выберите установщик, который соответствует вашей предпочтительной архитектуре, отметив либо 32-разрядный (x86), либо 64-разрядный флажок.

- Нажмите Далее , чтобы подтвердить выбор и начать загрузку.
- Дважды щелкните полностью загруженный файл установщика, чтобы начать установку
- Установите флажок лицензионного соглашения и нажмите Далее , чтобы завершить установку пакета.

Рекомендуется: Microsoft меняет журнал обновления Windows 10 с текстового файла на двоичный файл
3. Советы по выбору языка для обновления RSAT
Примечание . Перед запуском файла установщика RSAT необходимо установить английский язык США в качестве языка и установить его в качестве основного языка на компьютере с Windows 10.
Если язык не установлен, процесс установки определенно завершится неудачей. После завершения установки инструментов удаленного администрирования сервера языковые настройки можно изменить на прежние.
В предыдущих версиях Windows инструменты администрирования, включенные в пакет RSAT, были включены вручную, но в Win 10 эти инструменты легко включаются после установки.
Чтобы подтвердить состояние инструментов администрирования, выполните следующие действия:
-
Нажмите WinKey + R , чтобы открыть диалоговое окно Windows Выполнить , затем введите « панель управления » и нажмите ОК чтобы подтвердить.
- Нажмите Удалить программу в меню Программы .
- Нажмите на Просмотр установленных обновлений
- Нажмите Включить или выключить функции Windows
Инструменты RSAT должны быть проверены автоматически. Если нет, отметьте все три набора инструментов администрирования и нажмите ОК , чтобы сохранить сделанный выбор.

После полной деинсталляции предыдущей версии пакета средств удаленного администрирования сервера и установки новой версии для Windows 10 будет возможно обеспечить бесперебойную работу при использовании программного обеспечения RSAT.
- Remove From My Forums
-
Вопрос
-
После обновления ОС до версии 2004 пропали оснастки RSAT, при попытке установить пакетов WindowsTH-RSAT_WS2016-x64.msu, WindowsTH-RSAT_WS_1803-x64.msu, WindowsTH-RSAT_WS_1709-x64.msu
получаю ошибку 0x8024001d. Возможно есть еще какие то пакеты?
Ответы
-
уже давно все инструменты RSAT ставятся через Power Shell:
Get-WindowsCapability -Name RSAT* -Online | Add-WindowsCapability -Online
-
Помечено в качестве ответа
4 июня 2020 г. 8:33
-
Помечено в качестве ответа
-
так на страничке RSAT написано что на новых ос оснастки уже встроены и их просто необходимо включить
посмотрите инстукцию установки на сайте загрузки rsat
The opinion expressed by me is not an official position of Microsoft
-
Помечено в качестве ответа
Vector BCOModerator
4 июня 2020 г. 8:33
-
Помечено в качестве ответа
-
Пуск — Параметры — Приложения — Дополнительные компоненты — Добавить компонент
Скажите — ГДЕ я тут указал, что нужна Панель управления и ее
Установка/удаление программ ???Как бы пора уходить плавно от старой панели управления в новые интерфейсы, пока еще есть возможность
-
Изменено
SlalomJohn
2 июня 2020 г. 12:24 -
Помечено в качестве ответа
Vector BCOModerator
4 июня 2020 г. 8:34
-
Изменено
-
Спасибо за уделённое время. После советов, появилась другая ошибка. Решение оказалось простым. Прямой интернет. Кривая прокси в организации, не давала обновить. Всё заработало.
-
Помечено в качестве ответа
Vector BCOModerator
4 июня 2020 г. 8:34 -
Изменено
ПётрВ
4 июня 2020 г. 10:25
-
Помечено в качестве ответа