![]()
Download Article
![]()
Download Article
Wrap dresses are versatile garments that look great on many different body shapes. A common issue with them, though, is the neckline—they tend to sit too low or gape open. If this is the case with your dress, don’t worry! There are lots of ways you can fix it quickly with things you likely already have at home. There are even a few different ways to alter the dress to fix the neckline.
Things You Should Know
- Hold your neckline in the correct place with a safety pin, snap button, or double-sided tape.
- Add layers if you’re worried that your neckline is too low. A quick cami, lacy bra, or ribbon can help you add just the right amount of coverage.
- Alter your dress if necessary. For instance, adjusting the shoulder seam can stop your neckline from gaping.
-

1
Use a safety pin to hold your wrap dress in place on-the-go. Put on your wrap dress and pin it where the dress crisscrosses at the waist. Push the safety pin through the under-layer of fabric instead of all the way through, if possible, so the safety pin isn’t visible.[1]
- Pinning the dress where it crisscrosses near your waist will hold the neckline in place without causing it to pull.
- Use safety pins to fix a gaping neckline.
-
2
Hold your neckline exactly where you’d like it using double-sided tape. Purchase double-sided tape made specifically for clothing so that it sticks to your skin properly without causing irritation. Put on your dress and cut a strip of the tape. Place the tape along the inside edge of your dress’s neckline before pressing it down on your skin to keep it in place.[2]
- Double-sided tape for clothing can be found at a big box store or online.
- The tape will attach right at the neckline’s hem in a V-shape.
- This is a great option if your neckline is too low.
Advertisement
-
3
Attach a snap button to the neckline to hold it together. Put on the wrap dress and decide where you’d like the snap button to go so it holds your neckline together without pulling too much. This is usually where the bottom of the V-shape is in your dress’s neckline. Mark this with a safety pin and sew the bottom of the snap button on the bottom layer and the top of the button on the top layer by pulling a needle and thread through the holes of the snap button parts.[3]
- If your neckline is way too low, move the snap button up about 1 in (2.5 cm) from the bottom of the V-shape.
- Snap the button into place and enjoy your dress’s new neckline.
- Snap buttons can be found at a local craft or big box store.
- Use a snap button to fix a neckline that’s too low or gaping.
-
4
Sew a hook-and-eye clasp onto the neckline for a permanent solution. These clasps are a little more noticeable but will hold your neckline together similar to a snap button. Position the clasp where the fabric gapes or put it higher than the V if the neckline is too low. Sew each piece onto one side of the wrap dress’s neckline by looping a needle and thread through the holes in the clasp pieces. Once it’s sewed on, put on your dress and hook the clasp to show off your new neckline.[4]
- Look for hook-and-eye clasps at a craft or big box store, along with a needle and thread to attach them to the dress.
- Hook-and-eye clasps will fix gaping necklines as well as necklines that are too low.


Advertisement
-
1
Wear the wrap dress over a camisole or slip for a quick fix. Pick out a camisole or slip that matches your wrap dress and wear it underneath so you don’t have to worry about your neckline. Wearing a modest layer of clothing under your wrap dress is a great way to fix a neckline that’s gaping or too low.[5]
- Choose a cami or slip that’s the same color as your dress so it blends in seamlessly.
- Slips or camisoles with V-necks are best since your wrap dress has a V-shape too.
-
2
Let a lacy bra peek out from your dress to add texture. If your neckline is just a little too low, letting a little bit of lace show can be a nice way to cover up more skin while still creating a stylish look. Pick out a lacy bra or bralette that matches your wrap dress and wear it under the dress to show off some contrasting textures.[6]
- For example, you might wear a black lace bralette under a black, blue, and white floral wrap dress.
-
3
Add lace or ribbon to the neckline to make it more modest. Purchase strands of lace or ribbon that match your wrap dress. Measure the neckline’s length and cut the lace or ribbon so it’s long enough to go around the entire neckline. Use a needle and thread to attach the ribbon or lace to the edge of the neckline, making the neckline taller. Sew the ribbon or lace onto the inside of the dress so the stitching isn’t super visible.[7]
- Choose wide ribbon or lace for more coverage.
- If you have a sewing machine, you can use this to attach the ribbon or lace instead.


Advertisement
-
1
Take in the shoulder seam to fix a big neckline gape. Undo the sewed seams in each shoulder of your wrap dress using a seam ripper or scissors. Pull up the fabric so that the neckline is slightly shorter and sew the shoulder seams back together at the new fabric points. Use sewing pins to hold the seams in place as you sew them.[8]
- Try your dress on to see how much fabric you should take in at each shoulder seam before pinning it, if you’d like.
-
2
Create a drawstring gathering to make your neckline smaller. If you don’t mind part of your neckline looking scrunched up, this is an easy way to bring the neckline in so it fits you better. Sew a straight stitch along the area you’d like gathered, such as near the shoulders or at the base of the ‘V’ shape. Tug on the fabric to scrunch it up before knotting your thread so the fabric stays in place.[9]
- Use thread that matches the color of your wrap dress neckline so it blends in well.
-
3
Use stay tape along your neckline to keep it from stretching out. Take out the stitches in your neckline’s hem and cut strands of stay tape that fit along each edge of your neckline. Secure the stay tape using steam or its sticky coating in a straight line along the fabric’s edge before folding it over into the neckline. Stitch the fold together so your wrap dress looks just as it did before, but it now has stay tape to keep it from stretching.[10]
- Use a straight stitch or zig-zag stitch to hold the folded neckline hem in place.
- Some types of stay tape need steam for them to adhere to the fabric while others already have a fabric glue on them.
-
4
Make darts in the fabric to remove excess fabric so the neckline fits. Take out the stitching of the entire bodice of your wrap dress so that you can lay the front flat. Mark the fabric where you’d like to create the darts and cut a slim triangle on either side of the chest area to form them. Pinch the fabric together to gather the material and sew the triangle together so there isn’t any empty space anymore.[11]
- Put your wrap dress on and create two darts on either side of your chest by pulling the fabric into an overlapping triangle with your fingers to see how big the darts need to be.
- Sew the wrap dress bodice back onto the dress once you’re finished making the darts.


Advertisement
Add New Question
-
Question
Is it better to leave a longer dress neckline or tighten it up?

Kathi Burns is a board certified Professional Organizer (CPO) and Founder of Organized and Energized!, her consulting business with a mission to empower people to master their environment and personal image by assisting them in taking control, making change and organizing their lives. Kathi has over 17 years of organizing experience and her work has been featured on Better Homes and Gardens, NBC News, Good Morning America, and Entrepreneur. She has a BS in Communication from Ohio University.
Board Certified Professional Organizer
Expert Answer
It really depends on your style on body shape. So, first think about what you’re trying to achieve visually. If your outfit calls for a longer neckline, it’s fine the way it is! The other thing to keep in mind is your neck’s shape. If you have a longer neck, you may not want to overaccentuate it. Then again, if you’re on the shorter side and you have a shorter neck, the longer neckline may make you appear taller. It really depends!

Ask a Question
200 characters left
Include your email address to get a message when this question is answered.
Submit
Advertisement
-
If you bring your wrap dress to a tailor, they can fix your neckline for you.
Thanks for submitting a tip for review!
Advertisement
About This Article
Thanks to all authors for creating a page that has been read 138,524 times.
Did this article help you?
![]()
Download Article
![]()
Download Article
Wrap dresses are versatile garments that look great on many different body shapes. A common issue with them, though, is the neckline—they tend to sit too low or gape open. If this is the case with your dress, don’t worry! There are lots of ways you can fix it quickly with things you likely already have at home. There are even a few different ways to alter the dress to fix the neckline.
Things You Should Know
- Hold your neckline in the correct place with a safety pin, snap button, or double-sided tape.
- Add layers if you’re worried that your neckline is too low. A quick cami, lacy bra, or ribbon can help you add just the right amount of coverage.
- Alter your dress if necessary. For instance, adjusting the shoulder seam can stop your neckline from gaping.
-
1
Use a safety pin to hold your wrap dress in place on-the-go. Put on your wrap dress and pin it where the dress crisscrosses at the waist. Push the safety pin through the under-layer of fabric instead of all the way through, if possible, so the safety pin isn’t visible.[1]
- Pinning the dress where it crisscrosses near your waist will hold the neckline in place without causing it to pull.
- Use safety pins to fix a gaping neckline.
-
2
Hold your neckline exactly where you’d like it using double-sided tape. Purchase double-sided tape made specifically for clothing so that it sticks to your skin properly without causing irritation. Put on your dress and cut a strip of the tape. Place the tape along the inside edge of your dress’s neckline before pressing it down on your skin to keep it in place.[2]
- Double-sided tape for clothing can be found at a big box store or online.
- The tape will attach right at the neckline’s hem in a V-shape.
- This is a great option if your neckline is too low.
Advertisement
-
3
Attach a snap button to the neckline to hold it together. Put on the wrap dress and decide where you’d like the snap button to go so it holds your neckline together without pulling too much. This is usually where the bottom of the V-shape is in your dress’s neckline. Mark this with a safety pin and sew the bottom of the snap button on the bottom layer and the top of the button on the top layer by pulling a needle and thread through the holes of the snap button parts.[3]
- If your neckline is way too low, move the snap button up about 1 in (2.5 cm) from the bottom of the V-shape.
- Snap the button into place and enjoy your dress’s new neckline.
- Snap buttons can be found at a local craft or big box store.
- Use a snap button to fix a neckline that’s too low or gaping.
-
4
Sew a hook-and-eye clasp onto the neckline for a permanent solution. These clasps are a little more noticeable but will hold your neckline together similar to a snap button. Position the clasp where the fabric gapes or put it higher than the V if the neckline is too low. Sew each piece onto one side of the wrap dress’s neckline by looping a needle and thread through the holes in the clasp pieces. Once it’s sewed on, put on your dress and hook the clasp to show off your new neckline.[4]
- Look for hook-and-eye clasps at a craft or big box store, along with a needle and thread to attach them to the dress.
- Hook-and-eye clasps will fix gaping necklines as well as necklines that are too low.
Advertisement
-
1
Wear the wrap dress over a camisole or slip for a quick fix. Pick out a camisole or slip that matches your wrap dress and wear it underneath so you don’t have to worry about your neckline. Wearing a modest layer of clothing under your wrap dress is a great way to fix a neckline that’s gaping or too low.[5]
- Choose a cami or slip that’s the same color as your dress so it blends in seamlessly.
- Slips or camisoles with V-necks are best since your wrap dress has a V-shape too.
-
2
Let a lacy bra peek out from your dress to add texture. If your neckline is just a little too low, letting a little bit of lace show can be a nice way to cover up more skin while still creating a stylish look. Pick out a lacy bra or bralette that matches your wrap dress and wear it under the dress to show off some contrasting textures.[6]
- For example, you might wear a black lace bralette under a black, blue, and white floral wrap dress.
-
3
Add lace or ribbon to the neckline to make it more modest. Purchase strands of lace or ribbon that match your wrap dress. Measure the neckline’s length and cut the lace or ribbon so it’s long enough to go around the entire neckline. Use a needle and thread to attach the ribbon or lace to the edge of the neckline, making the neckline taller. Sew the ribbon or lace onto the inside of the dress so the stitching isn’t super visible.[7]
- Choose wide ribbon or lace for more coverage.
- If you have a sewing machine, you can use this to attach the ribbon or lace instead.
Advertisement
-
1
Take in the shoulder seam to fix a big neckline gape. Undo the sewed seams in each shoulder of your wrap dress using a seam ripper or scissors. Pull up the fabric so that the neckline is slightly shorter and sew the shoulder seams back together at the new fabric points. Use sewing pins to hold the seams in place as you sew them.[8]
- Try your dress on to see how much fabric you should take in at each shoulder seam before pinning it, if you’d like.
-
2
Create a drawstring gathering to make your neckline smaller. If you don’t mind part of your neckline looking scrunched up, this is an easy way to bring the neckline in so it fits you better. Sew a straight stitch along the area you’d like gathered, such as near the shoulders or at the base of the ‘V’ shape. Tug on the fabric to scrunch it up before knotting your thread so the fabric stays in place.[9]
- Use thread that matches the color of your wrap dress neckline so it blends in well.
-
3
Use stay tape along your neckline to keep it from stretching out. Take out the stitches in your neckline’s hem and cut strands of stay tape that fit along each edge of your neckline. Secure the stay tape using steam or its sticky coating in a straight line along the fabric’s edge before folding it over into the neckline. Stitch the fold together so your wrap dress looks just as it did before, but it now has stay tape to keep it from stretching.[10]
- Use a straight stitch or zig-zag stitch to hold the folded neckline hem in place.
- Some types of stay tape need steam for them to adhere to the fabric while others already have a fabric glue on them.
-
4
Make darts in the fabric to remove excess fabric so the neckline fits. Take out the stitching of the entire bodice of your wrap dress so that you can lay the front flat. Mark the fabric where you’d like to create the darts and cut a slim triangle on either side of the chest area to form them. Pinch the fabric together to gather the material and sew the triangle together so there isn’t any empty space anymore.[11]
- Put your wrap dress on and create two darts on either side of your chest by pulling the fabric into an overlapping triangle with your fingers to see how big the darts need to be.
- Sew the wrap dress bodice back onto the dress once you’re finished making the darts.
Advertisement
Add New Question
-
Question
Is it better to leave a longer dress neckline or tighten it up?
Kathi Burns is a board certified Professional Organizer (CPO) and Founder of Organized and Energized!, her consulting business with a mission to empower people to master their environment and personal image by assisting them in taking control, making change and organizing their lives. Kathi has over 17 years of organizing experience and her work has been featured on Better Homes and Gardens, NBC News, Good Morning America, and Entrepreneur. She has a BS in Communication from Ohio University.
Board Certified Professional Organizer
Expert Answer
It really depends on your style on body shape. So, first think about what you’re trying to achieve visually. If your outfit calls for a longer neckline, it’s fine the way it is! The other thing to keep in mind is your neck’s shape. If you have a longer neck, you may not want to overaccentuate it. Then again, if you’re on the shorter side and you have a shorter neck, the longer neckline may make you appear taller. It really depends!
Ask a Question
200 characters left
Include your email address to get a message when this question is answered.
Submit
Advertisement
-
If you bring your wrap dress to a tailor, they can fix your neckline for you.
Thanks for submitting a tip for review!
Advertisement
About This Article
Thanks to all authors for creating a page that has been read 138,524 times.
Did this article help you?
Платья с запахом — это универсальная одежда, которая отлично смотрится на разных фигурах. Однако их общая проблема — вырез — они обычно сидят слишком низко или зияют. Если это так с вашим платьем, не волнуйтесь! Есть много способов быстро исправить это с помощью вещей, которые у вас, вероятно, уже есть дома. Есть даже несколько разных способов переделать платье, чтобы поправить вырез.
Шаги
Метод 1 из 3: закрепление декольте

Шаг 1. Используйте английскую булавку, чтобы удерживать платье с запахом на ходу
Наденьте платье с запахом и прикрепите его булавками там, где платье перекрещивается на талии. Проденьте английскую булавку через нижний слой ткани, а не до конца, если это возможно, чтобы английская булавка не была видна.
- Прикрепите платье к талии в месте перекрещивания, чтобы вырез не растягивался.
- Используйте английские булавки, чтобы исправить зияющий вырез.

Шаг 2. Закрепите вырез горловины там, где хотите, с помощью двустороннего скотча
Купите двусторонний скотч, специально предназначенный для одежды, чтобы он плотно прилегал к коже, не вызывая раздражения. Наденьте платье и отрежьте полоску ленты. Оберните ленту вдоль внутреннего края декольте платья, прежде чем прижимать ее к коже, чтобы она оставалась на месте.
- Двусторонний скотч для одежды можно найти в большом магазине или в Интернете.
- Тесьма будет прикреплена прямо к подолу горловины в виде буквы V.
- Это отличный вариант, если у вас слишком низкий вырез.

Шаг 3. Прикрепите кнопку к вырезу горловины, чтобы скрепить его
Наденьте платье с запахом и решите, куда вы хотите, чтобы кнопка застегивалась так, чтобы она скрепляла вырез горловины, не натягивая ее слишком сильно. Обычно это место, где низ V-образной формы находится в вырезе вашего платья. Отметьте это английской булавкой и пришейте нижнюю часть кнопки на нижнем слое и верх кнопки на верхнем слое, протягивая иглу и продев ее через отверстия частей кнопки.
- Если у вас слишком низкий вырез горловины, переместите кнопку вверх примерно на 1 дюйм (2,5 см) от низа V-образной формы.
- Установите пуговицу на место и наслаждайтесь новым вырезом вашего платья.
- Кнопки с кнопками можно найти в местном магазине товаров для рукоделия или в магазине больших коробок.
- С помощью кнопки закрепите слишком низкий или зияющий вырез.

Шаг 4. Пришейте застежку-липучку к горловине для надежного решения
Эти застежки немного заметнее, но они скрепят вырез горловины, как кнопка. Расположите застежку там, где ткань раскрывается, или поместите ее выше, чем V, если вырез слишком низкий. Пришейте каждую деталь к одной стороне горловины платья с запахом, продев иглу и продев ее через отверстия в деталях застежки. Когда оно будет пришито, наденьте платье и зацепите застежку, чтобы продемонстрировать свой новый вырез.
- Поищите застежки-крючки в магазине товаров для рукоделия или в больших коробках, а также иголку и нитку, чтобы прикрепить их к платью.
- Застежки-крючки исправят зияющие вырезы, а также слишком низкие вырезы.
Метод 2 из 3: добавление слоев или дополнительного материала

Шаг 1. Наденьте платье с запахом поверх камзола или слипа для быстрого исправления
Выберите камзол или комбинацию, подходящую к вашему платью с запахом, и наденьте их под ним, чтобы не беспокоиться о декольте. Скромный слой одежды под платьем с запахом — отличный способ исправить зияющий или слишком низкий вырез.
- Выберите блузку или комбинацию того же цвета, что и ваше платье, чтобы они гармонично сочетались с вами.
- Лучше всего подойдут слипы или кофточки с V-образным вырезом, так как ваше платье с запахом тоже имеет V-образную форму.

Шаг 2. Пусть кружевной бюстгальтер выглядывает из-под платья, чтобы добавить текстуры
Если у вас слишком низкий вырез горловины, то немного кружева может быть хорошим способом скрыть больше кожи, сохраняя при этом стильный образ. Выберите кружевной бюстгальтер или бюстгальтер без косточек, который сочетается с вашим платьем с запахом, и наденьте его под платье, чтобы подчеркнуть контрастные текстуры.
Например, вы можете носить черный кружевной бюстгальтер без бюстгальтера под черным, сине-белым платьем с запахом и цветочным принтом

Шаг 3. Добавьте кружево или ленту на вырез горловины, чтобы сделать его более скромным
Купите кружевные или ленточные нити, подходящие к вашему платью с запахом. Измерьте длину выреза и обрежьте шнурок или ленту так, чтобы они охватывали весь вырез. С помощью иглы и нитки прикрепите ленту или шнурок к краю выреза горловины, сделав вырез выше. Пришейте ленту или кружево на внутренней стороне платья, чтобы строчки не были слишком заметны.
- Для большего покрытия выберите широкую ленту или кружево.
- Если у вас есть швейная машина, вы можете использовать ее, чтобы вместо этого прикрепить ленту или шнурок.
Метод 3 из 3: изменение выреза

Шаг 1. Возьмите плечевой шов, чтобы зафиксировать большой вырез горловины
Расстегните прошитые швы на каждом плече платья с запахом с помощью расширителя швов или ножниц. Поднимите ткань вверх, чтобы вырез горловины стал немного короче, и сшейте плечевые швы вместе в новых точках ткани. Используйте швейные булавки, чтобы удерживать швы на месте во время шитья.
Примерьте платье, чтобы увидеть, сколько ткани вы должны уложить в каждый плечевой шов, прежде чем закреплять его булавками, если хотите

Шаг 2. Создайте сборку на завязках, чтобы уменьшить вырез
Если вы не возражаете против того, чтобы часть вашего декольте выглядела сморщенной, это простой способ сделать декольте более подходящим для вас. Выполните прямую строчку вдоль области, которую вы хотите собрать, например, около плеч или у основания V-образной формы. Потяните за ткань, чтобы сморщить ее, прежде чем завязывать узел, чтобы ткань оставалась на месте.
Используйте нить, подходящую по цвету к вырезу вашего платья с запахом, чтобы она хорошо сочеталась

Шаг 3. Используйте фиксирующую ленту вдоль шеи, чтобы она не растягивалась
Уберите стежки на подоле декольте и обрежьте прядки фиксирующей ленты, которые подходят по каждому краю декольте. Закрепите фиксирующую ленту с помощью пара или ее липкого покрытия по прямой линии вдоль края ткани перед тем, как загнуть ее в вырез горловины. Сшейте складку, чтобы ваше платье с запахом выглядело так же, как и раньше, но теперь у него есть фиксирующая лента, чтобы оно не растягивалось.
- Используйте прямую или зигзагообразную строчку, чтобы закрепить сложенный край горловины.
- Некоторым типам фиксирующей ленты нужен пар, чтобы они приклеились к ткани, в то время как на другие уже нанесен тканевый клей.

Шаг 4. Сделайте вытачки в ткани, чтобы убрать лишнюю ткань по размеру выреза горловины
Снимите строчку всего лифа платья с запахом, чтобы можно было уложить переднюю часть ровно. Отметьте ткань, на которой вы хотите сделать вытачки, и вырежьте тонкий треугольник с обеих сторон груди, чтобы сформировать их. Сожмите ткань, чтобы собрать материал, и сшейте треугольник, чтобы больше не оставалось пустого места.
- Наденьте платье с запахом и сделайте два дротика по обе стороны от груди, натянув ткань пальцами в виде треугольника, перекрывающего друг друга, чтобы увидеть, какого размера должны быть дротики.
- Пришейте лиф платья с запахом обратно к платью, когда закончите делать вытачки.
подсказки
Здравствуйте! Помогите, пожалуйста советом, как из выкройки основы платья сделать выкройку этого лифа с запахом?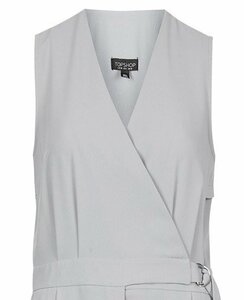
Всю тему пересмотрела, но ничего дельного не нашла. Всех интересует одна и та же выкройка: лиф с запахом с косыми складками. А мне нужно с вертикальными.
Но еще в больший ступор я впала, когда попыталась сконструировать выкройку по ссылке, которая идет в заглавии этой темы http://club.season.ru/index.php?showtopic=…mp;#entry112129
Такое впечатление, что тот человек из журнала, который описывал ход выполнения работ, совсем не хотел, чтобы кто-то его понял и сделал моделирование выкройки самостоятельно: дальше, чем окинуть взглядом свою выкройку, дело не продвинулось. Так как с первого предложения ты понимаешь, что автор знает о чем-то большем, чем пишет:
Цитата
Переведите направляющую 1 ( в этом случае раствор направляющей увеличивается до 1.2см с учетом того, что модельная линия проходит по косой), скос плеча и боковые швы.
Откуда эту линию проводить? Куда ее проводить? Какой еще раствор? Откуда? Или этими знаниями обладают все, кроме меня? я допускаю, что речь может идти вот об этой вытачке под номер 1 http://www.season.ru/sovety/modeling/princ…ek_dekolte.html Но опять же автор статьи тоже не захотел раскрывать всех секретов до конца:
Цитата
Нанесём эту линию на чертёж выкройки. Это прямая линия.
Да? А с какого именно места на горловине мне наносить эту линию?
В общем, весь день провозилась с выкройкой, закрыла нагрудную вытачку, а талевую раскрыла. На этом моя конструкция закончилась, т.к. я не понимаю, как мне разрезать выкройку, чтобы получить вторую складку? Или эти две складки распределили из одной талевой вытачки, которая расширилась в результате закрытой нагрудной вытачки. Так же не понимаю еще один момент: когда рисуешь модельный срез запашной части, то часть ее попадает на талевую вытачку второй половинки полочки. Или мне просто не обращать внимание на эту вытачку и отложить от серединного среза по линии талии нужное расстояние (длина запашной части по талии)?
Буду рада любому совету, за ранее спасибо!
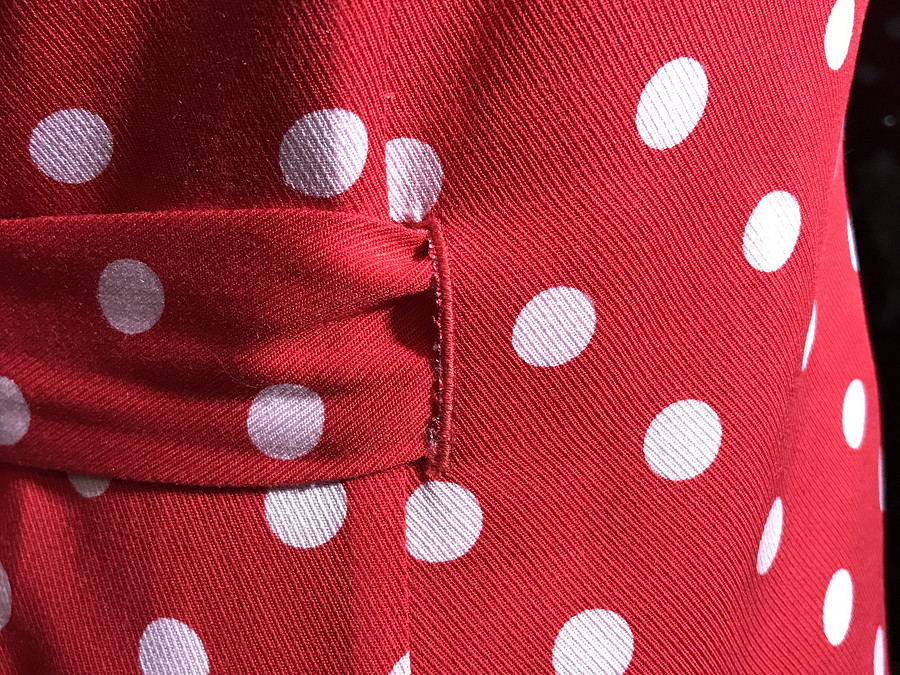
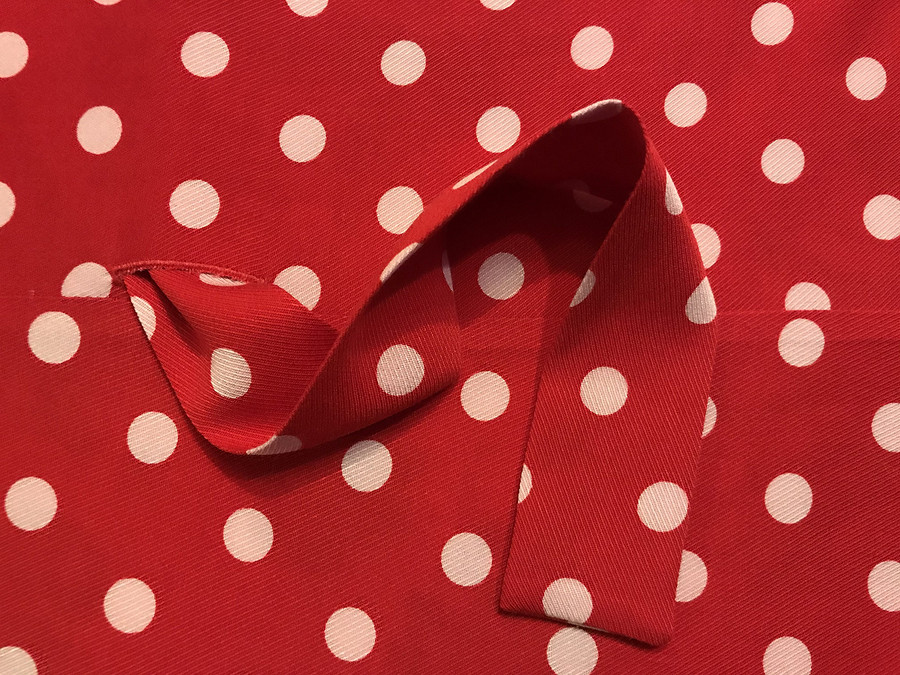
В таком случае, можно только правый боковой шов выполнить как обычно, оставив открытым участок (прорез) между поперечными метками для завязывающегося пояса. Припуски швов обметать на оверлоке и разутюжить. Но тогда общий вид с изнаночной стороны платья будет разниться.
- Бестселлер

- 1
- 2
- 3
- 4
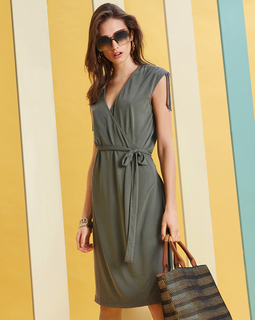
Верхняя часть выгодно подчеркивает женственные формы, а расклешенная юбка с боковым воланом эффек…
Верхняя часть выгодно подчеркивает женственные формы, а расклешенная юбка с боковым воланом эффек…
- Бестселлер

- 1
- 2
- 3
- 4
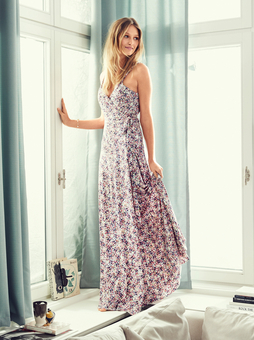
Романтично и соблазнительно одновременно: струящееся макси-платье с запахом, тонкими бретелями и …
Романтично и соблазнительно одновременно: струящееся макси-платье с запахом, тонкими бретелями и …

- 1
- 2
- 3
- 4
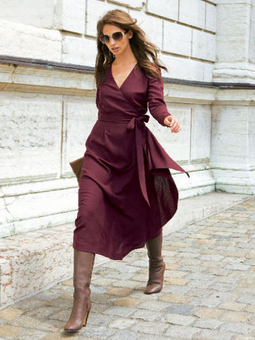
Комфортный покрой с запахом и практически немнущийся трикотаж делают это платье длиной до колен о…
Комфортный покрой с запахом и практически немнущийся трикотаж делают это платье длиной до колен о…


- 1
- 2
- 3
- 4
Утром в нем можно пойти на пляж, а вечером, дополнив стильными аксессуарами, — в ресторан н…
Утром в нем можно пойти на пляж, а вечером, дополнив стильными аксессуарами, — в ресторан н…
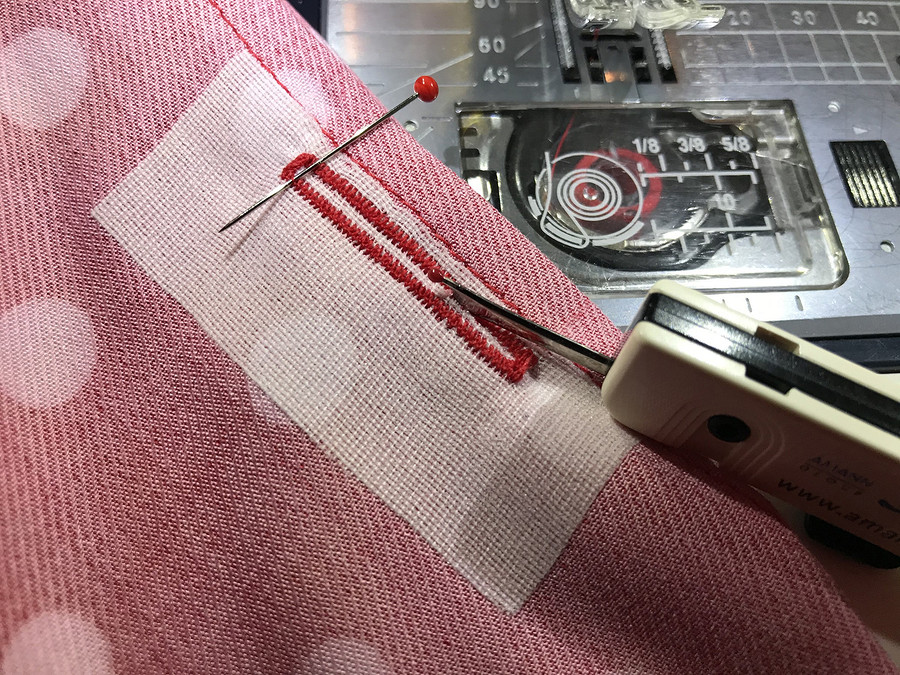
Чтобы все швы в платье были одинаковые, можно прибегнуть к нестандартному решению — в качестве прореза для завязывающегося пояса выполнить самую обычную пуговичную петлю на швейной машинке, главное, расположить её максимально близко к боковому шву и точно между поперечными метками.
Вам потребеутся:
✂ Лапка для вымётывания петель на швейной машинке;
✂ Полоска флизелина;
✂ Портновские булавки;
✂ Распарыватель
Шаг 1
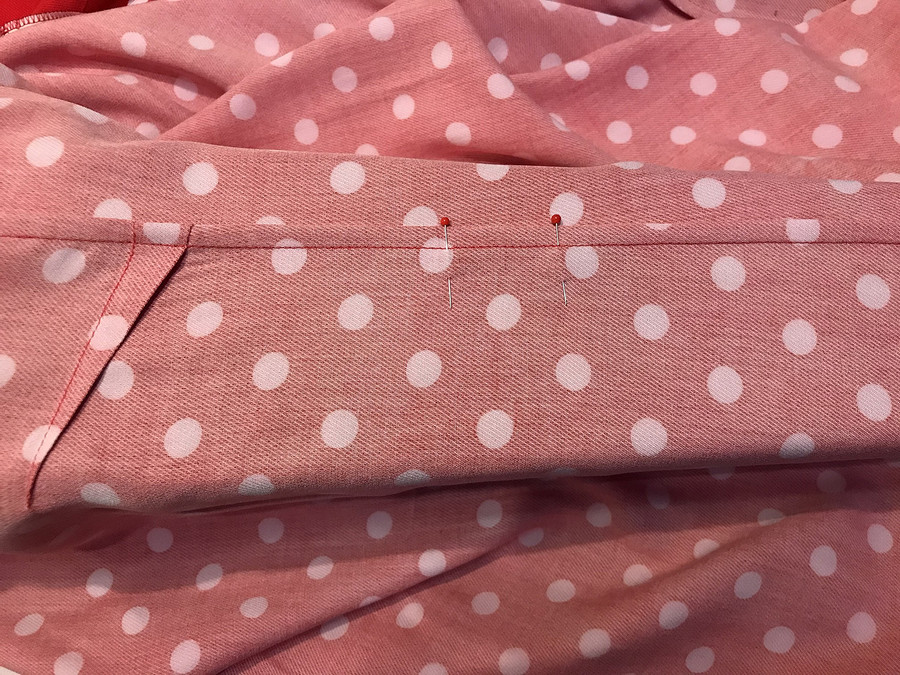
Поперечные метки для будущей петли обозначьте с помощью портновских булавок.
Шаг 2
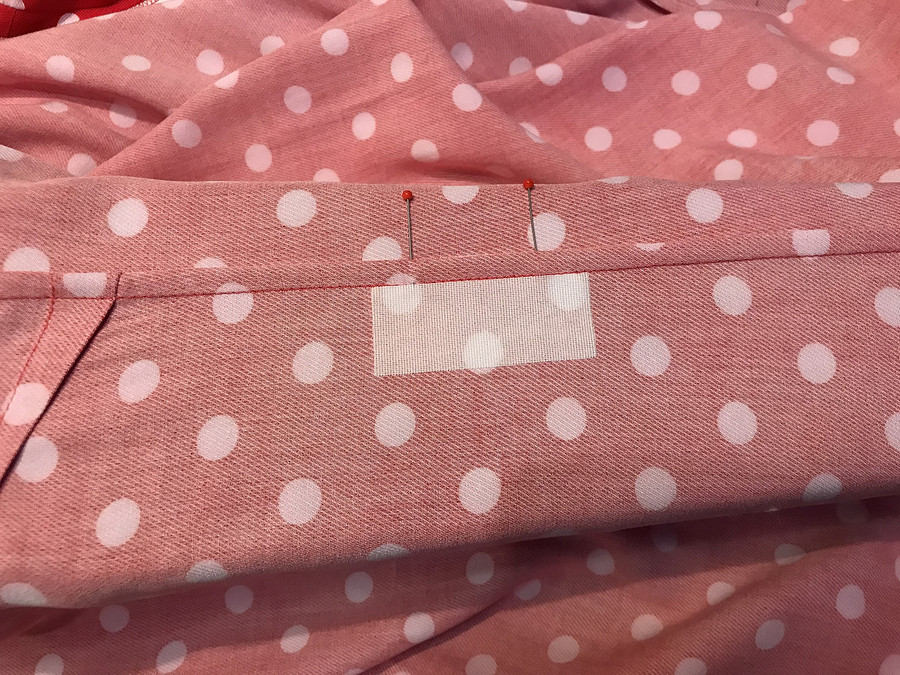
Вдоль бокового шва вплотную к машинной строчке наложите полоску флизелина.
Шаг 3
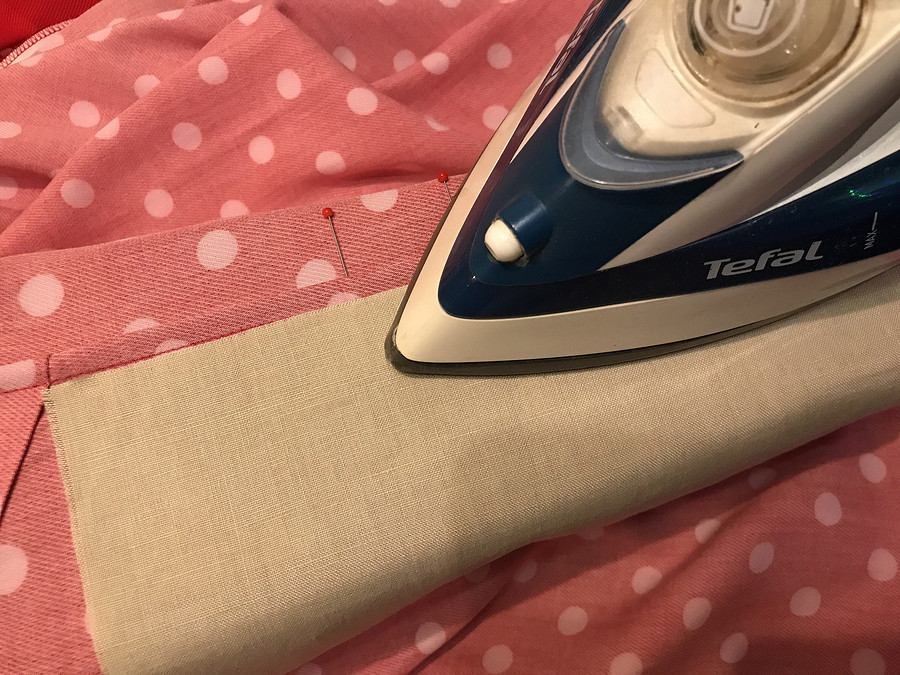
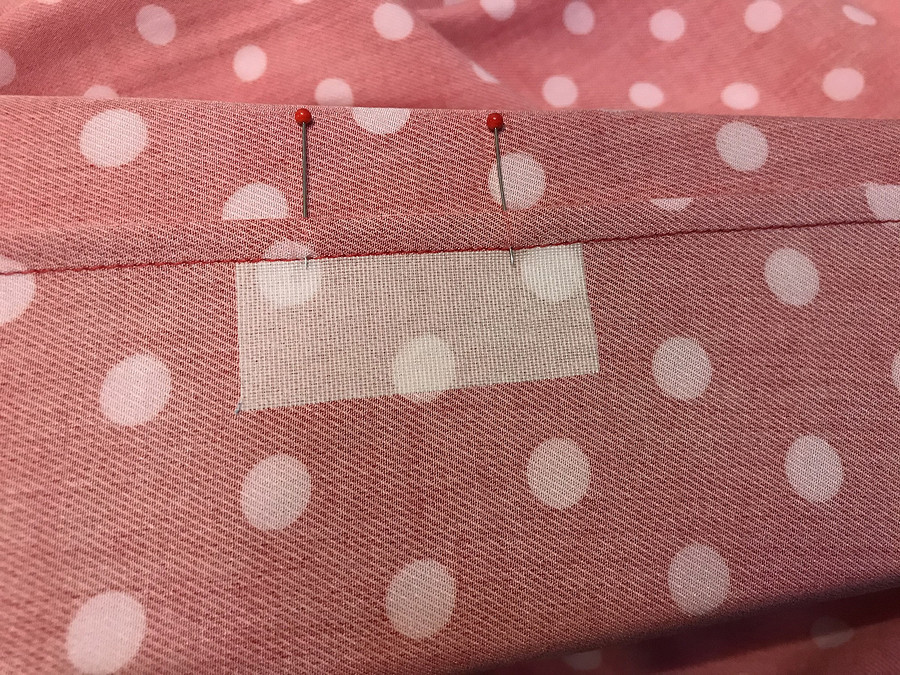
Через проутюжильник (лоскут хлопковой или льняной ткани) продублируйте место для петли.
Шаг 4
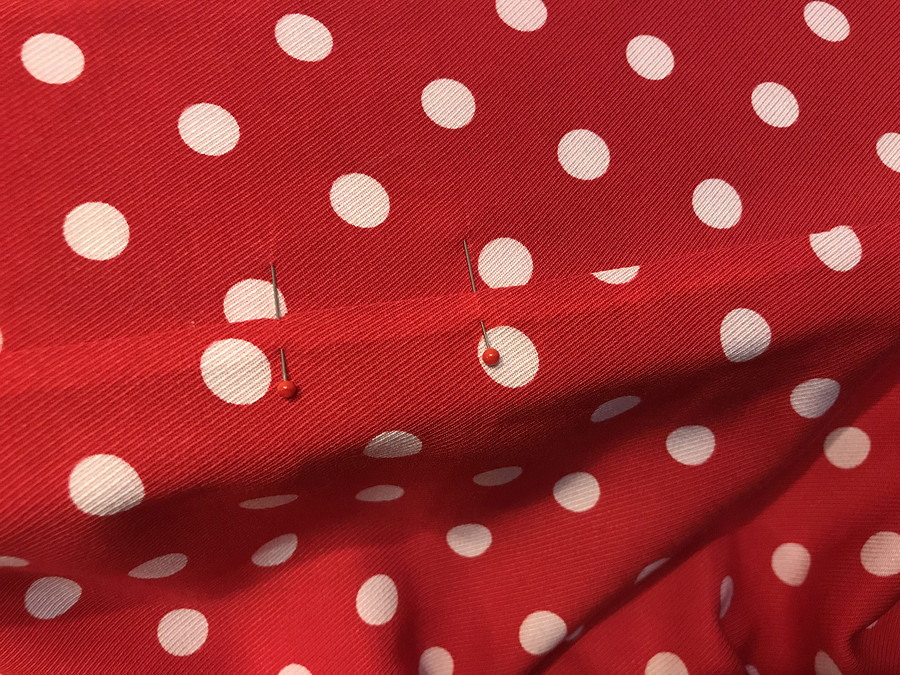
С помощью портновских булавок перенесите поперечные метки на лицевую сторону.
Шаг 5
На швейную машину установите лапку для вымётывания петель.
На лапке зафиксируйте максимальный размер петли.
Шаг 6
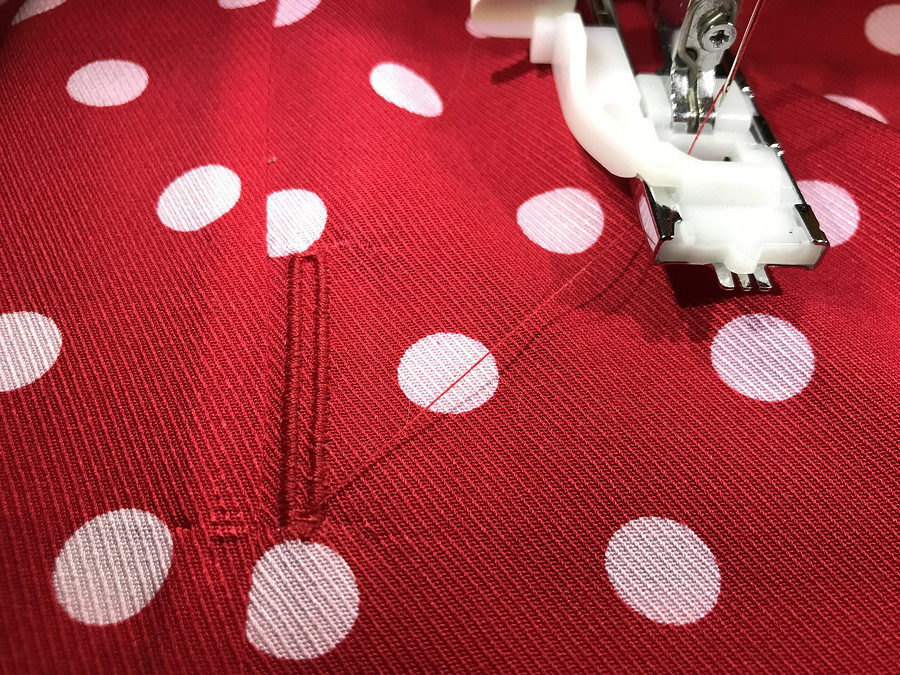
Выметайте петлю с лицевой стороны платья.
Шаг 7
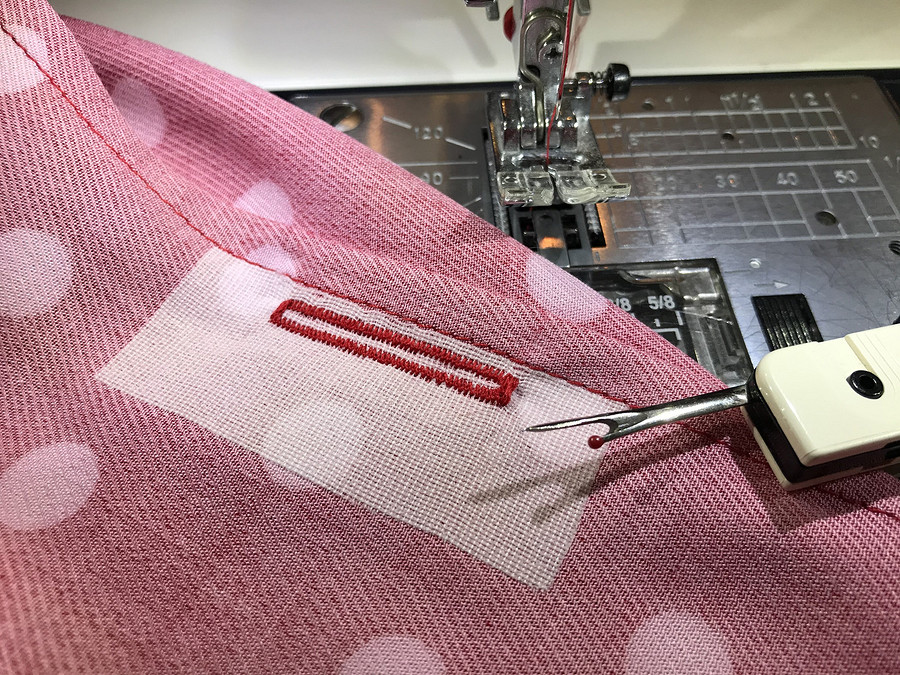
С помощью распарывателя прорежьте петлю с изнаночной стороны платья.
Шаг 8
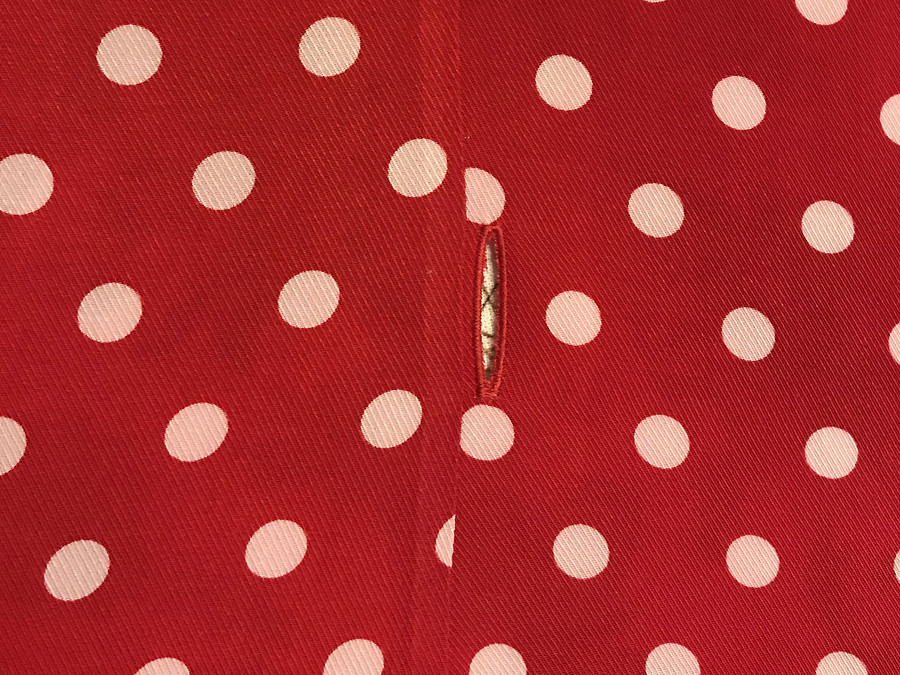
Петлю проутюжьте с обеих сторон.
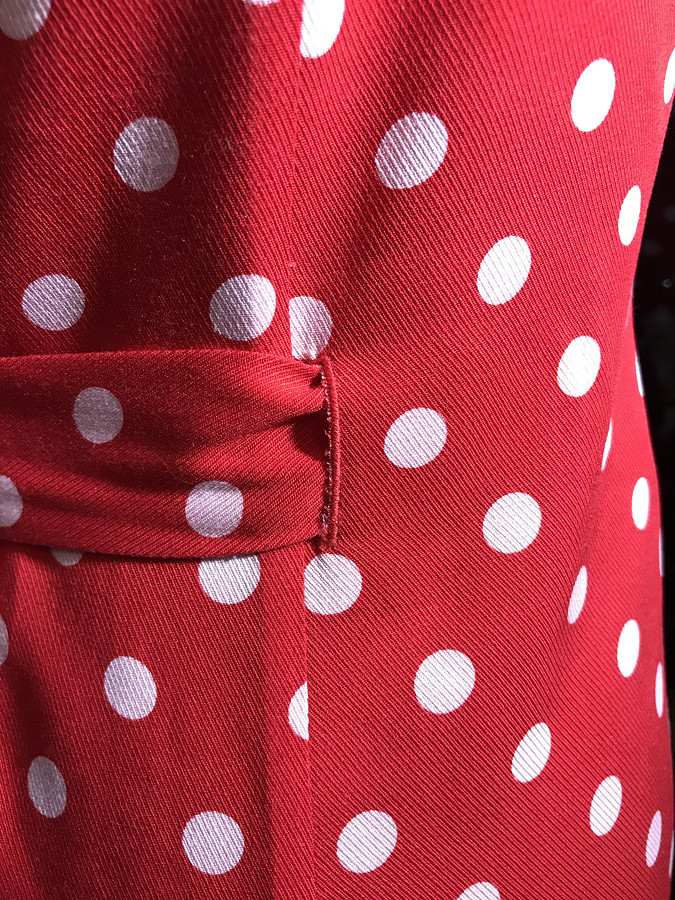
Готово!
Автор мастер-класса и фото: Юлия Деканова