Автор:
Virginia Floyd
Дата создания:
8 Август 2021
Дата обновления:
2 Февраль 2023
![[FIXED] Could not Complete Your Request Because the Smart Object is not Directly Editable](https://i.ytimg.com/vi/h5wYswCiH7g/hqdefault.jpg)
Содержание
- Что является причиной того, что смарт-объект не редактируется напрямую?
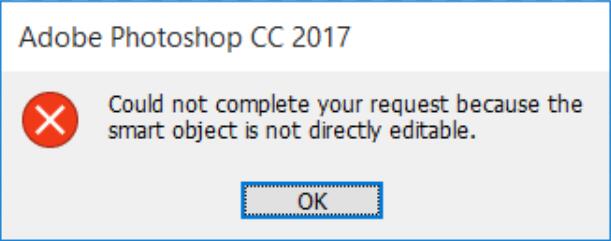
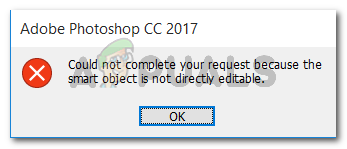
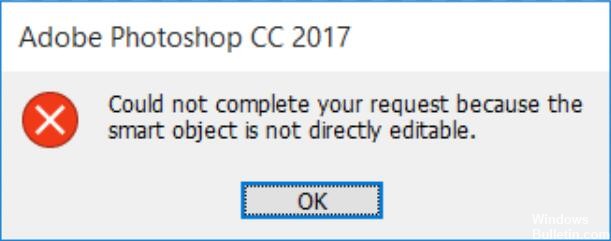
Несколько пользователей видят Не удалось выполнить ваш запрос, потому что смарт-объект нельзя редактировать напрямую ошибка при попытке вырезать или удалить выделенную часть изображения в Photoshop. Сообщается, что эта конкретная ошибка возникает в CS3, CS4, CS5, CS6 и всех версиях CC Photoshop.

Что является причиной того, что смарт-объект не редактируется напрямую?
Мы исследовали эту конкретную проблему, изучив различные отчеты пользователей. Нам также удалось воспроизвести ошибку на одной из наших тестовых машин. Из того, что мы собрали, есть несколько сценариев, которые приведут к появлению этого сообщения об ошибке:
- Слой изображения, участвующий в выборе, заблокирован — Наиболее частая причина возникновения этой проблемы — когда выбранный слой изображения заблокирован или частично заблокирован. Следуйте методу 1, чтобы узнать, как разблокировать выбранный слой изображения.
- Задействованный слой содержит векторные данные — Эта проблема также может возникнуть, если вы пытаетесь удалить выделение, содержащее векторные данные. Растеризация слоя должна решить проблему в этом случае.
Если вы изо всех сил пытаетесь решить эту конкретную проблему, эта статья предоставит вам несколько стратегий ремонта. Ниже у вас есть пара исправлений, которые многие пользователи, сталкивающиеся с одной и той же проблемой, использовали, чтобы обойти «Не удалось выполнить ваш запрос, потому что смарт-объект нельзя редактировать напрямую » сообщение об ошибке.
Метод 1: разблокировка слоя изображения
Как сообщила пара пользователей, для них решение было таким же простым, как открыть изображение, которое вызывало ошибку, в Photoshop и разблокировать слой изображения.
Это позволит вам удалить, вырезать или изменить выделенное изображение без получения Не удалось выполнить ваш запрос, потому что смарт-объект нельзя редактировать напрямую » ошибка.
Вот краткое руководство, как это сделать:
- Откройте Photoshop и загрузите изображение, на котором отображается сообщение об ошибке.
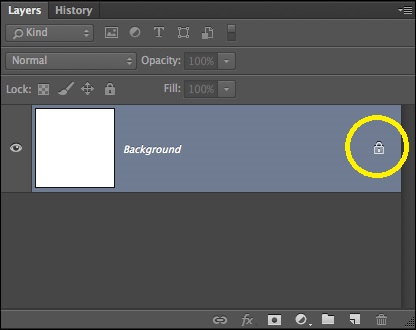
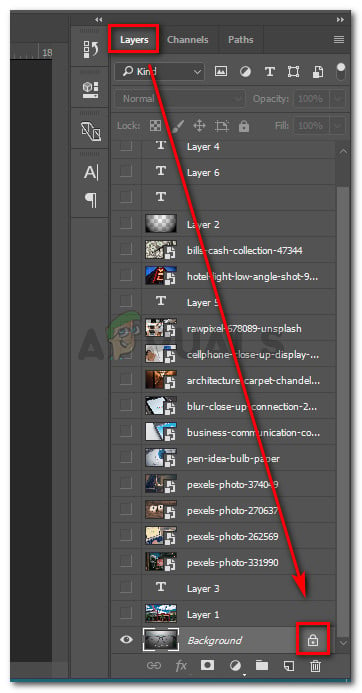
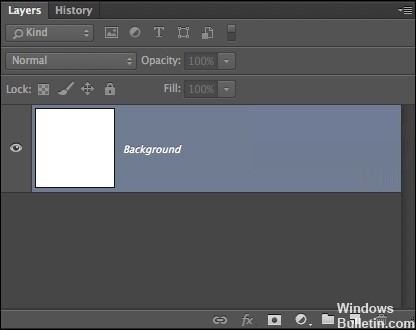
- Перед тем как сделать выбор, перейдите к Слои вкладку в правом боковом меню и нажмите на Замок значок, чтобы разблокировать частично заблокированный слой.
- С разблокированным слоем выберите область, которую вы хотите вырезать, скопировать и удалить, и посмотрите, возникает ли ошибка.
Если вы по-прежнему видите ту же ошибку, перейдите к Способ 2.
Метод 2: разрешение векторного конфликта
Другой распространенный подход, который вызывает эту ошибку, — это попытка использовать растровые инструменты поверх слоя-фигуры. Есть два способа разрешить конфликт этого короля:
- Вы используете инструменты векторов для редактирования или удаления всех векторных элементов (инструмент «Перо», инструмент прямого выбора и т. Д.)
- Вы растрируете слой, чтобы можно было использовать растровые инструменты.
Поскольку растеризация намного проще и может применяться в большинстве сценариев, мы собираемся сосредоточиться на этом. Вот краткое руководство о том, как растрировать слой, вызывающий проблемы:
- открыто файл Photoshop, с которым возникла проблема.
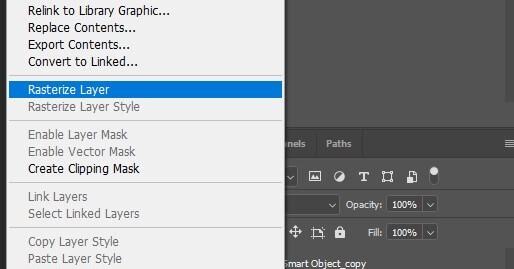
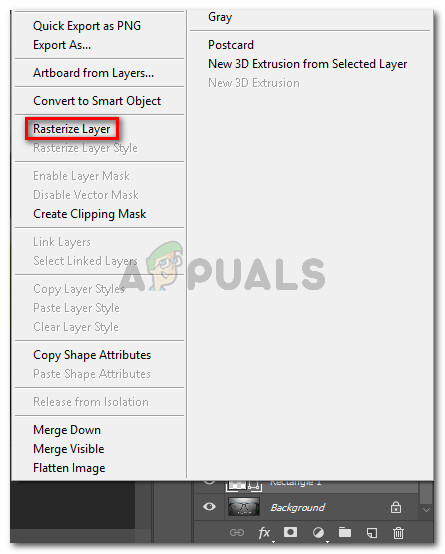
- Щелкните правой кнопкой мыши на слое, на котором отображается сообщение об ошибке, и выберите Растрировать слой.

Примечание: Вы также можете использовать функцию «Упростить слой» для преобразования смарт-объекта в нормальный растеризованный слой.
- После того, как смарт-объект был растеризован, удалите, вырежьте или повторите ту же процедуру, которая вызвала проблему. У вас не должно возникнуть проблем с его заполнением.

“Could not complete your request because the smart object is not directly editable.” This is an error that often occurs when using Photoshop. What does this error mean? What caused this error? And how to fix it? Check this post to find the answer you want.
Developed by Adobe Inc., Adobe Photoshop is a raster graphics editor for Mac and Windows, which is the most popular photo editor today. If you need an excellent photo slideshow maker, MiniTool MovieMaker released by MiniTool should be your first choice.
A smart object is a special type of layer that contains image data. It is designed to contain all the original features of the layer and enables you to perform thorough, non-destructive editing on the layer.
Editing smart objects is not as simple as you think. Some users are complaining that they encountered the “Could not complete your request because the smart object is not directly editable” error when trying to cut or delete selected parts from an image in Photoshop.
According to an investigation, this specific error occurs on CS3, CS4, CS5, CS6, and all CC versions of Photoshop.
Reasons for Could Not Complete Your Request Because the Smart Object Is Not Directly Editable
Based on the information we collected, several conditions will cause this error message:
- The image layer involved in the selection is locked. The most common cause of this problem is when the selected image layer is locked or partially locked.
- The layer involved contains vector data. This problem may also occur if you want to delete the selection containing vector data.
How to Fix Could Not Complete Your Request Because the Smart Object Is Not Directly Editable
If you are looking for a way to solve this specific problem, then you are lucky. This article will provide you with 3 different ways to help you solve the “Could not complete your request because the smart object is not directly editable” error.
To successfully solve this problem, please follow the methods below in order until you come across a solution that can effectively solve your problem.
Method 1. Unlock the Image Layer
No matter when you receive the error “Could not complete your request because the smart object is not directly editable”, the simplest solution is to open the wrong image and unlock the image layer in Photoshop. After that, you can delete, cut, or modify image selection. This method is effective in many cases.
Here’s a quick guide on how to unlock the image layer:
Step 1. Open Photoshop on your PC.
Step 2. Load the image showing the error message.
Step 3. Before making the selection, go to the Layers tab using the right-hand side menu and click on the Lock icon to unlock the partially locked layer.
Step 4. After the layer is unlocked, select the area that you want to cut, copy, and delete. Check if the error is still occurring.
If you’re still seeing the same error, move forward to the next method.
Method 2. Convert Smart Object to a Normal Layer
Another possible reason for the error “Could not complete your request because the smart object is not directly editable” is that the smart object contains data in a non-destructive container file. Therefore, you are not allowed to directly edit this smart object file. The solution to this problem is to convert the smart object to a normal layer.
Here’s a quick guide on how to convert the smart object to a normal layer. The first thing is to run Photoshop on your computer. And then follow one of these ways.
Way 1. In the Layers panel, double-click on the Smart Objects icon.
Way 2. Navigate to Layer > Smart Objects > Edit Contents.

Way 3. Go to Properties and select Edit Contents.
By performing any of the above ways, you can convert the smart object to a normal layer. Now you can try to edit the smart object again. If it fails, try the third method.
Method 3. Rasterize the Layer
Another reason for the “Could not complete your request because the smart object is not directly editable” error is that you are trying to use a grid-based tool on the shape layer. The solution is to rasterize the layer so that you can use raster-based tools. And this method can be applied to most situations.
Here’s a quick guide on how to rasterize the layer:
Step 1. Open the Photoshop app on your device first.
Step 2. Right-click on the layer that is showing the error message and select Rasterize Layer.
Step 3. Once the smart object has been rasterized, you can try repeating the same procedure that was triggering the issue to check if the error has been solved.
That’s all methods we have summarized. We hope these methods can help you get out of trouble.
Click to Tweet
About Photoshop Smart Object
What is a smart object in Photoshop?
A smart object is a special layer that can be truly non-destructively edited in Photoshop.
When you convert a normal layer to a smart object, the content of the original source layer will be saved separately as a file in the file. No matter how many smart objects you edit, the original source content will remain unchanged.
Smart objects can contain raster and vector content and can work like ordinary layers. You can adjust their size or transform them, apply filters, or add adjustment layers. You can also make selections and use masks.
What makes it even more useful is that you can also access and edit the source content at any time. Just double-click the thumbnail of the layer in the Layers panel.
What are the benefits of a smart object?
- Perform a nondestructive transformation. You can scale, rotate, skew, distort, perspective transform, or warp a layer without losing the original image data or quality.
- Handle vector data, such as vector illustrations in Illustrator.
- Perform nondestructive filtering. You can edit the filters applied to smart objects at any time.
- Edit a smart object and automatically update all its linked instances.
- Apply a layer mask that is linked to or not linked to a smart object layer.
- Try various designs with low-resolution placeholder images and then replace them with the final version.
Bonus – Other Common Photoshop Errors
In addition to the error we mentioned above, Photoshop users have encountered some other errors. The following will briefly introduce some common Photoshop errors. To make things easier, we also list their causes and solutions for your reference.
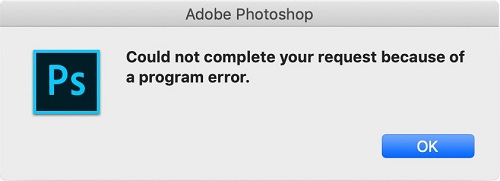
1. Could Not Complete Your Request Because of a Program Error
The “Photoshop could not complete your request because of a program error” error warning is often caused by the generator plugin or the settings of Photoshop along with the file extension of the image files.
In some cases, the error message only appears for a specific image file, while other image files can be loaded well. The reasons and solutions for the above error message will be discussed below.
4 possible causes:
- Photoshop Preferences is the most common cause of the error message.
- Another cause of the error message can be the extension of the image file.
- A locked library folder can also result in the error message.
- The generator plugin found in the Preferences window can also cause the error message.
4 practical solutions:
- Reset the Preferences of the Photoshop application.
- Change the extension of the image file.
- Unlock the library folder.
- Disable the generator plugin which is found in the Preferences window.
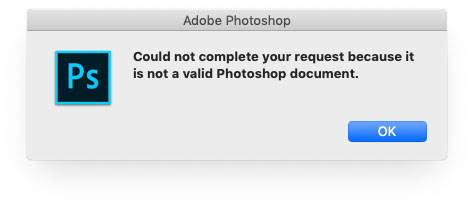
2. Could Not Complete Your Request Because It Is Not a Valid Photoshop Document
Several users claim that they got the “Could not complete your request because it is not a valid Photoshop document” error when trying to open PSD and PDF files with Photoshop. And this error is reported to occur on both Mac and Windows computers.
2 possible causes:
- The most common cause of this error is that the file is saved with another extension.
- Another known cause of this error is that the PSD file is corrupted.
2 practical solutions:
- Change the extension to the correct extension.
- Open the file with a different photo editor, such as GIMP.
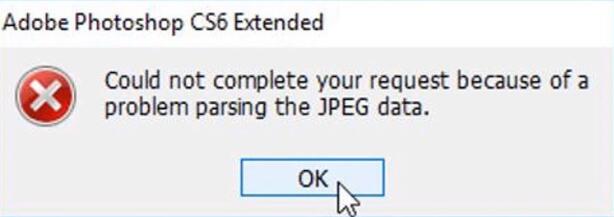
3. Could Not Complete Your Request Because of a Problem parsing the JPEG data
As we all know, Photoshop will parse all imported images to enable multiple functions and make certain functions possible. However, some users have experienced a special situation in which users cannot import pictures from their desktops.
The error message notes: “Could not complete your request because of a problem parsing the JPEG data”. And this error is not limited to only JPEG files. It may also occur in PNG or GIF files.
One possible cause:
This error is usually associated with the problem in the extension of the image.
3 practical solutions:
- Open the image via Paint and then save the picture in the correct JPEG format.
- Open the image in your default photo viewer, rotate the picture, and then close it without making any changes.
- Take a screenshot, crop out the unwanted area, and then save the final picture.
Conclusion
Did the above methods help you solve the “Could not complete your request because the smart object is not directly editable” error? If you think this article is useful, please share this article with someone who suffers from the same problem as you.
Of course, if you have any questions or suggestions about it, please let us know via [email protected] or share them in the comments section below.
Smart Object Is Not Directly Editable FAQ
Why does Photoshop say that smart object is not directly editable?
According to the survey, two conditions will cause this error message. The first one is the image layer involved in the selection is locked. The second one is the layer involved contains vector data.
How do I make a smart object editable in Photoshop?
Here are 3 practical approaches to make a smart object editable in Photoshop.
- Open the wrong image and unlock the image layer in Photoshop.
- Convert the smart object to a normal layer.
- Rasterize the layer.
How do you crop a smart object in Photoshop?
- Select the smart object under the Layers.
- Choose the Crop tool from the left panel.
- Drag any edge of the image to crop it.
- Use the checkmark icon on the top to save the change.
How can I make a smart object?
Here are 4 useful methods to make a smart object.
- Open an image as a smart object.
- Open raw files as smart objects.
- Convert a layer into a smart object.
- Place an image as a smart object.
Also read:
- [Full Review] What’s Photos Legacy & How to Get/Open/Use It?
- How to Use Windows 11 Photos Spot Fix & Do You Miss the Tool?
- How to Tag/Untag Photos on Facebook & Hide/See Tagged Photos?
- [Look] How to Crop a Picture on TikTok & Photo Crop Challenge
- [2 Ways] How to Circle Crop Photo by Office Apps (Word)?
Не можете использовать ластик, потому что смарт-объект нельзя редактировать напрямую?
Независимо от того, когда вы получаете сообщение об ошибке «Не удалось выполнить ваш запрос, поскольку смарт-объект не редактируется напрямую», самое простое решение — открыть неправильное изображение и разблокировать слой изображения в Photoshop. После этого вы можете удалить, вырезать или изменить выбор изображения.
Чтобы изменить это поведение, чтобы они встраивались в виде растеризованных слоев, выберите «Правка» > «Установки — Общие» на ПК или Photoshop > «Установки» > «Общие». на Mac. Снимите флажок «Всегда создавать смарт-объекты при размещении» и нажмите «ОК».
Как включить редактирование в Photoshop?
Параметры редактирования в Photoshop
- Рисунок 7.1 Чтобы увидеть внешнее приложение для редактирования, выберите «Настройки» в меню Lightroom (Mac) или меню «Правка» (ПК) и перейдите в раздел «Дополнительный внешний редактор». …
- Рисунок 7.2 Если открыть изображение, отличное от необработанного, с помощью основной команды «Редактировать в Photoshop» ([Mac] или.
18.08.2012
Как изменить смарт-объект на обычный?
Преобразование смарт-объекта в обычный слой
Это можно сделать одним из следующих способов: Выберите смарт-объект, затем выберите «Слой» > «Смарт-объекты» > «Растрировать». Выберите смарт-объект, затем выберите «Слой» > «Растрировать» > «Смарт-объект». Щелкните правой кнопкой мыши смарт-объект на панели «Слои» и выберите «Растрировать слой».
Как сделать объект редактируемым напрямую?
Выполните следующие действия, чтобы отредактировать содержимое смарт-объекта:
- В своем документе выберите слой смарт-объекта на панели «Слои».
- Выберите «Слой» → «Смарт-объекты» → «Редактировать содержимое». …
- Нажмите OK, чтобы закрыть диалоговое окно. …
- Отредактируйте файл до тошноты.
- Выберите «Файл» → «Сохранить», чтобы включить изменения.
- Закройте исходный файл.
Почему Photoshop говорит, что выделенная область пуста?
Вы получаете это сообщение, потому что выбранная часть слоя, над которым вы работаете, пуста.
Как удалить объект в фотошопе?
Инструмент «Точечная восстанавливающая кисть»
- Увеличьте масштаб объекта, который хотите удалить.
- Выберите инструмент Spot Healing Brush Tool, затем Content Aware Type.
- Проведите кистью по объекту, который хотите удалить. Photoshop автоматически накладывает пиксели на выбранную область. Точечное исцеление лучше всего использовать для удаления мелких предметов.
20.06.2020
Как повторно связать векторный смарт-объект в Photoshop?
Щелкните правой кнопкой мыши смарт-объект и выберите «Пересвязать с файлом»; Перейдите к новому местоположению исходного файла; Нажмите «Поместить», чтобы исправить неработающую ссылку.
Найдите и выберите инструмент «Текст» на панели «Инструменты». Вы также можете нажать клавишу T на клавиатуре, чтобы получить доступ к инструменту «Текст» в любое время. На панели управления в верхней части экрана выберите нужный шрифт и размер текста. Щелкните палитру «Цвет текста», затем выберите нужный цвет в диалоговом окне.
Как редактировать буквы в фотошопе?
Как редактировать текст
- Откройте документ Photoshop с текстом, который вы хотите отредактировать. …
- Выберите инструмент «Текст» на панели инструментов.
- Выделите текст, который хотите отредактировать.
- На панели параметров в верхней части есть параметры для редактирования типа шрифта, размера шрифта, цвета шрифта, выравнивания текста и стиля текста. …
- Наконец, щелкните на панели параметров, чтобы сохранить изменения.
Как отредактировать купюру в Photoshop?
Чему вы научились: редактировать текст
- Чтобы отредактировать текст на текстовом слое, выберите текстовый слой на панели «Слои» и выберите инструмент «Горизонтальный» или «Вертикальный текст» на панели «Инструменты». …
- Когда вы закончите редактирование, нажмите на галочку на панели параметров.
15.06.2020
Как изменить слой на обычный?
Преобразуйте фоновый слой в обычный слой
- Дважды щелкните фоновый слой на панели «Слои».
- Выберите «Слой» > «Создать» > «Слой из фона».
- Выберите фоновый слой и выберите «Дублировать слой» во всплывающем меню панели «Слои», чтобы оставить фоновый слой нетронутым и создать его копию как новый слой.
14.12.2018
Как отвязать смарт-объект?
Вы можете отменить связь смарт-объекта, растрировав его. Попробуйте сделать это: активируйте свой смарт-объект, а затем перейдите к: Слой > Смарт-объекты > Растеризовать.
Как взорвать смарт-объект в Photoshop?
Вот простой способ отключить смарт-объект в Adobe Photoshop CC:
- на элементе управления Mac + щелкните слой смарт-объекта.
- выберите «выбрать пиксели»
- зайдите в меню Layer/New/Layer Via Copy или нажмите command + J.
Several users are seeing the Could not complete your request because the smart object is not a directly editable error when trying to cutting or deleting a selected portion from an image in Photoshop. This particular error is reported to occur on CS3, CS4, CS5, CS6, and all CC versions of Photoshop.
What is causing the smart object is not directly editable error?
We investigated this particular issue by looking at various user reports. We also managed to replicate the error on one of our testing machines. From what we gathered, there are a couple of scenarios that will lead to the apparition of this error message:
- The image layer involved in the selection is locked – The most common reason why this issue occurs is when the selected image layer is locked or partially locked. Follow Method 1 for steps on unlocking the selected image layer.
- The involved layer contains vector data – This issue might also occur if you’re trying to delete a selection that contains vector data. Rasterizing the layer should resolve the issue in this case.
If you’re struggling to resolve this particular issue, this article will provide you with a couple of repair strategies. Below you have a couple of fixes that a lot of users encountering the same issue have used to get around the “Could not complete your request because the smart object is not directly editable” error prompt.
Method 1: Unlocking the image layer
As a couple of users have reported that the solution was as simple as opening the image that was producing the error in Photoshop and unlocking the image layer.
This will allow you to delete, cut, or modify the image selection without receiving the Could not complete your request because the smart object is not directly editable” error.
Here’s a quick guide on how to do this:
- Open Photoshop and load up the image that is displaying the error message.
- Before making the selection, go to the Layers tab using the right-hand side menu and click on the Lock icon to unlock the partially locked layer.

Unlocking the partially locked layer - With the layer unlocked, select the area that you want to cut, copy and delete and see if the error is still occurring.
If you’re still seeing the same error, move down to Method 2.
Method 2: Resolving the vector conflict
Another common approach that will produce this error is if you tried to use raster-based tools over a shape layer. There are two ways in which you can resolve the conflict of this king:
- You use vector tools to edit or remove all vector elements (pen tool, direct selection tool, etc.)
- You rasterize the layer so that you can use raster-based tools
Because rasterizing is way easier and can be applied to most scenarios, we are going to focus on that. Here’s a quick guide on how to rasterize the layer that is causing you issues:
- Open the Photoshop file that you’re encountering the issue on.
- Right-click on the layer that is showing the error message and choose Rasterize Layer.

Rasterizing the smart object layer Note: You can also use the Simplify Layer function to convert the smart object into a normal rasterized layer.
- Once the smart object has been rasterized, delete, cut or repeat the same procedure that was triggering the issue. You should have no trouble completing it.
If you don’t want to rasterize the layer simply try to rasterize the object and it should work just fine.

Kevin Arrows
Kevin is a dynamic and self-motivated information technology professional, with a Thorough knowledge of all facets pertaining to network infrastructure design, implementation and administration. Superior record of delivering simultaneous large-scale mission critical projects on time and under budget.
Updated January 2023: Stop getting error messages and slow down your system with our optimization tool. Get it now at this link
- Download and install the repair tool here.
- Let it scan your computer.
- The tool will then repair your computer.
A layer in Photoshop is, as the name implies, a file that can be overlaid. A new image has only one layer. However, if you add multiple layers on top of the original image, you can add more data or use them just for color or tonal correction. Thus, using layers, you can change the image to your liking without changing the original pixels.
Smart Objects, on the other hand, are a special type of layer that contains image data. They are designed to preserve all the original characteristics of the layer, and also give you the ability to do extensive non-destructive editing on the layer.
What causes the message “Your request cannot be fulfilled because the smart object is not directly editable”?
The affected image layer is blocked: The most common cause of this problem is that the selected image layer is blocked or partially blocked. Follow method 1 to unlock the selected image layer.
The affected layer contains vector data: This problem can also occur when you try to delete a selection that contains vector data. In this case, rasterizing the layer should solve the problem.
If you are having trouble solving this problem, this article provides several repair strategies. Below are some solutions that many users who have encountered the same problem have used to get around the error message.
How to fix the “Your request cannot be processed because the smart object is not directly editable” error message?
January 2023 Update:
You can now prevent PC problems by using this tool, such as protecting you against file loss and malware. Additionally it is a great way to optimize your computer for maximum performance.
The program fixes common errors that might occur on Windows systems with ease — no need for hours of troubleshooting when you have the perfect solution at your fingertips:
- Step 1 : Download PC Repair & Optimizer Tool (Windows 10, 8, 7, XP, Vista – Microsoft Gold Certified).
- Step 2 : Click “Start Scan” to find Windows registry issues that could be causing PC problems.
- Step 3 : Click “Repair All” to fix all issues.

Unblock the image layer
- Open Photoshop on your computer.
- Load the image that displays the error message.
- Before selecting, use the menu on the right to go to the Layers tab and click the “Lock” icon to unlock the partially locked layer.
- When the layer is unlocked, select the area you want to cut, copy and delete.
- Check to see if the error continues to occur.
Rasterizing a layer
- First, open the Photoshop application on your device.
- Right-click on the layer where the error message appeared and select Rasterize Layer.
- After rasterizing the smart object, you can try repeating the same process that caused the problem to see if the error has been fixed.
Converting a smart object to a regular layer
- Double-click the Smart Objects icon in the Layers panel.
- Go to Layer -> Smart Objects -> Edit Content.
- Go to Properties and choose Edit Content.
Expert Tip: This repair tool scans the repositories and replaces corrupt or missing files if none of these methods have worked. It works well in most cases where the problem is due to system corruption. This tool will also optimize your system to maximize performance. It can be downloaded by Clicking Here
Frequently Asked Questions
Unlock the layer with the image. If you get the error message «Your request cannot be completed because the smart object is not directly editable,» the easiest solution is to open the wrong image and unlock the image layer in Photoshop. You can then delete, cut or modify the selected image.
- In your document, select the Smart Object layer in the Layers panel.
- Choose Layer -> Smart Objects -> Edit Content.
- Click OK to close the dialog box.
- Edit your file until it is completely impossible.
- Choose File -> Save to apply the changes.
- Close the original file.
- Select the smart object layer in the Layers panel.
- Choose Layer -> Smart Objects -> Replace Contents.
- In the Place dialog box, locate the new file and click Place.
- Click OK when the dialog box appears, and the new content will be placed in the desired location, replacing the old one.
- Click the Lock All Pixels icon in the Layers panel to lock all layer properties.
- Click the icon again to unlock them.
- In the Layers panel, click the Lock Transparency icon to lockout transparent areas of the layer and not draw on them.
- Click the icon again to unlock it.
Post Views: 240