| Inheritance | yiiwidgetsActiveForm » yiibaseWidget » yiibaseComponent » yiibaseObject |
|---|---|
| Implements | yiibaseConfigurable, yiibaseViewContextInterface |
| Subclasses | yiibootstrapActiveForm |
| Available since version | 2.0 |
| Source Code | https://github.com/yiisoft/yii2/blob/master/framework/widgets/ActiveForm.php |
ActiveForm is a widget that builds an interactive HTML form for one or multiple data models.
For more details and usage information on ActiveForm, see the guide article on forms.
Public Properties
| Property | Type | Description | Defined By |
|---|---|---|---|
| $action | array|string | The form action URL. | yiiwidgetsActiveForm |
| $ajaxDataType | string | The type of data that you’re expecting back from the server. | yiiwidgetsActiveForm |
| $ajaxParam | string | The name of the GET parameter indicating the validation request is an AJAX request. | yiiwidgetsActiveForm |
| $attributes | array | The client validation options for individual attributes. | yiiwidgetsActiveForm |
| $autoIdPrefix | string | The prefix to the automatically generated widget IDs. | yiibaseWidget |
| $behaviors | yiibaseBehavior[] | List of behaviors attached to this component | yiibaseComponent |
| $counter | integer | A counter used to generate $id for widgets. | yiibaseWidget |
| $enableAjaxValidation | boolean | Whether to enable AJAX-based data validation. | yiiwidgetsActiveForm |
| $enableClientScript | boolean | Whether to hook up `yii. | yiiwidgetsActiveForm |
| $enableClientValidation | boolean | Whether to enable client-side data validation. | yiiwidgetsActiveForm |
| $encodeErrorSummary | boolean | Whether to perform encoding on the error summary. | yiiwidgetsActiveForm |
| $errorCssClass | string | The CSS class that is added to a field container when the associated attribute has validation error. | yiiwidgetsActiveForm |
| $errorSummaryCssClass | string | The default CSS class for the error summary container. | yiiwidgetsActiveForm |
| $fieldClass | string | The default field class name when calling field() to create a new field. | yiiwidgetsActiveForm |
| $fieldConfig | array|Closure | The default configuration used by field() when creating a new field object. | yiiwidgetsActiveForm |
| $id | string | ID of the widget. | yiibaseWidget |
| $method | string | The form submission method. | yiiwidgetsActiveForm |
| $options | array | The HTML attributes (name-value pairs) for the form tag. | yiiwidgetsActiveForm |
| $requiredCssClass | string | The CSS class that is added to a field container when the associated attribute is required. | yiiwidgetsActiveForm |
| $scrollToError | boolean | Whether to scroll to the first error after validation. | yiiwidgetsActiveForm |
| $scrollToErrorOffset | integer | Offset in pixels that should be added when scrolling to the first error. | yiiwidgetsActiveForm |
| $stack | yiibaseWidget[] | The widgets that are currently being rendered (not ended). | yiibaseWidget |
| $successCssClass | string | The CSS class that is added to a field container when the associated attribute is successfully validated. | yiiwidgetsActiveForm |
| $validateOnBlur | boolean | Whether to perform validation when an input field loses focus. | yiiwidgetsActiveForm |
| $validateOnChange | boolean | Whether to perform validation when the value of an input field is changed. | yiiwidgetsActiveForm |
| $validateOnSubmit | boolean | Whether to perform validation when the form is submitted. | yiiwidgetsActiveForm |
| $validateOnType | boolean | Whether to perform validation while the user is typing in an input field. | yiiwidgetsActiveForm |
| $validatingCssClass | string | The CSS class that is added to a field container when the associated attribute is being validated. | yiiwidgetsActiveForm |
| $validationDelay | integer | Number of milliseconds that the validation should be delayed when the user types in the field and $validateOnType is set true. |
yiiwidgetsActiveForm |
| $validationUrl | array|string | The URL for performing AJAX-based validation. | yiiwidgetsActiveForm |
| $view | yiiwebView | The view object that can be used to render views or view files. | yiibaseWidget |
| $viewPath | string | The directory containing the view files for this widget. | yiibaseWidget |
Public Methods
| Method | Description | Defined By |
|---|---|---|
| __call() | Calls the named method which is not a class method. | yiibaseObject |
| __clone() | This method is called after the object is created by cloning an existing one. | yiibaseComponent |
| __construct() | Constructor. | yiibaseObject |
| __get() | Returns the value of an object property. | yiibaseObject |
| __isset() | Checks if a property is set, i.e. defined and not null. | yiibaseObject |
| __set() | Sets value of an object property. | yiibaseObject |
| __unset() | Sets an object property to null. | yiibaseObject |
| afterRun() | This method is invoked right after a widget is executed. | yiibaseWidget |
| attachBehavior() | Attaches a behavior to this component. | yiibaseComponent |
| attachBehaviors() | Attaches a list of behaviors to the component. | yiibaseComponent |
| beforeRun() | This method is invoked right before the widget is executed. | yiibaseWidget |
| begin() | Begins a widget. | yiibaseWidget |
| beginField() | Begins a form field. | yiiwidgetsActiveForm |
| behaviors() | Returns a list of behaviors that this component should behave as. | yiibaseComponent |
| canGetProperty() | Returns a value indicating whether a property can be read. | yiibaseObject |
| canSetProperty() | Returns a value indicating whether a property can be set. | yiibaseObject |
| className() | Returns the fully qualified name of this class. | yiibaseObject |
| detachBehavior() | Detaches a behavior from the component. | yiibaseComponent |
| detachBehaviors() | Detaches all behaviors from the component. | yiibaseComponent |
| end() | Ends a widget. | yiibaseWidget |
| endField() | Ends a form field. | yiiwidgetsActiveForm |
| ensureBehaviors() | Makes sure that the behaviors declared in behaviors() are attached to this component. | yiibaseComponent |
| errorSummary() | Generates a summary of the validation errors. | yiiwidgetsActiveForm |
| field() | Generates a form field. | yiiwidgetsActiveForm |
| getBehavior() | Returns the named behavior object. | yiibaseComponent |
| getBehaviors() | Returns all behaviors attached to this component. | yiibaseComponent |
| getId() | Returns the ID of the widget. | yiibaseWidget |
| getView() | Returns the view object that can be used to render views or view files. | yiibaseWidget |
| getViewPath() | Returns the directory containing the view files for this widget. | yiibaseWidget |
| hasEventHandlers() | Returns a value indicating whether there is any handler attached to the named event. | yiibaseComponent |
| hasMethod() | Returns a value indicating whether a method is defined. | yiibaseObject |
| hasProperty() | Returns a value indicating whether a property is defined. | yiibaseObject |
| init() | Initializes the widget. | yiiwidgetsActiveForm |
| off() | Detaches an existing event handler from this component. | yiibaseComponent |
| on() | Attaches an event handler to an event. | yiibaseComponent |
| registerClientScript() | This registers the necessary JavaScript code. | yiiwidgetsActiveForm |
| render() | Renders a view. | yiibaseWidget |
| renderFile() | Renders a view file. | yiibaseWidget |
| run() | Runs the widget. | yiiwidgetsActiveForm |
| setId() | Sets the ID of the widget. | yiibaseWidget |
| setView() | Sets the view object to be used by this widget. | yiibaseWidget |
| trigger() | Triggers an event. | yiibaseComponent |
| validate() | Validates one or several models and returns an error message array indexed by the attribute IDs. | yiiwidgetsActiveForm |
| validateMultiple() | Validates an array of model instances and returns an error message array indexed by the attribute IDs. | yiiwidgetsActiveForm |
| widget() | Creates a widget instance and runs it. | yiibaseWidget |
Protected Methods
| Method | Description | Defined By |
|---|---|---|
| getClientOptions() | Returns the options for the form JS widget. | yiiwidgetsActiveForm |
Events
| Event | Type | Description | Defined By |
|---|---|---|---|
| EVENT_AFTER_RUN | yiibaseWidgetEvent | An event raised right after executing a widget. (available since version 2.0.11) | yiibaseWidget |
| EVENT_BEFORE_RUN | yiibaseWidgetEvent | An event raised right before executing a widget. (available since version 2.0.11) | yiibaseWidget |
| EVENT_INIT | yiibaseEvent | An event that is triggered when the widget is initialized via init(). (available since version 2.0.11) | yiibaseWidget |
Property Details
$action
The form action URL. This parameter will be processed by yiihelpersUrl::to().
See also $method for specifying the HTTP method for this form.
public array|string $action = ''
$ajaxDataType
The type of data that you’re expecting back from the server.
public string $ajaxDataType = 'json'
$ajaxParam
The name of the GET parameter indicating the validation request is an AJAX request.
public string $ajaxParam = 'ajax'
$attributes
The client validation options for individual attributes. Each element of the array represents the validation options for a particular attribute.
public array $attributes = []
$enableAjaxValidation
Whether to enable AJAX-based data validation. If yiiwidgetsActiveField::$enableAjaxValidation is set, its value will take precedence for that input field.
public boolean $enableAjaxValidation = false
$enableClientScript
Whether to hook up yii.activeForm JavaScript plugin. This property must be set true if you want to support client validation and/or AJAX validation, or if you want to take advantage of the yii.activeForm plugin. When this is false, the form will not generate any JavaScript.
See also registerClientScript().
public boolean $enableClientScript = true
$enableClientValidation
Whether to enable client-side data validation. If yiiwidgetsActiveField::$enableClientValidation is set, its value will take precedence for that input field.
public boolean $enableClientValidation = true
$encodeErrorSummary
Whether to perform encoding on the error summary.
public boolean $encodeErrorSummary = true
$errorCssClass
The CSS class that is added to a field container when the associated attribute has validation error.
public string $errorCssClass = 'has-error'
$errorSummaryCssClass
The default CSS class for the error summary container.
See also errorSummary().
public string $errorSummaryCssClass = 'error-summary'
$fieldClass
The default field class name when calling field() to create a new field.
See also $fieldConfig.
public string $fieldClass = 'yiiwidgetsActiveField'
$fieldConfig
The default configuration used by field() when creating a new field object. This can be either a configuration array or an anonymous function returning a configuration array. If the latter, the signature should be as follows:
function ($model, $attribute)
The value of this property will be merged recursively with the $options parameter passed to field().
See also $fieldClass.
public array|Closure $fieldConfig = []
$method
The form submission method. This should be either post or get. Defaults to post.
When you set this to get you may see the url parameters repeated on each request. This is because the default value of $action is set to be the current request url and each submit will add new parameters instead of replacing existing ones. You may set $action explicitly to avoid this:
$form = ActiveForm::begin([
    'method' => 'get',
    'action' => ['controller/action'],
]);
public string $method = 'post'
$options
The HTML attributes (name-value pairs) for the form tag.
See also yiihelpersHtml::renderTagAttributes() for details on how attributes are being rendered.
public array $options = []
$requiredCssClass
The CSS class that is added to a field container when the associated attribute is required.
public string $requiredCssClass = 'required'
$scrollToError
Whether to scroll to the first error after validation.
public boolean $scrollToError = true
$scrollToErrorOffset
Offset in pixels that should be added when scrolling to the first error.
public integer $scrollToErrorOffset = 0
$successCssClass
The CSS class that is added to a field container when the associated attribute is successfully validated.
public string $successCssClass = 'has-success'
$validateOnBlur
Whether to perform validation when an input field loses focus. If yiiwidgetsActiveField::$validateOnBlur is set, its value will take precedence for that input field.
public boolean $validateOnBlur = true
$validateOnChange
Whether to perform validation when the value of an input field is changed. If yiiwidgetsActiveField::$validateOnChange is set, its value will take precedence for that input field.
public boolean $validateOnChange = true
$validateOnSubmit
Whether to perform validation when the form is submitted.
public boolean $validateOnSubmit = true
$validateOnType
Whether to perform validation while the user is typing in an input field. If yiiwidgetsActiveField::$validateOnType is set, its value will take precedence for that input field.
See also $validationDelay.
public boolean $validateOnType = false
$validatingCssClass
The CSS class that is added to a field container when the associated attribute is being validated.
public string $validatingCssClass = 'validating'
$validationDelay
Number of milliseconds that the validation should be delayed when the user types in the field and $validateOnType is set true. If yiiwidgetsActiveField::$validationDelay is set, its value will take precedence for that input field.
public integer $validationDelay = 500
$validationUrl
The URL for performing AJAX-based validation. This property will be processed by yiihelpersUrl::to(). Please refer to yiihelpersUrl::to() for more details on how to configure this property. If this property is not set, it will take the value of the form’s action attribute.
public array|string $validationUrl = null
Method Details
beginField()
Begins a form field.
This method will create a new form field and returns its opening tag. You should call endField() afterwards.
See also:
- endField()
- field()
| public string beginField ( $model, $attribute, $options = [] ) | ||
|---|---|---|
| $model | yiibaseModel |
The data model. |
| $attribute | string |
The attribute name or expression. See yiihelpersHtml::getAttributeName() for the format about attribute expression. |
| $options | array |
The additional configurations for the field object. |
| return | string |
The opening tag. |
endField()
Ends a form field.
This method will return the closing tag of an active form field started by beginField().
| public string endField ( ) | ||
|---|---|---|
| return | string |
The closing tag of the form field. |
| throws | yiibaseInvalidCallException |
if this method is called without a prior beginField() call. |
errorSummary()
Generates a summary of the validation errors.
If there is no validation error, an empty error summary markup will still be generated, but it will be hidden.
See also $errorSummaryCssClass.
| public string errorSummary ( $models, $options = [] ) | ||
|---|---|---|
| $models | yiibaseModel|yiibaseModel[] |
The model(s) associated with this form. |
| $options | array |
The tag options in terms of name-value pairs. The following options are specially handled:
The rest of the options will be rendered as the attributes of the container tag. The values will be HTML-encoded using yiihelpersHtml::encode(). If a value is |
| return | string |
The generated error summary. |
field()
Generates a form field.
A form field is associated with a model and an attribute. It contains a label, an input and an error message and use them to interact with end users to collect their inputs for the attribute.
See also $fieldConfig.
| public yiiwidgetsActiveField field ( $model, $attribute, $options = [] ) | ||
|---|---|---|
| $model | yiibaseModel |
The data model. |
| $attribute | string |
The attribute name or expression. See yiihelpersHtml::getAttributeName() for the format about attribute expression. |
| $options | array |
The additional configurations for the field object. These are properties of yiiwidgetsActiveField or a subclass, depending on the value of $fieldClass. |
| return | yiiwidgetsActiveField |
The created ActiveField object. |
getClientOptions()
Returns the options for the form JS widget.
| protected array getClientOptions ( ) | ||
|---|---|---|
| return | array |
The options. |
init()
Initializes the widget.
This renders the form open tag.
| public void init ( ) |
|---|
registerClientScript()
This registers the necessary JavaScript code.
| public void registerClientScript ( ) |
|---|
run()
Runs the widget.
This registers the necessary JavaScript code and renders the form open and close tags.
| public void run ( ) | ||
|---|---|---|
| throws | yiibaseInvalidCallException |
if |
validate()
Validates one or several models and returns an error message array indexed by the attribute IDs.
This is a helper method that simplifies the way of writing AJAX validation code.
For example, you may use the following code in a controller action to respond to an AJAX validation request:
$model = new Post;
$model->load(Yii::$app->request->post());
if (Yii::$app->request->isAjax) {
    Yii::$app->response->format = Response::FORMAT_JSON;
    return ActiveForm::validate($model);
}
// ... respond to non-AJAX request ...
To validate multiple models, simply pass each model as a parameter to this method, like the following:
ActiveForm::validate($model1, $model2, ...);
| public static array validate ( $model, $attributes = null ) | ||
|---|---|---|
| $model | yiibaseModel |
The model to be validated. |
| $attributes | mixed |
List of attributes that should be validated. If this parameter is empty, it means any attribute listed in the applicable validation rules should be validated. When this method is used to validate multiple models, this parameter will be interpreted as a model. |
| return | array |
The error message array indexed by the attribute IDs. |
validateMultiple()
Validates an array of model instances and returns an error message array indexed by the attribute IDs.
This is a helper method that simplifies the way of writing AJAX validation code for tabular input.
For example, you may use the following code in a controller action to respond to an AJAX validation request:
// ... load $models ...
if (Yii::$app->request->isAjax) {
    Yii::$app->response->format = Response::FORMAT_JSON;
    return ActiveForm::validateMultiple($models);
}
// ... respond to non-AJAX request ...
| public static array validateMultiple ( $models, $attributes = null ) | ||
|---|---|---|
| $models | array |
An array of models to be validated. |
| $attributes | mixed |
List of attributes that should be validated. If this parameter is empty, it means any attribute listed in the applicable validation rules should be validated. |
| return | array |
The error message array indexed by the attribute IDs. |
Validating Input
As a rule of thumb, you should never trust the data received from end users and should always validate it
before putting it to good use.
Given a model populated with user inputs, you can validate the inputs by calling the
[[yiibaseModel::validate()]] method. The method will return a boolean value indicating whether the validation
succeeded or not. If not, you may get the error messages from the [[yiibaseModel::errors]] property. For example,
$model = new appmodelsContactForm();

// populate model attributes with user inputs
$model->load(Yii::$app->request->post());
// which is equivalent to the following:
// $model->attributes = Yii::$app->request->post('ContactForm');

if ($model->validate()) {
    // all inputs are valid
} else {
    // validation failed: $errors is an array containing error messages
    $errors = $model->errors;
}
Declaring Rules
To make validate() really work, you should declare validation rules for the attributes you plan to validate.
This should be done by overriding the [[yiibaseModel::rules()]] method. The following example shows how
the validation rules for the ContactForm model are declared:
public function rules()
{
    return [
        // the name, email, subject and body attributes are required
        [['name', 'email', 'subject', 'body'], 'required'],

        // the email attribute should be a valid email address
        ['email', 'email'],
    ];
}
The [[yiibaseModel::rules()|rules()]] method should return an array of rules, each of which is an array
of the following format:
[
    // required, specifies which attributes should be validated by this rule.
    // For a single attribute, you can use the attribute name directly
    // without having it in an array
    ['attribute1', 'attribute2', ...],

    // required, specifies the type of this rule.
    // It can be a class name, validator alias, or a validation method name
    'validator',

    // optional, specifies in which scenario(s) this rule should be applied
    // if not given, it means the rule applies to all scenarios
    // You may also configure the "except" option if you want to apply the rule
    // to all scenarios except the listed ones
    'on' => ['scenario1', 'scenario2', ...],

    // optional, specifies additional configurations for the validator object
    'property1' => 'value1', 'property2' => 'value2', ...
]
For each rule you must specify at least which attributes the rule applies to and what is the type of the rule.
You can specify the rule type in one of the following forms:
- the alias of a core validator, such as
required,in,date, etc. Please refer to
the Core Validators for the complete list of core validators. - the name of a validation method in the model class, or an anonymous function. Please refer to the
Inline Validators subsection for more details. - a fully qualified validator class name. Please refer to the Standalone Validators
subsection for more details.
A rule can be used to validate one or multiple attributes, and an attribute may be validated by one or multiple rules.
A rule may be applied in certain scenarios only by specifying the on option.
If you do not specify an on option, it means the rule will be applied to all scenarios.
When the validate() method is called, it does the following steps to perform validation:
- Determine which attributes should be validated by getting the attribute list from [[yiibaseModel::scenarios()]]
using the current [[yiibaseModel::scenario|scenario]]. These attributes are called active attributes. - Determine which validation rules should be used by getting the rule list from [[yiibaseModel::rules()]]
using the current [[yiibaseModel::scenario|scenario]]. These rules are called active rules. - Use each active rule to validate each active attribute which is associated with the rule.
The validation rules are evaluated in the order they are listed.
According to the above validation steps, an attribute will be validated if and only if it is
an active attribute declared in scenarios() and is associated with one or multiple active rules
declared in rules().
Note: It is handy to give names to rules i.e.
public function rules()
{
    return [
        // ...
        'password' => [['password'], 'string', 'max' => 60],
    ];
}
You can use it in a child model:
public function rules()
{
    $rules = parent::rules();
    unset($rules['password']);
    return $rules;
}
Customizing Error Messages
Most validators have default error messages that will be added to the model being validated when its attributes
fail the validation. For example, the [[yiivalidatorsRequiredValidator|required]] validator will add
a message «Username cannot be blank.» to a model when the username attribute fails the rule using this validator.
You can customize the error message of a rule by specifying the message property when declaring the rule,
like the following,
public function rules()
{
    return [
        ['username', 'required', 'message' => 'Please choose a username.'],
    ];
}
Some validators may support additional error messages to more precisely describe different causes of
validation failures. For example, the [[yiivalidatorsNumberValidator|number]] validator supports
[[yiivalidatorsNumberValidator::tooBig|tooBig]] and [[yiivalidatorsNumberValidator::tooSmall|tooSmall]]
to describe the validation failure when the value being validated is too big and too small, respectively.
You may configure these error messages like configuring other properties of validators in a validation rule.
Validation Events
When [[yiibaseModel::validate()]] is called, it will call two methods that you may override to customize
the validation process:
- [[yiibaseModel::beforeValidate()]]: the default implementation will trigger a [[yiibaseModel::EVENT_BEFORE_VALIDATE]]
event. You may either override this method or respond to this event to do some preprocessing work
(e.g. normalizing data inputs) before the validation occurs. The method should return a boolean value indicating
whether the validation should proceed or not. - [[yiibaseModel::afterValidate()]]: the default implementation will trigger a [[yiibaseModel::EVENT_AFTER_VALIDATE]]
event. You may either override this method or respond to this event to do some postprocessing work after
the validation is completed.
Conditional Validation
To validate attributes only when certain conditions apply, e.g. the validation of one attribute depends
on the value of another attribute you can use the [[yiivalidatorsValidator::when|when]] property
to define such conditions. For example,
    ['state', 'required', 'when' => function($model) {
        return $model->country == 'USA';
    }]
The [[yiivalidatorsValidator::when|when]] property takes a PHP callable with the following signature:
/**
 * @param Model $model the model being validated
 * @param string $attribute the attribute being validated
 * @return bool whether the rule should be applied
 */
function ($model, $attribute)
If you also need to support client-side conditional validation, you should configure
the [[yiivalidatorsValidator::whenClient|whenClient]] property which takes a string representing a JavaScript
function whose return value determines whether to apply the rule or not. For example,
    ['state', 'required', 'when' => function ($model) {
        return $model->country == 'USA';
    }, 'whenClient' => "function (attribute, value) {
        return $('#country').val() == 'USA';
    }"]
Data Filtering
User inputs often need to be filtered or preprocessed. For example, you may want to trim the spaces around the
username input. You may use validation rules to achieve this goal.
The following examples shows how to trim the spaces in the inputs and turn empty inputs into nulls by using
the trim and default core validators:
return [
    [['username', 'email'], 'trim'],
    [['username', 'email'], 'default'],
];
You may also use the more general filter validator to perform more complex
data filtering.
As you can see, these validation rules do not really validate the inputs. Instead, they will process the values
and save them back to the attributes being validated.
A complete processing of user input is shown in the following example code, which will ensure only integer
values are stored in an attribute:
['age', 'trim'],
['age', 'default', 'value' => null],
['age', 'integer', 'min' => 0],
['age', 'filter', 'filter' => 'intval', 'skipOnEmpty' => true],
The above code will perform the following operations on the input:
- Trim whitespace from the input value.
- Make sure empty input is stored as
nullin the database; we differentiate between a value being «not set»
and the actual value0. Ifnullis not allowed you can set another default value here. - Validate that the value is an integer greater than 0 if it is not empty. Normal validators have
[[yiivalidatorsValidator::$skipOnEmpty|$skipOnEmpty]] set totrue. - Make sure the value is of type integer, e.g. casting a string
'42'to integer42.
Here we set [[yiivalidatorsFilterValidator::$skipOnEmpty|$skipOnEmpty]] totrue, which isfalseby default
on the [[yiivalidatorsFilterValidator|filter]] validator.
Handling Empty Inputs
When input data are submitted from HTML forms, you often need to assign some default values to the inputs
if they are empty. You can do so by using the default validator. For example,
return [
    // set "username" and "email" as null if they are empty
    [['username', 'email'], 'default'],

    // set "level" to be 1 if it is empty
    ['level', 'default', 'value' => 1],
];
By default, an input is considered empty if its value is an empty string, an empty array or a null.
You may customize the default empty detection logic by configuring the [[yiivalidatorsValidator::isEmpty]] property
with a PHP callable. For example,
    ['agree', 'required', 'isEmpty' => function ($value) {
        return empty($value);
    }]
Note: Most validators do not handle empty inputs if their [[yiivalidatorsValidator::skipOnEmpty]] property takes
the default valuetrue. They will simply be skipped during validation if their associated attributes receive empty
inputs. Among the core validators, only thecaptcha,default,filter,
required, andtrimvalidators will handle empty inputs.
Ad Hoc Validation
Sometimes you need to do ad hoc validation for values that are not bound to any model.
If you only need to perform one type of validation (e.g. validating email addresses), you may call
the [[yiivalidatorsValidator::validate()|validate()]] method of the desired validator, like the following:
$email = 'test@example.com';
$validator = new yiivalidatorsEmailValidator();

if ($validator->validate($email, $error)) {
    echo 'Email is valid.';
} else {
    echo $error;
}
Note: Not all validators support this type of validation. An example is the unique
core validator which is designed to work with a model only.
Note: The [[yiibaseValidator::skipOnEmpty]] property is used for [[yiibaseModel]] validation only. Using it without a model has no effect.
If you need to perform multiple validations against several values, you can use [[yiibaseDynamicModel]]
which supports declaring both attributes and rules on the fly. Its usage is like the following:
public function actionSearch($name, $email)
{
    $model = DynamicModel::validateData(['name' => $name, 'email' => $email], [
        [['name', 'email'], 'string', 'max' => 128],
        ['email', 'email'],
    ]);

    if ($model->hasErrors()) {
        // validation fails
    } else {
        // validation succeeds
    }
}
The [[yiibaseDynamicModel::validateData()]] method creates an instance of DynamicModel, defines the attributes
using the given data (name and email in this example), and then calls [[yiibaseModel::validate()]]
with the given rules.
Alternatively, you may use the following more «classic» syntax to perform ad hoc data validation:
public function actionSearch($name, $email)
{
    $model = new DynamicModel(['name' => $name, 'email' => $email]);
    $model->addRule(['name', 'email'], 'string', ['max' => 128])
        ->addRule('email', 'email')
        ->validate();

    if ($model->hasErrors()) {
        // validation fails
    } else {
        // validation succeeds
    }
}
After validation, you can check if the validation succeeded or not by calling the
[[yiibaseDynamicModel::hasErrors()|hasErrors()]] method, and then get the validation errors from the
[[yiibaseDynamicModel::errors|errors]] property, like you do with a normal model.
You may also access the dynamic attributes defined through the model instance, e.g.,
$model->name and $model->email.
Creating Validators
Besides using the core validators included in the Yii releases, you may also
create your own validators. You may create inline validators or standalone validators.
Inline Validators
An inline validator is one defined in terms of a model method or an anonymous function. The signature of
the method/function is:
/**
 * @param string $attribute the attribute currently being validated
 * @param mixed $params the value of the "params" given in the rule
 * @param yiivalidatorsInlineValidator $validator related InlineValidator instance.
 * This parameter is available since version 2.0.11.
 * @param mixed $current the currently validated value of attribute.
 * This parameter is available since version 2.0.36.
 */
function ($attribute, $params, $validator, $current)
If an attribute fails the validation, the method/function should call [[yiibaseModel::addError()]] to save
the error message in the model so that it can be retrieved back later to present to end users.
Below are some examples:
use yiibaseModel;

class MyForm extends Model
{
    public $country;
    public $token;

    public function rules()
    {
        return [
            // an inline validator defined as the model method validateCountry()
            ['country', 'validateCountry'],

            // an inline validator defined as an anonymous function
            ['token', function ($attribute, $params, $validator) {
                if (!ctype_alnum($this->$attribute)) {
                    $this->addError($attribute, 'The token must contain letters or digits.');
                }
            }],
        ];
    }

    public function validateCountry($attribute, $params, $validator)
    {
        if (!in_array($this->$attribute, ['USA', 'Indonesia'])) {
            $this->addError($attribute, 'The country must be either "USA" or "Indonesia".');
        }
    }
}
Note: Since version 2.0.11 you can use [[yiivalidatorsInlineValidator::addError()]] for adding errors instead. That way the error
message can be formatted using [[yiii18nI18N::format()]] right away. Use{attribute}and{value}in the error
message to refer to an attribute label (no need to get it manually) and attribute value accordingly:$validator->addError($this, $attribute, 'The value "{value}" is not acceptable for {attribute}.');
Note: By default, inline validators will not be applied if their associated attributes receive empty inputs
or if they have already failed some validation rules. If you want to make sure a rule is always applied,
you may configure the [[yiivalidatorsValidator::skipOnEmpty|skipOnEmpty]] and/or [[yiivalidatorsValidator::skipOnError|skipOnError]]
properties to befalsein the rule declarations. For example:[ ['country', 'validateCountry', 'skipOnEmpty' => false, 'skipOnError' => false], ]
Standalone Validators
A standalone validator is a class extending [[yiivalidatorsValidator]] or its child class. You may implement
its validation logic by overriding the [[yiivalidatorsValidator::validateAttribute()]] method. If an attribute
fails the validation, call [[yiibaseModel::addError()]] to save the error message in the model, like you do
with inline validators.
For example, the inline validator above could be moved into new [[components/validators/CountryValidator]] class.
In this case we can use [[yiivalidatorsValidator::addError()]] to set customized message for the model.
namespace appcomponents; use yiivalidatorsValidator; class CountryValidator extends Validator { public function validateAttribute($model, $attribute) { if (!in_array($model->$attribute, ['USA', 'Indonesia'])) { $this->addError($model, $attribute, 'The country must be either "{country1}" or "{country2}".', ['country1' => 'USA', 'country2' => 'Indonesia']); } } }
If you want your validator to support validating a value without a model, you should also override
[[yiivalidatorsValidator::validate()]]. You may also override [[yiivalidatorsValidator::validateValue()]]
instead of validateAttribute() and validate() because by default the latter two methods are implemented
by calling validateValue().
Below is an example of how you could use the above validator class within your model.
namespace appmodels; use Yii; use yiibaseModel; use appcomponentsvalidatorsCountryValidator; class EntryForm extends Model { public $name; public $email; public $country; public function rules() { return [ [['name', 'email'], 'required'], ['country', CountryValidator::class], ['email', 'email'], ]; } }
Multiple Attributes Validation
Sometimes validators involve multiple attributes. Consider the following form:
class MigrationForm extends yiibaseModel { /** * Minimal funds amount for one adult person */ const MIN_ADULT_FUNDS = 3000; /** * Minimal funds amount for one child */ const MIN_CHILD_FUNDS = 1500; public $personalSalary; public $spouseSalary; public $childrenCount; public $description; public function rules() { return [ [['personalSalary', 'description'], 'required'], [['personalSalary', 'spouseSalary'], 'integer', 'min' => self::MIN_ADULT_FUNDS], ['childrenCount', 'integer', 'min' => 0, 'max' => 5], [['spouseSalary', 'childrenCount'], 'default', 'value' => 0], ['description', 'string'], ]; } }
Creating validator
Let’s say we need to check if the family income is enough for children. We can create inline validator
validateChildrenFunds for that which will run only when childrenCount is more than 0.
Note that we can’t use all validated attributes (['personalSalary', 'spouseSalary', 'childrenCount']) when attaching
validator. This is because the same validator will run for each attribute (3 times in total) and we only need to run it
once for the whole attribute set.
You can use any of these attributes instead (or use what you think is the most relevant):
['childrenCount', 'validateChildrenFunds', 'when' => function ($model) { return $model->childrenCount > 0; }],
Implementation of validateChildrenFunds can be like this:
public function validateChildrenFunds($attribute, $params) { $totalSalary = $this->personalSalary + $this->spouseSalary; // Double the minimal adult funds if spouse salary is specified $minAdultFunds = $this->spouseSalary ? self::MIN_ADULT_FUNDS * 2 : self::MIN_ADULT_FUNDS; $childFunds = $totalSalary - $minAdultFunds; if ($childFunds / $this->childrenCount < self::MIN_CHILD_FUNDS) { $this->addError('childrenCount', 'Your salary is not enough for children.'); } }
You can ignore $attribute parameter because validation is not related to just one attribute.
Adding errors
Adding error in case of multiple attributes can vary depending on desired form design:
- Select the most relevant field in your opinion and add error to it’s attribute:
$this->addError('childrenCount', 'Your salary is not enough for children.');
- Select multiple important relevant attributes or all attributes and add the same error message to them. We can store
message in separate variable before passing it toaddErrorto keep code DRY.
$message = 'Your salary is not enough for children.'; $this->addError('personalSalary', $message); $this->addError('wifeSalary', $message); $this->addError('childrenCount', $message);
Or use a loop:
$attributes = ['personalSalary', 'wifeSalary', 'childrenCount']; foreach ($attributes as $attribute) { $this->addError($attribute, 'Your salary is not enough for children.'); }
- Add a common error (not related to particular attribute). We can use the not existing attribute name for adding
error, for example*, because attribute existence is not checked at that point.
$this->addError('*', 'Your salary is not enough for children.');
As a result, we will not see error message near form fields. To display it, we can include the error summary in view:
<?= $form->errorSummary($model) ?>
Note: Creating validator which validates multiple attributes at once is well described in the community cookbook.
Client-Side Validation
Client-side validation based on JavaScript is desirable when end users provide inputs via HTML forms, because
it allows users to find out input errors faster and thus provides a better user experience. You may use or implement
a validator that supports client-side validation in addition to server-side validation.
Info: While client-side validation is desirable, it is not a must. Its main purpose is to provide users with a better
experience. Similar to input data coming from end users, you should never trust client-side validation. For this reason,
you should always perform server-side validation by calling [[yiibaseModel::validate()]], as
described in the previous subsections.
Using Client-Side Validation
Many core validators support client-side validation out-of-the-box. All you need to do
is just use [[yiiwidgetsActiveForm]] to build your HTML forms. For example, LoginForm below declares two
rules: one uses the required core validator which is supported on both
client and server-sides; the other uses the validatePassword inline validator which is only supported on the server
side.
namespace appmodels; use yiibaseModel; use appmodelsUser; class LoginForm extends Model { public $username; public $password; public function rules() { return [ // username and password are both required [['username', 'password'], 'required'], // password is validated by validatePassword() ['password', 'validatePassword'], ]; } public function validatePassword() { $user = User::findByUsername($this->username); if (!$user || !$user->validatePassword($this->password)) { $this->addError('password', 'Incorrect username or password.'); } } }
The HTML form built by the following code contains two input fields username and password.
If you submit the form without entering anything, you will find the error messages requiring you
to enter something appear right away without any communication with the server.
<?php $form = yiiwidgetsActiveForm::begin(); ?> <?= $form->field($model, 'username') ?> <?= $form->field($model, 'password')->passwordInput() ?> <?= Html::submitButton('Login') ?> <?php yiiwidgetsActiveForm::end(); ?>
Behind the scene, [[yiiwidgetsActiveForm]] will read the validation rules declared in the model
and generate appropriate JavaScript code for validators that support client-side validation. When a user
changes the value of an input field or submit the form, the client-side validation JavaScript will be triggered.
If you want to turn off client-side validation completely, you may configure the
[[yiiwidgetsActiveForm::enableClientValidation]] property to be false. You may also turn off client-side
validation of individual input fields by configuring their [[yiiwidgetsActiveField::enableClientValidation]]
property to be false. When enableClientValidation is configured at both the input field level and the form level,
the former will take precedence.
Info: Since version 2.0.11 all validators extending from [[yiivalidatorsValidator]] receive client-side options
from separate method — [[yiivalidatorsValidator::getClientOptions()]]. You can use it:
- if you want to implement your own custom client-side validation but leave the synchronization with server-side
validator options;- to extend or customize to fit your specific needs:
public function getClientOptions($model, $attribute) { $options = parent::getClientOptions($model, $attribute); // Modify $options here return $options; }
Implementing Client-Side Validation
To create a validator that supports client-side validation, you should implement the
[[yiivalidatorsValidator::clientValidateAttribute()]] method which returns a piece of JavaScript code
that performs the validation on the client-side. Within the JavaScript code, you may use the following
predefined variables:
attribute: the name of the attribute being validated.value: the value being validated.messages: an array used to hold the validation error messages for the attribute.deferred: an array which deferred objects can be pushed into (explained in the next subsection).
In the following example, we create a StatusValidator which validates if an input is a valid status input
against the existing status data. The validator supports both server-side and client-side validation.
namespace appcomponents; use yiivalidatorsValidator; use appmodelsStatus; class StatusValidator extends Validator { public function init() { parent::init(); $this->message = 'Invalid status input.'; } public function validateAttribute($model, $attribute) { $value = $model->$attribute; if (!Status::find()->where(['id' => $value])->exists()) { $model->addError($attribute, $this->message); } } public function clientValidateAttribute($model, $attribute, $view) { $statuses = json_encode(Status::find()->select('id')->asArray()->column()); $message = json_encode($this->message, JSON_UNESCAPED_SLASHES | JSON_UNESCAPED_UNICODE); return <<<JS if ($.inArray(value, $statuses) === -1) { messages.push($message); } JS; } }
Tip: The above code is given mainly to demonstrate how to support client-side validation. In practice,
you may use the in core validator to achieve the same goal. You may
write the validation rule like the following:[ ['status', 'in', 'range' => Status::find()->select('id')->asArray()->column()], ]
Tip: If you need to work with client validation manually i.e. dynamically add fields or do some custom UI logic, refer
to Working with ActiveForm via JavaScript
in Yii 2.0 Cookbook.
Deferred Validation
If you need to perform asynchronous client-side validation, you can create Deferred objects.
For example, to perform a custom AJAX validation, you can use the following code:
public function clientValidateAttribute($model, $attribute, $view) { return <<<JS deferred.push($.get("/check", {value: value}).done(function(data) { if ('' !== data) { messages.push(data); } })); JS; }
In the above, the deferred variable is provided by Yii, which is an array of Deferred objects. The $.get()
jQuery method creates a Deferred object which is pushed to the deferred array.
You can also explicitly create a Deferred object and call its resolve() method when the asynchronous callback
is hit. The following example shows how to validate the dimensions of an uploaded image file on the client-side.
public function clientValidateAttribute($model, $attribute, $view) { return <<<JS var def = $.Deferred(); var img = new Image(); img.onload = function() { if (this.width > 150) { messages.push('Image too wide!!'); } def.resolve(); } var reader = new FileReader(); reader.onloadend = function() { img.src = reader.result; } reader.readAsDataURL(file); deferred.push(def); JS; }
Note: The
resolve()method must be called after the attribute has been validated. Otherwise the main form
validation will not complete.
For simplicity, the deferred array is equipped with a shortcut method add() which automatically creates a Deferred
object and adds it to the deferred array. Using this method, you can simplify the above example as follows,
public function clientValidateAttribute($model, $attribute, $view) { return <<<JS deferred.add(function(def) { var img = new Image(); img.onload = function() { if (this.width > 150) { messages.push('Image too wide!!'); } def.resolve(); } var reader = new FileReader(); reader.onloadend = function() { img.src = reader.result; } reader.readAsDataURL(file); }); JS; }
AJAX Validation
Some validations can only be done on the server-side, because only the server has the necessary information.
For example, to validate if a username is unique or not, it is necessary to check the user table on the server-side.
You can use AJAX-based validation in this case. It will trigger an AJAX request in the background to validate the
input while keeping the same user experience as the regular client-side validation.
To enable AJAX validation for a single input field, configure the [[yiiwidgetsActiveField::enableAjaxValidation|enableAjaxValidation]]
property of that field to be true and specify a unique form id:
use yiiwidgetsActiveForm; $form = ActiveForm::begin([ 'id' => 'registration-form', ]); echo $form->field($model, 'username', ['enableAjaxValidation' => true]); // ... ActiveForm::end();
To enable AJAX validation for all inputs of the form, configure [[yiiwidgetsActiveForm::enableAjaxValidation|enableAjaxValidation]]
to be true at the form level:
$form = ActiveForm::begin([ 'id' => 'contact-form', 'enableAjaxValidation' => true, ]);
Note: When the
enableAjaxValidationproperty is configured at both the input field level and the form level,
the former will take precedence.
You also need to prepare the server so that it can handle the AJAX validation requests.
This can be achieved by a code snippet like the following in the controller actions:
if (Yii::$app->request->isAjax && $model->load(Yii::$app->request->post())) { Yii::$app->response->format = Response::FORMAT_JSON; return ActiveForm::validate($model); }
The above code will check whether the current request is an AJAX. If yes, it will respond to
this request by running the validation and returning the errors in JSON format.
Info: You can also use Deferred Validation to perform AJAX validation.
However, the AJAX validation feature described here is more systematic and requires less coding effort.
When both enableClientValidation and enableAjaxValidation are set to true, AJAX validation request will be triggered
only after the successful client validation. Note that in case of validating a single field that happens if either
validateOnChange, validateOnBlur or validateOnType is set to true, AJAX request will be sent when the field in
question alone successfully passes client validation.
Содержание
- Проверка входящих данных 
- Правила проверки 
- Настройка сообщений об ошибках 
- События валидации 
- Условные валидации 
- Фильтрация данных 
- Обработка пустых входных данных 
- Специальная валидация 
- Создание Валидаторов 
- Встроенные Валидаторы 
- Автономные валидаторы 
- Валидация на стороне клиента 
- Использование валидации на стороне клиента 
- Реализация проверки на стороне клиента 
- Отложенная валидация 
- AJAX валидация 
Проверка входящих данных 
Как правило, вы никогда не должны доверять данным, полученным от пользователей и всегда проверять их прежде, чем работать с ними и добавлять в базу данных.
Учитывая модель данных которые должен заполнить пользователь, можно проверить эти данные на валидность воспользовавшись методом yiibaseModel::validate(). Метод возвращает логическое значение с результатом валидации ложь/истина. Если данные не валидны, ошибку можно получить воспользовавшись свойством yiibaseModel::$errors. Рассмотрим пример:
Правила проверки 
Для того, чтобы validate() действительно работал, нужно объявить правила проверки атрибутов. Правила для проверки нужно указать в методе yiibaseModel::rules(). В следующем примере показано, как правила для проверки модели ContactForm , нужно объявлять:
Метод rules() должен возвращать массив правил, каждое из которых является массивом в следующем формате:
Для каждого правила необходимо указать, по крайней мере, какие атрибуты относится к этому правилу и тип правила. Вы можете указать тип правила в одном из следующих форматов:
- Псевдонимы основного валидатора, например required , in , date и другие. Пожалуйста, обратитесь к списку Основных валидаторов за более подробной информацией.
- Название метода проверки в модели класса, или анонимную функцию. Пожалуйста, обратитесь к разделу Встроенных валидаторов за более подробной информацией.
- Полное имя класса валидатора. Пожалуйста, обратитесь к разделу Автономных валидаторов за более подробной информацией.
Правило может использоваться для проверки одного или нескольких атрибутов. Атрибут может быть проверен одним или несколькими правилами. Правило может быть применено только к определенным сценариям указав свойство on . Если вы не укажите свойство on , это означает, что правило будет применяться ко всем сценариям.
Когда вызывается метод validate() для проверки, он выполняет следующие действия:
- Определяет, какие атрибуты должны проверяться путем получения списка атрибутов от yiibaseModel::scenarios() используя текущий scenario. Эти атрибуты называются — активными атрибутами.
- Определяет, какие правила проверки должны использоваться, получив список правил от yiibaseModel::rules() используя текущий scenario. Эти правила называются — активными правилами.
- Каждое активное правило проверяет каждый активный атрибут, который ассоциируется с правилом. Правила проверки выполняются в том порядке, как они перечислены.
Согласно вышеизложенным пунктам, атрибут будет проверяться, если и только если он является активным атрибутом, объявленным в scenarios() и связан с одним или несколькими активными правилами, объявленными в rules() .
Примечание: Правилам валидации полезно давать имена. Например:
В случае наследования предыдущей модели, именованные правила можно модифицировать или удалить:
Настройка сообщений об ошибках 
Большинство валидаторов имеют сообщения об ошибках по умолчанию, которые будут добавлены к модели когда его атрибуты не проходят проверку. Например, required валидатор добавляет к модели сообщение об ошибке «Имя пользователя не может быть пустым.» когда атрибут username не удовлетворил правилу этого валидатора.
Вы можете настроить сообщение об ошибке для каждого правила, указав свойство message при объявлении правила, следующим образом:
Некоторые валидаторы могут поддерживать дополнительные сообщения об ошибках, чтобы более точно описать причину ошибки. Например, number валидатор поддерживает tooBig и tooSmall для описания ошибки валидации, когда проверяемое значение является слишком большим и слишком маленьким, соответственно. Вы можете настроить эти сообщения об ошибках, как в настройках валидаторов, так и непосредственно в правилах проверки.
События валидации 
Когда вызывается метод yiibaseModel::validate() он инициализирует вызов двух методов, которые можно переопределить, чтобы настроить процесс проверки:
- yiibaseModel::beforeValidate(): выполнение по умолчанию вызовет yiibaseModel::EVENT_BEFORE_VALIDATE событие. Вы можете переопределить этот метод, или обрабатывать это событие, чтобы сделать некоторую предобработку данных (например, форматирование входных данных), метод вызывается до начала валидации. Этот метод должен возвращать логическое значение, указывающее, следует ли продолжать проверку или нет.
- yiibaseModel::afterValidate(): выполнение по умолчанию вызовет yiibaseModel::EVENT_AFTER_VALIDATE событие. Вы можете либо переопределить этот метод или обрабатывать это событие, чтобы сделать некоторую постобработку данных (например, отформатировать данные удобным для дальнейшей обработки образом), метод вызывается после валидации.
Условные валидации 
Для проверки атрибутов только при выполнении определенных условий, например если один атрибут зависит от значения другого атрибута можно использовать when свойство, чтобы определить такие условия. Например:
Это свойство when принимает PHP callable функцию с следующим описанием:
Если вам нужна поддержка условной проверки на стороне клиента, вы должны настроить свойство метода whenClient, которое принимает строку, представляющую JavaScript функцию, возвращаемое значение определяет, следует ли применять правило или нет. Например:
Фильтрация данных 
Пользователь часто вводит данные которые нужно предварительно отфильтровать или предварительно обработать(очистить). Например, вы хотите обрезать пробелы вокруг username . Вы можете использовать правила валидации для достижения этой цели.
В следующих примерах показано, как обрезать пробелы во входных данных и превратить пустые входные данные в NULL с помощью trim и указать значения по умолчанию с помощью свойства default основного валидатора:
Вы также можете использовать более сложные фильтрации данных с помощью анонимной функции подробнее об этом filter.
Как видите, эти правила валидации на самом деле не проверяют входные данные. Вместо этого, они будут обрабатывать значения и обратно возвращать результат работы. Фильтры по сути выполняют предобработку входящих данных.
Обработка пустых входных данных 
Если входные данные представлены из HTML-формы, часто нужно присвоить некоторые значения по умолчанию для входных данных, если они не заполнены. Вы можете сделать это с помощью валидатора default. Например:
По умолчанию входные данные считаются пустыми, если их значением является пустая строка, пустой массив или null . Вы можете реализовать свою логику определения пустых входящих данных путем переопределения метода yiivalidatorsValidator::isEmpty() используя анонимную функцию. Например:
Примечание: большинство валидаторов не обрабатывает пустые входные данные, если их yiibaseValidator::skipOnEmpty свойство принимает значение по умолчанию true . Они просто будут пропущены во время проверки, если связанные с ними атрибуты являются пустыми. Среди основных валидаторов, только captcha , default , filter , required , и trim будут обрабатывать пустые входные данные.
Специальная валидация 
Иногда вам нужно сделать специальную валидацию для значений, которые не связаны с какой-либо моделью.
Если необходимо выполнить только один тип проверки (например, проверка адреса электронной почты), вы можете вызвать метод validate() нужного валидатора. Например:
Примечание: Не все валидаторы поддерживают такой тип проверки. Примером может служить unique валидатор, который предназначен для работы с моделью.
Примечание: Свойство yiibaseValidator::skipOnEmpty используется только в yiibaseModel и использование его отдельно не будет иметь никакого эффекта.
Если необходимо выполнить несколько проверок в отношении нескольких значений, вы можете использовать yiibaseDynamicModel, который поддерживает объявление, как атрибутов так и правил «на лету». Его использование выглядит следующим образом:
Метод yiibaseDynamicModel::validateData() создает экземпляр DynamicModel , определяет атрибуты, используя приведенные данные ( name и email в этом примере), и затем вызывает yiibaseModel::validate() с данными правилами.
Кроме того, вы можете использовать следующий «классический» синтаксис для выполнения специальной проверки данных:
После валидации, вы можете проверить успешность выполнения вызвав метод hasErrors() и затем получить ошибки проверки вызвав метод errors как это делают нормальные модели. Вы можете также получить доступ к динамическим атрибутам, определенным через экземпляр модели, например, $model->name и $model->email .
Создание Валидаторов 
Кроме того, используя основные валидаторы, включенные в релизы Yii, вы также можете создавать свои собственные валидаторы. Вы можете создавать встроенные валидаторы или автономные валидаторы.
Встроенные Валидаторы 
Встроенный валидатор наследует методы модели или использует анонимную функцию. Описание метода/функции:
Если атрибут не прошел проверку, метод/функция должна вызвать yiibaseModel::addError(), чтобы сохранить сообщение об ошибке в модели, для того чтобы позже можно было получить сообщение об ошибке для представления конечным пользователям.
Ниже приведены некоторые примеры:
Примечание: по умолчанию, встроенные валидаторы не будут применяться, если связанные с ними атрибуты получат пустые входные данные, или если они уже не смогли пройти некоторые правила валидации. Если вы хотите, чтобы, это правило применялось всегда, вы можете настроить свойства skipOnEmpty и/или skipOnError свойства false в правиле объявления. Например:
Автономные валидаторы 
Автономный валидатор — это класс, расширяющий yiivalidatorsValidator или его дочерний класс. Вы можете реализовать свою логику проверки путем переопределения метода yiivalidatorsValidator::validateAttribute(). Если атрибут не прошел проверку, вызвать yiibaseModel::addError(), чтобы сохранить сообщение об ошибке в модели, как это делают встроенные валидаторы.
Валидация может быть помещена в отдельный класс [[components/validators/CountryValidator]]. В этом случае можно использовать метод yiivalidatorsValidator::addError() для того, чтобы добавить своё сообщение об ошибке в модель:
Если вы хотите, чтобы ваш валидатор поддерживал проверку значений без модели, также необходимо переопределить yiivalidatorsValidator::validate(). Вы можете также переопределить yiivalidatorsValidator::validateValue() вместо validateAttribute() и validate() , потому что по умолчанию последние два метода реализуются путем вызова validateValue() .
Валидация на стороне клиента 
Проверка на стороне клиента на основе JavaScript целесообразна, когда конечные пользователи вводят входные данные через HTML-формы, так как эта проверка позволяет пользователям узнать ошибки ввода быстрее и таким образом улучшает ваш пользовательский интерфейс. Вы можете использовать или реализовать валидатор, который поддерживает валидацию на стороне клиента в дополнение к проверке на стороне сервера.
Информация: Проверка на стороне клиента желательна, но необязательна. Её основная цель заключается в предоставлении пользователям более удобного интерфейса. Так как входные данные, поступают от конечных пользователей, вы никогда не должны доверять верификации на стороне клиента. По этой причине, вы всегда должны выполнять верификацию на стороне сервера путем вызова yiibaseModel::validate(), как описано в предыдущих пунктах.
Использование валидации на стороне клиента 
Многие основные валидаторы поддерживают проверку на стороне клиента out-of-the-box. Все, что вам нужно сделать, это просто использовать yiiwidgetsActiveForm для построения HTML-форм.
Например, LoginForm ниже объявляет два правила: первое использует required основной валидатор, который поддерживается на стороне клиента и сервера; второе использует validatePassword встроенный валидатор, который поддерживается только на стороне сервера.
HTML-форма построена с помощью следующего кода, содержит поля для ввода username и password . Если вы отправите форму, не вводя ничего, вы получите сообщения об ошибках, требующих ввести данные. Сообщения появятся сразу, без обращения к серверу.
Класс yiiwidgetsActiveForm будет читать правила проверки заявленные в модели и генерировать соответствующий код JavaScript для валидаторов, которые поддерживают проверку на стороне клиента. Когда пользователь изменяет значение поля ввода или отправляет форму, JavaScript на стороне клиента будет срабатывать и проверять введенные данные.
Если вы хотите отключить проверку на стороне клиента полностью, вы можете настроить свойство yiiwidgetsActiveForm::$enableClientValidation установив значение false . Вы также можете отключить проверку на стороне клиента отдельных полей ввода, настроив их с помощью свойства yiiwidgetsActiveField::$enableClientValidation установив значение false .
Реализация проверки на стороне клиента 
Чтобы создать валидатор, который поддерживает проверку на стороне клиента, вы должны реализовать метод yiivalidatorsValidator::clientValidateAttribute() возвращающий фрагмент кода JavaScript, который выполняет проверку на стороне клиента. В JavaScript-коде, вы можете использовать следующие предопределенные переменные:
- attribute : имя атрибута для проверки.
- value : проверяемое значение.
- messages : массив, используемый для хранения сообщений об ошибках проверки значения атрибута.
- deferred : массив, который содержит отложенные объекты (описано в следующем подразделе).
В следующем примере мы создаем StatusValidator который проверяет значение поля на соответствие допустимым статусам. Валидатор поддерживает оба способа проверки и на стороне сервера и на стороне клиента.
Подсказка: приведенный выше код даётся, в основном, чтобы продемонстрировать, как осуществляется поддержка проверки на стороне клиента. На практике вы можете использовать in основные валидаторы для достижения той же цели. Вы можете написать проверку, как правило, например:
Отложенная валидация 
Если Вам необходимо выполнить асинхронную проверку на стороне клиента, вы можете создавать Deferred objects. Например, чтобы выполнить пользовательские AJAX проверки, вы можете использовать следующий код:
В примере выше переменная deferred предусмотренная Yii, которая является массивом Отложенных объектов. $.get() метод jQuery создает Отложенный объект, который помещается в массив deferred .
Также можно явно создать Отложенный объект и вызвать его методом resolve() , тогда выполняется асинхронный вызов к серверу. В следующем примере показано, как проверить размеры загружаемого файла изображения на стороне клиента.
Примечание: метод resolve() должен быть вызван после того, как атрибут был проверен. В противном случае основная проверка формы не будет завершена.
Для простоты работы с массивом deferred , существует упрощенный метод add() , который автоматически создает Отложенный объект и добавляет его в deferred массив. Используя этот метод, вы можете упростить пример выше, следующим образом:
AJAX валидация 
Некоторые проверки можно сделать только на стороне сервера, потому что только сервер имеет необходимую информацию. Например, чтобы проверить логин пользователя на уникальность, необходимо проверить логин в базе данных на стороне сервера. Вы можете использовать проверку на основе AJAX в этом случае. Это вызовет AJAX-запрос в фоновом режиме, чтобы проверить логин пользователя, сохраняя при этом валидацию на стороне клиента. Выполняя её перед запросом к серверу.
Чтобы включить AJAX-валидацию для одного поля, Вы должны свойство enableAjaxValidation выбрать как true и указать уникальный id формы:
Чтобы включить AJAX-валидацию для всей формы, Вы должны свойство enableAjaxValidation выбрать как true для формы:
Примечание: В случае, если свойство enableAjaxValidation указано и у поля и у формы, первый вариант будет иметь приоритет.
Также необходимо подготовить сервер для обработки AJAX-запросов валидации. Это может быть достигнуто с помощью следующего фрагмента кода, в контроллере действий:
Приведенный выше код будет проверять, является ли текущий запрос AJAX. Если да, он будет отвечать на этот запрос, предварительно выполнив проверку и возвратит ошибки в случае их появления в формате JSON.
Информация: Вы также можете использовать Deferred Validation AJAX валидации. Однако, AJAX-функция проверки, описанная здесь более интегрированная и требует меньше усилий к написанию кода.
Источник
Validating Input
As a rule of thumb, you should never trust the data received from end users and should always validate it
before putting it to good use.
Given a model populated with user inputs, you can validate the inputs by calling the
[[yiibaseModel::validate()]] method. The method will return a boolean value indicating whether the validation
succeeded or not. If not, you may get the error messages from the [[yiibaseModel::errors]] property. For example,
$model = new appmodelsContactForm;
// populate model attributes with user inputs
$model->attributes = Yii::$app->request->post('ContactForm');
if ($model->validate()) {
// all inputs are valid
} else {
// validation failed: $errors is an array containing error messages
$errors = $model->errors;
}
Declaring Rules
To make validate() really work, you should declare validation rules for the attributes you plan to validate.
This should be done by overriding the [[yiibaseModel::rules()]] method. The following example shows how
the validation rules for the ContactForm model are declared:
public function rules()
{
return [
// the name, email, subject and body attributes are required
[['name', 'email', 'subject', 'body'], 'required'],
// the email attribute should be a valid email address
['email', 'email'],
];
}
The [[yiibaseModel::rules()|rules()]] method should return an array of rules, each of which is an array
of the following format:
[
// required, specifies which attributes should be validated by this rule.
// For a single attribute, you can use the attribute name directly
// without having it in an array
['attribute1', 'attribute2', ...],
// required, specifies the type of this rule.
// It can be a class name, validator alias, or a validation method name
'validator',
// optional, specifies in which scenario(s) this rule should be applied
// if not given, it means the rule applies to all scenarios
// You may also configure the "except" option if you want to apply the rule
// to all scenarios except the listed ones
'on' => ['scenario1', 'scenario2', ...],
// optional, specifies additional configurations for the validator object
'property1' => 'value1', 'property2' => 'value2', ...
]
For each rule you must specify at least which attributes the rule applies to and what is the type of the rule.
You can specify the rule type in one of the following forms:
- the alias of a core validator, such as
required,in,date, etc. Please refer to
the Core Validators for the complete list of core validators. - the name of a validation method in the model class, or an anonymous function. Please refer to the
Inline Validators subsection for more details. - a fully qualified validator class name. Please refer to the Standalone Validators
subsection for more details.
A rule can be used to validate one or multiple attributes, and an attribute may be validated by one or multiple rules.
A rule may be applied in certain scenarios only by specifying the on option.
If you do not specify an on option, it means the rule will be applied to all scenarios.
When the validate() method is called, it does the following steps to perform validation:
- Determine which attributes should be validated by getting the attribute list from [[yiibaseModel::scenarios()]]
using the current [[yiibaseModel::scenario|scenario]]. These attributes are called active attributes. - Determine which validation rules should be used by getting the rule list from [[yiibaseModel::rules()]]
using the current [[yiibaseModel::scenario|scenario]]. These rules are called active rules. - Use each active rule to validate each active attribute which is associated with the rule.
The validation rules are evaluated in the order they are listed.
According to the above validation steps, an attribute will be validated if and only if it is
an active attribute declared in scenarios() and is associated with one or multiple active rules
declared in rules().
Customizing Error Messages
Most validators have default error messages that will be added to the model being validated when its attributes
fail the validation. For example, the [[yiivalidatorsRequiredValidator|required]] validator will add
a message «Username cannot be blank.» to a model when the username attribute fails the rule using this validator.
You can customize the error message of a rule by specifying the message property when declaring the rule,
like the following,
public function rules()
{
return [
['username', 'required', 'message' => 'Please choose a username.'],
];
}
Some validators may support additional error messages to more precisely describe different causes of
validation failures. For example, the [[yiivalidatorsNumberValidator|number]] validator supports
[[yiivalidatorsNumberValidator::tooBig|tooBig]] and [[yiivalidatorsNumberValidator::tooSmall|tooSmall]]
to describe the validation failure when the value being validated is too big and too small, respectively.
You may configure these error messages like configuring other properties of validators in a validation rule.
Validation Events
When [[yiibaseModel::validate()]] is called, it will call two methods that you may override to customize
the validation process:
- [[yiibaseModel::beforeValidate()]]: the default implementation will trigger a [[yiibaseModel::EVENT_BEFORE_VALIDATE]]
event. You may either override this method or respond to this event to do some preprocessing work
(e.g. normalizing data inputs) before the validation occurs. The method should return a boolean value indicating
whether the validation should proceed or not. - [[yiibaseModel::afterValidate()]]: the default implementation will trigger a [[yiibaseModel::EVENT_AFTER_VALIDATE]]
event. You may either override this method or respond to this event to do some postprocessing work after
the validation is completed.
Conditional Validation
To validate attributes only when certain conditions apply, e.g. the validation of one attribute depends
on the value of another attribute you can use the [[yiivalidatorsValidator::when|when]] property
to define such conditions. For example,
[
['state', 'required', 'when' => function($model) {
return $model->country == 'USA';
}],
]
The [[yiivalidatorsValidator::when|when]] property takes a PHP callable with the following signature:
/**
* @param Model $model the model being validated
* @param string $attribute the attribute being validated
* @return boolean whether the rule should be applied
*/
function ($model, $attribute)
If you also need to support client-side conditional validation, you should configure
the [[yiivalidatorsValidator::whenClient|whenClient]] property which takes a string representing a JavaScript
function whose return value determines whether to apply the rule or not. For example,
[
['state', 'required', 'when' => function ($model) {
return $model->country == 'USA';
}, 'whenClient' => "function (attribute, value) {
return $('#country').val() == 'USA';
}"],
]
Data Filtering
User inputs often need to be filtered or preprocessed. For example, you may want to trim the spaces around the
username input. You may use validation rules to achieve this goal.
The following examples shows how to trim the spaces in the inputs and turn empty inputs into nulls by using
the trim and default core validators:
[
[['username', 'email'], 'trim'],
[['username', 'email'], 'default'],
]
You may also use the more general filter validator to perform more complex
data filtering.
As you can see, these validation rules do not really validate the inputs. Instead, they will process the values
and save them back to the attributes being validated.
Handling Empty Inputs
When input data are submitted from HTML forms, you often need to assign some default values to the inputs
if they are empty. You can do so by using the default validator. For example,
[
// set "username" and "email" as null if they are empty
[['username', 'email'], 'default'],
// set "level" to be 1 if it is empty
['level', 'default', 'value' => 1],
]
By default, an input is considered empty if its value is an empty string, an empty array or a null.
You may customize the default empty detection logic by configuring the the [[yiivalidatorsValidator::isEmpty]] property
with a PHP callable. For example,
[
['agree', 'required', 'isEmpty' => function ($value) {
return empty($value);
}],
]
Note: Most validators do not handle empty inputs if their [[yiibaseValidator::skipOnEmpty]] property takes
the default value true. They will simply be skipped during validation if their associated attributes receive empty
inputs. Among the core validators, only thecaptcha,default,filter,
required, andtrimvalidators will handle empty inputs.
Ad Hoc Validation
Sometimes you need to do ad hoc validation for values that are not bound to any model.
If you only need to perform one type of validation (e.g. validating email addresses), you may call
the [[yiivalidatorsValidator::validate()|validate()]] method of the desired validator, like the following:
$email = 'test@example.com';
$validator = new yiivalidatorsEmailValidator();
if ($validator->validate($email, $error)) {
echo 'Email is valid.';
} else {
echo $error;
}
Note: Not all validators support this type of validation. An example is the unique
core validator which is designed to work with a model only.
If you need to perform multiple validations against several values, you can use [[yiibaseDynamicModel]]
which supports declaring both attributes and rules on the fly. Its usage is like the following:
public function actionSearch($name, $email)
{
$model = DynamicModel::validateData(compact('name', 'email'), [
[['name', 'email'], 'string', 'max' => 128],
['email', 'email'],
]);
if ($model->hasErrors()) {
// validation fails
} else {
// validation succeeds
}
}
The [[yiibaseDynamicModel::validateData()]] method creates an instance of DynamicModel, defines the attributes
using the given data (name and email in this example), and then calls [[yiibaseModel::validate()]]
with the given rules.
Alternatively, you may use the following more «classic» syntax to perform ad hoc data validation:
public function actionSearch($name, $email)
{
$model = new DynamicModel(compact('name', 'email'));
$model->addRule(['name', 'email'], 'string', ['max' => 128])
->addRule('email', 'email')
->validate();
if ($model->hasErrors()) {
// validation fails
} else {
// validation succeeds
}
}
After validation, you can check if the validation succeeded or not by calling the
[[yiibaseDynamicModel::hasErrors()|hasErrors()]] method, and then get the validation errors from the
[[yiibaseDynamicModel::errors|errors]] property, like you do with a normal model.
You may also access the dynamic attributes defined through the model instance, e.g.,
$model->name and $model->email.
Creating Validators
Besides using the core validators included in the Yii releases, you may also
create your own validators. You may create inline validators or standalone validators.
Inline Validators
An inline validator is one defined in terms of a model method or an anonymous function. The signature of
the method/function is:
/**
* @param string $attribute the attribute currently being validated
* @param mixed $params the value of the "params" given in the rule
*/
function ($attribute, $params)
If an attribute fails the validation, the method/function should call [[yiibaseModel::addError()]] to save
the error message in the model so that it can be retrieved back later to present to end users.
Below are some examples:
use yiibaseModel;
class MyForm extends Model
{
public $country;
public $token;
public function rules()
{
return [
// an inline validator defined as the model method validateCountry()
['country', 'validateCountry'],
// an inline validator defined as an anonymous function
['token', function ($attribute, $params) {
if (!ctype_alnum($this->$attribute)) {
$this->addError($attribute, 'The token must contain letters or digits.');
}
}],
];
}
public function validateCountry($attribute, $params)
{
if (!in_array($this->$attribute, ['USA', 'Web'])) {
$this->addError($attribute, 'The country must be either "USA" or "Web".');
}
}
}
Note: By default, inline validators will not be applied if their associated attributes receive empty inputs
or if they have already failed some validation rules. If you want to make sure a rule is always applied,
you may configure the [[yiivalidatorsValidator::skipOnEmpty|skipOnEmpty]] and/or [[yiivalidatorsValidator::skipOnError|skipOnError]]
properties to be false in the rule declarations. For example:
php
[
    ['country', 'validateCountry', 'skipOnEmpty' => false, 'skipOnError' => false],
]
Standalone Validators
A standalone validator is a class extending [[yiivalidatorsValidator]] or its child class. You may implement
its validation logic by overriding the [[yiivalidatorsValidator::validateAttribute()]] method. If an attribute
fails the validation, call [[yiibaseModel::addError()]] to save the error message in the model, like you do
with inline validators. For example,
namespace appcomponents;
use yiivalidatorsValidator;
class CountryValidator extends Validator
{
public function validateAttribute($model, $attribute)
{
if (!in_array($model->$attribute, ['USA', 'Web'])) {
$this->addError($model, $attribute, 'The country must be either "USA" or "Web".');
}
}
}
If you want your validator to support validating a value without a model, you should also override
[[yiivalidatorsValidator::validate()]]. You may also override [[yiivalidatorsValidator::validateValue()]]
instead of validateAttribute() and validate() because by default the latter two methods are implemented
by calling validateValue().
Client-Side Validation
Client-side validation based on JavaScript is desirable when end users provide inputs via HTML forms, because
it allows users to find out input errors faster and thus provides a better user experience. You may use or implement
a validator that supports client-side validation in addition to server-side validation.
Info: While client-side validation is desirable, it is not a must. Its main purpose is to provide users with a better
experience. Similar to input data coming from end users, you should never trust client-side validation. For this reason,
you should always perform server-side validation by calling [[yiibaseModel::validate()]], as
described in the previous subsections.
Using Client-Side Validation
Many core validators support client-side validation out-of-the-box. All you need to do
is just use [[yiiwidgetsActiveForm]] to build your HTML forms. For example, LoginForm below declares two
rules: one uses the required core validator which is supported on both
client and server sides; the other uses the validatePassword inline validator which is only supported on the server
side.
namespace appmodels;

use yiibaseModel;
use appmodelsUser;

class LoginForm extends Model
{
    public $username;
    public $password;

    public function rules()
    {
        return [
            // username and password are both required
            [['username', 'password'], 'required'],

            // password is validated by validatePassword()
            ['password', 'validatePassword'],
        ];
    }

    public function validatePassword()
    {
        $user = User::findByUsername($this->username);

        if (!$user || !$user->validatePassword($this->password)) {
            $this->addError('password', 'Incorrect username or password.');
        }
    }
}
The HTML form built by the following code contains two input fields username and password.
If you submit the form without entering anything, you will find the error messages requiring you
to enter something appear right away without any communication with the server.
<?php $form = yiiwidgetsActiveForm::begin(); ?>
    <?= $form->field($model, 'username') ?>
    <?= $form->field($model, 'password')->passwordInput() ?>
    <?= Html::submitButton('Login') ?>
<?php yiiwidgetsActiveForm::end(); ?>
Behind the scene, [[yiiwidgetsActiveForm]] will read the validation rules declared in the model
and generate appropriate JavaScript code for validators that support client-side validation. When a user
changes the value of an input field or submit the form, the client-side validation JavaScript will be triggered.
If you want to turn off client-side validation completely, you may configure the
[[yiiwidgetsActiveForm::enableClientValidation]] property to be false. You may also turn off client-side
validation of individual input fields by configuring their [[yiiwidgetsActiveField::enableClientValidation]]
property to be false.
Implementing Client-Side Validation
To create a validator that supports client-side validation, you should implement the
[[yiivalidatorsValidator::clientValidateAttribute()]] method which returns a piece of JavaScript code
that performs the validation on the client side. Within the JavaScript code, you may use the following
predefined variables:
attribute: the name of the attribute being validated.value: the value being validated.messages: an array used to hold the validation error messages for the attribute.deferred: an array which deferred objects can be pushed into (explained in the next subsection).
In the following example, we create a StatusValidator which validates if an input is a valid status input
against the existing status data. The validator supports both server side and client side validation.
namespace appcomponents;
use yiivalidatorsValidator;
use appmodelsStatus;
class StatusValidator extends Validator
{
public function init()
{
parent::init();
$this->message = 'Invalid status input.';
}
public function validateAttribute($model, $attribute)
{
$value = $model->$attribute;
if (!Status::find()->where(['id' => $value])->exists()) {
$model->addError($attribute, $this->message);
}
}
public function clientValidateAttribute($model, $attribute, $view)
{
$statuses = json_encode(Status::find()->select('id')->asArray()->column());
$message = json_encode($this->message, JSON_UNESCAPED_SLASHES | JSON_UNESCAPED_UNICODE);
return <<<JS
if (!$.inArray(value, $statuses)) {
messages.push($message);
}
JS;
}
}
Tip: The above code is given mainly to demonstrate how to support client-side validation. In practice,
you may use the in core validator to achieve the same goal. You may
write the validation rule like the following:
php
[
    ['status', 'in', 'range' => Status::find()->select('id')->asArray()->column()],
]
Deferred Validation
If you need to perform asynchronous client-side validation, you can create Deferred objects.
For example, to perform a custom AJAX validation, you can use the following code:
public function clientValidateAttribute($model, $attribute, $view)
{
    return <<<JS
        deferred.push($.get("/check", {value: value}).done(function(data) {
            if ('' !== data) {
                messages.push(data);
            }
        }));
JS;
}
In the above, the deferred variable is provided by Yii, which is an array of Deferred objects. The $.get()
jQuery method creates a Deferred object which is pushed to the deferred array.
You can also explicitly create a Deferred object and call its resolve() method when the asynchronous callback
is hit. The following example shows how to validate the dimensions of an uploaded image file on the client side.
public function clientValidateAttribute($model, $attribute, $view)
{
    return <<<JS
        var def = $.Deferred();
        var img = new Image();
        img.onload = function() {
            if (this.width > 150) {
                messages.push('Image too wide!!');
            }
            def.resolve();
        }
        var reader = new FileReader();
        reader.onloadend = function() {
            img.src = reader.result;
        }
        reader.readAsDataURL(file);

        deferred.push(def);
JS;
}
Note: The
resolve()method must be called after the attribute has been validated. Otherwise the main form
validation will not complete.
For simplicity, the deferred array is equipped with a shortcut method add() which automatically creates a Deferred
object and adds it to the deferred array. Using this method, you can simplify the above example as follows,
public function clientValidateAttribute($model, $attribute, $view)
{
    return <<<JS
        deferred.add(function(def) {
            var img = new Image();
            img.onload = function() {
                if (this.width > 150) {
                    messages.push('Image too wide!!');
                }
                def.resolve();
            }
            var reader = new FileReader();
            reader.onloadend = function() {
                img.src = reader.result;
            }
            reader.readAsDataURL(file);
        });
JS;
}
AJAX Validation
Some validations can only be done on the server side, because only the server has the necessary information.
For example, to validate if a username is unique or not, it is necessary to check the user table on the server side.
You can use AJAX-based validation in this case. It will trigger an AJAX request in the background to validate the
input while keeping the same user experience as the regular client-side validation.
To enable AJAX validation for the whole form, you have to set the
[[yiiwidgetsActiveForm::enableAjaxValidation]] property to be true and specify id to be a unique form identifier:
<?php $form = yiiwidgetsActiveForm::begin([
'id' => 'contact-form',
'enableAjaxValidation' => true,
]); ?>
You may also turn AJAX validation on or off for individual input fields by configuring their
[[yiiwidgetsActiveField::enableAjaxValidation]] property.
You also need to prepare the server so that it can handle the AJAX validation requests.
This can be achieved by a code snippet like the following in the controller actions:
if (Yii::$app->request->isAjax && $model->load(Yii::$app->request->post())) {
    Yii::$app->response->format = Response::FORMAT_JSON;
    return ActiveForm::validate($model);
}
The above code will check whether the current request is an AJAX. If yes, it will respond to
this request by running the validation and returning the errors in JSON format.
Info: You can also use Deferred Validation to perform AJAX validation.
However, the AJAX validation feature described here is more systematic and requires less coding effort.
The Yii Active Form functionality makes managing forms a snap, complete with client side validation.
In GridView, let’s click on the pencil for a record. Or, click the open eye, then click the Update button. Either way, you end up with a page that looks
like the following:
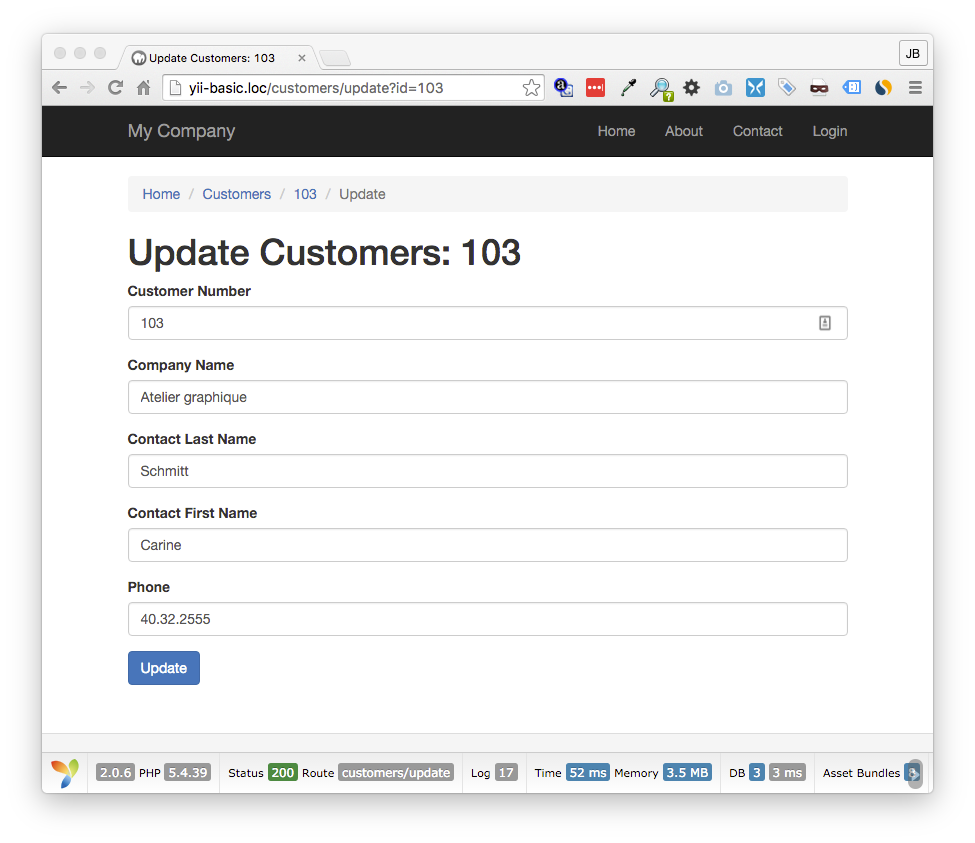
This form has been completely auto-generated just as you see. You will notice that labels are provided for each input field and each field is filled in
with the current data for that record.
However, there is one easy trick that improves this form. All these fields are set as required in the model rules. If you try to submit this form with a
field empty, you would get an error. That being the case, it would be nice, and is standard procedure, to put a red asterisk next to each field label for
all required fields. As it turns out, this is very easy to do. Actually, the form generated above already has a class called ‘required’ assigned to each
required field. To make a red asterisk appear, simply add the following to the CSS file: /web/css/site.css
div.required label:after {
    content: " *";
    color: #e13431;
}
Once added, the form will now look like this, with no further alteration:
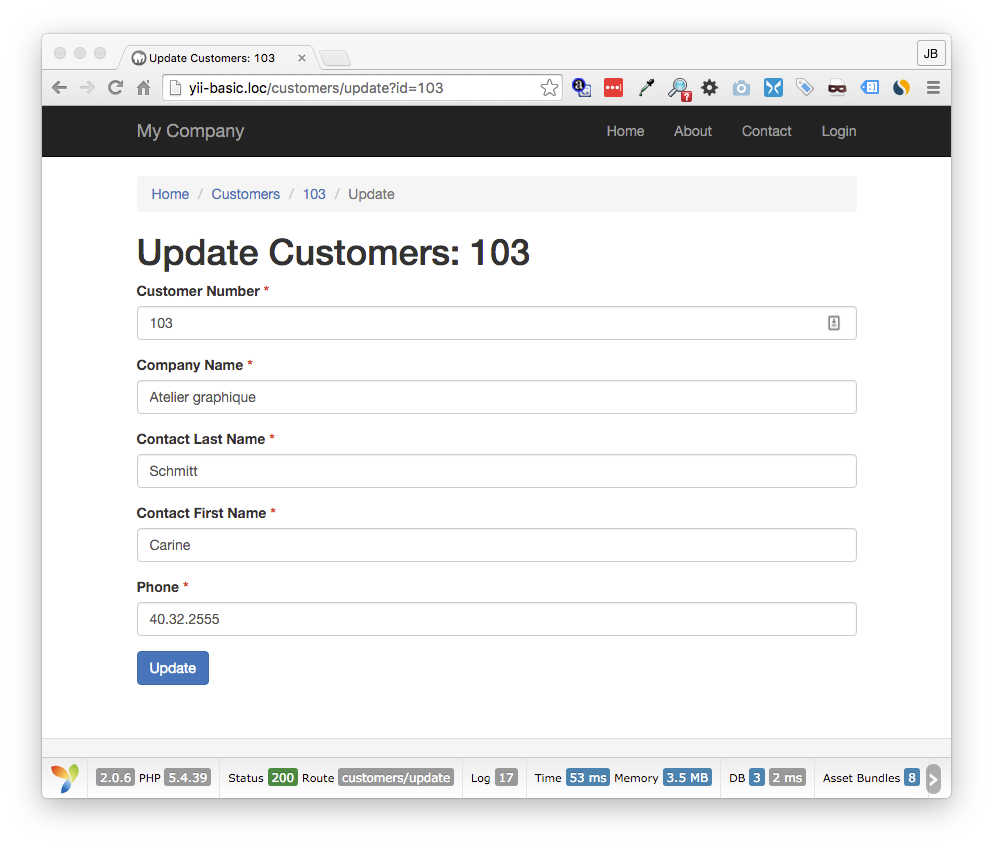
Notice the red asterisk next to each field label. Like magic!
14.1 The Active Form Code
Take a moment and refer back to section 10.1.2 where we used Gii to generate the CRUD function. Remember that along with the models, there were a number of
view files. One of these files was /views/customers/_form.php. That is the file containing the generated form we see here.
The nice thing about this arrangement is that the same _form.php file is used for updating a record or creating a new record. In both the
/views/customers/update.php file and the /views/customers/create.php file you will see the following code:
   <?= $this->render('_form', [
        'model' => $model,
    ]) ?>
The interesting thing about this code is that you are calling a view from within another view, which is, obviously, entirely valid. This calls the same
form for creating a new record as updating a current record.
And, following, is the code for the form:
<?php

use yiihelpersHtml;
use yiiwidgetsActiveForm;

?>

<div class="customers-form">

    <?php $form = ActiveForm::begin(); ?>

    <?= $form->field($model, 'customerNumber')->textInput() ?>

    <?= $form->field($model, 'companyName')->textInput(['maxlength' => true]) ?>

    <?= $form->field($model, 'contactLastName')->textInput(['maxlength' => true]) ?>

    <?= $form->field($model, 'contactFirstName')->textInput(['maxlength' => true]) ?>

    <?= $form->field($model, 'phone')->textInput(['maxlength' => true]) ?>

    <div class="form-group">
        <?= Html::submitButton($model->isNewRecord ? 'Create' : 'Update', ['class' => $model->isNewRecord ? 'btn btn-success' : 'btn btn-primary']) ?>
    </div>

    <?php ActiveForm::end(); ?>

</div>
And that is it! Just this code generates the entire form.
14.2 The Resulting HTML From Code
Here is the HTML that this code snippet generates:
<div class="customers-form">

    <form id="w0" action="/customers/update?id=103" method="post">
        <input type="hidden" name="_csrf" value="cXJEWk41OGgZCggxKn5xJh8YJ2g4AXklFCAUFTcFSTswFWkvP0F.Aw==">
        <div class="form-group field-customers-customernumber required">
            <label class="control-label" for="customers-customernumber">Customer Number</label>
            <input type="text" id="customers-customernumber" class="form-control" name="Customers[customerNumber]" value="103">

            <div class="help-block"></div>
        </div>
        <div class="form-group field-customers-companyname required">
            <label class="control-label" for="customers-companyname">Company Name</label>
            <input type="text" id="customers-companyname" class="form-control" name="Customers[companyName]" value="Atelier graphique" maxlength="50">

            <div class="help-block"></div>
        </div>
        <div class="form-group field-customers-contactlastname required">
            <label class="control-label" for="customers-contactlastname">Contact Last Name</label>
            <input type="text" id="customers-contactlastname" class="form-control" name="Customers[contactLastName]" value="Schmitt" maxlength="50">

            <div class="help-block"></div>
        </div>
        <div class="form-group field-customers-contactfirstname required">
            <label class="control-label" for="customers-contactfirstname">Contact First Name</label>
            <input type="text" id="customers-contactfirstname" class="form-control" name="Customers[contactFirstName]" value="Carine " maxlength="50">

            <div class="help-block"></div>
        </div>
        <div class="form-group field-customers-phone required">
            <label class="control-label" for="customers-phone">Phone</label>
            <input type="text" id="customers-phone" class="form-control" name="Customers[phone]" value="40.32.2555" maxlength="50">

            <div class="help-block"></div>
        </div>
        <div class="form-group">
            <button type="submit" class="btn btn-primary">Update</button>    </div>

    </form>
</div>
14.3 Initialize Active Form
The code
$form = ActiveForm::begin();
variable $form and creates the opening form tag. In this case the tag generated is:
<form id="w0" action="/customers/update?id=103" method="post">
The form is closed out by firing the
ActiveForm::end();
Configuration parameters to control the form can be passed as an array to the
ActiveForm::begin()
14.3.1 Setting the Form Action Value
The default form action is to submit the form back to the same page. Thus, the page that we are viewing is customers/update?id=103 and that is the value
for the form action.
To have the form submit to a different page, you would pass the url in as part of the config array. So, say we wanted instead to submit to the url some-controller/some-action and have id 101 as a GET parameter. You would pass this as the value for
the ‘action’ key in the array. Your method would look like this:
<?php $form = ActiveForm::begin([
    'action' => ['some-controller/some-action','id' => '101']
]); ?>
14.3.2 Setting the Form ID
Perhaps you would like to change the form id from what is auto-generated (in this case it is ‘w0’) to something specific, like ‘ login-form’. You would
simply set this as the value for the ‘id’ key in the config array. Adding this to the action config above, you would have the following:
<?php $form = ActiveForm::begin([
'action' => ['some-controller/some-action','id' => '101'],
'id' => 'login-form',
]); ?>
14.3.3 Setting the Form Submission Method
By default, your forms will be set to use the POST method when using Active Form. You can change this default by passing a value to the ‘method’ key.
Adding to the config above, if you wanted to change the method to GET, you would do so as such:
<?php $form = ActiveForm::begin([
	'action' => ['some-controller/some-action','id' => '101'],
	'id' => 'login-form',
	'method' => 'get'
]); ?>
14.3.4 Other Form Tag Attributes
The final key in the config array is ‘options’. You can put any additional tag attributes as key/value pairs as an array assigned to the ‘options’ key. If
you wanted to specify a css class to use for this form, you would add that to the options array. Adding to the config above, if you wanted to set the class
to ‘form-class-1’, your final code would be as follows:
<?php $form = ActiveForm::begin([
	'action' => ['some-controller/some-action','id' => '101'],
	'id' => 'login-form',
	'method' => 'get',
	'options' => ['class' => 'form-class-1']
]); ?>
14.4 Active Form Fields
Yii supports all HTML form controls. These are referred to as Active Fields. A lot of the work is taken care of. This includes form validation on each
field. If the form is submitted with invalid or missing data, the valid fields that are filled in will persist. If updating records, the current value of
the field is used to generate the form field.
14.4.1 Text Input Field
The basic code to create a simple text input form field is as follows:
<?php echo $form->field($model, 'field_name')->textInput() ?>
The $form variable holds the Active Form object created with the begin() method.
The field() method accepts two values. The first specifies the model associated with the data being entered on this form. The second value is the name of
the form field, which will match the field name in the model.
The final method in the chain is textInput, which does the actual creation of the text input field. A config array can be passed to this method specifying
various attributes.
Notice that we are echoing out the return value from the method. The shorthand method is actually more common, being equivalent to the following:
<?= $form->field($model, 'field_name')->textInput() ?>
14.4.1.1 Specify Text Input Field Attributes
The most common attribute you will specify for a text input field is maxlength which limits the number of characters that can be entered into the field.
Setting a maxlength of 50 characters would be done as follows:
<?= $form->field($model, 'field_name')->textInput(['maxlength' => 50]) ?>
You may have noticed in the Gii generated form for the text input fields, the attribute pass was
['maxlength' => true]
rules allow you to set a maximum character length for a string. By setting maxlength to true, it simply enforces what is set in the rule for maximum string
length. You can verify this above by viewing the input fields generated in section 14.2.
Another common attribute for at text input field is to set a placeholder. This is the greyed out text you sometimes see in a text field that disappears
when you begin typing in the field. Here is an example:

Adding a placeholder is as simple as the following:
<?= $form->field($model, 'companyName')->textInput(['maxlength' => true, 'placeholder' => 'Enter Company Name']) ?>
14.4.2 Text Area
Rendering a text area is simple and text entered will persist if the page is reloaded due to validation errors.
<?= $form->field($model, 'description')->textarea(['rows' => 4]) ?>
This will create a text area with ‘description’ as the field name and having 4 rows.
14.4.3 Dropdown List
Yii active form solves a lot of the challenges with managing a dropdown list. The list options are generated with a simple array of key/value pairs. And,
again, if a option is selected, that option remains selected if the page is reloaded due to validation errors.
Here is an example:
<?php
$items = [
'key1' => 'Option 1',
'key2' => 'Option 2',
'key3' => 'Option 3'
];
echo $form->field($model, 'options')->dropDownList($items);
?>
First we create an array of options. Then we pass that array to the dropDownList method.
This code will result in the following HTML:
<select id="customers-options" class="form-control" name="Customers[options]">
<option value="key1">Option 1</option>
<option value="key2">Option 2</option>
<option value="key3">Option 3</option>
</select>
As listed above, the dropdown would have ‘Option 1’ as the default. However, many times you want to have a prompt displayed as default instead, such as
‘select’. The following alteration will accomplish just that:
echo $form->field($model, 'options')->dropDownList(
	$items,
	['prompt' => '-select-']
);
We can also set a specific element ID for this dropdown. Let’s see we want to set the id to be ‘field-id’. You would add it as so:
echo $form->field($model, 'options')->dropDownList(
	$items,
	[
		'prompt' => '-select-',
		'id'=> 'field-id',
	]
);
14.4.3.1 Multi Select List Box
To expand further, perhaps we want to have the dropdown displayed as a multi select list box and set the width to 200 pixels. We want the selection box to
show 5 options for selection. This would be the code:
echo $form->field($model, 'phone')->dropDownList(
	$options,
	[
		'prompt' => '-select-',
		'multiple' => true,
		'id'=> 'field-id',
		'style' => 'width:200px;',
		'size' => 5
	]
);
The result would look like this:
14.4.3.2 Option Grouping
We can also group our options in the dropdown list with the optgroup tag. To perform grouping, simply alter the $items array. The key will be the group
name. The following example will group the options into Group 1 and Group 2:
$items = [
	'Group 1' => [
		'key1' => 'Option 1',
		'key2' => 'Option 2',
		'key3' => 'Option 3',
		],
	'Group 2' => [
		'key4' => 'Option 4',
		'key5' => 'Option 5',
		'key6' => 'Option 6',
	]
];

echo $form->field($model, 'options')->dropDownList(
	$items,
	[
		'multiple' => true,
		'id'=> 'field-id',
		'style' => 'width:200px;',
		'size' => 8,
	]
);
The result would appear as such:

14.4.4 ListBox
The listBox method accomplishes basically the same thing as the dropDownList setting ‘multiple’ to true. The following code will produce the same result as
the dropDownList shown in section 14.4.3.2:
echo $form->field($model, 'options')->listBox(
	$items,
	[
		'style' => 'width:200px;',
		'size' => 8,
	]
);
14.4.5 Checkbox
The code to create a form checkbox is as follows:
<?= $form->field($model, 'optin')->checkbox() ?>
The checkbox method can take two parameters. The first is an array of options and the second is a boolean specifying whether to enclose the checkbox with
the label template, defaults to true.
There are two attributes for the options array that you should be aware of. The first is the ‘label’ attribute. This allows you to specify a label for the
checkbox that will be printed to the right of the checkbox. The default is to use the standard label for that attribute of that model. This would be set as
such:
<?= $form->field($model, 'optin')->checkbox(['label' => 'My Label']) ?>
The second option array attribute to be aware of is a little tricky. Be default, when you use the checkbox method, along with the checkbox, a hidden form
field will be included. This field will have the same name as the checkbox field and by default will be assigned the value of zero. Thus, if the form is
submitted without the checkbox checked, there will still be a submission for that field. Again, zero by default.
The value associated with the unchecked state of the checkbox is set by passing a value for the array key of ‘uncheck’. Thus, if you want the unchecked
state to pass the number 123 when the form is submitted with the checkbox not checked, you would do so like this:
<?php echo $form->field($model, 'phone')->checkbox([
	'label' => 'My Label',
	'uncheck' => '123'
]) ?>
If you want to disable this behavior entirely, you must pass ‘null’ for the value of the ‘uncheck’ attribute, as such:
<?php echo $form->field($model, 'phone')->checkbox([
	'label' => 'My Label',
	'uncheck' => null
]) ?>
14.4.6 Radio Buttons
Lists of radio buttons can easily be created and managed with Active Form. The button that is checked will be preserved if the page is reloaded due to
validation error. Let’s see we want to create a list of radio buttons that would look like this in HTML:
<input type="radio" name="gender" value="male"> Male<br>
<input type="radio" name="gender" value="female"> Female<br>
<input type="radio" name="gender" value="other"> Something Else
First, we would create an array of key/value pairs to specify the form input values and the labels for each.
<?php
$radio_ary = [
	'male' => 'Male',
	'female' => 'Female',
	'other' => 'Something Else'
]
?>
Then we would call the radioList Active Form method and pass that array as the first parameter, as such:
<?= $form->field($model, 'gender')->radioList($radio_ary) ?>
The second optional parameter that can be passed to the radioList method is an options array.
The result appears as such:
As with the checkbox, a hidden form field will be generated with the same field name so that there can be something submitted as default when no box is
checked. By default, the value of this field is empty.
If you want to disable this behavior, you would set the ‘unselect’ value of the array to null.
<?= $form->field($model, 'gender')->radioList($radio_ary,['unselect' => null]) ?>
As for displaying radio button groups, the default behavior is to display the buttons in a horizontal line as shown above. Here is a simple trick to stack
them vertically instead.
The options array has an attribute named ‘separator’. This allows you to pass any string and it will be used to separate the radio buttons. If you pass the
string ‘<br>’, your buttons will then stack vertically rather than horizontally. Here is how the code would look:
<?= $form->field($model, 'gender')->radioList($radio_ary,[
	'unselect' => null,
	'separator' => '<br>'
]) ?>
This code would produce the following:
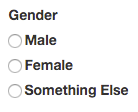
14.4.7 Checkbox List
Radio button allow a selection of only one option. In the example above, you would select either Male, Female or Something Else. You could not select more
than one at a time.
The Checkbox List is similar to the radioList but instead of creating radio buttons, it creates a list of checkboxes. This allows the selection of more
than one.
The following code would produce a list of three checkboxes:
<?= $form->field($model, 'items[]')->checkboxList(
	[
		'a' => 'Item A',
		'b' => 'Item B',
		'c' => 'Item C'
	]
); ?>
The result will appear as follows:
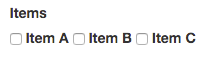
This code will submit an array of items using the attribute name, rather than just one value for the attribute.
As shown, the first parameter to pass to this method is the array of key/value pairs to construct the checkbox list. The optional second parameter that can
be passed is the options array.
The options are similar to the radio list options. You can set the unselect string to be submitted if no box is checked and you can pass a separator to
display the list differently.
The following code would display this same checkbox list vertically instead of horizontally:
<?= $form->field($model, 'items[]')->checkboxList(
	[
		'a' => 'Item A',
		'b' => 'Item B',
		'c' => 'Item C'
	],
	['separator' => '<br>']
); ?>
14.4.8 Password Field
To create a password field which blanks out the characters as they are typed, all that is need is the following code:
<?= $form->field($model, 'password')->passwordInput() ?>
As usual, the passwordInput input method accepts an options array. If you wanted to specify a specific ID for this form field, you would pass that as an
array as such:
<?= $form->field($model, 'password')->passwordInput(['id' => 'password-field']) ?>
14.4.9 Hidden Field
It is not necessary to use Active Form for hidden form fields as there is generally no validation, labels or formatting. The following code will create a
hidden field for the attribute ‘hidden_field’:
<?= Html::activeHiddenInput($model, 'hidden_field'); ?>
You may ask, ‘how is the value for the hidden field set’?
The answer is, whatever the value for that attribute in that model is, this will be set as the hidden field value. If this form is to update a record, the
current field value for that record will be set as the value for the hidden field.
If you want to specifically set a value, you would assign that value to the model attribute in the controller. So, if you wanted to set the value to
‘test123’, you would see this in the controller that calls that form view:
$model = new Customers();

$model->hidden_field = 'test123';

return $this->render('create', [
    'model' => $model,
]);
14.4.10 Submit Button
The code to create a simple submit button for the form with the label ‘Create’ would be as follows:
<?= Html::submitButton('Create', ['class'=> 'btn btn-primary']) ?>
This leverages the Bootstrap CSS framework. The class being ‘btn btn-primary’ results in the submit button looking like this:

14.4.11 HTML 5 Fields
HTML 5 fields can come in very handy at times and are fully supported by Active Form. There are a number of HTML 5 form fields in the spec, but not all
browsers support all field types. Internet Explorer supports the least.
However, there are a couple that are commonly supported that you may find of use, especially if you are creating an application for a mobile or touch
screen device.
14.4.11.1 Email Input Field
If you require a user to input their email address on a mobile device, you may want to use this HTML 5 field as it will pull up a special keyboard that
facilitates entering an email address:
<?= $form->field($model, 'email')->input('email') ?>
14.4.11.2 Number Input Field
The number input field will only allow numbers to by typed into the field and will pull up the number keypad on a mobile device:
<?= $form->field($model, 'number_field')->input('number') ?>
The field will also show an up/down arrow that allows the user to scroll through numbers when displayed on a desktop.
1.4.11.3 Range
A nifty HTML 5 field type that is fairly widely supported is the range. When setting a field to this type, the field turns into a slider. It appears as
such:
![]()
14.4.11.4 Min Max
For number fields and range fields, you can set the minimum and maximum numbers. This allows you to set the possible range on the number slider.
<?= $form->field($model, 'number_field')->input('range', ['min' => 50, 'max' => 100]) ?>
14.5 Extra Controls
Additional methods can be added on to further control the look of the form fields.
14.5.1 Form Field Label
As covered in sections 12.4.1 and 12.4.2 regarding the GridView, labels for the fields can be auto generated based on the attribute name, or they can be
specified in the attributeLabels method of the model file.
However, if you would like to override the default label for a field, you can do so by adding the label method as such:
<?= $form->field($model, 'contactFirstName')->textInput()->label('My First Name Label') ?>
This would result in the following output:

14.5.2 Form Field Hint
Perhaps you need to add some clarifying info as to how to fill out a certain field. You can use the hint method to add explanatory details:
<?= $form->field($model, 'contactFirstName')->textInput()->label('My First Name Label')->hint('Please enter only your first name.') ?>
The field would now appear as such:
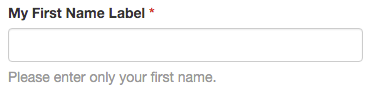
14.5.3 isNewRecord
Active Form has a handy property that can be accessed in the form that will be Boolean true if the record is new. This is useful when using the same form
to create new records as updating existing records.
The property is:
$model->isNewRecord
For example, notice the code to display the submit button for the form generated by Gii:
			<?= Html::submitButton($model->isNewRecord ? 'Create' : 'Update', ['class' => $model->isNewRecord ? 'btn btn-success' : 'btn btn-primary'])

			?>
This code will use the label Create for the update button if it is a new record and Update if it is updating an existing record.
14.6 Form Validation Feedback
One of the nicest features built into Yii Active Form is the validation feedback. Let’s submit a test form and see the validation results.
This is the submitted form:
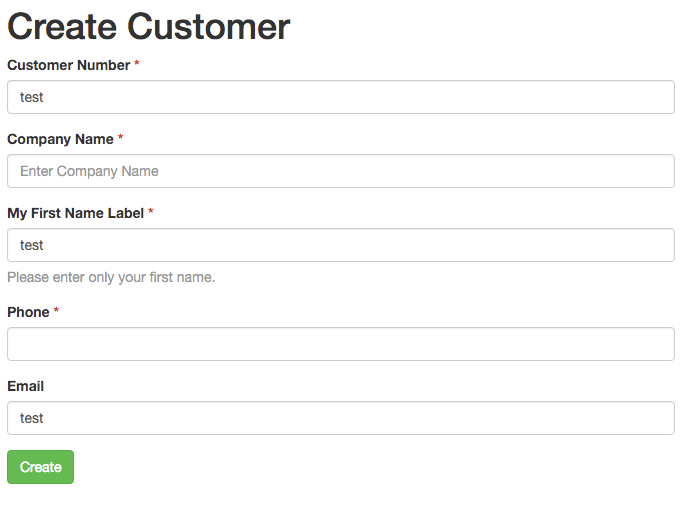
There are some errors with this submission. According to the model rules, the Customer Number must be an integer. The Company Name, First Name and Phone
are required. The first name must be at least 10 characters long. And the Email field must contain a valid email address.
Here is the response when submitting this form:
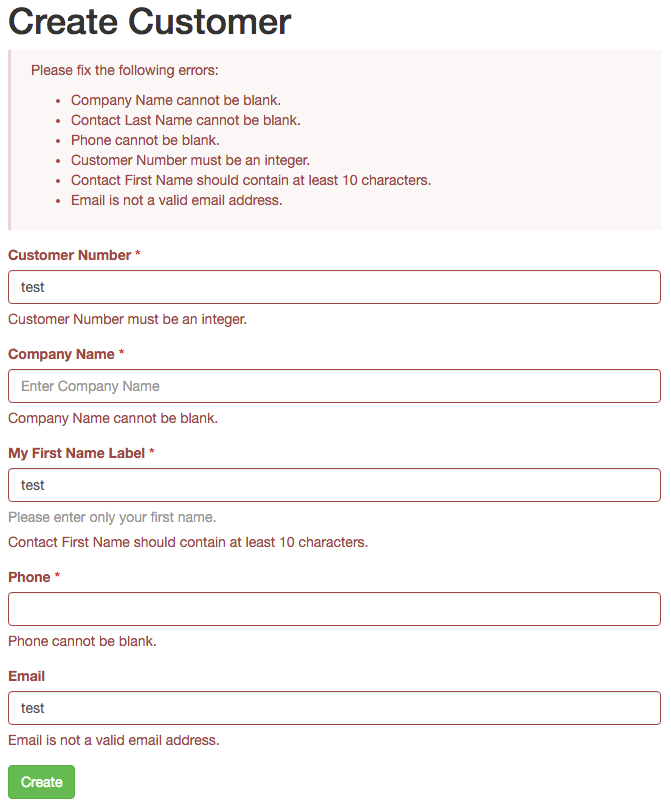
Notice each invalid field is in red and has an error message associated with it specifying why that field submission is not valid.
You will also notice an error summary at the top of the page. This is a nice feature of the validation, however, this error summary is not automatically
generated when you generate your form using Gii. You must put the following code into the form view file after ActiveForm::begin.
<?php $form = ActiveForm::begin(); ?>
<?= $form->errorSummary($model); ?>
Как указать ошибку для конкретного поля, которое является массивом ?
-
nepster
- Сообщения: 838
- Зарегистрирован: 2013.01.02, 03:35
Как указать ошибку для конкретного поля, которое является массивом ?
Есть форма, которая содержит следующие поля:
title
meta_title
meta_description
и тп.
Я сделал форму, которая генерируется на основе подключенных языков, тоесть такие поля превращаются в массивы:
title[ru]
meta_title[ru]
meta_description [ru]
title[en]
meta_title[en]
meta_description [en]
и тп.
Выглядит это вот таким образом:
Код: Выделить всё
                 <div class="row">
                            <div class="col-md-4 col-md-4 col-sm-4 col-xs-6 col-lg-4"><?= $form->field($formModel, 'meta_title['.$lang['code'].']')->textInput(['maxlength' => true]) ?></div>
                            <div class="col-md-4 col-md-4 col-sm-4 col-xs-6 col-lg-4"><?= $form->field($formModel, 'meta_description['.$lang['code'].']')->textInput(['maxlength' => true]) ?></div>
                            <div class="col-md-4 col-md-4 col-sm-4 col-xs-6 col-lg-4"><?= $form->field($formModel, 'meta_keywords['.$lang['code'].']')->textInput(['maxlength' => true]) ?></div>
                        </div>
Все отлично работает, за исключением, когда речь идет о валидации. Тоесть если в русском языке к примеру допущена ошибка, то Yii помечает ошибку как глобально на все поле. Тоесть, вместо title-ru он говорит, что ошибка в поле title, тем самым указывая, все все переводы указаны неверно, даже если это не так.
Все происходит вот из-за этого кода:
Код: Выделить всё
public static function getAttributeName($attribute)
    {
        if (preg_match('/(^|.*])([w.]+)([.*|$)/', $attribute, $matches)) {
            return $matches[2];
        } else {
            throw new InvalidParamException('Attribute name must contain word characters only.');
        }
    }
Тоесть он просто всегда удаляет все, что в [] и не дает возможность валидировать только определенное поле в массиве. Что с этим делать ?
-
nepster
- Сообщения: 838
- Зарегистрирован: 2013.01.02, 03:35
Re: Как указать ошибку для конкретного поля, которое является массивом ?
Сообщение
nepster » 2016.02.29, 18:26
andrei.obuhovski писал(а):Сдается мне, что тут нужно было так делать:
Код: Выделить всё
$form->field($model, "[".$lang['code']."]meta_title")
В таком случае придется создавать свойства в модели по имени кодов языка, а заранее мы не знаем сколько их будет и какие они.
rak писал(а):варианты навскидку:
1. делать переводы отдельными моделями, тогда можно использовать код видаКод: Выделить всё
<?= $form->field($langModels['en'], '[en]meta_title')->textInput() ?>2. добавить дополнительные поля в модель, валидировать их, а перед сохранением сохранять в нужные поля бд
3. использовать готовое поведение, например, вот это https://github.com/OmgDef/yii2-multilingual-behavior
1 — хороший вариант. Но тогда нужно будет писать мануал по php и yii2 в админке и возможность создавать модели для заказчика через текстовый редактор.
2 — не вариант, так как мы изначально не знаем какие языки и какие поля. Так как в любой момент в админке могут скажем добавить язык или удалить язык.
3 — я не использую подобные расширения, это весьма сомнительные реализации. С Yii2 нужно быть особо осторожным.
А зачем было так усложнять ? Интересно, что по поводу этого скажем Александр Макаров ?
-
nepster
- Сообщения: 838
- Зарегистрирован: 2013.01.02, 03:35
Re: Как указать ошибку для конкретного поля, которое является массивом ?
Сообщение
nepster » 2016.02.29, 19:05
Либо я понял смысл и мне такое к сожалению не подходит, либо я не понял идею =(.
У меня нет работы с ActivRecord, вообще с ним на прямую лучше не работать. У меня есть модель (base Model), в которой я получаю все данные, там я их валидирую привожу к нужному формату и только потом сохраняю через актив рекорд. Тоесть по сути мне нужно сейчас при валидации сделать что-то такое:
Код: Выделить всё
$this->addError('[en]title', 'Возникла ошибка именно с языком EN'); И в любом случае та нехорошая регулярка обрезает все, что есть в [].
-
andrei.obuhovski
- Сообщения: 610
- Зарегистрирован: 2015.07.16, 10:50
Re: Как указать ошибку для конкретного поля, которое является массивом ?
Сообщение
andrei.obuhovski » 2016.02.29, 22:51
Если я правильно понял, то у вас одни и те же поля повторяются N количество раз. (где N — количество языков)
Тогда вам нужно создать одну модель с этими полями. А выводить, и заполнять, и валидировать через foreach (или loadMultiple и validateMultiple). При этом в качестве ключей вам нужно указать коды ваших языков(или их айдишнники).
Т.е. логика примерно такая:
При выводе:
1) Получаем массив языков
2) Перебираем их в цикле, и делаем новый массив из FormModel. В качестве ключей указываем коды языков.
3) Выводим в цикле форму. $form->field($formModel, «[$lang]meta_title»)
При отправке:
1) Model::LoadMultiple()
2) Model::ValidateMultiple()
3) Сохраняем в цикле
-
nepster
- Сообщения: 838
- Зарегистрирован: 2013.01.02, 03:35
Re: Как указать ошибку для конкретного поля, которое является массивом ?
Сообщение
nepster » 2016.02.29, 23:51
Честно говоря я не совсем понимаю зачем *Multiple у меня нет нескольких моделей и валидация мне нужна кастомная. Да и в этом случае тот злой метод вчерашнего удалит скобки и оставит только title. В результате ошибки будут везде.
По факту я просто в одной модели хочу поработать с языками и потом что-то сделать, мне не нужно по модели на каждый язык. Это походу косяк yii.
-
Nerf
- Сообщения: 780
- Зарегистрирован: 2015.01.29, 00:37
Re: Как указать ошибку для конкретного поля, которое является массивом ?
Сообщение
Nerf » 2016.03.01, 00:52
Переопределите yiiwidgetsActiveField. Как минимум error(). А потом еще…
Про js валидацию, наверное, стоит забыть. Получите снежный ком проблем.
andrei.obuhovski дело говорит.
Сделайте на каждый язык модель(не суть AR или нет) с нужными вам полями.
Controller:
Код: Выделить всё
$models = [];
$langCodes = ['ru', 'en']; // из параметров, БД...
foreach($langCodes as $code) {
    $models[$code] = new YouModel([
        'lang' => $code,
    ]);
}

if (Model::loadMultiple($models, Yii::$app->request->post()) && Model::validateMultiple($models)) {
    foreach ($models as $model) {
        // $model->save(false);
        // ваша логика сохранения
    }
    return $this->redirect('index');
}

return $this->render('update', ['models' => $models]);
View:
Код: Выделить всё
use yiihelpersHtml;
use yiiwidgetsActiveForm;

$form = ActiveForm::begin();

foreach ($models as $langCode => $model) { // вывод всех полей модели, или продублируйте foreach, чтобы вывести заголовок 1, заголовок 2...
    echo $form->field($model, "[$langCode]title")->label($model->getTranslatedLabel('title')); // label() опционально
    echo $form->field($model, "[$langCode]meta_title")->label($model->getTranslatedLabel('meta_title'));
    // ...
}

ActiveForm::end();-
nepster
- Сообщения: 838
- Зарегистрирован: 2013.01.02, 03:35
Re: Как указать ошибку для конкретного поля, которое является массивом ?
Сообщение
nepster » 2016.03.01, 10:32
Сделайте на каждый язык модель(не суть AR или нет) с нужными вам полями.
Nerf писал(а):Переопределите yiiwidgetsActiveField. Как минимум error(). А потом еще…
Про js валидацию, наверное, стоит забыть. Получите снежный ком проблем.andrei.obuhovski дело говорит.
Сделайте на каждый язык модель(не суть AR или нет) с нужными вам полями.
Controller:Код: Выделить всё
$models = [];
$langCodes = ['ru', 'en']; // из параметров, БД...
foreach($langCodes as $code) {
    $models[$code] = new YouModel([
        'lang' => $code,
    ]);
}

if (Model::loadMultiple($models, Yii::$app->request->post()) && Model::validateMultiple($models)) {
    foreach ($models as $model) {
        // $model->save(false);
        // ваша логика сохранения
    }
    return $this->redirect('index');
}

return $this->render('update', ['models' => $models]);
View:
Код: Выделить всё
use yiihelpersHtml;
use yiiwidgetsActiveForm;

$form = ActiveForm::begin();

foreach ($models as $langCode => $model) { // вывод всех полей модели, или продублируйте foreach, чтобы вывести заголовок 1, заголовок 2...
    echo $form->field($model, "[$langCode]title")->label($model->getTranslatedLabel('title')); // label() опционально
    echo $form->field($model, "[$langCode]meta_title")->label($model->getTranslatedLabel('meta_title'));
    // ...
}

ActiveForm::end();
Я ж говорю, к сожалению за ранее неизвестно какие будут языки, сколько их, какой по умолчанию и тп. Все задает админ.
JS валидация это такое, она и так не всегда работает, например в случае с exist unique и тп.
Мне кажется это жирный косяк АктивФорма. А точнее даже хелпера Html::error(). Потому, как если убрать ту регулярку вроде пробелмы пропадают. И тут либо что-то мы упускаем, либо косячелло.
Последний раз редактировалось nepster 2016.03.05, 13:38, всего редактировалось 1 раз.
-
rak
- Сообщения: 2181
- Зарегистрирован: 2010.11.02, 23:40
- Контактная информация:
Re: Как указать ошибку для конкретного поля, которое является массивом ?
Сообщение
rak » 2016.03.01, 22:12
nepster писал(а):
3 — я не использую подобные расширения, это весьма сомнительные реализации. С Yii2 нужно быть особо осторожным.
угу, а потом тот, кто будет поддерживать этот код будет вспоминать предыдущего разработчика не злым тихим словом за очередной велосипед с квадратными колесами
-
nepster
- Сообщения: 838
- Зарегистрирован: 2013.01.02, 03:35
Re: Как указать ошибку для конкретного поля, которое является массивом ?
Сообщение
nepster » 2016.03.01, 23:23
Вот как раз наоборот скорее всего. У меня вся логика инкапсуляция в разных моделях, а не вешаются глобальные непонятные поведения на всю модель. Я уже это проходит. Если у вас несколько сценариев и все завязано на одной форме, то оптом геморроя будет прилично. Если ваше приложение хоть чуть-чуть больше блога, с актив рекордом нужно быть очень осторожным.
По теме, такое вариант работает (привет велосипедам), но проблема в том, что мне нужна логика валидации. Например если вы указали дефолтный язык, то для друго-го валидация на required будет необязательна. В свою очередь, если вы указали другой язык, то тоже самое для дефолтного.
Как только нужно сделать что-то кастомное, виджеты yii сыпятся.
-
nepster
- Сообщения: 838
- Зарегистрирован: 2013.01.02, 03:35
Re: Как указать ошибку для конкретного поля, которое является массивом ?
Сообщение
nepster » 2016.03.01, 23:45
В общем пока реализовал в стиле Yii2 «не нравится? переопредели»:
В бутстрап файле (только для админки, ну понятно, что для продакшина человек в здравом уме виджеты yii не использует):
Код: Выделить всё
        Yii::$container->set('yiiwidgetsActiveForm', [
            'fieldClass' => 'appcomponentsbackendActiveField',
        ]);
Привет DI. Отличная штука, когда пришло озарение зачем она.
Далее переопределяем 2 метода
Код: Выделить всё
    public function error($options = [])
    public function begin()
На первый взгляд работает. Но если кому-то нужно будет, такую штуку не используйте, пока не понятно к чему это может привести.
-
rak
- Сообщения: 2181
- Зарегистрирован: 2010.11.02, 23:40
- Контактная информация:
Re: Как указать ошибку для конкретного поля, которое является массивом ?
Сообщение
rak » 2016.03.02, 00:47
nepster писал(а):Вот как раз наоборот скорее всего. У меня вся логика инкапсуляция в разных моделях, а не вешаются глобальные непонятные поведения на всю модель. Я уже это проходит. Если у вас несколько сценариев и все завязано на одной форме, то оптом геморроя будет прилично. Если ваше приложение хоть чуть-чуть больше блога, с актив рекордом нужно быть очень осторожным.
По теме, такое вариант работает (привет велосипедам), но проблема в том, что мне нужна логика валидации. Например если вы указали дефолтный язык, то для друго-го валидация на required будет необязательна. В свою очередь, если вы указали другой язык, то тоже самое для дефолтного.
Как только нужно сделать что-то кастомное, виджеты yii сыпятся.
тут проблема скорее с проектированием бд.
по-хорошему, нужно все поля, которые необходимо переводить, вынести в отдельную таблицу бд. по сути поведение, которое я скидывал выше и реализует эту логику, причем не создавая дополнительных моделей.
но можно его и не использовать, а реализовать тоже самое самому.
стандартная валидация yii отлично работает для определенной структуры, если начинать выдумывать что-то свое, то естественно, что стандартные варианты не будут работать без напильника.
но вот для чего городить огород для задач, которые уже 100 раз решались ранее — не понятно
-
Nerf
- Сообщения: 780
- Зарегистрирован: 2015.01.29, 00:37
Re: Как указать ошибку для конкретного поля, которое является массивом ?
Сообщение
Nerf » 2016.03.02, 03:21
Just fo lulz…
Вот как раз наоборот скорее всего. У меня вся логика инкапсуляция в разных моделях
Как раз наоборот наоборот. Логика в разных моделях звучит многообещающе… Почитайте про SOLID.
Если ваше приложение хоть чуть-чуть больше блога, с актив рекордом нужно быть очень осторожным.
О Боже, какой мужчина! ActiveRecord — это ORM по одноименному шаблону проектирования. Что же там такого опасного?
но проблема в том, что мне нужна логика валидации. Например если вы указали дефолтный язык, то для друго-го валидация на required будет необязательна. В свою очередь, если вы указали другой язык, то тоже самое для дефолтного.
И почему для этого не работают rules()?
Как только нужно сделать что-то кастомное, виджеты yii сыпятся.
Потому что вы пытаетесь их использовать не по назначению.
Мне кажется это жирный косяк АктивФорма. А точнее даже хелпера Html::error(). Потому, как если убрать ту регулярку вроде пробелмы пропадают. И тут либо что-то мы упускаем, либо косячелло.
Если убрать ту регулярку, часть функционала не будет работать.
только для админки, ну понятно, что для продакшина человек в здравом уме виджеты yii не использует
Продакшена? Я использую виджеты yii и в бекенде, и в фронтенде. И вроде на здравый ум не так часто жалуются ![]()
Yii::$container->set(‘yiiwidgetsActiveForm’, [
‘fieldClass’ => ‘appcomponentsbackendActiveField’,
]);
Только учтите, что в других местах будет использоваться этот класс(в зависимости где вы это указали). Если используете ActiveForm в других местах и явно не задаете fieldClass, то что-то у вас скорее всего поломается. Не проще указать в конфиге ActiveForm? С DIC как раз нужно быть осторожней.
По непонятным причинам, обрабатывая набор некоторых сущностей, вы пытаетесь слепить их вместе и ругаетесь, что решение вам не подходит, а поэтому неправильное. Ну, на ошибках учимся.
-
nepster
- Сообщения: 838
- Зарегистрирован: 2013.01.02, 03:35
Re: Как указать ошибку для конкретного поля, которое является массивом ?
Сообщение
nepster » 2016.03.02, 10:42
rak писал(а):
nepster писал(а):Вот как раз наоборот скорее всего. У меня вся логика инкапсуляция в разных моделях, а не вешаются глобальные непонятные поведения на всю модель. Я уже это проходит. Если у вас несколько сценариев и все завязано на одной форме, то оптом геморроя будет прилично. Если ваше приложение хоть чуть-чуть больше блога, с актив рекордом нужно быть очень осторожным.
По теме, такое вариант работает (привет велосипедам), но проблема в том, что мне нужна логика валидации. Например если вы указали дефолтный язык, то для друго-го валидация на required будет необязательна. В свою очередь, если вы указали другой язык, то тоже самое для дефолтного.
Как только нужно сделать что-то кастомное, виджеты yii сыпятся.
тут проблема скорее с проектированием бд.
по-хорошему, нужно все поля, которые необходимо переводить, вынести в отдельную таблицу бд. по сути поведение, которое я скидывал выше и реализует эту логику, причем не создавая дополнительных моделей.
но можно его и не использовать, а реализовать тоже самое самому.стандартная валидация yii отлично работает для определенной структуры, если начинать выдумывать что-то свое, то естественно, что стандартные варианты не будут работать без напильника.
но вот для чего городить огород для задач, которые уже 100 раз решались ранее — не понятно
В бд все впорядке. Отдельная табилца, ключи, все дела. У вас просто не было задач посложнее.
Nerf писал(а):Just fo lulz…
Вот как раз наоборот скорее всего. У меня вся логика инкапсуляция в разных моделях
Как раз наоборот наоборот. Логика в разных моделях звучит многообещающе… Почитайте про SOLID.
Если ваше приложение хоть чуть-чуть больше блога, с актив рекордом нужно быть очень осторожным.
О Боже, какой мужчина! ActiveRecord — это ORM по одноименному шаблону проектирования. Что же там такого опасного?
но проблема в том, что мне нужна логика валидации. Например если вы указали дефолтный язык, то для друго-го валидация на required будет необязательна. В свою очередь, если вы указали другой язык, то тоже самое для дефолтного.
И почему для этого не работают rules()?
Как только нужно сделать что-то кастомное, виджеты yii сыпятся.
Потому что вы пытаетесь их использовать не по назначению.
Мне кажется это жирный косяк АктивФорма. А точнее даже хелпера Html::error(). Потому, как если убрать ту регулярку вроде пробелмы пропадают. И тут либо что-то мы упускаем, либо косячелло.
Если убрать ту регулярку, часть функционала не будет работать.
только для админки, ну понятно, что для продакшина человек в здравом уме виджеты yii не использует
Продакшена? Я использую виджеты yii и в бекенде, и в фронтенде. И вроде на здравый ум не так часто жалуются
Yii::$container->set(‘yiiwidgetsActiveForm’, [
‘fieldClass’ => ‘appcomponentsbackendActiveField’,
]);Только учтите, что в других местах будет использоваться этот класс(в зависимости где вы это указали). Если используете ActiveForm в других местах и явно не задаете fieldClass, то что-то у вас скорее всего поломается. Не проще указать в конфиге ActiveForm? С DIC как раз нужно быть осторожней.
По непонятным причинам, обрабатывая набор некоторых сущностей, вы пытаетесь слепить их вместе и ругаетесь, что решение вам не подходит, а поэтому неправильное. Ну, на ошибках учимся.
1) SOLID никакого отношения не имеет к Yii2. В Yii2 почти каждый класс нарушет принцип единой ответственности. И как говорил Александр, можно обойтись без SOLID и Yii2 это некий баланс между безнесом и суровым ооп. Поэтому писать по SOLID в рамках Yii2 крайне тяжело, а иногда и невозможно.
2) ActiveRecord — на больших проектах это очень опасная штука. Я уже 500 раз описывал ее проблемы. Все у кого выростает проект, рано или позжно понимают, что неправильно приготовленный ActiveRecord — это полный ад.
3) По поводу нерабочего функционала, ну может быть, поэтому пока я сам првоерю и уже позже смогу казать подробнее.
4) «Я использую виджеты yii и в бекенде, и в фронтенде. И вроде на здравый ум не так часто жалуются ![]() » — потому, что вы не решаете «суровые» задачи. Для прототипов и стандартны штуковен это то что нужно.
» — потому, что вы не решаете «суровые» задачи. Для прототипов и стандартны штуковен это то что нужно.
5) и по поводу ActiveForm. Мне такое поведение нужно только в админке, на фронте я не рискую больше использовать актив форм. Используя DI контейнер мы просто подменяем данные помолчанию. Тоесть в остальных случаях будет стандартное значение. Это делается для того, чтобы каждой форме не прописывать конфиг.
На самом деле DI это очень крутая штука, которой не пользуются в Yii2, потому что так исторически сложилось.
-
Nerf
- Сообщения: 780
- Зарегистрирован: 2015.01.29, 00:37
Re: Как указать ошибку для конкретного поля, которое является массивом ?
Сообщение
Nerf » 2016.03.02, 16:07
1) SOLID никакого отношения не имеет к Yii2. В Yii2 почти каждый класс нарушет принцип единой ответственности. И как говорил Александр, можно обойтись без SOLID и Yii2 это некий баланс между безнесом и суровым ооп. Поэтому писать по SOLID в рамках Yii2 крайне тяжело, а иногда и невозможно.
Это всего лишь набор принципов. Я не настаиваю, что нужно строго следовать им везде. Но стараться придерживаться их, наверное, все же неплохо. На самом деле, не зная что в действительности представляют ваши объекты, я могу быть не прав, но со стороны кажется, что вы делаете «велосипед с квадратными колесами».
ActiveRecord — на больших проектах это очень опасная штука. Я уже 500 раз описывал ее проблемы. Все у кого выростает проект, рано или позжно понимают, что неправильно приготовленный ActiveRecord — это полный ад.
Очень интересно услышать доводы. Наверное, «неправильно приготовленный ActiveRecord — это полный ад» — ключевое. Что не есть проблема AR.
4) «Я использую виджеты yii и в бекенде, и в фронтенде. И вроде на здравый ум не так часто жалуются
» — потому, что вы не решаете «суровые» задачи. Для прототипов и стандартны штуковен это то что нужно.
Выпейте немного «антиЧСВина». Что же в них такого ужасного, опасного и т.п., чтобы их не использовать?
Используя DI контейнер мы просто подменяем данные помолчанию. Тоесть в остальных случаях будет стандартное значение. Это делается для того, чтобы каждой форме не прописывать конфиг.
В остальных случаях будет то, что вы указали в DIC, если явно не указано что использовать. Т.е. в других виджетах ActiveForm будет использоваться переопределенный класс.
На самом деле DI это очень крутая штука, которой не пользуются в Yii2, потому что так исторически сложилось.
Не используете вы => все? В «ядре» Yii используется.