Что такое ошибка «В настоящее время у вас нет разрешения на доступ к этой папке»
Если вы открыли это руководство, то, скорее всего, вы станете жертвой В настоящее время у вас нет разрешения на доступ к этой папке — ошибка, которая выскакивает при попытке открыть директорию какой-то папки. Многие пользователи начали сталкиваться с этой проблемой после перехода со старых версий на Windows 10. В результате эта ошибка стала огромным узким местом, не позволяющим пользователям открывать папки, выполнять удаление или даже влиять на некоторые простые изменения. Симптомы очень похожи на «Доступ запрещен», еще одно популярное сообщение, ухудшающее впечатление пользователей. Обычно наиболее частые причины проблем с доступом к папкам связаны с правами пользователя. Если некоторые из них отключены или конфликтуют, пользователи могут иметь ограниченный доступ к некоторым каталогам, включая файлы и папки, расположенные внутри. К счастью, проблема более чем решаема с помощью пары простых шагов. Обязательно следуйте приведенным ниже инструкциям, чтобы устранить ошибку «У вас нет разрешения на доступ к этой папке».

В настоящее время у вас нет разрешения на доступ к этой папке »в Windows 10 (пример 1)

В настоящее время у вас нет разрешения на доступ к этой папке (пример 2)
Скачать средство восстановления Windows

Существуют специальные утилиты для восстановления Windows, которые могут решить проблемы, связанные с повреждением реестра, неисправностью файловой системы, нестабильностью драйверов Windows. Мы рекомендуем вам использовать Advanced System Repair Pro, чтобы исправить ошибку «В настоящее время у вас нет разрешения на доступ к этой папке» в Windows 11, Windows 10, Windows 8 или Windows 7.
1. Измените разрешения в свойствах папки.
Есть вероятность, что при обновлении до Windows 10 система не внесла ваше Имя пользователя в список разрешенных владельцев. В этом методе мы собираемся это проверить и при необходимости устранить недостачу. Вы можете использовать как ручной, так и командный способы. В последнем случае требуется только одна команда для входа и ваше право собственности на папку снова в ваших руках. Выбирайте, что вам нравится:
Используя ручные шаги:
- Щелкните правой кнопкой мыши проблемную папку и выберите Объявления.
- Перейдите в Охранник вкладка и проверьте, есть ли ваше имя пользователя под Имя пользователя или группа.
- Если там нет названия, откройте Дополнительно и нажмите на Изменить (выделено синим) рядом с Владелец.
- В открывшемся окне перейдите к Дополнительно еще раз. Выберите Поиск и выберите свое текущее имя пользователя из появившегося списка и нажмите OK.
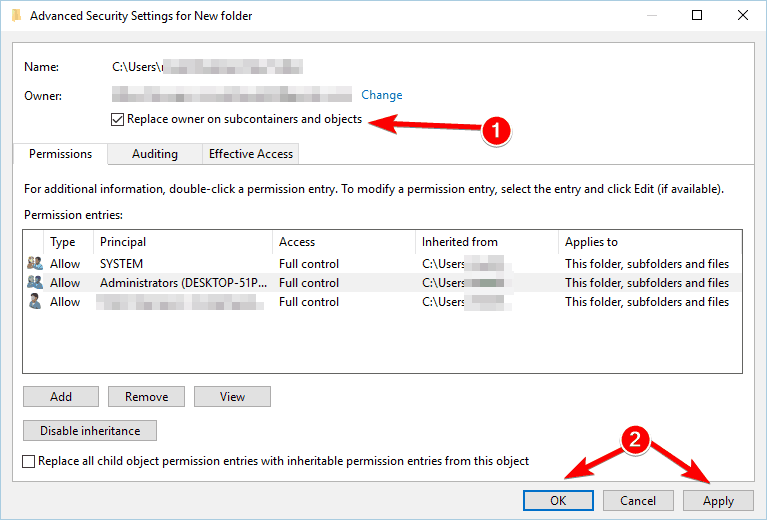
- Также выберите Заменить владельца на подконтейнеров и объектов если есть такая возможность.
- Нажмите OK , чтобы закрыть окно и перезагрузить компьютер, чтобы проверить, исчезла ли ошибка.
Используя командную строку:
Перед запуском команд нам нужно знать путь к вашей папке. Для этого щелкните правой кнопкой мыши проблемную папку и выберите Объявления. Скопируйте путь к папке (рядом с Местоположение) и приклеиваем куда-нибудь, чтобы не забыть. После этого вы должны быть готовы выполнить следующие шаги:
- Откройте Командная строка , введя
cmdв поле поиска рядом с Меню Пуск кнопку. - Щелкните правой кнопкой мыши по Командная строка , а затем выберите Запуск от имени администратора. Разрешить окно UAC, нажав Да.
- Затем скопируйте и вставьте эту команду, заменив «Путь к папке» на путь к вашей папке, который мы нашли выше.
- После написания команды нажмите Enter привести его в действие.
- Наконец, вы должны запустить другую команду, используя тот же шаблон, описанный выше.
- После завершения процесса закройте консоль и перезагрузите компьютер, чтобы все изменения вступили в силу.
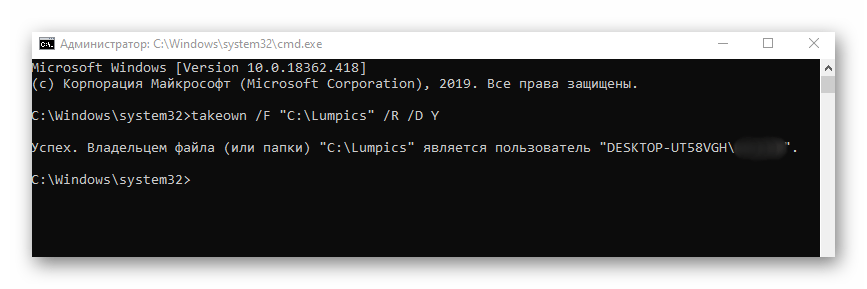
TAKEOWN /F "Folder Path" /R /D Y
Например, полная команда с C:Users{usernameDocumentsPhotos путь должен выглядеть так TAKEOWN /F C:Users{username}DocumentsPhotos /R /D Y
ICACLS "Folder Path" /grant administrators:F
Надеемся, вам удалось решить проблемы с доступом к папкам. Если нет, выполните следующие шаги, которые мы представили ниже.
2. Разрешить всем
Если вам не удалось решить проблему с помощью предыдущего метода, попробуйте этот альтернативный способ предоставления разрешений. Предыдущие два шага преследовали одну и ту же цель — отсутствие личной собственности. Хотя этот очень похож, все же стоит попробовать избавиться от проблемы.
- Щелкните правой кнопкой мыши проблемную папку и выберите Объявления.
- Перейдите в Охранник вкладку и нажмите Редактировать.
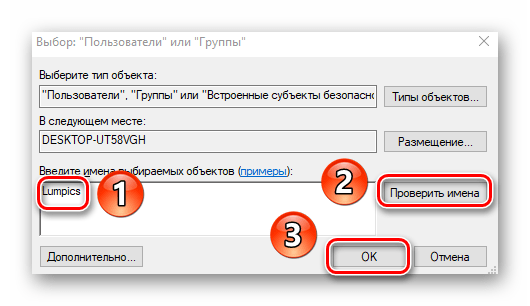
- Затем нажмите Добавить, напишите Все, нажмите Проверить именаи OK в конце.
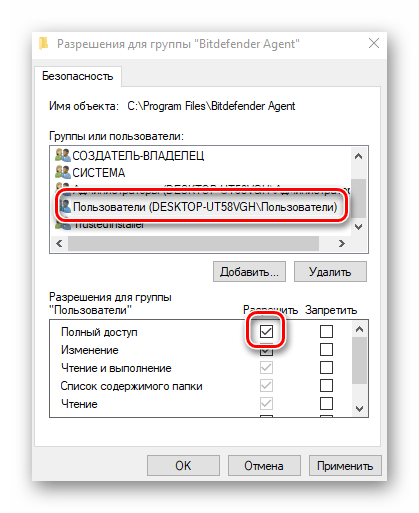
- Выберите Все и поставьте галочку рядом с Полный доступ.
- Нажмите Применить и OK , чтобы закрыть окно.
- Перезагрузите компьютер и проверьте, можете ли вы снова получить доступ к папке.
3. Измените значения в редакторе локальной политики.
Есть еще один способ обойти проблемы администратора — изменить настройки локальной политики. Мы отключим режим одобрения администратором, чтобы Windows не была слишком строгой в отношении доступа. Следуйте инструкциям ниже:
- Нажмите Windows Key + R кнопки, вставьте
gpedit.mscи откройте его. - На левой панели перемещайтесь по этим папкам Конфигурация компьютера > Параметры Windows > Настройки безопасности > Локальная политика > параметры безопасности.
- После нажатия на параметры безопасности, найдите и дважды щелкните Режим одобрения администратором контроля учетных записей пользователей для встроенной учетной записи администратора на правой панели.
- Установите это как Запрещено, затем нажмите Применить и OK для сохранения изменений.
- Вы также должны найти запись под названием Контроль учетных записей пользователей Запускать всех администраторов в режиме утверждения администратором и сделайте те же изменения, что и на предыдущем шаге.
- После этого закройте Редактор политик и перезагрузите вашу систему, чтобы эти изменения вступили в силу.
4. Просканируйте свой компьютер на наличие вредоносных программ.
Если у вас когда-либо возникало подозрение, что ваш компьютер заражен, также стоит запустить сканирование на наличие вредоносных программ и другого нежелательного программного обеспечения. Знаете вы об этом или нет, но вредоносное ПО могло проникнуть в вашу систему без согласия и вызвать некоторые изменения в конфигурации системы, что привело к различным ошибкам. Несмотря на то, что вы только что обновились до Windows 10, мы по-прежнему рекомендуем сделать это, даже если вероятность заражения незначительна. Вы можете использовать либо встроенный Защитник Windows, либо установить расширенное антивирусное программное обеспечение, которое будет бороться с угрозами, которые Windows может пропустить. Мы рекомендуем вам использовать антивирус, разработанный Malwarebytes — надежной и талантливой группой экспертов, постоянно обновляющей свое программное обеспечение для борьбы как с незначительными, так и с глобальными угрозами. Вы можете скачать его сейчас, используя ссылку ниже, и бесплатно попробовать 14-дневную пробную версию окончательного решения для защиты от вредоносных программ.

Главное окно Malwarebytes

Настройки Malwarebytes

Результаты сканирования Malwarebytes
Скачать Malwarebytes
Заключение
Мы надеемся, что вы больше не имеете дело с сообщением «В настоящее время у вас нет разрешения на доступ к этой папке». Однако, если ни одно из перечисленных решений не помогло вам забыть об этой проблеме, попробуйте переустановить систему с нуля. Возможно, что-то пошло не так при переходе на Windows 10. Вот почему полная переустановка Windows может помочь вам устранить проблему. Если что-то еще ухудшает работу вашего ПК, вы можете поискать другие руководства на нашей странице, чтобы получить быстрые и эффективные решения. Мы регулярно обновляем их по мере появления новых ошибок.
Windows 8 Enterprise Windows 8 Pro Windows 8 Windows 7 Enterprise Windows 7 Professional Windows 7 Ultimate Windows 7 Home Premium Windows 7 Home Basic Windows 7 Starter Windows Vista Enterprise Windows Vista Ultimate Windows Vista Business Windows Vista Home Premium Windows Vista Home Basic Windows Vista Starter Microsoft Windows XP Professional Microsoft Windows XP Home Edition Microsoft Windows XP Starter Edition Еще…Меньше
Аннотация
При попытке доступа к файлам и папкам в Windows или работе с ними могут возникать такие проблемы:
-
Проблема 1. Вы получаете сообщение об ошибке «Отказано в доступе» или аналогичное.
-
Проблема 2. Невозможно получить доступ к файлам и папкам, изменить, сохранить или удалить их.
-
Проблема 3. Невозможно открыть файл или папку после установки новой версии Windows.
Способ
Чтобы решить конкретную проблему, выберите наиболее подходящее к вашей ситуации описание и выполните указанные действия. Используйте метод, соответствующий вашей версии Windows.
Примечание. При подобных проблемах не всегда появляется сообщение об ошибке «Отказано в доступе». Если устранить проблему не удается, попробуйте другие предлагаемые действия.
Причина
Сообщение об ошибке «Отказано в доступе» может появляться по одной или нескольким из следующих причин:
-
Изменился владелец папки.
-
У вас нет необходимых разрешений.
-
Файл зашифрован.
Решение
Windows 8
Возможно, вы не являетесь владельцем файла или папки.
Если вы недавно обновили систему до Windows 8, могли измениться некоторые сведения о вашей учетной записи. Поэтому вы можете больше не быть владельцем некоторых файлов или папок. Эту проблему можно устранить, снова став владельцем файлов и папок.
Чтобы стать владельцем файла или папки, выполните указанные ниже действия.
-
Нажмите и удерживайте папку, владельцем которой вы хотите стать, и выберите пункт Свойства. (Если вы используете мышь, щелкните папку правой кнопкой и выберите пункт Свойства.)
-
Откройте вкладку Безопасность, нажмите кнопку Дополнительно и выберите пункт Изменить. При получении запроса на ввод пароля администратора или подтверждение введите пароль или подтвердите действие.
-
Введите имя пользователя, которому нужно предоставить права владельца, и выберите элемент Проверить имена.
Примечание. Появится имя учетной записи лица, которому вы предоставляете права владельца.
-
Нажмите кнопку ОК.
-
Если необходимо, чтобы этот пользователь также стал владельцем файлов и вложенных папок в этой папке, установите флажок Заменить владельца подконтейнеров и объектов.
-
Нажмите кнопку ОК.
Возможно, у вас нет необходимых разрешений.
Проблемы при доступе к файлам и папкам могут быть связаны с разрешениями. Разрешения — это правила, которые определяют, может ли пользователь получать доступ к файлам и папкам или изменять их. Чтобы проверить разрешения на файл или папку:
-
Нажмите и удерживайте (или щелкните правой кнопкой мыши) файл или папку, а затем выберите пункт Свойства.
-
Откройте вкладку Безопасность.
-
В разделе Группы или пользователи выберите свое имя, чтобы увидеть имеющиеся у вас разрешения.
Для открытия файла необходимо разрешение на чтение. Чтобы изменить разрешения на файл или папку, выполните указанные ниже действия.
Важно! Чтобы изменить разрешения на файлы и папки, необходимо войти в систему с правами администратора.
-
Нажмите и удерживайте (или щелкните правой кнопкой мыши) файл или папку, а затем выберите пункт Свойства.
-
Откройте вкладку Безопасность.
-
В разделе Группы или пользователи выберите свое имя, чтобы увидеть имеющиеся у вас разрешения.
-
Нажмите кнопку Изменить, выберите свое имя, установите флажки для нужных разрешений и нажмите кнопку ОК.
Файл или папка могут быть зашифрованы.
Шифрование позволяет защитить файлы и папки от нежелательного доступа. Открыть зашифрованный файл или папку без сертификата, который использовался для шифрования, невозможно. Чтобы увидеть, зашифрованы ли файл или папка:
-
Нажмите и удерживайте (или щелкните правой кнопкой мыши) файл или папку, а затем выберите пункт Свойства.
-
Перейдите на вкладку Общие и нажмите кнопку Дополнительно.
Если установлен флажок Шифровать содержимое для защиты данных, для открытия файла или папки потребуется сертификат, который использовался для их шифрования. В этом случае следует получить этот сертификат у пользователя, который создал или зашифровал файл или папку, либо попросить его расшифровать их.
Windows 7
Возможно, вы не являетесь владельцем файла или папки.
Если вы недавно обновили систему до Windows 7, могли измениться некоторые сведения о вашей учетной записи. Поэтому вы можете больше не быть владельцем некоторых файлов или папок. Эту проблему можно устранить, снова став владельцем файлов и папок.
Чтобы стать владельцем файла или папки:
-
Щелкните правой кнопкой мыши значок папки, владельцем которой вы хотите стать, и выберите пункт Свойства.
-
Откройте вкладку Безопасность, нажмите кнопку Дополнительно и выберите вкладку Владелец.
-
Нажмите кнопку Изменить.
Примечание. При получении запроса на ввод пароля администратора или подтверждения введите пароль или подтвердите действие.
-
Выберите имя лица, которому требуется предоставить права владельца.
-
Если необходимо, чтобы этот пользователь также стал владельцем файлов и вложенных папок в этой папке, установите флажок Заменить владельца подконтейнеров и объектов.
-
Нажмите кнопку ОК.
Возможно, у вас нет необходимых разрешений.
Проблемы при доступе к файлам и папкам могут быть связаны с разрешениями. Разрешения — это правила, которые определяют, может ли пользователь получать доступ к файлам и папкам или изменять их. Чтобы установить разрешения файла или папки, выполните указанные ниже действия.
-
Щелкните файл или папку правой кнопкой мыши и выберите пункт Свойства.
-
Откройте вкладку Безопасность.
-
В разделе Группы или пользователи выберите свое имя, чтобы увидеть имеющиеся у вас разрешения.
Для открытия файла необходимо разрешение на чтение. Чтобы изменить разрешения на файл или папку, выполните указанные ниже действия.
Важно! Чтобы изменить разрешения на файлы и папки, необходимо войти в систему с правами администратора.
-
Щелкните файл или папку правой кнопкой мыши и выберите пункт Свойства.
-
Откройте вкладку Безопасность.
-
В разделе Группы или пользователи выберите свое имя, чтобы увидеть имеющиеся у вас разрешения.
-
Нажмите кнопку Изменить, выберите свое имя, установите флажки для нужных разрешений и нажмите кнопку ОК.
Дополнительные сведения о разрешениях см. в статье Что такое разрешения?.
Файл или папка могут быть зашифрованы.
Шифрование позволяет защитить файлы и папки от нежелательного доступа. Открыть зашифрованный файл или папку без сертификата, который использовался для шифрования, невозможно. Чтобы увидеть, зашифрованы ли файл или папка:
-
Щелкните файл или папку правой кнопкой мыши и выберите пункт Свойства.
-
Откройте вкладку Общие и нажмите кнопку Дополнительно.
Если установлен флажок Шифровать содержимое для защиты данных, для открытия файла или папки потребуется сертификат, который использовался для их шифрования.
Этот сертификат следует получить у пользователя, который создал или зашифровал файл или папку, либо попросить его расшифровать их.
Дополнительные сведения см. в статье Импорт и экспорт сертификатов и закрытых ключей.
Причина
Проблемы с доступом к файлам и папкам и при работе с ними могут возникать по одной или нескольким из следующих причин:
-
Изменился владелец папки.
-
У вас нет необходимых разрешений.
-
Файл зашифрован.
-
Файл поврежден.
-
Профиль пользователя поврежден.
Решение
Windows 8
Возможно, вы не являетесь владельцем файла или папки.
Если вы недавно обновили систему до Windows 8, могли измениться некоторые сведения о вашей учетной записи. Поэтому вы можете больше не быть владельцем некоторых файлов или папок. Эту проблему можно устранить, снова став владельцем файлов и папок.
Чтобы стать владельцем файла или папки, выполните указанные ниже действия.
-
Нажмите и удерживайте папку, владельцем которой вы хотите стать, и выберите пункт Свойства. (Если вы используете мышь, щелкните папку правой кнопкой и выберите пункт Свойства.)
-
Откройте вкладку Безопасность, нажмите кнопку Дополнительно и выберите пункт Изменить. При получении запроса на ввод пароля администратора или подтверждение введите пароль или подтвердите действие.
-
Введите имя пользователя, которому нужно предоставить права владельца, и выберите элемент Проверить имена.
Примечание. Появится имя учетной записи лица, которому вы предоставляете права владельца.
-
Нажмите кнопку ОК.
-
Если необходимо, чтобы этот пользователь также стал владельцем файлов и вложенных папок в этой папке, установите флажок Заменить владельца подконтейнеров и объектов.
-
Нажмите кнопку ОК.
Возможно, у вас нет необходимых разрешений.
Проблемы при доступе к файлам и папкам могут быть связаны с разрешениями. Разрешения — это правила, которые определяют, может ли пользователь получать доступ к файлам и папкам или изменять их. Чтобы проверить разрешения на файл или папку:
-
Нажмите и удерживайте (или щелкните правой кнопкой мыши) файл или папку, а затем выберите пункт Свойства.
-
Откройте вкладку Безопасность.
-
В разделе Группы или пользователи выберите свое имя, чтобы увидеть имеющиеся у вас разрешения.
Для открытия файла необходимо разрешение на чтение. Чтобы изменить разрешения на файл или папку, выполните указанные ниже действия.
Важно! Чтобы изменить разрешения на файлы и папки, необходимо войти в систему с правами администратора.
-
Нажмите и удерживайте (или щелкните правой кнопкой мыши) файл или папку, а затем выберите пункт Свойства.
-
Откройте вкладку Безопасность.
-
В разделе Группы или пользователи выберите свое имя, чтобы увидеть имеющиеся у вас разрешения.
-
Нажмите кнопку Изменить, выберите свое имя, установите флажки для нужных разрешений и нажмите кнопку ОК.
Дополнительные сведения о разрешениях см. в статье Что такое разрешения?.
Файл или папка могут быть зашифрованы.
Шифрование позволяет защитить файлы и папки от нежелательного доступа. Открыть зашифрованный файл или папку без сертификата, который использовался для шифрования, невозможно. Чтобы увидеть, зашифрованы ли файл или папка:
-
Нажмите и удерживайте (или щелкните правой кнопкой мыши) файл или папку, а затем выберите пункт Свойства.
-
Перейдите на вкладку Общие и нажмите кнопку Дополнительно.
Если установлен флажок Шифровать содержимое для защиты данных, для открытия файла или папки потребуется сертификат, который использовался для их шифрования. В этом случае следует получить этот сертификат у пользователя, который создал или зашифровал файл или папку, либо попросить его расшифровать их.
Файл или папка могут быть повреждены
Файлы могут оказаться поврежденными по разным причинам. Наиболее часто это случается, когда при открытом файле происходит сбой компьютера или пропадает питание. Большинство поврежденных файлов невозможно восстановить. В таком случае необходимо удалить файл или восстановить его из резервной копии.
Дополнительные сведения о поврежденных файлах и способах их восстановления см. в статье Поврежденные файлы: вопросы и ответы.
Ваш локальный профиль пользователя может быть поврежден.
Иногда Windows может неправильно читать данные локального профиля пользователя. Это может заблокировать доступ к файлам и папкам. В таком случае может потребоваться новый локальный профиль пользователя. Для его создания сначала создайте учетную запись локального пользователя. При создании учетной записи также создается и профиль. Чтобы создать учетную запись локального пользователя:
-
Проведите пальцем от правого края экрана, нажмите Параметры и выберите Изменение параметров компьютера. (Если вы используете мышь, наведите указатель на правый верхний угол экрана, переместите его вниз, нажмите Параметры, а затем Изменение параметров компьютера.)
-
В области навигации выберите элемент Пользователи.
-
Выберите команду Добавить пользователя, а затем выберите пункт Возможен ли вход без учетной записи Майкрософт?
-
Выберите элемент Локальная учетная запись.
-
Введите имя новой учетной записи.
-
Если вы хотите использовать пароль, введите и подтвердите его. Если вы решили не использовать пароль, не вводите его и нажмите кнопку Далее.
-
Нажмите кнопку Готово.
Windows 7
Возможно, вы не являетесь владельцем файла или папки.
Если вы недавно обновили систему до Windows 7, могли измениться некоторые сведения о вашей учетной записи. Поэтому вы можете больше не быть владельцем некоторых файлов или папок. Эту проблему можно устранить, снова став владельцем файлов и папок.
Чтобы стать владельцем файла или папки:
-
Щелкните правой кнопкой мыши значок папки, владельцем которой вы хотите стать, и выберите команду Свойства.
-
Откройте вкладку Безопасность, нажмите кнопку Дополнительно и выберите вкладку Владелец.
-
Нажмите кнопку Изменить. При получении запроса на ввод пароля администратора или подтверждение введите пароль или подтвердите действие.
-
Выберите имя лица, которому требуется предоставить права владельца.
-
Если необходимо, чтобы этот пользователь также стал владельцем файлов и вложенных папок в этой папке, установите флажок Заменить владельца подконтейнеров и объектов.
-
Нажмите кнопку ОК.
Возможно, у вас нет необходимых разрешений.
Проблемы при доступе к файлам и папкам могут быть связаны с разрешениями. Разрешения — это правила, которые определяют, может ли пользователь получать доступ к файлам и папкам или изменять их. Чтобы проверить разрешения на файл или папку:
-
Нажмите и удерживайте (или щелкните правой кнопкой мыши) файл или папку, а затем выберите пункт Свойства.
-
Откройте вкладку Безопасность.
-
В разделе Группы или пользователи выберите свое имя, чтобы увидеть имеющиеся у вас разрешения.
Для открытия файла необходимо разрешение на чтение. Чтобы изменить разрешения на файл или папку, выполните указанные ниже действия.
Важно! Чтобы изменить разрешения на файлы и папки, необходимо войти в систему с правами администратора.
-
Щелкните файл или папку правой кнопкой мыши и выберите пункт Свойства.
-
Откройте вкладку Безопасность.
-
В разделе Группы или пользователи выберите свое имя, чтобы увидеть имеющиеся у вас разрешения.
-
Нажмите кнопку Изменить, выберите свое имя, установите флажки для нужных разрешений и нажмите кнопку ОК.
Дополнительные сведения о разрешениях см. в статье Что такое разрешения?.
Файл или папка могут быть зашифрованы.
Шифрование позволяет защитить файлы и папки от нежелательного доступа. Открыть зашифрованный файл или папку без сертификата, который использовался для шифрования, невозможно. Чтобы увидеть, зашифрованы ли файл или папка:
-
Щелкните файл правой кнопкой мыши и выберите пункт Свойства.
-
Откройте вкладку Общие и нажмите кнопку Дополнительно.
Если установлен флажок Шифровать содержимое для защиты данных, для открытия файла или папки потребуется сертификат, который использовался для их шифрования.
Этот сертификат следует получить у пользователя, создавшего файл. Дополнительные сведения см. в статье Импорт и экспорт сертификатов и закрытых ключей.
Файл или папка могут быть повреждены
Файлы могут оказаться поврежденными по разным причинам. Наиболее часто это случается, когда при открытом файле происходит сбой компьютера или пропадает питание. Большинство поврежденных файлов невозможно восстановить. В таком случае необходимо удалить файл или восстановить его из резервной копии.
Дополнительные сведения о поврежденных файлах и способах их восстановления см. в статье Поврежденные файлы: вопросы и ответы.
Ваш профиль пользователя может быть поврежден.
Иногда Windows может неправильно читать данные локального профиля пользователя. Это может заблокировать доступ к файлам и папкам. В таком случае может потребоваться новый локальный профиль пользователя. Для его создания сначала создайте учетную запись локального пользователя. При создании учетной записи также создается и профиль.
Дополнительные сведения о создании профилей пользователя см. в статье Восстановление поврежденного профиля пользователя. После того как профиль пользователя создан, можно скопировать в него существующие файлы, чтобы иметь к ним доступ.
Причина
Проблемы с доступом к файлам и папкам после обновления версии Windows могут возникать по одной или нескольким из следующих причин:
-
Изменился владелец папки.
-
Файлы из предыдущей системы сохранены в папку Windows.old.
Решение
Windows 8
Возможно, вы не являетесь владельцем файла или папки.
Если вы недавно обновили систему до Windows 8, могли измениться некоторые сведения о вашей учетной записи. Поэтому вы можете больше не быть владельцем некоторых файлов и папок. Эту проблему можно устранить, снова став владельцем файлов и папок.
Чтобы стать владельцем файла или папки:
-
Нажмите и удерживайте папку, владельцем которой вы хотите стать, и выберите пункт Свойства. (Если вы используете мышь, щелкните папку правой кнопкой и выберите пункт Свойства.)
-
Откройте вкладку Безопасность, нажмите кнопку Дополнительно и выберите пункт Изменить. При получении запроса на ввод пароля администратора или подтверждение введите пароль или подтвердите действие.
-
Введите имя пользователя, которому нужно предоставить права владельца, и выберите элемент Проверить имена.
Примечание. Появится имя учетной записи лица, которому вы предоставляете права владельца.
-
Нажмите кнопку ОК.
-
Если необходимо, чтобы этот пользователь также стал владельцем файлов и вложенных папок в этой папке, установите флажок Заменить владельца подконтейнеров и объектов.
-
Нажмите кнопку ОК.
Вам нужно восстановить файлы из папки Windows.old.
Если вы недавно обновили систему до Windows 8 и не переформатировали жесткий диск, старые файлы могут быть доступны в папке Windows.old.
Чтобы устранить эту проблему автоматически, щелкните ссылку или нажмите кнопку Исправить. Затем в диалоговом окне Загрузка файла нажмите кнопку Выполнить и следуйте инструкциям мастера устранения проблем. Чтобы устранить проблему самостоятельно, перейдите к разделу «Самостоятельное решение проблемы».
Получить помощь в решении проблемы
Примечания.
-
Мастер может быть доступен только на английском языке. Однако автоматическое исправление подходит для версий Windows на всех языках.
-
Если вы используете не тот компьютер, на котором возникла проблема, сохраните решение для исправления на устройство флэш-памяти или компакт-диск и запустите его на нужном компьютере.
Самостоятельное решение проблемы
Чтобы извлечь файлы вручную:
-
Откройте рабочий стол, коснитесь значка папки и нажмите Компьютер. Или нажмите клавиши WINDOWS+Е.
-
Дважды коснитесь диска, на котором установлена ОС Windows (обычно это диск С), или дважды щелкните его.
-
Дважды коснитесь папки Windows.old или дважды щелкните ее.
-
Дважды коснитесь папки «Пользователи» или дважды щелкните ее.
-
Дважды коснитесь имени пользователя или дважды щелкните его.
-
Откройте папки с файлами, которые требуется извлечь. Например, чтобы извлечь файлы из папки «Документы», дважды коснитесь папки Документы или дважды щелкните ее.
-
Скопируйте нужные файлы из каждой папки и вставьте их в папку в Windows 8. Например, если необходимо извлечь все содержимое папки «Документы», находящейся в папке Windows.old, скопируйте все файлы из этой папки и вставьте их в библиотеку документов в Windows 8.
-
Повторите действия с 5-го по 7-е для каждой учетной записи пользователя на компьютере.
Дополнительные сведения о восстановлении данных из предыдущих версий Windows см. в статье Восстановление потерянных или удаленных файлов.
Windows 7
Возможно, вы не являетесь владельцем файла или папки.
Если вы недавно обновили систему до Windows 7, могли измениться некоторые сведения о вашей учетной записи. Поэтому вы можете больше не быть владельцем некоторых файлов и папок. Эту проблему можно устранить, снова став владельцем файлов и папок.
Чтобы стать владельцем файла или папки:
-
Щелкните правой кнопкой мыши значок папки, владельцем которой вы хотите стать, и выберите команду Свойства.
-
Откройте вкладку Безопасность, нажмите кнопку Дополнительно и выберите вкладку Владелец.
-
Нажмите кнопку Изменить. При получении запроса на ввод пароля администратора или подтверждение введите пароль или подтвердите действие.
-
Выберите имя лица, которому требуется предоставить права владельца.
-
Если необходимо, чтобы этот пользователь также стал владельцем файлов и вложенных папок в этой папке, установите флажок Заменить владельца подконтейнеров и объектов.
-
Нажмите кнопку ОК.
Возможно, вам потребуется восстановить файлы из папки Windows.old.
Если вы недавно обновили систему до Windows 7 и не переформатировали жесткий диск, старые файлы могут быть доступны в папке Windows.old.
Чтобы устранить эту проблему автоматически, щелкните ссылку или нажмите кнопку Исправить. В диалоговом окне Загрузка файла нажмите кнопку Выполнить и следуйте инструкциям мастера устранения проблем. Если вы предпочитаете решить проблему самостоятельно, перейдите к разделу «Самостоятельное решение проблемы».
Получить помощь в решении проблемы
Примечания.
-
Мастер может быть доступен только на английском языке. Однако автоматическое исправление подходит для версий Windows на всех языках.
-
Если вы используете не тот компьютер, на котором возникла проблема, сохраните решение для исправления на устройство флэш-памяти или компакт-диск и запустите его на нужном компьютере.
Самостоятельное решение проблемы
Чтобы извлечь файлы вручную:
-
Нажмите кнопку Пуск и выберите пункт Компьютер.
-
Дважды щелкните диск, на котором установлена ОС Windows (обычно это диск C).
-
Дважды щелкните папку Windows.old.
-
Дважды щелкните папку «Пользователи».
-
Дважды щелкните имя пользователя.
-
Откройте папки с файлами, которые требуется извлечь. Например, чтобы извлечь файлы из папки «Документы», дважды щелкните папку Документы.
-
Скопируйте нужные файлы из каждой папки и вставьте их в папку в Windows 7. Например, если необходимо извлечь все содержимое папки «Документы», находящейся в папке Windows.old, скопируйте все файлы из этой папки и вставьте их в библиотеку документов в Windows 7.
-
Повторите действия с 5-го по 7-е для каждой учетной записи пользователя на компьютере.
Дополнительные сведения о восстановлении данных из предыдущих версий Windows см. в статье Восстановление потерянных или удаленных файлов.
Нужна дополнительная помощь?
Changing the ownership of the folder is a quick way around this
by Milan Stanojevic
Milan has been enthusiastic about technology ever since his childhood days, and this led him to take interest in all PC-related technologies. He’s a PC enthusiast and he… read more
Updated on January 29, 2023
Reviewed by
Alex Serban

After moving away from the corporate work-style, Alex has found rewards in a lifestyle of constant analysis, team coordination and pestering his colleagues. Holding an MCSA Windows Server… read more
- If you are getting you have been denied permission to access this folder prompt, it might be due to a lack of appropriate privilege.
- You can fix this issue quickly by changing the security settings of the affected folder.
- Another effective solution is to change the ownership of the folder.
XINSTALL BY CLICKING THE DOWNLOAD FILE
This software will repair common computer errors, protect you from file loss, malware, hardware failure and optimize your PC for maximum performance. Fix PC issues and remove viruses now in 3 easy steps:
- Download Restoro PC Repair Tool that comes with Patented Technologies (patent available here).
- Click Start Scan to find Windows issues that could be causing PC problems.
- Click Repair All to fix issues affecting your computer’s security and performance
- Restoro has been downloaded by 0 readers this month.
In order to protect your files from unauthorized access, Windows 10 can lock certain folders. This means that some folders are inaccessible for certain non-administrator users.
Users reported You have been denied permission to access this folder message, and today we’re going to show you how to fix it.
What can I do if I don’t have permission to access this folder?
- What can I do if I don’t have permission to access this folder?
- 1. Change the ownership of the folder
- 2. Modify your registry
- 3. Use TakeOwnershipEx
- 4. Close Shared Folder Sessions
- 5. Try using a different explorer application
- 6. Copy the folder to a different location
- 7. Use Command Prompt to access files
- 8. Create a new group and add your user account to it
- Fix — You have been denied permission to access this folder USB
- 1. Connect your USB flash drive to a different PC
- 2. Use xcopy command
- 3. Uninstall the USB driver
- 4. Make sure that you’re authenticated
- 5. Change the security settings
- 6. Uninstall HP software
- 7. Change the ownership of the drive
- 8. Use Partition Wizard software
- Fix — You have been denied permission to access this folder no Security tab
- 1. Connect your drive to a different PC
- 2. Use Command Prompt
- 3. Change Group Policy settings
1. Change the ownership of the folder
- Locate the folder that you can’t access and right-click it. Choose Properties from the menu.

- Go to the Security tab and click the Advanced button.

- Look for the Owner section at the top of the window. Click the Change button.

- In the Enter the object name to select field, enter your account username.
- Now, click Check Names. If your input is correct, the input field will change.
- Click the OK button to save the changes.

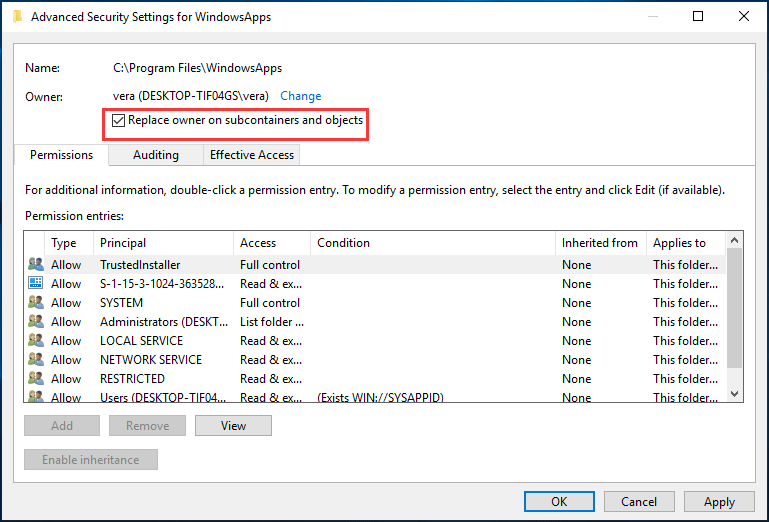
- Next, go back to the Advanced Security Settings page and check the Replace owner on subcontainers and objects box.
- Click the Apply button, followed by OK.

As we already mentioned, many folders are protected by Windows, and you can’t access them without certain privileges.
However, by changing the folder ownership, you can fix You have been denied permission to access this folder message.
After taking ownership of the folder, you should be able to access it without any problems.
2. Modify your registry
- Download the Take Ownership.zip file.
- Open the zip file and extract the available files to any folder.
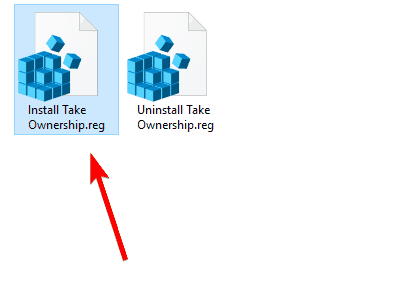
- Now, run the Install Take Ownership.reg file.

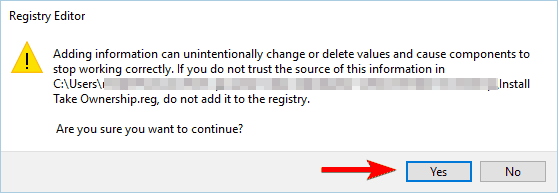
- When the confirmation message appears, click Yes to confirm.

- After doing that, right-click the problematic folder and choose the Take Ownership option from the menu.
Modifying the registry can be risky, so before you make any changes, we advise you to back up your registry just in case.
If you’re getting You have been denied permission to access this folder message, you can fix it by changing the ownership of that folder using your registry.
3. Use TakeOwnershipEx
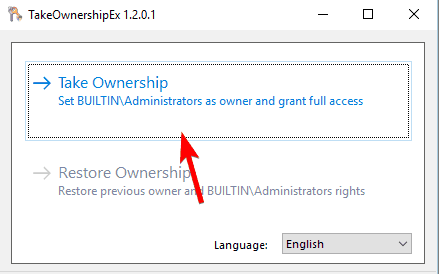
- Start the TakeOwnershipEx tool.
- Click the Take Ownership button.

- Now select the problematic folder.

- After doing that, you’ll see a success message on the screen.
- Optional: If you want, you can always restore ownership settings to default by using the Restore Ownership option.
Unlike the previous solution, this one offers a way to restore ownership, which can be useful if trying to access any system file.
If you’re not comfortable modifying your registry and want to use a third-party tool to fix You have been denied permission to access this folder message. Feel free to use this simple tool.
4. Close Shared Folder Sessions
- Press Windows key + X and select Computer Management from the menu.

- When Computer Management opens, navigate to System Tools > Shared Folders > Sessions.
- You should now see all available sessions. Right-click them and choose Close Session from the menu.
- You can also right-click Sessions in the left pane and choose Disconnect All Sessions.

- After that, close Computer Management and check if the problem is resolved.


Several users reported that you have been denied permission to access this folder issue occurs even after changing ownership settings. If that’s the case, you might have to close Shared Folder Sessions.
5. Try using a different explorer application
If you’re getting You have been denied permission to access this folder message, you might want to try using a different explorer application.
File Explorer is the default application for file access in Windows 10. However, it is not free from issues like frequent crashes and the inability to open some folders.
Hence, we suggest that you download Q-Dir. Simply download and run this portable application and try accessing the folder using this tool.
6. Copy the folder to a different location
You can try a simple workaround if you can’t access a folder because you have been denied permission to access this folder message.
According to users, you can copy the folder to a different location and try it access it from there. This might not be the best solution, but it works according to users, so try it out.
7. Use Command Prompt to access files
You have been denied permission to access this folder message can prevent you from accessing certain folders, but there’s a way to circumvent this issue.
According to users, you can access any folder on your PC simply by using Command Prompt as administrator. You only need to press the Windows key, type cmd and select the Run as administrator option under Command Prompt.
After Command Prompt starts, you can access and copy files from the problematic folder.
8. Create a new group and add your user account to it
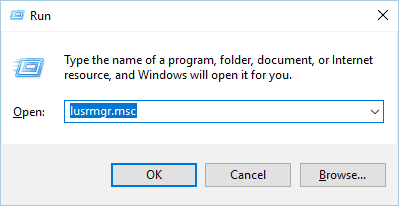
- Press Windows key + R, type lusrmgr.msc, and press Enter.

- When the Local Users and Groups window opens, select Groups in the left pane.
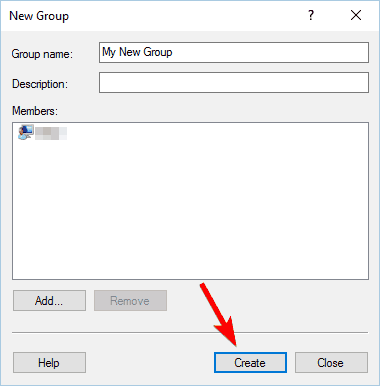
- Right-click Groups and choose New Group.

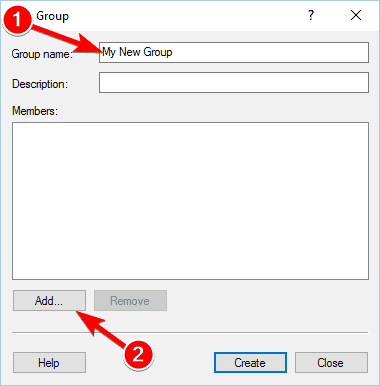
- A New Group window will appear. Enter the desired Group name. Now, click the Add button.

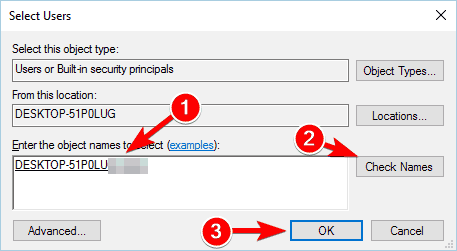
- In Enter the object names to select field, enter your username or Microsoft account email. Click Check Names.
- If your input is valid, click OK.

- Click the Create button to create a new group.
- Now, close that window.

According to some users, they fixed you have been denied permission to access this folder issue simply by creating a new group and giving ownership of the folder to the new group.
After creating a new group, you need to change the ownership of the problematic folder. You can do that simply by following the steps from Solution 1. Remember that you need to enter the group’s name while changing the ownership instead of your username.
In addition, if you see Replace all existing inheritable permissions on all descendants with inheritable permissions from this object option while changing the ownership, be sure to select it.
Fix – You have been denied permission to access this folder USB
1. Connect your USB flash drive to a different PC
Many users reported that they are getting You have been denied permission to access this folder message while trying to access certain folders on removable storage.
If you have the same problem, we advise you to connect the problematic USB flash drive to a different PC. After that, create a copy of the problematic folder and delete the original.
Rename the copy, and connect the flash drive back to your PC. After doing that, the issue will be resolved, and you should be able to access that folder.
2. Use xcopy command
If you can’t access a folder on your USB flash drive due to this error, we suggest that you try using the xcopy command.
Some PC issues are hard to tackle, especially when it comes to corrupted repositories or missing Windows files. If you are having troubles fixing an error, your system may be partially broken.
We recommend installing Restoro, a tool that will scan your machine and identify what the fault is.
Click here to download and start repairing.
This is a bit advanced process, so before you can perform it, we advise you to research and learn how to use xcopy command.
In addition, you’ll need to use this command from Command Prompt. We already explained how to start Command Prompt as an administrator in one of our previous solutions, so be sure to check it out.
3. Uninstall the USB driver
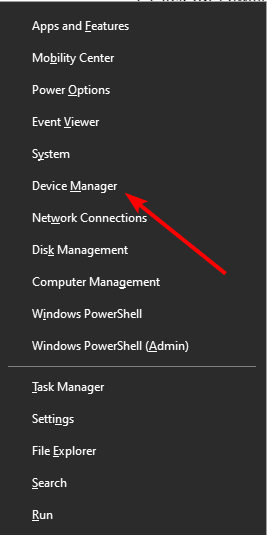
- Press Windows key + X and choose Device Manager from the menu.

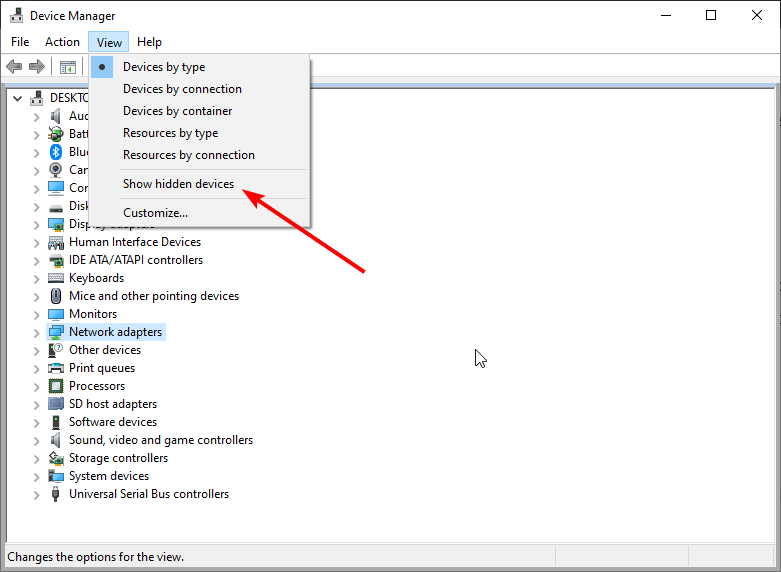
- Go to the View menu and check Show hidden devices option.

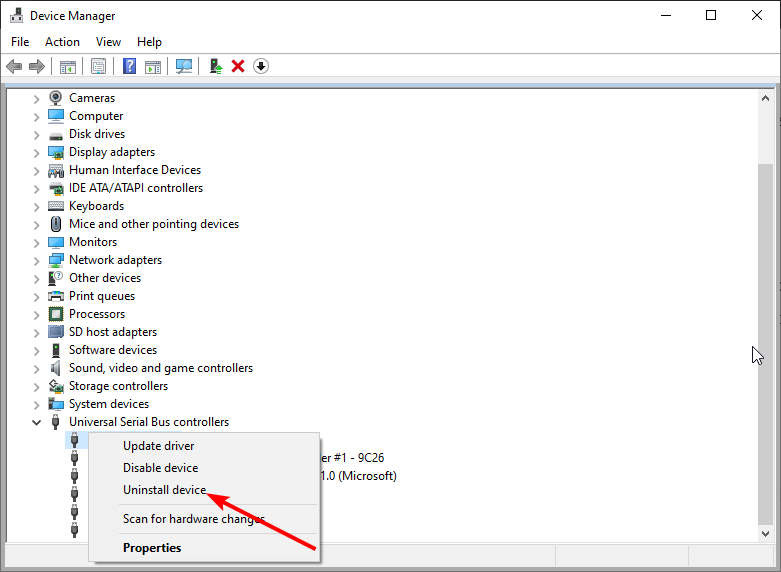
- Now, Double-click the Universal Serial Bus controllers option and right-click your USB flash drive.
- Select the Uninstall device option.
- Finally, click the Uninstall button to confirm the action.
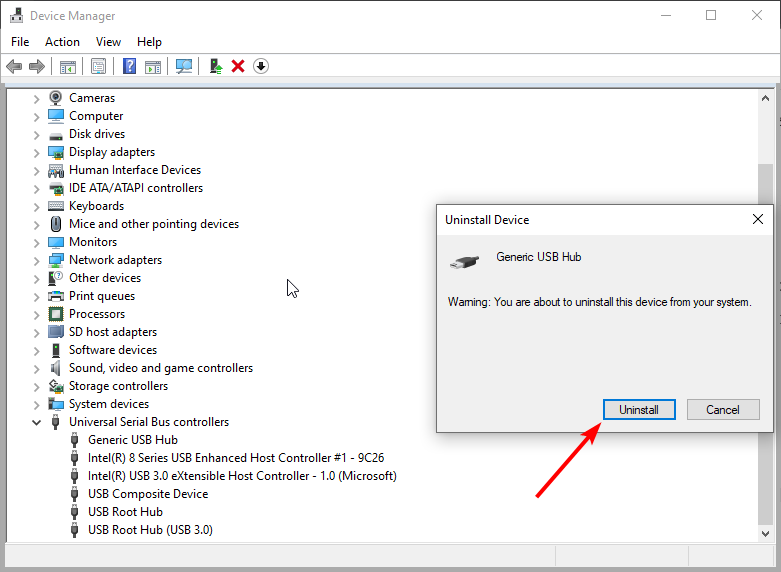
According to users, they fixed You have been denied permission to access this folder message simply by uninstalling their USB device driver.
Now you need to connect your USB flash drive to a different port on your PC. After doing that, Windows 10 will automatically install the necessary drivers, and the issue will be fixed.
4. Make sure that you’re authenticated
Users reported You have been denied permission to access this folder message on certain HP computers. According to them, they cannot access their USB flash drive until they are properly authenticated.
To do that, you need to click the HP icon in the lower right corner and follow the authentication process. This is a security measure on some HP computers, and if you own an HP PC, we advise you to try this solution.
5. Change the security settings
- Open HP Client Security.
- Navigate to the Device Permissions.
- Click on Change.
- Now change the removable storage settings and allow full access for administrators and users. A few users reported that this option is grayed out but can still be changed.
- After doing that, save the changes and try to access your USB flash drive again.
If you’re having this issue on your HP computer, you might be able to solve it by changing the security settings.
This fixed You have been denied permission to access this folder message for some users on their HP computers. So, you might want to try this solution out.
- Windows 10 Undoing Changes Made to Your Computer [Fix]
- Circular Kernel Context Logger 0xc0000035: 6 Easy Fixes
- Second GPU not Detected: 3 Methods to get it Working
6. Uninstall HP software
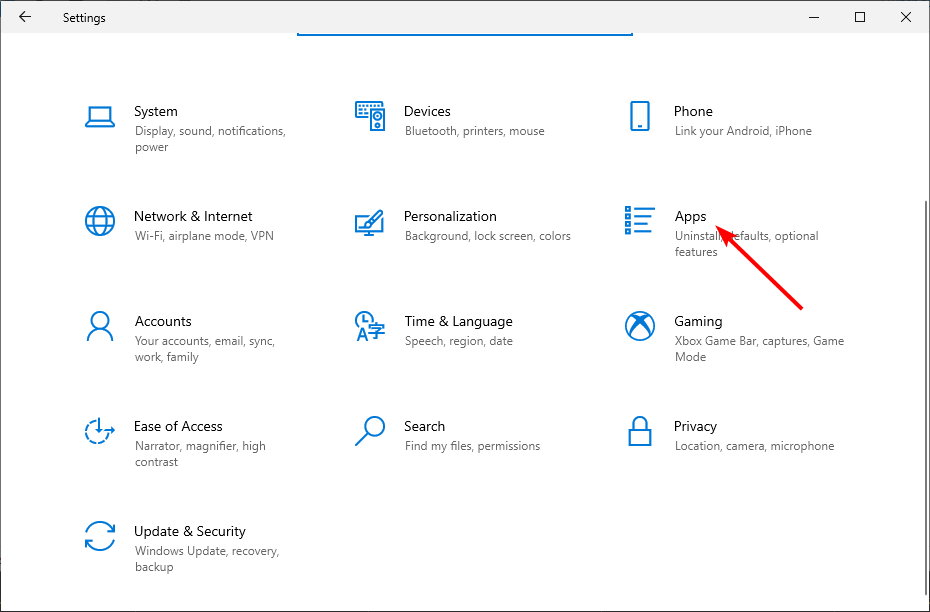
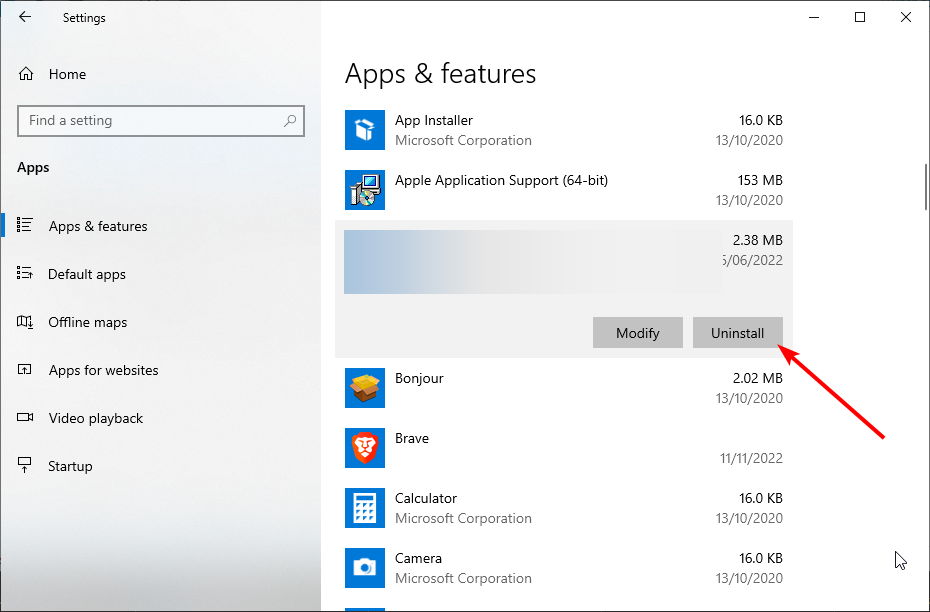
- Press the Windows key + I to open the Settings app and select the Apps option.

- Now, select any HP software there and click the Uninstall button.
- Finally, follow the onscreen instructions to complete the process.
The HP software can often interfere with your USB flash drive and prevent you from accessing it. If you’re getting You have been denied permission to access this folder message on your HP computer, you can solve it by removing HP software.
7. Change the ownership of the drive
You have been denied permission to access this folder is an ownership issue, and in most cases, you can fix it by changing the ownership. If you have this problem with your USB flash drive, we advise you to change the drive owner.
To do that, right-click your USB flash drive and choose Properties. Now go to the Security tab and follow the steps from the first solution in this article.
After taking ownership of the desired drive, the issue should be resolved.
8. Use Partition Wizard software
According to users, you can fix You have been denied permission to access this folder message simply by running Partition Wizard software. You need to run this software and let it scan your USB flash drive.
After doing that, close the application, and you should be able to access the USB drive without any problems.
Fix – You have been denied permission to access this folder no Security tab
1. Connect your drive to a different PC
You might need to change your security permissions if you have a problem accessing certain folders due to the You have been denied permission to access this folder message.
We already explained how to do that in our previous solutions. However, some users reported missing the Security tab on their PC.
This is an unusual problem, and if you have this issue, you might have to remove your hard drive or removable storage and connect it to a different PC. After doing that, you should be able to access the files and make the necessary changes.
This is a workaround, but if you need to access your files urgently, try it out.
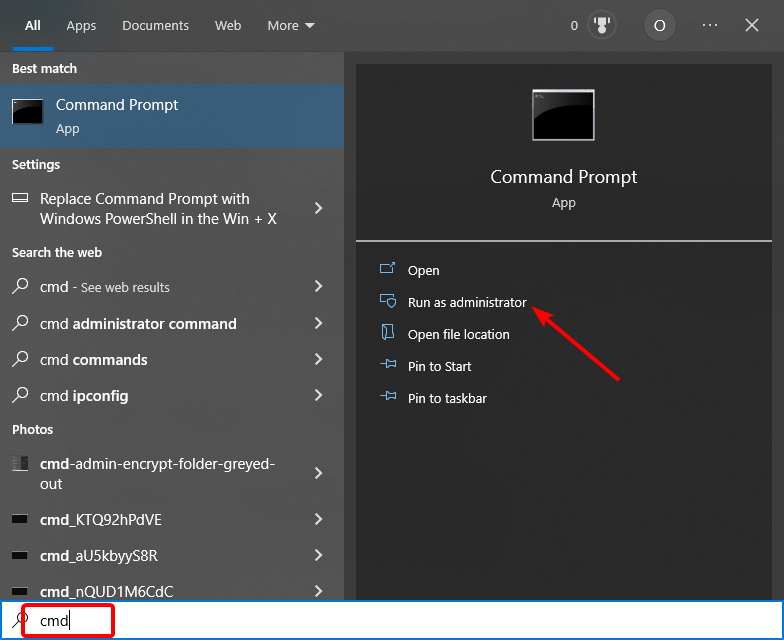
2. Use Command Prompt
- Press the Windows key, type cmd, and click Run as administrator under Command Prompt.

- Type the commands below and press Enter after each:
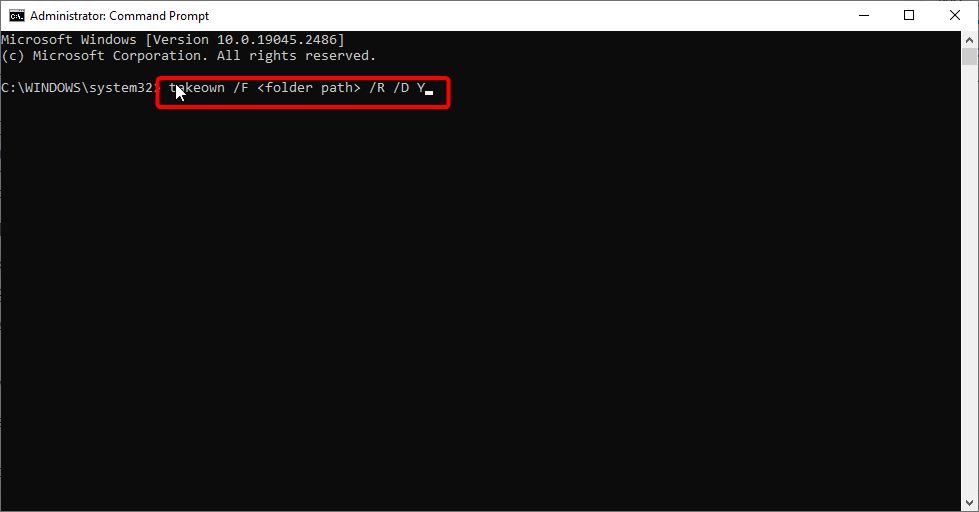
takeown /F <folder path> /R /D Y
C:>icacls <folder path> /grant administrators:F /T - Be sure to replace <folder path> with the correct path to the folder that you can’t access.
- After running those commands, close Command Prompt and check if the problem is resolved.

Since You have been denied permission to access this folder message requires you to change your security permissions, you need to use the Settings tab.
Unfortunately, several users reported that this tab is missing on their PC. However, this doesn’t have to be a major problem since you can take ownership of the folder from Command Prompt.
3. Change Group Policy settings
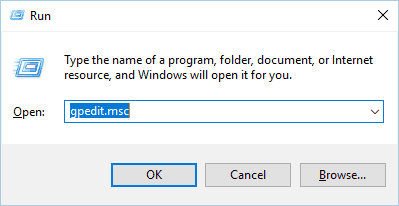
- Press Windows key + R, type gpedit.msc, and press Enter.
- Navigate to the path below in the left pane:
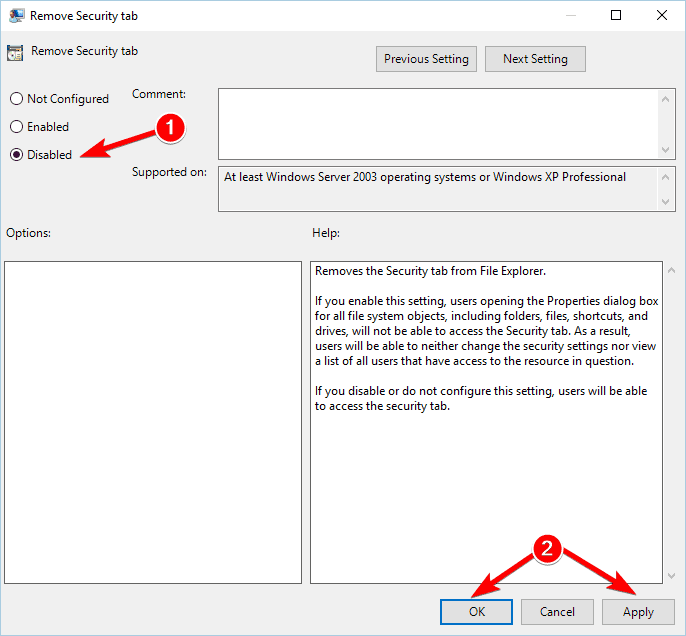
User Configuration > Administrative Templates > Windows Components > File Explorer - In the right pane, double-click the Remove Security tab.

- Now, select the Disabled option from the menu and click the Apply button, followed by OK to save changes.

- Close Group Policy Editor.

If you can’t find Settings tab in Properties window, you might have to change Group Policy settings. This is a simple procedure.
After making the changes, the Security tab will become available and you should be able to access it and change the folder ownership.
You have been denied permission to access this folder message usually appears if you don’t have the necessary privileges to access a specific folder.
In most cases, you can fix this problem simply by changing the ownership of the folder or by removing the problematic apps.
If you are facing a similar issue in you don’t have permission to open this file on Windows 10, check our detailed guide to fix it.
Feel free to let us know the solution that helped you fix this issue in the comments below.
Still having issues? Fix them with this tool:
SPONSORED
If the advices above haven’t solved your issue, your PC may experience deeper Windows problems. We recommend downloading this PC Repair tool (rated Great on TrustPilot.com) to easily address them. After installation, simply click the Start Scan button and then press on Repair All.
![]()
Newsletter
Changing the ownership of the folder is a quick way around this
by Milan Stanojevic
Milan has been enthusiastic about technology ever since his childhood days, and this led him to take interest in all PC-related technologies. He’s a PC enthusiast and he… read more
Updated on January 29, 2023
Reviewed by
Alex Serban
After moving away from the corporate work-style, Alex has found rewards in a lifestyle of constant analysis, team coordination and pestering his colleagues. Holding an MCSA Windows Server… read more
- If you are getting you have been denied permission to access this folder prompt, it might be due to a lack of appropriate privilege.
- You can fix this issue quickly by changing the security settings of the affected folder.
- Another effective solution is to change the ownership of the folder.
XINSTALL BY CLICKING THE DOWNLOAD FILE
This software will repair common computer errors, protect you from file loss, malware, hardware failure and optimize your PC for maximum performance. Fix PC issues and remove viruses now in 3 easy steps:
- Download Restoro PC Repair Tool that comes with Patented Technologies (patent available here).
- Click Start Scan to find Windows issues that could be causing PC problems.
- Click Repair All to fix issues affecting your computer’s security and performance
- Restoro has been downloaded by 0 readers this month.
In order to protect your files from unauthorized access, Windows 10 can lock certain folders. This means that some folders are inaccessible for certain non-administrator users.
Users reported You have been denied permission to access this folder message, and today we’re going to show you how to fix it.
What can I do if I don’t have permission to access this folder?
- What can I do if I don’t have permission to access this folder?
- 1. Change the ownership of the folder
- 2. Modify your registry
- 3. Use TakeOwnershipEx
- 4. Close Shared Folder Sessions
- 5. Try using a different explorer application
- 6. Copy the folder to a different location
- 7. Use Command Prompt to access files
- 8. Create a new group and add your user account to it
- Fix — You have been denied permission to access this folder USB
- 1. Connect your USB flash drive to a different PC
- 2. Use xcopy command
- 3. Uninstall the USB driver
- 4. Make sure that you’re authenticated
- 5. Change the security settings
- 6. Uninstall HP software
- 7. Change the ownership of the drive
- 8. Use Partition Wizard software
- Fix — You have been denied permission to access this folder no Security tab
- 1. Connect your drive to a different PC
- 2. Use Command Prompt
- 3. Change Group Policy settings
1. Change the ownership of the folder
- Locate the folder that you can’t access and right-click it. Choose Properties from the menu.
- Go to the Security tab and click the Advanced button.
- Look for the Owner section at the top of the window. Click the Change button.
- In the Enter the object name to select field, enter your account username.
- Now, click Check Names. If your input is correct, the input field will change.
- Click the OK button to save the changes.
- Next, go back to the Advanced Security Settings page and check the Replace owner on subcontainers and objects box.
- Click the Apply button, followed by OK.
As we already mentioned, many folders are protected by Windows, and you can’t access them without certain privileges.
However, by changing the folder ownership, you can fix You have been denied permission to access this folder message.
After taking ownership of the folder, you should be able to access it without any problems.
2. Modify your registry
- Download the Take Ownership.zip file.
- Open the zip file and extract the available files to any folder.
- Now, run the Install Take Ownership.reg file.
- When the confirmation message appears, click Yes to confirm.
- After doing that, right-click the problematic folder and choose the Take Ownership option from the menu.
Modifying the registry can be risky, so before you make any changes, we advise you to back up your registry just in case.
If you’re getting You have been denied permission to access this folder message, you can fix it by changing the ownership of that folder using your registry.
3. Use TakeOwnershipEx
- Start the TakeOwnershipEx tool.
- Click the Take Ownership button.
- Now select the problematic folder.
- After doing that, you’ll see a success message on the screen.
- Optional: If you want, you can always restore ownership settings to default by using the Restore Ownership option.
Unlike the previous solution, this one offers a way to restore ownership, which can be useful if trying to access any system file.
If you’re not comfortable modifying your registry and want to use a third-party tool to fix You have been denied permission to access this folder message. Feel free to use this simple tool.
4. Close Shared Folder Sessions
- Press Windows key + X and select Computer Management from the menu.
- When Computer Management opens, navigate to System Tools > Shared Folders > Sessions.
- You should now see all available sessions. Right-click them and choose Close Session from the menu.
- You can also right-click Sessions in the left pane and choose Disconnect All Sessions.
- After that, close Computer Management and check if the problem is resolved.
Several users reported that you have been denied permission to access this folder issue occurs even after changing ownership settings. If that’s the case, you might have to close Shared Folder Sessions.
5. Try using a different explorer application
If you’re getting You have been denied permission to access this folder message, you might want to try using a different explorer application.
File Explorer is the default application for file access in Windows 10. However, it is not free from issues like frequent crashes and the inability to open some folders.
Hence, we suggest that you download Q-Dir. Simply download and run this portable application and try accessing the folder using this tool.
6. Copy the folder to a different location
You can try a simple workaround if you can’t access a folder because you have been denied permission to access this folder message.
According to users, you can copy the folder to a different location and try it access it from there. This might not be the best solution, but it works according to users, so try it out.
7. Use Command Prompt to access files
You have been denied permission to access this folder message can prevent you from accessing certain folders, but there’s a way to circumvent this issue.
According to users, you can access any folder on your PC simply by using Command Prompt as administrator. You only need to press the Windows key, type cmd and select the Run as administrator option under Command Prompt.
After Command Prompt starts, you can access and copy files from the problematic folder.
8. Create a new group and add your user account to it
- Press Windows key + R, type lusrmgr.msc, and press Enter.
- When the Local Users and Groups window opens, select Groups in the left pane.
- Right-click Groups and choose New Group.
- A New Group window will appear. Enter the desired Group name. Now, click the Add button.
- In Enter the object names to select field, enter your username or Microsoft account email. Click Check Names.
- If your input is valid, click OK.
- Click the Create button to create a new group.
- Now, close that window.
According to some users, they fixed you have been denied permission to access this folder issue simply by creating a new group and giving ownership of the folder to the new group.
After creating a new group, you need to change the ownership of the problematic folder. You can do that simply by following the steps from Solution 1. Remember that you need to enter the group’s name while changing the ownership instead of your username.
In addition, if you see Replace all existing inheritable permissions on all descendants with inheritable permissions from this object option while changing the ownership, be sure to select it.
Fix – You have been denied permission to access this folder USB
1. Connect your USB flash drive to a different PC
Many users reported that they are getting You have been denied permission to access this folder message while trying to access certain folders on removable storage.
If you have the same problem, we advise you to connect the problematic USB flash drive to a different PC. After that, create a copy of the problematic folder and delete the original.
Rename the copy, and connect the flash drive back to your PC. After doing that, the issue will be resolved, and you should be able to access that folder.
2. Use xcopy command
If you can’t access a folder on your USB flash drive due to this error, we suggest that you try using the xcopy command.
Some PC issues are hard to tackle, especially when it comes to corrupted repositories or missing Windows files. If you are having troubles fixing an error, your system may be partially broken.
We recommend installing Restoro, a tool that will scan your machine and identify what the fault is.
Click here to download and start repairing.
This is a bit advanced process, so before you can perform it, we advise you to research and learn how to use xcopy command.
In addition, you’ll need to use this command from Command Prompt. We already explained how to start Command Prompt as an administrator in one of our previous solutions, so be sure to check it out.
3. Uninstall the USB driver
- Press Windows key + X and choose Device Manager from the menu.
- Go to the View menu and check Show hidden devices option.
- Now, Double-click the Universal Serial Bus controllers option and right-click your USB flash drive.
- Select the Uninstall device option.
- Finally, click the Uninstall button to confirm the action.
According to users, they fixed You have been denied permission to access this folder message simply by uninstalling their USB device driver.
Now you need to connect your USB flash drive to a different port on your PC. After doing that, Windows 10 will automatically install the necessary drivers, and the issue will be fixed.
4. Make sure that you’re authenticated
Users reported You have been denied permission to access this folder message on certain HP computers. According to them, they cannot access their USB flash drive until they are properly authenticated.
To do that, you need to click the HP icon in the lower right corner and follow the authentication process. This is a security measure on some HP computers, and if you own an HP PC, we advise you to try this solution.
5. Change the security settings
- Open HP Client Security.
- Navigate to the Device Permissions.
- Click on Change.
- Now change the removable storage settings and allow full access for administrators and users. A few users reported that this option is grayed out but can still be changed.
- After doing that, save the changes and try to access your USB flash drive again.
If you’re having this issue on your HP computer, you might be able to solve it by changing the security settings.
This fixed You have been denied permission to access this folder message for some users on their HP computers. So, you might want to try this solution out.
- Windows 10 Undoing Changes Made to Your Computer [Fix]
- Circular Kernel Context Logger 0xc0000035: 6 Easy Fixes
6. Uninstall HP software
- Press the Windows key + I to open the Settings app and select the Apps option.
- Now, select any HP software there and click the Uninstall button.
- Finally, follow the onscreen instructions to complete the process.
The HP software can often interfere with your USB flash drive and prevent you from accessing it. If you’re getting You have been denied permission to access this folder message on your HP computer, you can solve it by removing HP software.
7. Change the ownership of the drive
You have been denied permission to access this folder is an ownership issue, and in most cases, you can fix it by changing the ownership. If you have this problem with your USB flash drive, we advise you to change the drive owner.
To do that, right-click your USB flash drive and choose Properties. Now go to the Security tab and follow the steps from the first solution in this article.
After taking ownership of the desired drive, the issue should be resolved.
8. Use Partition Wizard software
According to users, you can fix You have been denied permission to access this folder message simply by running Partition Wizard software. You need to run this software and let it scan your USB flash drive.
After doing that, close the application, and you should be able to access the USB drive without any problems.
Fix – You have been denied permission to access this folder no Security tab
1. Connect your drive to a different PC
You might need to change your security permissions if you have a problem accessing certain folders due to the You have been denied permission to access this folder message.
We already explained how to do that in our previous solutions. However, some users reported missing the Security tab on their PC.
This is an unusual problem, and if you have this issue, you might have to remove your hard drive or removable storage and connect it to a different PC. After doing that, you should be able to access the files and make the necessary changes.
This is a workaround, but if you need to access your files urgently, try it out.
2. Use Command Prompt
- Press the Windows key, type cmd, and click Run as administrator under Command Prompt.
- Type the commands below and press Enter after each:
takeown /F <folder path> /R /D Y C:>icacls <folder path> /grant administrators:F /T - Be sure to replace <folder path> with the correct path to the folder that you can’t access.
- After running those commands, close Command Prompt and check if the problem is resolved.
Since You have been denied permission to access this folder message requires you to change your security permissions, you need to use the Settings tab.
Unfortunately, several users reported that this tab is missing on their PC. However, this doesn’t have to be a major problem since you can take ownership of the folder from Command Prompt.
3. Change Group Policy settings
- Press Windows key + R, type gpedit.msc, and press Enter.
- Navigate to the path below in the left pane:
User Configuration > Administrative Templates > Windows Components > File Explorer - In the right pane, double-click the Remove Security tab.
- Now, select the Disabled option from the menu and click the Apply button, followed by OK to save changes.
- Close Group Policy Editor.
If you can’t find Settings tab in Properties window, you might have to change Group Policy settings. This is a simple procedure.
After making the changes, the Security tab will become available and you should be able to access it and change the folder ownership.
You have been denied permission to access this folder message usually appears if you don’t have the necessary privileges to access a specific folder.
In most cases, you can fix this problem simply by changing the ownership of the folder or by removing the problematic apps.
If you are facing a similar issue in you don’t have permission to open this file on Windows 10, check our detailed guide to fix it.
Feel free to let us know the solution that helped you fix this issue in the comments below.
Still having issues? Fix them with this tool:
SPONSORED
If the advices above haven’t solved your issue, your PC may experience deeper Windows problems. We recommend downloading this PC Repair tool (rated Great on TrustPilot.com) to easily address them. After installation, simply click the Start Scan button and then press on Repair All.
![]()
Newsletter
You are here:
Home » Windows 10 » Fix: You Have Been Denied Permission To Access This Folder In Windows 10
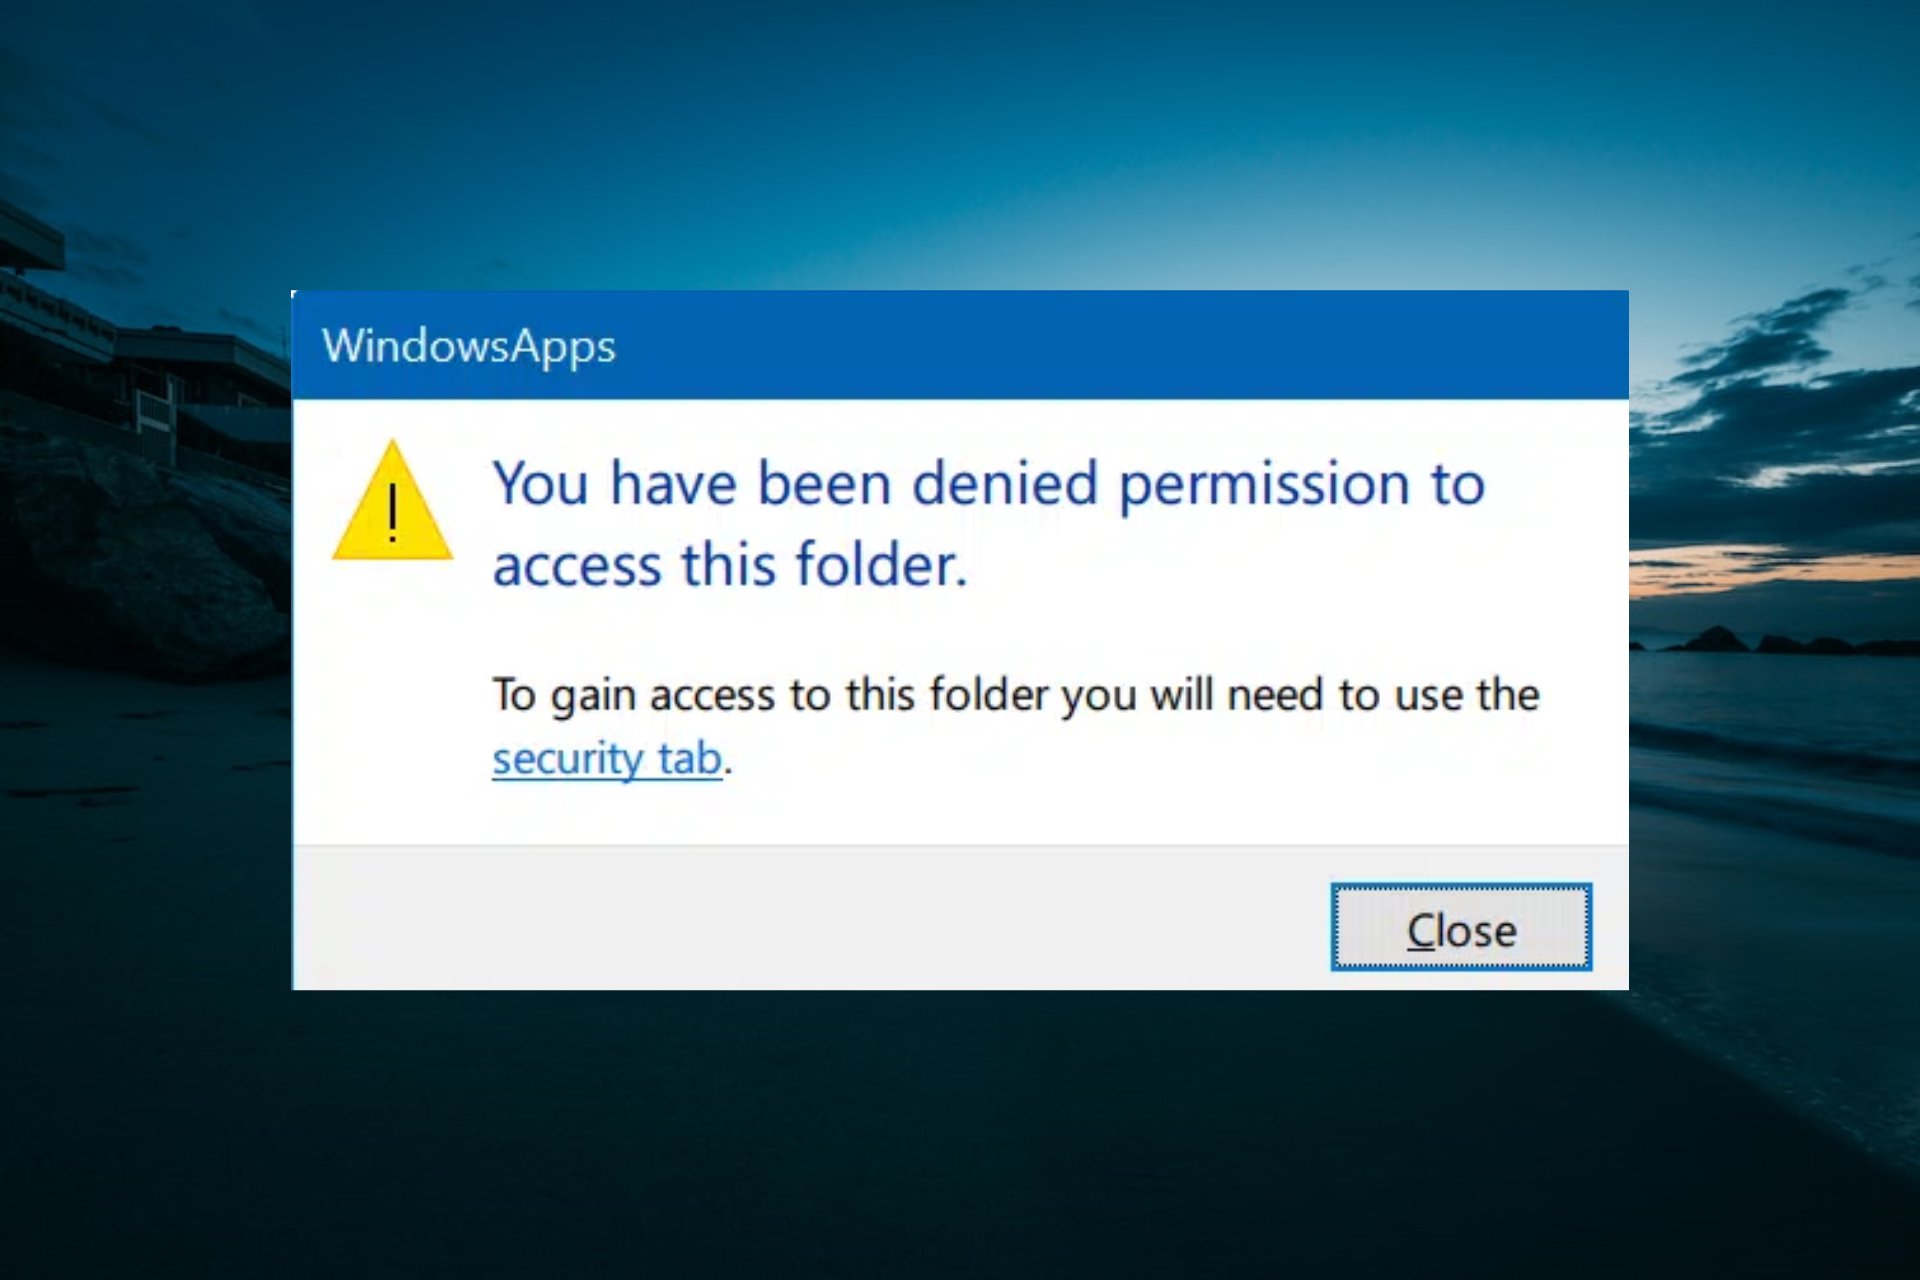
At times, while accessing a folder in Windows 10, you might get “You have been denied permission to access this folder. To gain access to this folder you will need to use the security tab” error.
The “You have been denied permission to access this folder. To gain access to this folder you will need to use the security tab” error appears when you are trying to access a system protected folder in Windows 10 or earlier versions of Windows. You get the error if you try to access WindowsApps folder, for instance.
To get access to the folder in question, you need to make appropriate changes to folder’s permission and it can be done with ease. However, you must have admin rights, or you need admin password in order to change permissions of system files and folders on a Windows 10 machine.
So, in this guide, we will see how to get rid of “You have been denied permission to access this folder. To gain access to this folder you will need to use the security tab” error and access any folder on a Windows 10 PC.
Method 1 of 3
Take ownership of file/folder
Step 1: Open up File Explorer. Navigate to the location where the folder that you want to take ownership of is located.
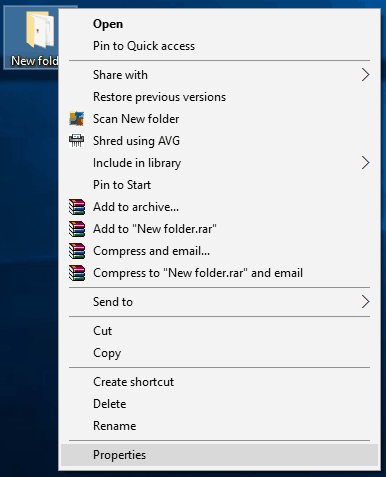
Step 2: Right-click on the folder and then click Properties.
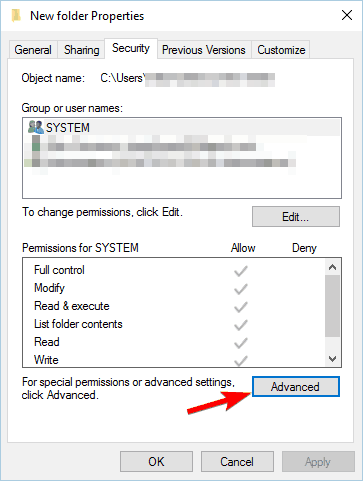
Step 3: Move to the Security tab. Click Advanced button to open Advanced Security Settings for the current folder.
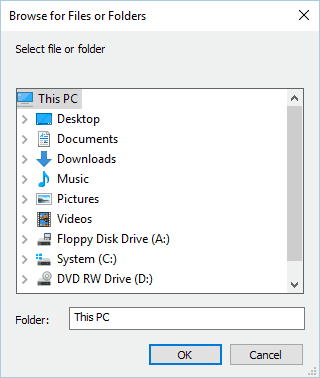
Step 4: You should now see Change link next to the owner field. Click the Change link to open Select this object type dialog.
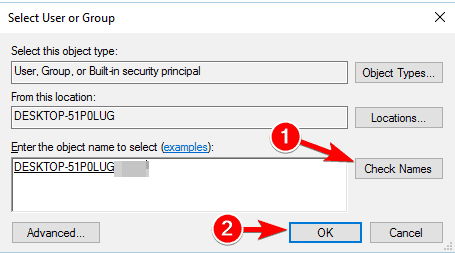
Step 5: Here, in Enter the object name to select filed, type Administrators, and then click Check Names button. Finally, click OK button to see Advanced Security Settings.
Step 6: Finally, check Replace owner on subcontainers and objects option. Click Apply button to take the ownership of the folder. That’s it!
You can access or open the folder now without the above mentioned error.
Method 2 of 3
Add take ownership to file/folder context menu in Windows 10
The above method is perfect to take ownership of files/folders in Windows 10. However, if you feel that the procedure is long and takes considerable amount of time, you can add a Take ownership option to file/folder context menu to quickly take ownership of files and folders in Windows 10.
Step 1: Follow the step-by-step instructions in our how to add Take Ownership option to right-click menu in Windows 10 guide to add Take Ownership option to file/folder context menu.
Step 2: Right-click on the folder that you want to take ownership of, and click Take Ownership option. That’s it!
You should now be able to open or access the folder without “You have been denied permission to access this folder. To gain access to this folder you will need to use the security tab” error.
Method 3 of 3
Use TakeOwnershipEx utility to take ownership of folders
There are quite a few third-party utilities out there to enable you take ownership of files and folders in Windows operating system. One of them is TakeOwnershipEx utility.
To take ownership of a file/folder, run TakeOwnershipEx tool, click Take Ownership and select a file/folder to take ownership of that file/folder. You can also right-click on a folder and then click Take ownership/restore ownership option to take or restore ownership of a folder.
Содержание
- Исправление ошибки «Отказано в доступе»
- Способ 1: Специализированный софт
- Способ 2: Настройки Windows
- Способ 3: Командная строка
- Вопросы и ответы
Открыть нужную папку или файл в операционной системе Windows получается не всегда. Одна из причин, по которой не получается это сделать – ошибка «Отказано в доступе». Из данной статьи вы узнаете о том, как устранить указанную проблему на устройствах под управлением Windows 10.
Исправление ошибки «Отказано в доступе»
Одна из основных причин появления ошибки – отсутствие соответствующих прав доступа у пользователя. Тем не менее, бывают случаи, когда проблема вызвана системным сбоем и решается банальной перезагрузкой компьютера. Можно выделить три основных метода ее устранения – через настройки ОС, системными утилитами и сторонним софтом. О каждом из них мы и расскажем далее в деталях.
Способ 1: Специализированный софт
Начнем с самого простого метода. Его суть заключается в том, чтобы выдать текущей учетной записи права на использование проблемной папкой или файлом. Делать это будем с помощью программы TakeOwnershipEx. Порядок действий должен быть следующим:
Скачать TakeOwnershipEx
- Перейдите на официальный сайт программы и загрузите архив с софтом. Ссылка на него находится в самом низу указанной страницы.
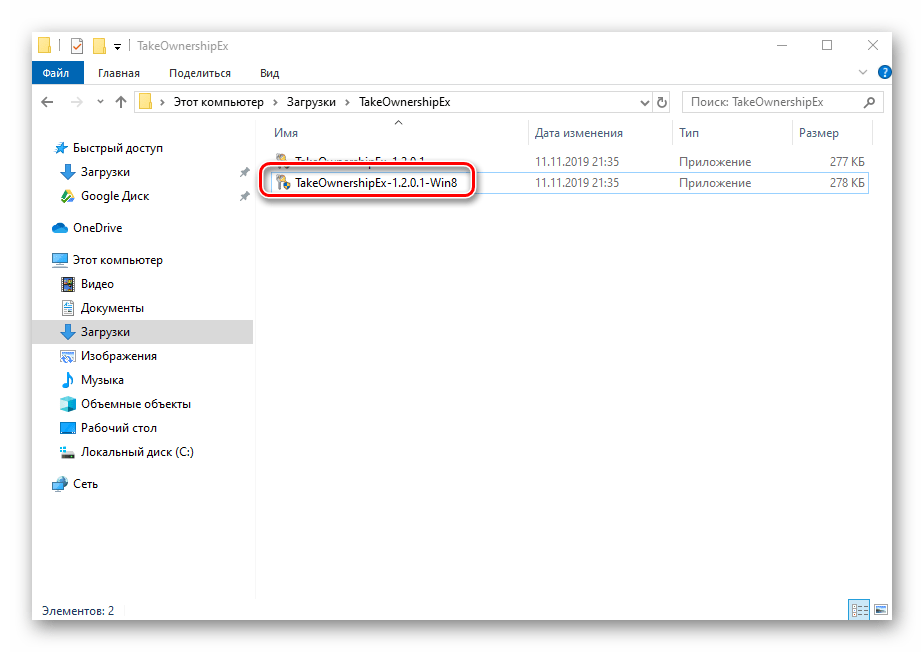
- Извлеките все файлы из скачанного архива в отдельную папку, после чего запустите «TakeOwnershipEx–1.2.0.1-Win8».
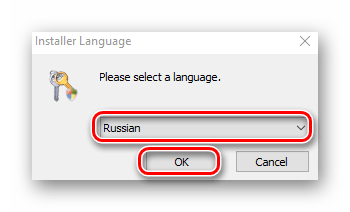
- В следующем окне нужно выбрать язык, на котором будет происходить дальнейшая установка программы.
- За этим последует весьма стандартный процесс – подтверждение лицензионного соглашения, выбор папки для софта и непосредственно установка. Останавливаться на каждом шаге не будем, так как проблемы на этом этапе у вас вряд ли возникнут.
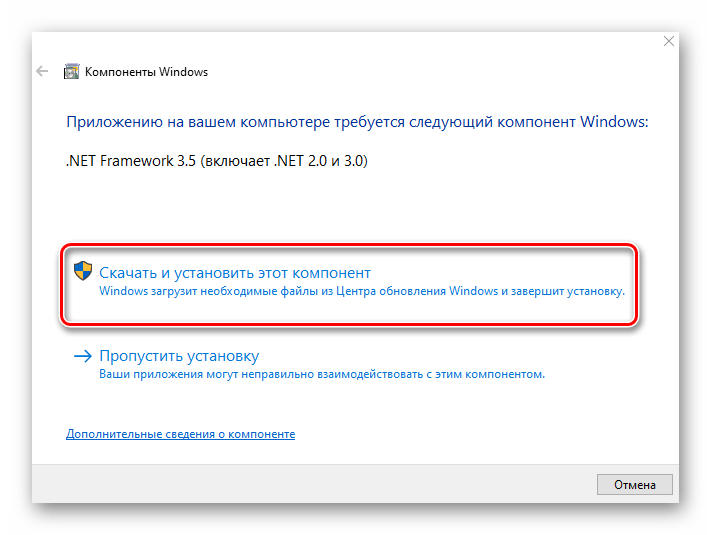
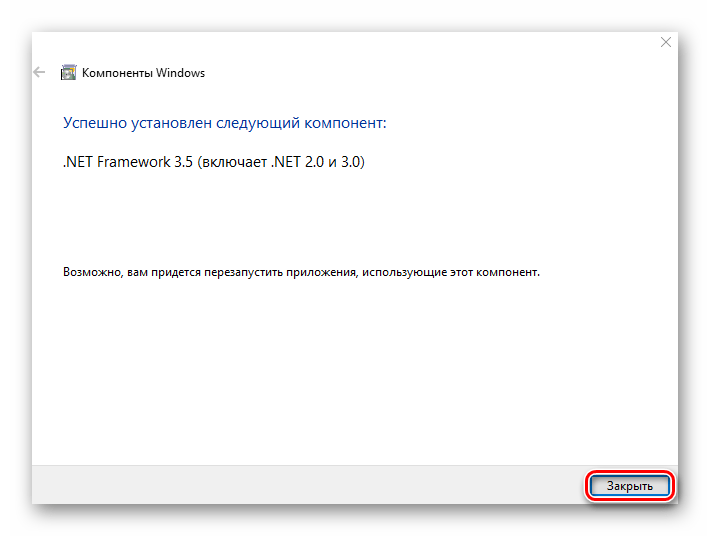
- По окончании установки запустите программу. При первом запуске будет произведена проверка на наличие системных компонентов. Если таковые не будут обнаружены, вы увидите окно с предложением их установки. Нажмите кнопку «Скачать и установить этот компонент».
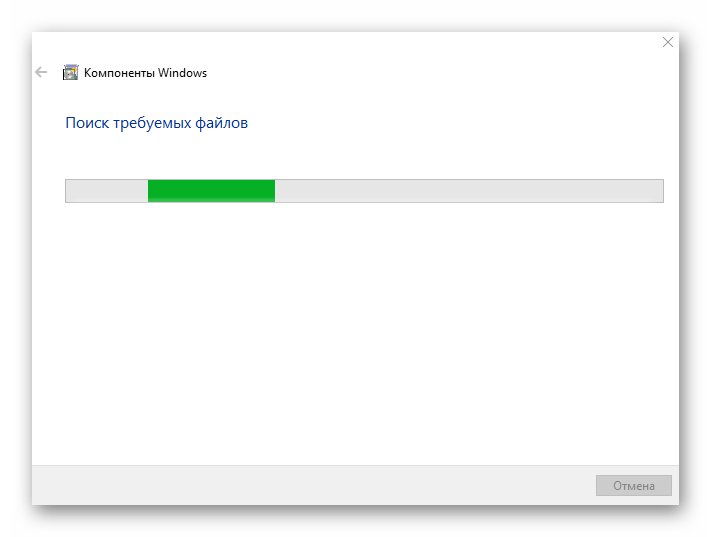
- После этого подождите. Процесс инсталляции займет около 10 минут. Он будет отображаться в отдельном окне в виде заполняющейся шкалы.
- По завершении инсталляции вы увидите соответствующее уведомление. Закройте его и перезапустите приложение.
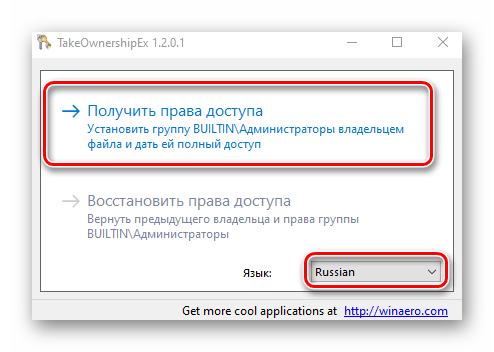
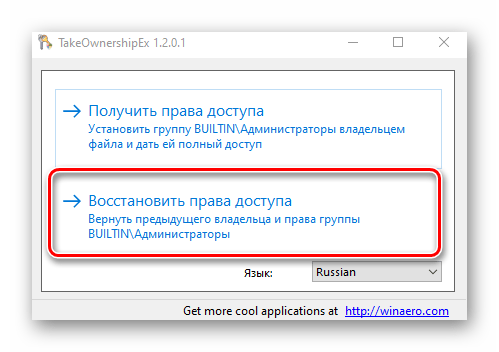
- После запуска интерфейс по умолчанию будет на английском языке. Переключите его по желанию на русский (выберите соответствующий пункт в выпадающем меню в правом нижнем углу), затем нажмите кнопку «Получить права доступа».
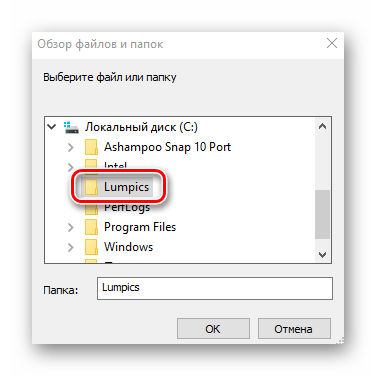
- Появится небольшое окно с древовидным каталогом всех разделов жесткого диска. Вам нужно найти и указать в нем проблемную папку, после чего нажать «OK».
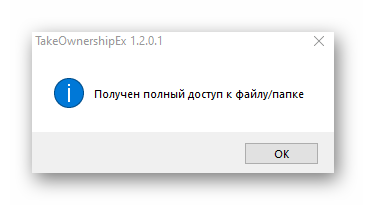
- Процесс выдачи соответствующих прав начнется автоматически. Вам же нужно дождаться, пока на экране не появится уведомление об успешном завершении операции.
- Закройте его и само приложение. Попробуйте снова открыть проблемную папку. Помните, что все внесенные изменения можно вернуть в исходное состояние. Для этого после запуска программы просто нажмите вторую кнопку «Восстановить права доступа» и выберите модифицированную ранее папку.
Способ 2: Настройки Windows
Этот метод решает проблему в большинстве случаев. Как и предыдущий, он заключается в выдаче специальных прав нужному пользователю ПК. От вас потребуется следующее:

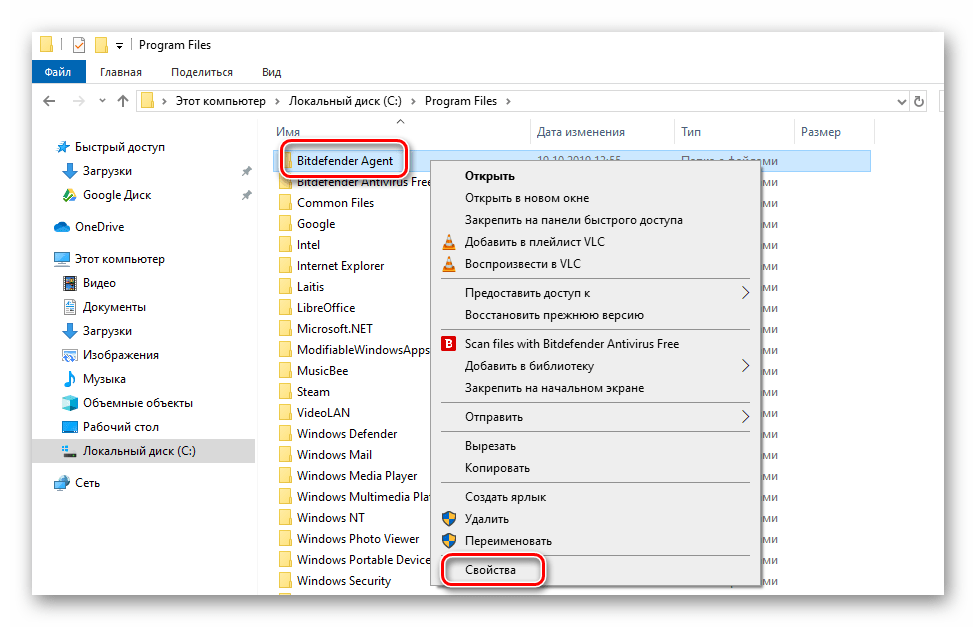
- На той папке или файле, к которому нужно восстановить доступ, кликните правой кнопкой мышки. В появившемся контекстном меню выберите строку «Свойства».
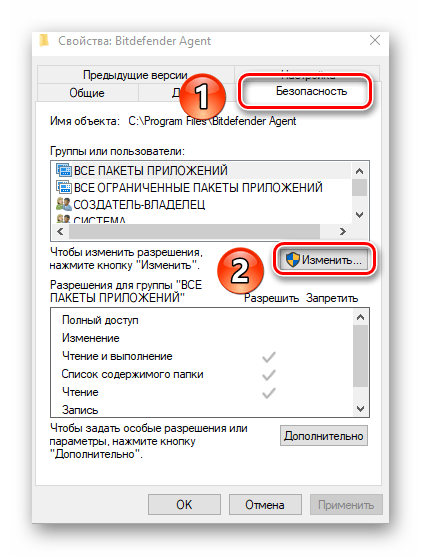
- Появится новое окно с несколькими вкладками сверху. Перейдите во вкладку «Безопасность». В ней обратите внимание на самый первый блок «Группы и пользователи». Вам необходимо нажать кнопку «Изменить», которая находится под ним.
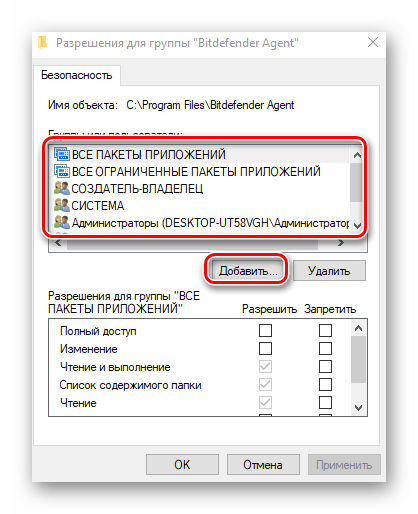
- Далее проверьте, нет ли в перечне пользователей в открывшемся окне имени учетной записи, через которую вы вошли в систему. Если есть, тогда выберите ее одиночным нажатием левой кнопки мышки и поставьте отметку в нижнем блоке напротив строки «Полный доступ». В противном случае нажмите кнопку «Добавить».
- В нижнее поле введите полное имя своей учетной записи с учетом букв верхнего и нижнего регистра, а после нажмите кнопку «Проверить имена». Система сформирует запись должным образом, дописав свои значения. Затем кликните по кнопке «OK».
- В открытом ранее окне, в списке пользователей, появится добавленная учетная запись. Выполните действия, описанные выше: выберите имя пользователя и поставьте отметку возле строки «Полный доступ». Подтвердите свои намерения, нажав «Применить» и «OK».
- После этого закройте все окна и попробуйте открыть проблемную папку или файл. С большой долей вероятности все заработает как положено.
Способ 3: Командная строка
Как понятно из названия метода, для его реализации нужно прибегнуть к помощи «Командной строки». В ней прописывается специальная команда, которая автоматически выдаст разрешения нужной папке или файлу. Выполните следующий ряд действий:
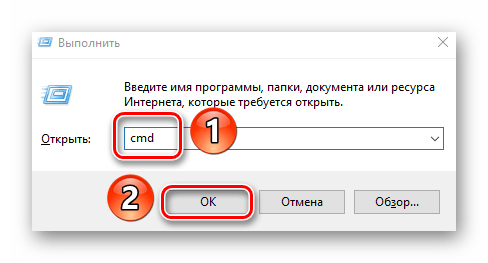
- Нажмите сочетание клавиш «Win» и «R». Появится окно программы «Выполнить», в котором нужно ввести команду
cmd. Затем, удерживая вместе клавиши «Shift» и «Ctrl», нажать на клавиатуре «Enter». Данные действия позволят запустить «Командную строку» от имени администратора. Напомним, что сделать это можно и другими способами.

Подробнее: Запуск «Командной строки» от имени администратора в Windows 10
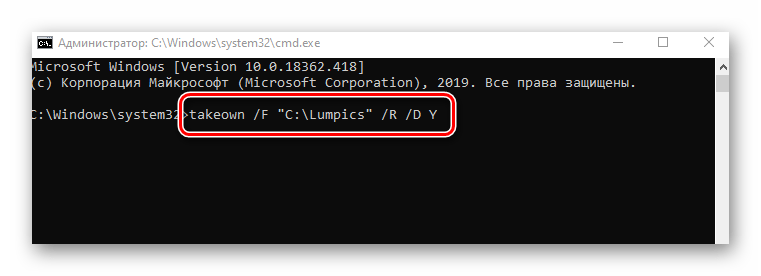
- Далее нужно ввести в открывшееся окно следующую команду и нажать «Enter»:
takeown /F "C:FolderLumpics" /R /D YОбратите внимание, что вместо значения в кавычках нужно указать путь к проблемной папке или файлу на диске вашего ПК.
- После этого нужно подождать. Если в указанной папке находится большое количество вложенных файлов, процесс займет некоторое время. В любом случае, в конце вы увидите следующее сообщение:
- Остается лишь закрыть все программы и окна, после чего вновь попробовать открыть файл или папку, доступ к которой был закрыт.
Таким образом, воспользовавшись любым из описанных методов, вы сможете избавиться от ошибки «Отказано в доступе». Напомним, что аналогичная проблема нередко встречается и при попытке открыть каталог на флешке. Если вы столкнулись с подобным, рекомендуем прочитать наше отдельное руководство:
Подробнее: Решение проблемы «Отказано в доступе» к флешке
Еще статьи по данной теме:
Помогла ли Вам статья?
-
MiniTool
-
MiniTool News Center
- Fixes — You Have Been Denied Permission to Access This Folder
By Vera | Follow |
Last Updated November 28, 2020
![]()
Many users have reported the error message “you have been denied permission to access this folder” in Windows 10. If you are also encountering this issue, you come to the right place and you can get some solutions from this post on the MiniTool website.
You Have Been Denied Permission to Access This Folder Windows 10
Windows 10 can lock some folders to protect your files from unauthorized access. That is, for certain non-administrator users, these folders are inaccessible.
According to users, when trying to access a system protected folder like WhatsApps, you may get the error message “You don’t currently have permission to access this folder” and if you click Continue, you see “You have been denied permission to access this folder. To gain access to this folder, you will need to use the security tab.”
Sometimes, you also get the same error when accessing folders on your external HDD, SSD, SD card, USB, etc. Although you are an administrator, you still cannot access the folder.
How can you fix the denied access to folder issue? It is easy to troubleshoot and you can follow these solutions below.
Take Ownership of Folder
As mentioned above, many folders are protected by Windows and if there are no certain privileges, you can’t access them. To fix this issue, you can take ownership of the folder by following these steps.
Step 1: Right-click the inaccessible folder and choose Properties.
Step 2: Under the Security tab, click Advanced.
Step 3: Click the Change link next to Owner.
Step 4: Type the object name, click Check Names and click OK.

Step 5: Check the box of Replace owner on subcontainers and objects and click Apply then OK.
Modify Your Registry
If you are encountering “you have been denied permission to access this folder”, you can modify your registry to change the ownership of that folder. But editing the registry is a risky process, thus, it is best to back up the registry just in case.
Step 1: Download the Take Ownership.zip file.
Step 2: Extract the available files from the .zip file.
Step 3: Run the file called Install Take Ownership.reg.

Step 4: Confirm the operation and after that, right-click the inaccessible folder and choose Take Ownership from the menu.
Use TakeOwnershipEx
In addition to using these two methods, you can use a third-party utility to take ownership of files and folders in Windows operating system. One popular tool is TakeOwnershipEx and you can get it to fix the denied access to folder issue.
Step 1: Run TakeOwnershipEx and click Take Ownership.
Step 2: Choose the problematic folder to take its ownership.
Other ways recommended by some users:
- Use Command Prompt to access files
- Copy the folder to a different location
- Create a new group and add your user account to it
If the above ways don’t work, you can also try them and the detailed steps can be found from the Internet.
Bottom Line
Are you encountering this case – you have been denied permission to access this folder Windows 10 when trying to access a system protected folder? Don’t worry and you can easily get rid of this error if you follow these solutions mentioned above.
About The Author

Position: Columnist
Vera is an editor of the MiniTool Team since 2016 who has more than 5 years’ writing experiences in the field of technical articles. Her articles mainly focus on disk & partition management, PC data recovery, video conversion, as well as PC backup & restore, helping users to solve some errors and issues when using their computers. In her spare times, she likes shopping, playing games and reading some articles.
You might find it strange when Windows tells you that you don’t have permission to access something on your own computer. Usually, this is a result of a permission configuration in the NTFS file system that Windows uses by default.
If you see access is denied messages on Windows 10 when trying to access a file or folder, we’ll walk you through the steps to resolve this. While we focus on Windows 10, most of this guide is also applicable to Windows 11 since the two are so similar.
1. Are You an Administrator?
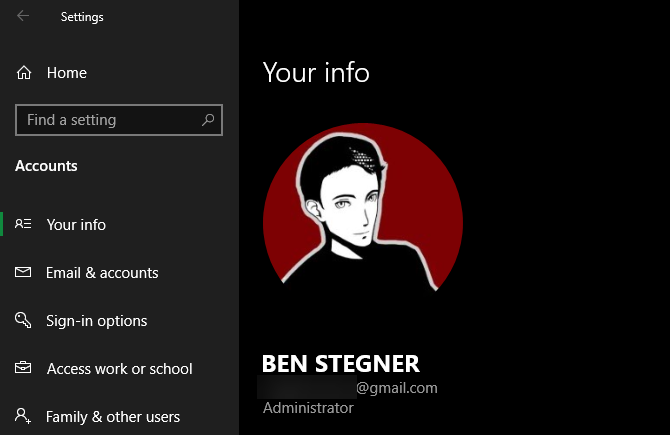
In the majority of cases, you’ll need to be an administrator on your PC to make changes to file/folder ownership. You may be able to tweak the permissions in directories that belong to you, but you won’t have much control elsewhere.
This is to keep everyone’s files on a computer private. Only administrators can gain access to files that belong to another user. In addition, you’ll need to provide admin permissions to make changes to system files, such as those in the Program Files and Windows folders.
See our guide to getting admin rights in Windows if you haven’t done so yet. We’ll assume you’re an administrator moving forward. If you’re not, talk to whoever is in control of your computer.
2. Fix Access Denied Errors by Taking Ownership
The most common fix to try when you see «folder access denied» is to take ownership of the folder through the File Explorer. Here’s how to do this.
First, right-click the folder or file in question and select Properties. On the resulting window, switch to the Security tab. Next, click the Advanced button for more options.
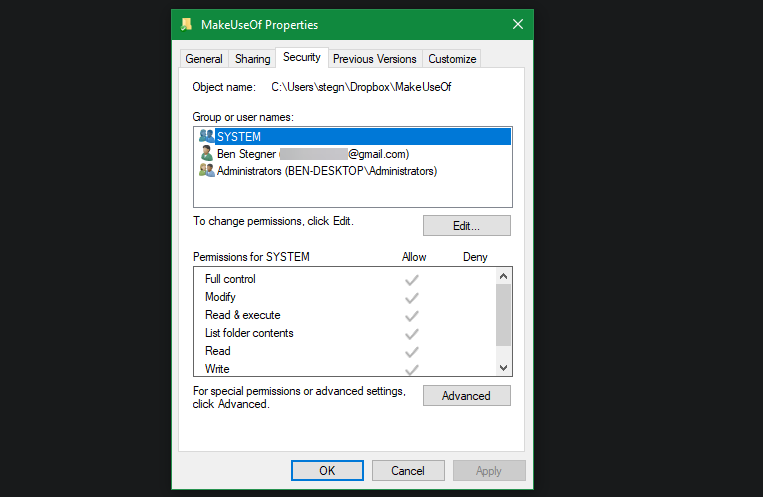
At the top of the next window, you’ll see a field labeled Owner. This will likely say Unable to display current owner if you’re having an issue. Click the blue Change link next to this to fix it—note that you’ll need to be an administrator to do so.
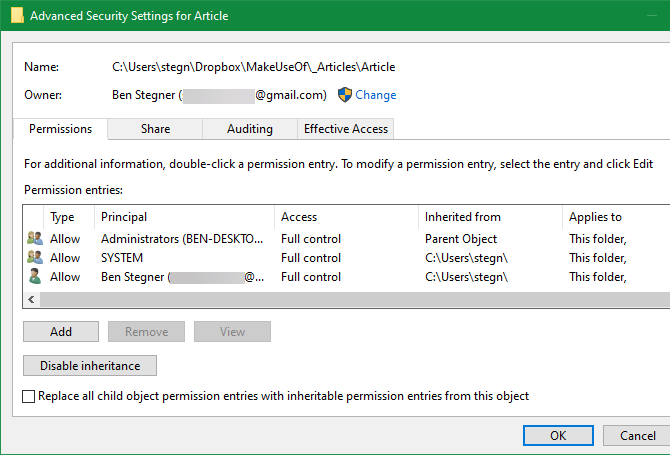
You’ll now see a dialog box titled Select User or Group. Inside this, in the Enter the object name to select box, type the account name of the new folder owner. This can be either an account username, or a group of users on your PC.
Groups include standard units like Administrators (if you want all computer admins to own it), or Users (for everyone to own it). For home usage, it usually makes the most sense to assign ownership to one person.
We assume that you want to take ownership of the folder with your own account, so type your username here. If you use a Microsoft account to sign in to Windows, your username is the first five letters of your email address.
Hit Check Names once you’re done to make sure it’s correct. If you are, it will automatically change to [PC Name][Username]. Click OK.
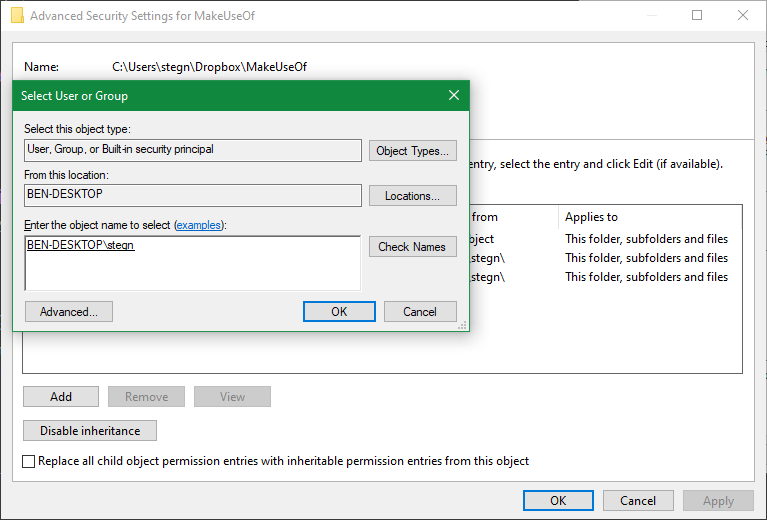
Back on the main Advanced window, you’ll notice a box at the bottom that starts with Replace all child object permission entries…. If you want your changes to apply to all folders inside the current one (which you probably do in most cases), check this box. Then hit OK twice, and you’re all done.
Be Careful When Changing File Ownership Settings
When dealing with «access denied» errors, you should apply the above steps with care. Avoid taking ownership of folders in system directories like Windows, Program Files, Program Data, or similar.
Doing so will weaken the security of your system, because normal accounts aren’t meant to be the owners of these directories. They contain important Windows folders that you shouldn’t touch.
You can still get access to most of these folders by navigating to them in File Explorer. You’ll have to confirm admin permissions, then you can take a look at them without becoming the owner.
3. Review Folder Permissions
If taking ownership of a folder doesn’t work, or you’re an administrator trying to give permissions to someone else, you should next review what users have which permissions for the folder in question.
Pull up the same Security tab in a folder’s Properties box as before. At the top, you’ll see a list of users and groups on your PC. Select an entry here, and the bottom panel will show what permissions they have for this folder. Hit the Edit button to change the permissions for each user as desired.
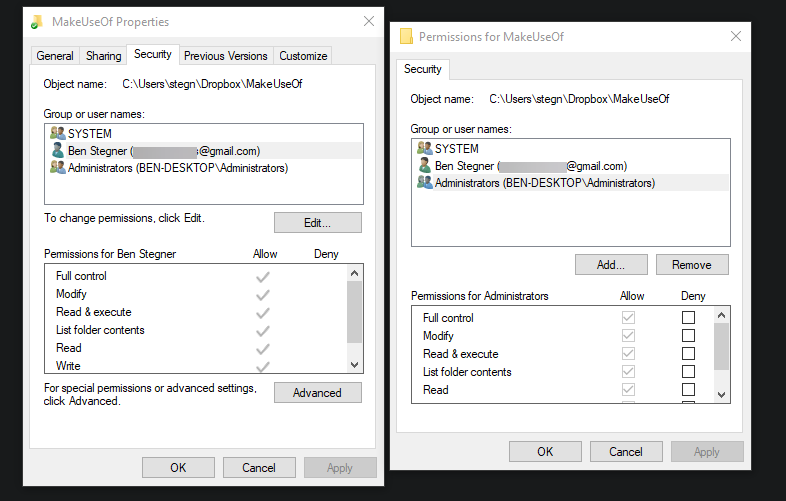
As you’d expect, Full control gives a user (or group) complete power over the folder and everything inside. Read is the most restrictive option, as it only allows you to see what’s in the folder. See Microsoft’s page on file and folder permissions for a more detailed breakdown.
4. Double-Check Your Antivirus Settings
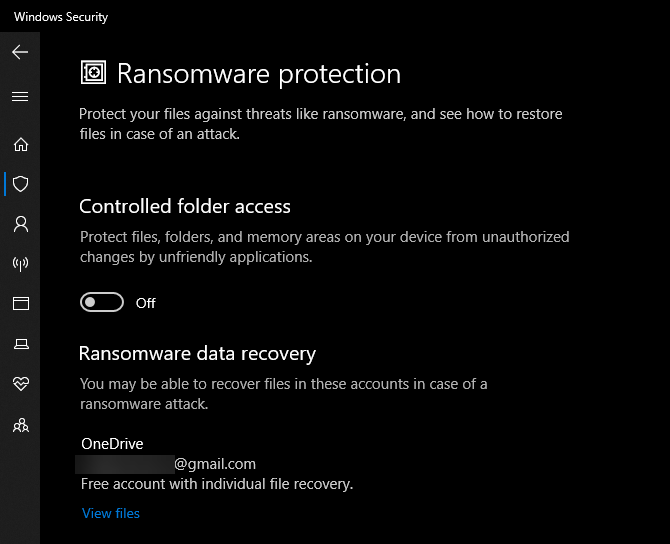
Sometimes, your antivirus can get overzealous and end up messing with your ability to access files. If you’ve confirmed that everything is correct with your file permissions after going through the above, you should consider checking your security tool next.
Take a look around your antivirus program’s settings and see if there’s an option like a file shield, ransomware protection, or similar. Try disabling this and then attempt to access the file again. If it doesn’t have an effect, temporarily disable your antivirus entirely and see if that helps.
5. Check for File Encryption
Another reason you might see the «access is denied» message is that a folder’s contents are encrypted. As you may know, encryption protects a file by only allowing someone with the key to view it.
You can encrypt folder contents in Windows, though this feature is only available in Professional and above versions. To do so, right-click a folder and choose Properties. On the resulting window, click the Advanced button on the General tab.
Here, check the Encrypt contents to secure data box. With this in place, everything inside the folder will be locked.
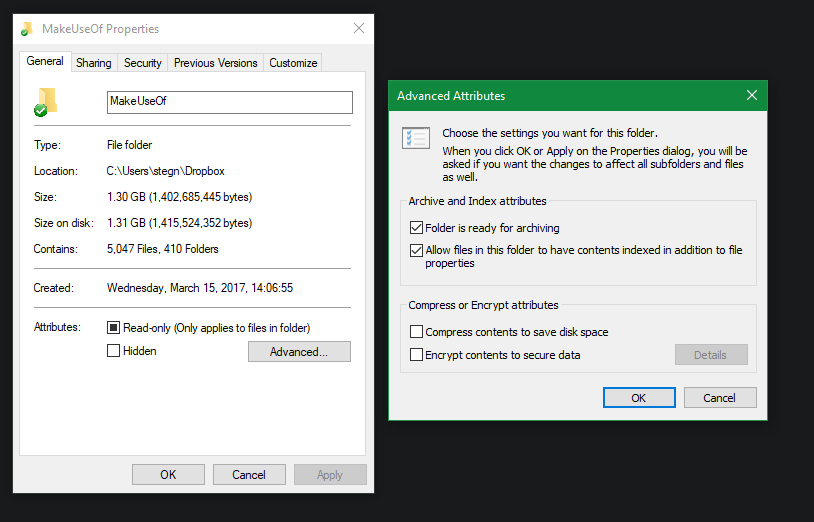
This type of encryption is transparent, meaning that the owner never notices the encryption. As long as they’re logged into the system, they can access these files. But if you don’t have the certificate used to encrypt the folder, Windows will deny you access. Whoever encrypted the file will need to unlock it.
This isn’t the only way to encrypt files in Windows 10 and 11, but it could cause the error you’re seeing.
Other Potential «File Access Denied» Fixes
We’ve covered the most important solutions for the «folder access denied» problem in Windows 10. You’ll see a lot of advice floating around the web for this issue, but not all of it is great. Some proposed solutions revolve around gaining admin permissions, which we’ve already discussed.
Other advice may not work in every case, but it’s worth bringing up in case nothing else was successful for you.
One common tactic is to disable User Account Control (UAC). To do this, type UAC into the Start menu and choose Change User Account Control settings. Drag the slider all the way down and hit OK.
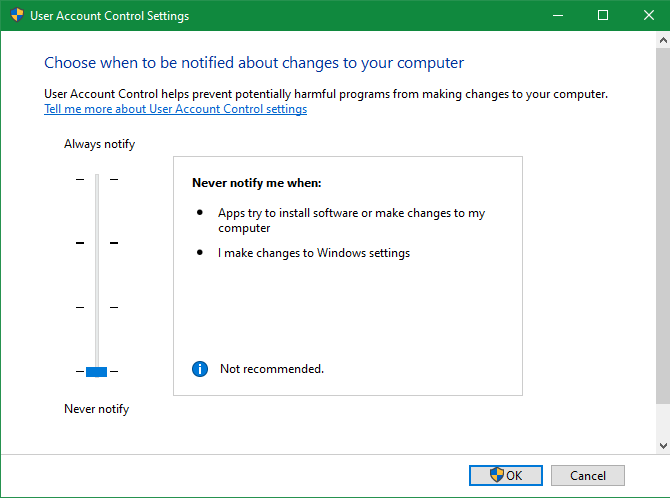
Once you’ve done this, try the steps in #2 above again to take ownership. After you’re done, make sure to reset the UAC setting to where it was to keep your system safe.
As another troubleshooting step, try booting your computer in Safe Mode and running through the steps to take ownership that way. This rules out any interference from third-party programs.
Finally, make sure that nothing else is using the folder or file you want to access. Another process could have the file locked, which is why you can’t make any changes to it. This is another issue that Safe Mode helps to weed out.
Fixing «Destination Folder Access Denied» and «You Have Been Denied Permission to Access This Folder»
You might see the more specific «destination folder access denied» issue pop up instead. In most cases, you can fix this using the same troubleshooting methods as above. Despite the message, don’t look to fix just the destination folder. Check the permissions on the source folder, too.
«You have been denied permission to access this folder» is another form of this same error. If the standard steps don’t fix it, run through the menu in #3 again and make sure your account hasn’t explicitly been denied permissions for that folder. If you see this for every folder, you may need to repair corruption on your Windows system or profile.
Access Is Denied? We’ll See About That
We’ve taken a look at how to resolve folder and file «access denied» problems in Windows. Usually, this comes down to a simple permission fix. Make sure you have administrator rights, then you can try taking ownership and adjusting permissions as needed. Just avoid changing ownership of protected system folders, which could compromise your system security.
Speaking of permissions, you should also know how to lock down accounts in Windows so they can’t access more than needed.