1.11
Open Source
-
Search
-
Search all Forums
-
Search this Forum
-
Search this Thread
-
-
Tools
-
Jump to Forum
-
- |<<
- <
- >
- >>|
-
View Results
Poll: Would you like to see wristbands? Design: goo.gl/I0ltfg
I want to get your guys opinion of creating merchandise for my Furniture Mod. I want to start with wristbands.
- Prev
- 1
- …
- 138
- 139
- 140
- 141
- 142
- 143
- 144
- 145
- 146
- …
- 180
- Next
- 10
- 20
- 30
- 40
- 50
- 60
- 70
- 80
- 90
- 100
-
For some reason, the mod works well, with the one exception, the couches cannot have any color. In my testing I went to the creative inventory and found only the white couch for some reason.

[URL=http://doctorwho.ikingssgc.com/]
-
For some reason, the mod works well, with the one exception, the couches cannot have any color. In my testing I went to the creative inventory and found only the white couch for some reason.
right click couch with dye to change its color
-
This mod is bugged i place a wooden chair and it is invisible, It does that for every furniture!
Possibilities:
1. 1.8 bug? (since i don’t know if you are using the 1.8 beta or not)
2. Forge version. I dont know the exact one you need to use but someone else on this thread should know.
3. The 3dblocks mod that makes things like grass look 3d-ish makes modded blocks with special models like this become invisible.—————————————
—————————————
-
Drako9823-
View User Profile
-
View Posts
-
Send Message
- The Meaning of Life, the Universe, and Everything.
- Location:
Las Vegas, Nevada
- Join Date:
7/26/2014
- Posts:
115
- Minecraft:
Drako Alcarus
- Member Details
Hi all,
I have placed an infinite water source under the sink but when I try to fill the sink it repeats «You need to have a water source under the block the sink is on to fill it. Alternatively you can usf a water bucket to fill it.»
I’ve tried putting the water down before the sink, sink down before the water, putting the sink on a block of water then adding blocks left and right. The same happens with the bath. I think it has to do with the fact that the bath and sink don’t touch the water — it doesn’t look like they’re full blocks. Is there a trick to this?
Regards,
PicketyDid you try putting water under a block, then the furniture above that block?
-
-
redmen65-
View User Profile
-
View Posts
-
Send Message
- Out of the Water
- Join Date:
1/20/2015
- Posts:
5
- Member Details
There is no 1.8 yet im using 1.7.10 forge and 1.7.10 3.3.7 the kitchen update that says bugs fixes but it is invisible
Here is the image of. That invisible block is that chair!
Oh ya i don’t have the 3d blocks mod!ATTACHMENTS
-
2015-01-20_12.59.50
-
-
There is no 1.8 yet im using 1.7.10 forge and 1.7.10 3.3.7 the kitchen update that says bugs fixes but it is invisible
Here is the image of. That invisible block is that chair!
Oh ya i don’t have the 3d blocks mod!So you mean you aren’t using the 1.8 version? because there is 1.8 forge and a 1.8 development build of the mod.
It’s probably some problem with the forge version, but since i don’t know the exact one you would need to fix it someone else would need to tell you.
—————————————
—————————————
-
There is no 1.8 yet im using 1.7.10 forge and 1.7.10 3.3.7 the kitchen update that says bugs fixes but it is invisible
Here is the image of. That invisible block is that chair!
Oh ya i don’t have the 3d blocks mod!I searched back on this thread and found this answer on page 158, post # 3165. Hope it helps
Quote from Dulciphigo-next
This problem was caused by an update in Forge (anything greater than 1232) creating problems with Optifine. The fix used to be to downgrade to Forge 1231 but Optifinerecently updated to HD U B1 to fix the problem.
-
Hi
This is what I have. The screenshot is a test world, no mods except this one.
Regards,
PicketyWell try putting that water 1 block lower. It’s like placing the sink on top of your floor and the water below your floor.
—————————————
—————————————
-
redmen65-
View User Profile
-
View Posts
-
Send Message
- Out of the Water
- Join Date:
1/20/2015
- Posts:
5
- Member Details
-
-
Can somebody tell me, what the hotkey «key.fart.desc» (F) do? It’s sorted under «keys.cfm.category» in controls.
Try pressing it while on the toilet
—————————————
—————————————
-
Hi,
I’ve been trying to add some blender recipes for Natura berries and Pam’s Harvestcraft but they keep failing. Has anyone succeeded in adding from these mods?
I’ve tried this for Natura:
type=blender,name=Berries,heal=6,ingredients=natura:blueberry:2/natura:blackberry:5,colour=76:0:153
Not sure how to add Harvestcraft as there is an apostrophe in the name.
Appreciate any helpRegards,
PicketyI don’t know if adding blender recipies is fully supported, yet. Someone will correct me if i’m wrong.
—————————————
—————————————
-
ThiefCatEike-
View User Profile
-
View Posts
-
Send Message
- Zombie Killer
- Join Date:
11/7/2014
- Posts:
152
- Minecraft:
ThiefCat
- PSN:
Neko_Potsu
- Member Details
The blender recipes do work, but I’ve only been successful in using vanilla items like apples and melons.
-
-
Why don’t the other coaches work. Try to make them by following the recipe and it does nothing.
-
I and my UCXG group like this mod =D.
ATTACHMENTS
-
Equipe UCXG By CoolGuy123_Gamer
-
-
Hello how do I download? please HELP ME!!
Click under downloads on the main post then scroll down. click the version for your version of minecraft and download it. If you are taken to adfly (I forgot if it is on adfly or not) then wait 5 seconds and click skip ad in the top right corner.
—————————————
—————————————
-
Hi all,
I have placed an infinite water source under the sink but when I try to fill the sink it repeats «You need to have a water source under the block the sink is on to fill it. Alternatively you can usf a water bucket to fill it.»
I’ve tried putting the water down before the sink, sink down before the water, putting the sink on a block of water then adding blocks left and right. The same happens with the bath. I think it has to do with the fact that the bath and sink don’t touch the water — it doesn’t look like they’re full blocks. Is there a trick to this?
Regards,
PicketySink
Block
Water -
The blender recipes do work, but I’ve only been successful in using vanilla items like apples and melons.
You can use mod items, you just need to know the modid and the registered name of the item.
- To post a comment, please login.


")


- Prev
- 1
- …
- 138
- 139
- 140
- 141
- 142
- 143
- 144
- 145
- 146
- …
- 180
- Next
- 10
- 20
- 30
- 40
- 50
- 60
- 70
- 80
- 90
- 100
- |<<
- <
- >
- >>|
Posts Quoted:
Reply
Clear All Quotes
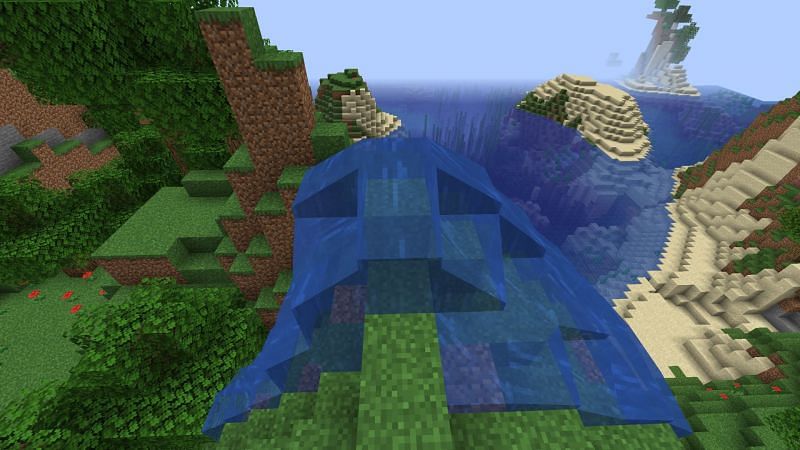
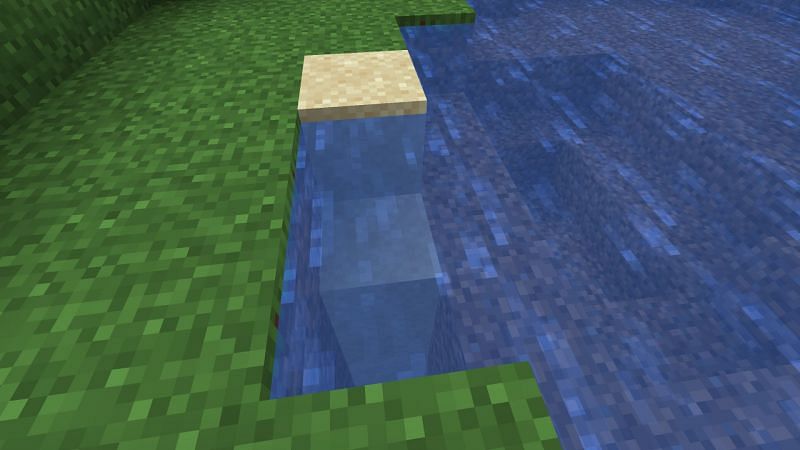
I will start this answer with a question. Is your flowing water only 1 block deep?
Yes
Good in this case you can use either 2 ways.
The first one is to fill the area with an easy to remove block (for example dirt) also fill the water blocks that are still source blocks. Then dig the first corner block away. Wait for the source blocks to fill the other block and dig the next block away.
Sidenote : For flowing water to create a source block you need to have 2 or more water flows coming from the sides and the water cant flow farther then 1 block. An example is found below.
X X X X X
D D D X X
D D D D D
D D D D D
D D D D D
X being water and D being Dirt.
Removing the top-middle dirt block results in 2 water blocks (X’s) to flow in the empty space and the water cant flow further then 1 block because of the other dirt blocks, thus creating a source block.
Another example
X X X X X
X X D X X
D D D D D
D D D D D
D D D D D
Removing the top middle D again results in 3 source blocks to flow into the empty space and thus creating a source block.
Another example
X X X X X
D D D D D
D D D D D
D D D D D
D D D D D
Removing the top-middle D block here results into only 1 source block to flow into the empty space thus creating flowing water.
This methode takes a long time so the fastest way is create some buckets and collect some water. Then dig a row of dirt away and replace the flowing water with water from your buckets. (You can place the water against the dirt blocks your standing on.)
No
If its more than 1 block deep you need to wonder if its worth spending the time seeing as there is no quick way to solve this. What i would do is to empty the area with the flowing water (yes just empty it till the bottom and wall off with dirt. Now fill the bottom layer with water. Next place a layer of dirt above the water (like shown below).
D D D D D
D D D D D
D D D D D
D D D D D
D D D D D
Now dig an entire row of dirt away and replace the air space with a bucket.(like shown below).
X X X X X
D D D D D
D D D D D
D D D D D
D D D D D
Repeat until you have filled the entire area with water blocks.
Now for removing the wall you have build, remove the top layer of the wall and place water on top of there. Once you have done that just repeat this layer after layer until you have reached a bottom. (you might want to take some scubba gear with you.(sugarcanes, metal bars, signs etc.)).
I think this has covered the most ways of getting rid of the flowing water. However neither of these ways can be considered fast so if anyone knows a faster way feel free to add it to my answer.
Anyway i hope this helped.
Cheers, Marco
-

fry_lad
New Member
- Messages:
- 41
- Likes Received:
- 19
- Local Time:
- 10:17 PM
I’m making this thread as a way for people to find out things about Crash landing that they otherwise might not, (if you have anything to add comment below and I’ll edit the post)
Note: I will not be including Bugy/Exploitative ideas in this post unless I know they’re specifically allowed.
Part 1 Acquiring items:
Getting Water:There are a few main ways to get water in Crash landing but sometimes it can be confusing on how to get a steady supply.
-Shear leaves / crook leaves *Personal Favorite*
-once you have the leaves or saplings all you need to do is put them in the fluid transposer or crusible and power it to get 100ml of water each (you need 10 saplings or 10 leaves to get 1 water bottle)-Cook Dirty water
the first step for this is to get yourself a bucket, it doesn’t matter if it’s clay or iron, once you have that pick up the water by your house and dig a tunnel down to Y level 47ish then place your water block there and it’ll become a dirty water block, once you’ve gotten this far all you need to do is right click on the water block with an empty bottle and you’ll get dirty water which you can then smelt in a furnace to get clean waterCobblestone Generators:
depending on your play style you may only find yourself using 1 or 2 of these ideas but they are all plausible:
-Pyrothium cobblegen
This generator is quite simple to do and can be done within the first 3 minutes of getting your island.what you need to do is gather a bit of dust from around the area to help you stay out of the fire, then you want to dig a trench under your ship from the pyrothium to your water (works best if you make them meet up in the center)
once you’ve done that the pyrothium will turn the water into smoothstone which can be harvested with a wood hamme-r or pick to get an early start on cobble
-Plain old Vanilla cobble Gen
this is a cobblestone generator that you’d end up making in vanilla minecraft but can still make in this mod pack.what you do is you get some cobblestone from sifting your dust util you have 4 blocks, then (assuming you have made a crusible with 7 of the clay and bonemeal) place the cobble in the crusible with a torch or pyrothium underneath it to start melting it into lava, once it reaches 1000mb you’ll have a bucket of lava and you can make your cobble gen by having water and lava rub up against eachother.
-Transfernode *Personal Favorite*
this type of cobble gen requires a bit of materials before hand (1 chest, 5 smoothstone, 12 redstone, 2 glass)to make this cobble gen you need to have a lava source block and a water source block on either side of a piece of cobble, then you place your transfer node on top of the cobble and put a chest or barrel above that so that it has an inventory to put the cobble into, once you’ve done all that you have infinite auto cobble, Simple right?
Seared Brick:
There are only two ways I know of to get seared brick.
-Nether / City world
This is perhaps the simplest way to get seared bricks.First thing you want to do for this method is make a nether portal (I’ll explain how to get Obsidion in the next section) after that you want to find a Smeltery building in a city (type /rt until you are able to see a city on your minimap then walk to it)
you should find a smeltery inside as well as 2 chests (one on the first floor beside the smeltery and one on the second in the corner.) normally one of those chests will have seared brick in them, if not you can at least get some parts of a smeltery from the one in the building
-Stones
You know all those little stones you were getting from sifting dust/dirt or from breaking smoothstone with a hammer? well you can turn those into seared briccktake those stones and put them into a crusible to melt them down into seared stone (1 stone = 1mb Seared stone)
it’s a lot of stones to make a smeltery but with a little ingenuity you can completely automate it with an item duct, a crucible, a vacuum hopper and a autonomous activator.
Obsidian:
A lot of people seem to be confused on how to get obsidian for a portal, or just in general, so here’s the easiest way to get it.
-Stone barrel
this is literally the easiest and quickest way of getting obsidian I can think of (seeing as you don’t need to mine it)the first thing you need to do is to get a stone barrel, one you have that place down the barrel and put a bucket of lava in it by right clicking on it with the bucket of lava in hand. after this just place water on top for a few seconds then remove the water with the bucket and right click on the obsidian in the barrel to pick it up.
Making Dirt:
Ex Nihlo Barrel
This is the more used way to get dirt, it involves getting compostable materials and right clicking on the barrel with them i order to add them to the barrel and compost them into dirtCurrent Item to Dirt recipies I know of are:
Tree Saplings, Leaves, Rotten Flesh, Spider Eyes, Wheat, Bread, Dandelions, Roses, Brown Mushrooms, Red Mushrooms, Apples, Carrots, Potatoes, Baked Potatoes, Poison Potatoes, Pumpkins, Jack-o-lanterns, Pumpkin Pie, Melons, Melon Slices, Cactus, Lily pads, Vines, Sugar Cane, Tall Grass, Nether Wart, Pork (raw and cooked), Beef (raw and cooked), Chicken (raw and cooked), Eggs, Fish (raw and cooked), silkworms (raw and cooked), String, as well as any other types of seeds and fruit/vegtables.Sludge Boiler
this method requires you to have a working harvester from Mine factory reloaded and a Sludge Boilerall you need to do is pump the sludge / waste from the harvester over too the Sludge boiler and let it run, not only does it create power for your mine factory machines but it also produces dirt/Sand/mycilium and a few other products.
Soul Sand:
Witch water
In order to use this method you need to have either ancient spores or mycilium.If you have ancient spores, right click on a dirt block to place it and it’ll turn the dirt into mycilium, once you have a mycilium block you can place barrels around it and fill them with water, where they’ll slowly turn the water inside the barrels into witch water, once it becomes witch water you can right click on it with a piece of sand to create soul sand, right click again to get the soul sand out then refill the barrel
-Sludge Bioler
much like the dirt you are able to get soul sand from a sludge boiler by pumping in 1000mb of sludge to get a random Item.I’ll add more later
Thanks for reading
~Fry
EDIT: this is only part 1 of possibly 3 parts, I’ll also update as people suggest things on what they want in it.
Last edited: Aug 26, 2014
-
Jeppe0701
Active Member
- Messages:
- 50
- Likes Received:
- 7
- Local Time:
- 7:17 AM
Very good tutorial, really the basics!.
Keep on posting some more.
-
Herr8
New Member
- Messages:
- 8
- Likes Received:
- 1
- Local Time:
- 7:17 AM
Below Y:30 you get Dirty Water instead of Salt Water when right clicking on a Water Source Block with a Bottle.
-
light5hade
New Member
- Messages:
- 16
- Likes Received:
- 7
- Local Time:
- 2:17 AM
Boy thanks for all the advice man will sure help me
-
fry_lad
New Member
- Messages:
- 41
- Likes Received:
- 19
- Local Time:
- 10:17 PM
actually it’s Y47 and lower from what i’ve tested.
alven4 and Jeppe0701 like this.
-
RAM55579
New Member
- Messages:
- 2
- Likes Received:
- 1
- Local Time:
- 1:17 AM
cool this is really hellpful[DOUBLEPOST=1411081800,1411081485][/DOUBLEPOST]Just I noticed there was no mention of getting food early.
-
fry_lad
New Member
- Messages:
- 41
- Likes Received:
- 19
- Local Time:
- 10:17 PM
Sorry I’m actually writing up ways to get food and other nessesities now but have been taking my time as my internet is very unreliable ATM so I’ve rarely been home.
-
RAM55579
New Member
- Messages:
- 2
- Likes Received:
- 1
- Local Time:
- 1:17 AM
Its alright, you’ll get it done eventually.
-
Ehh not to bad really, you still have to make the crucible, slab furnace etc before you can get one as a quest reward.
Edit: i was going to mention that the only thing i really find Auto’s useful for is water or using a hammer to break down ores without wasting power. Otherwise the other ones i have just sit in a chest
-
Jeppe0701
Active Member
- Messages:
- 50
- Likes Received:
- 7
- Local Time:
- 7:17 AM
yeah that is to true XD, but thats kinda early game already.
-
fry_lad
New Member
- Messages:
- 41
- Likes Received:
- 19
- Local Time:
- 10:17 PM
I said I wasn’t going to be using exploitative ways in getting recources, and since this is a bug I count it as such.
-
Ahh my mistake, i wasn’t aware this was a bug.
-
fry_lad
New Member
- Messages:
- 41
- Likes Received:
- 19
- Local Time:
- 10:17 PM
That is considered exploitable in my mind, although you probably won’t be banned for it but it seems like a half dupe, sorry.
-
Tiani2709
Well-Known Member
- Messages:
- 44
- Likes Received:
- 3
- Local Time:
- 2:17 AM
It is not a bug, because the Mod-Pack maker know about that. He put that for when you can do a automatic system so you can make a better Smeltery.
-
epictommy145
New Member
- Messages:
- 9
- Likes Received:
- 0
- Local Time:
- 2:17 PM
Actually, getting dirty water bottle of a water source below the y 47 is not intended for this modpack. It is a feature in Enviromine and it can’t be changed in the config which is why it is still existed.
-
i just tested this on cl3 and it does not create power but the other products are still great to have
-
This thread was posted back in September 2014, it’s quite old now ^^’
-
so then it should be updated, edited or corrected
oh never mind i did that with my post -
Hey @fry_lad do you have anymore tips and tricks thanks
-
Unfortunately @fry_lad is not active on the forums anymore,
But if youre interested into CL: I’ve made a thread for tips and tricks as well:
CrashLanding: starter tip’s and trick’s | MineYourMind Community

![[IMG]](https://i.imgur.com/x5toOBn.png)
![[IMG]](https://i.imgur.com/xFcEytG.png)


Share This Page
Большой словарь испанского языка Collins
- Благодаря добавлению в очередное издание нескольких тысяч новых слов, этот лучший в мире большой словарь испанского языка остается идеальным пособием для изучения языка на продвинутом уровне и использования специалистами. С учетом текстового корпуса, состоящего из нескольких миллионов слов, подробных примечаний об испанском языке, грамматике, культуре и огромного количества идиом и примеров, это издание является самым большим словарем испанского языка на рынке.
- Благодаря добавлению в очередное издание нескольких тысяч новых слов, этот лучший в мире большой словарь испанского языка остается идеальным пособием для изучения языка на продвинутом уровне и использования специалистами. С учетом текстового корпуса, состоящего из нескольких миллионов слов, подробных примечаний об испанском языке, грамматике, культуре и огромного количества идиом и примеров, это издание является самым большим словарем испанского языка на рынке.
[juː]
PRON
Note that subject pronouns are used less in Spanish than in English — mainly for emphasis or to avoid ambiguity.
-
(sing)
-
(familiar) (=as subject) tú; (as direct/indirect object) te; (after prep) ti
-
frm (=as subject) usted, Ud, Vd; (as direct object) lo/la, le (Sp); (as indirect object) le; (after prep) usted, Ud, Vd
Change [le] to [se] before a direct object pronoun:
-
-
(pl)
-
(familiar) (=as subject) vosotros(-as) (Sp), ustedes (LAm); (as direct object) os (Sp), los/las (LAm); (as indirect object) os (Sp), les (LAm); (after prep) vosotros(-as) (Sp), ustedes (LAm)
-
frm (=as subject) ustedes, Uds, Vds; (as direct object) los/las, les (Sp); (as indirect object) les; (after prep) ustedes, Uds, Vds
Change [les] to [se] before a direct object pronoun:
-
-
(general)
When you means «one» or «people» in general, the impersonal se is often used:
A further possibility is [uno]:
Impersonal constructions are also used:
-
(phrases and special uses)
YOU
When translating you, even though you often need not use the pronoun itself, you will have to choose between using familiar tú/vosotros verb forms and the polite usted/ustedes ones.
► In Spain, use tú and the plural vosotros/vosotras with anyone you call by their first name, with children and younger adults. Use usted/ustedes with people who are older than you, those in authority and in formal contexts.
► In Latin America usage varies depending on the country and in some places only the usted forms are used. Where the tú form does exist, only use it with people you know very well. In other areas vos, used with verb forms that are similar to the vosotros ones, often replaces tú. This is standard in Argentina and certain Central American countries while in other countries it is considered substandard. Use ustedes for all cases of you in the plural.
For further uses and examples, see main entry
CraftMarine
Guest
-
#1
Hi everyone , I’m new here and I come here to get some help.
I’m playing on a 3rd party pack, «Infitech».
My probleme is, I can’t make infinite water supply.
I make a 4×4 hole filled with water, but when I take water from it, the water don’t generate back. :/
I search if it was gregtech, I haven’t found anything in config. And I don’t know wich mod can do this.
So, I need some help to find how to have infinite water again.
Tanks, CraftMarine
If I made some mistake in my english, correct me I’m french
![]()
-
#2
Hi everyone
, I’m new here and I come here to get some help.
I’m playing on a 3rd party pack, «Infitech».
My probleme is, I can’t make infinite water supply.
I make a 4×4 hole filled with water, but when I take water from it, the water don’t generate back. :/I search if it was gregtech, I haven’t found anything in config. And I don’t know wich mod can do this.
So, I need some help to find how to have infinite water again.
Tanks, CraftMarine
If I made some mistake in my english, correct meI’m french
I’ve had a quick scan through and can’t see which it would be, but: there are mods which change/remove infinite water source behaviour — these are intended to force you to build a machine that makes water — in this case, you might want an Extra Utilities liquid transfer node placed against what should be an infinite water source (i.e. the middle block in a row of three), with 1 or more world interaction upgrades in the transfer node. Then connect ExU pipes to wherever you want the water to go, and that should work, I think…
-
#3
CodeChickenCore.cfg -> finiteWater=True needs to be changed to False if ya want infinite water
Makes everything lotsa easier, so I suggest playing around with the pack before going easymode
CraftMarine
Guest
-
#4
Thanks, it was CCC. I’ve put on false and I’ve got my water Thanks
![]()
-
#5
CodeChickenCore.cfg -> finiteWater=True needs to be changed to False if ya want infinite water
Makes everything lotsa easier, so I suggest playing around with the pack before going easymode
Well that would do it! hehe
I wasn’t sure if there was meant to be a theme like with Crash Landings, where the need to find novel ways of making water is actively part of the story and gameplay! Sorry
-
#6
Just to confirm, it’s definitely not a gregtech thing — the modpack creator (Jason) prefers finite water. It does act as a bit of an early-game challenge as well until you get a railcraft water tank.
EdIt: Also, there’s a very large thread on infitech here.
-
#7
Thanks, it was CCC. I’ve put on false and I’ve got my water Thanks
")
Or, you know, you could put the setting back and actually try the modpacks way of making water.
-
#8
If that’s the style of play you enjoy by all means. But this user clearly doesn’t like that. Your post sounds like «if you don’t like it, tough». If I’m wrong in that view I apologize, but to me it sounds like you’re trying to push a gameplay element on to someone who doesn’t want it.
![]()
Pyure
Not Totally Useless
-
#9
Everybody above (more or less) is correct. Infinite water is disabled by default. It can be re-enabled as demonstrated above if you’re not especially interested in it. (There are several blocks that do produce infinite water, you just need to achieve them)
Besides combat, there is a lot of fun activities that you can do in Minecraft. If you want to survive and replenish your health, you can try farming by leaning how to hydrate your farmland. If this is a relatively new concept to you, I will take you through the basics to help improve your Minecraft farming skills.
So, can you place water under dirt in Minecraft? It isn’t advisable to place water under dirt in Minecraft if you want to irrigate your land. The result will be a partially wet ground unviable for crop planting. It is advisable to have the water at the same level or a higher block than the dirt when preparing for farming. Otherwise, the earth will likely stay the same without sufficient moisture for future agriculture.
If you want to farm in Minecraft but are uncertain about the best way to water your farmland, you will need to understand where and how to place water to grow your crops and generally why you need to keep your land hydrated.
To effectively farm, you need a sufficient supply of water and a reliable method to distribute. In Minecraft, you will often see rows of water between soil, making you question whether you can have the water below the dirt.
It isn’t possible to place water under dirt when farming in Minecraft because you cannot effectively water your crops on a lower level. Therefore, it will note hydrate the ground, meaning that it will only remain as dirt.
The conventional way to irrigate your plants is to place water at the same level or above the dirt mass; this way, the water will seep to the ground and moisten the dirt. If you plan to convert the earth to fertile land, you should have the water running between the chunks; for instance, you can have a stream for two dirt rows.
Generally, you should have water near the dirt to keep it hydrated when you farm in Minecraft. Although it stays on a separate row, it still seeps into the ground and hydrates it, perfect for when you want to prepare for farming. Any farmland on Minecraft has a water structure in between dirt rows, and there may be two blocks between each stream.
Therefore, in this case, your farming area is usually reduced by a third. Thus, it is understandable if you want to increase your farm size to have the water under the dirt. Unfortunately, Minecraft doesn’t allow this; instead, the water must be at a block above or at least the same level.
Also, it is advisable to plant on it after hydrating the ground as soon as possible. Otherwise, it will only return to its original dirt state. Secondly, it also dries out when you or other characters step on it. The only way for the dirt to be viable for farming is to place your plants when still moist; otherwise, you would have to start the process again.
Can Water Be Under Crops in Minecraft?
Farming in Minecraft may be pretty similar to actual farming, but there are still some differing aspects. For instance, there is a specific way to place the water and to harvest the plants in the game. Therefore, you may wonder, can you put water at a lower level than the crops in Minecraft?
The best and only way to water plants is to be at the same level or a block higher. If you have water beneath the crops, there are high chances that the better part of your farm will not be well-hydrated.
Therefore, your plants can only grow with a sufficient water supply; or else, you may not get the result you want. It is easier to water the crops if you have water above flowing down or at the same level to seep through.
Although some gamers prefer combat in Minecraft, farming is also a necessity in survival mode. If you have a crop supply, you will have enough to sustain yourself because you will frequently make harvests, reload your health, and cater to your needs.
It is the same principle as in real life, but the virtual aspect of the game makes it pretty complex. Watering your crops in Minecraft involves blocks of water and separate ones for the plants.
The best way is to have the water block above or at the same level as your crops. If the water is lower, your plants will not get the recommended moisture level to grow, resulting in stagnation. You can tell that your soil has enough water if it has a dark, rich color than dry dirt. Also, note that unless you keep your ground hydrated, there is a risk of reverting to earth and becoming unsuitable for your crops.
Can You Place Water Under Dirt To Farm?
In Minecraft, farmland requires enough water for plants’ growth; therefore, your water sources should be strategic to irrigate the crops adequately. It explains why you have a limited distance to place your water block in this game. Read on to understand whether water under dirt can be profitable on your farm.
Water under dirt isn’t an appropriate hydration method to till the land above it and plant crops. The water below the earth may not irrigate the farmland proportionately, making it unwise to irrigate crops below the block if you want better yield.
Besides, unevenly damp dirt farmland cannot support most crops unless you like dry farming, which only works with wheat crops. Furthermore, inadequate wetness on the farm can make your land unproductive in the long run.
Gamers in Minecraft don’t use the water-under-farmland technique but deploy the most reliable design to put the water source in the middle of the block. This way, the dirt can get moisture evenly. Alternatively, the water can also be at the same ground level as the farmland or one block above the land. In this case, it will spread and hydrate about four blocks horizontally or diagonally.
Given that dirt is dry soil, it will require tons of water to rehabilitate it to its original state. Moreover, the water under your dirt block may be flowing downwards rather than seeping upwards to wet your block of land, and the block may prevent water from percolating.
Despite all the activities you may undertake on your farm, it is best to use the standard guidelines while watering it for a bounty harvest that can adequately sustain you.
Can Water Go Through Dirt in Minecraft?
Water movement on a parcel of land is necessary to wet the dirt as you prepare for farming. Since the amount of water the farm can hold influences the harvest to expect, I will discuss how water percolates through the dirt in Minecraft and how vital it is to your farming.
Water can flow through dirt in Minecraft as it would on real-life soil. Dirt farmland may lose its moisture, making it unproductive, but this land type can become rich enough to sustain you with proper hydration and farm management techniques.
To ensure that water seeps into the dirt, you can place the irrigation source about four blocks away. Notably, the water flows from its origin to the ground as long as it is either at the same level or a block higher; this way, the land will hydrate and transform into productive soil for farming.
Whether your soil turned to dirt or not, you can reverse it and till it like any other damp farmland. However, most likely, the dry soil can take more water than wet blocks. Therefore, before planting, you may need to fertilize the soil to improve your yields since transitioning dirt to viable farmland may take longer than using ready soil.
If you have any difficulty differentiating dirt from the soil in Minecraft, you will notice that an irrigated farmland is darker than dirt due to the high water content. Generally, if you want your ground to remain viable, it is advisable to water it regularly, preparing it for planting season.
You can also be wary of factors that may lead to farmland turning to dirt. For instance, it is advisable not to allow players to jump on it and frequently tend to it.
How Far Can Water Be from the Soil in Minecraft?
In Minecraft, you may spend a lot of time and effort to make your crops grow because they are your only source of sustenance. Therefore, you will need to look for the most effective way to irrigate. To avoid leaving your farmland dry, here’s what you should know.
The furthest your water can be when farming in Minecraft is four blocks away on each side. For instance, if your water source is in the middle, it will comfortably hydrate a 9×9 piece of land. If you have more crops, you may have to add more water sources because the plants on the far end may not get enough.
For best results, you can have the water at a level ground with the farm or place it a level higher but not below. It is also important to note that the hydration of a farm in Minecraft is constant regardless of the amount of water you provide.
As long as there’s a water source for a 9×9 land, you will have enough to hydrate your crops. You can even have a water block, and you won’t have to worry about it drying out. Note that you can also comfortably have four blocks horizontally, vertically, and diagonally.
Another critical point is that your plant’s hydration rate isn’t necessarily dependent on the amount of water you offer because the moisture retention is usually constant.
However, remember that the water should always be above or the same level as the farm block. Additionally, you can also design your farm such that you only have a single water source dripping down from the top to irrigate all the crops.
Besides, rainwater can also be helpful to keep the land moist alongside the water. Lastly, note that different seeds have different growth levels, but generally, the process is faster when the soil is well-hydrated.
What Is the Best Way To Water a Farm in Minecraft?
Many Minecraft gamers overlook farming, but it is one of the most fulfilling activities you can participate in the game. The best part is that it isn’t too complicated since you can quickly get the hang of it with more practice. Read on as I take you through the most effective way to water your crops to get the best out of your farm.
As soon as you find a nearby water source, right-click on your bucket to pick, then right-click again to irrigate your crops when full. Consequently, you can also dig a canal or hole where you want to plant but remember to do it as soon as possible because land tends to dry out without crops or irrigation water.
You can achieve great results when you place the water at least at the same level or above the farm since it being lower won’t fully hydrate the crops. Lastly, note that a block of water can sustain a 9×9 land horizontally and diagonally.
Crops are essential if you are in survival mode because they will keep you going by improving your health. However, it may thwart your mission if you don’t know the best way to water your plants because they will only dry out without the proper moisture level. It is advisable to ensure that there is always water on your farm for your plants to grow.
On the other hand, some plants like wheat don’t necessarily need water to survive but irrigating them improves their growth rate. Besides water, also remember that your crops will also need lighting and fertilizer.
Finally
It is critical to learn how to grow your crops and take care of them to survive in Minecraft. Therefore, you should know how to water them to help them thrive at a steady rate. It is advisable to place the water on the same block-level or higher than the crops to seep better into the soil.
If you put it under, it means that most of the farm will remain dry, unfit for planting. Luckily, with only a block of water, you can have enough to hydrate a 9×9 land. Also, your crops will additionally need lighting and fertilizer, and different plants have different growth rates.
Minecraft is a beautiful sandbox game that allows its players to explore and build whatever they desire within its infinite world, filled with numerous blocks.
Some of the game mechanics of Minecraft are very realistic and imitate life-like physics, like how gravity affects water. Gravity affects some mobs differently, but water mechanics are the same for almost every entity and block.
The most common problem while making underwater builds or structures with water as a part of them is when it gets logged in unwanted places. This article covers how players can dispose of water in Minecraft.
Ways to get rid of water in Minecraft
1) Replacing water source
Water will always start spreading in various directions from a source block of water. This source block of water can often be located very easily, and to stop the water from spreading, players can use a solid block to replace the water source by placing the block on it.
2) Using an empty bucket
A bucket can be crafted from three iron ingots by placing them in a V shape in a crafting table. To remove water using an empty bucket, players need to locate the water source and then right-click on it while holding the bucket in their hand.
3) Using a sponge
A sponge is a block that only generates in sponge rooms of ocean monuments. A sponge can absorb water in a seven-block radius of itself and immediately becomes a wet sponge. Smelting a wet sponge in a furnace will revert it to a dry sponge.
4) Using sand or gravel
Unlike most blocks in Minecraft, sand and gravel are affected by gravity and will start falling if the block under them is removed. This feature can be used to remove waterlogged in a deep area.
While holding sand, players can spam the right-click button until the hole or a deep area is filled with sand. Then they can easily remove the sand using a shovel.
5) Using lava
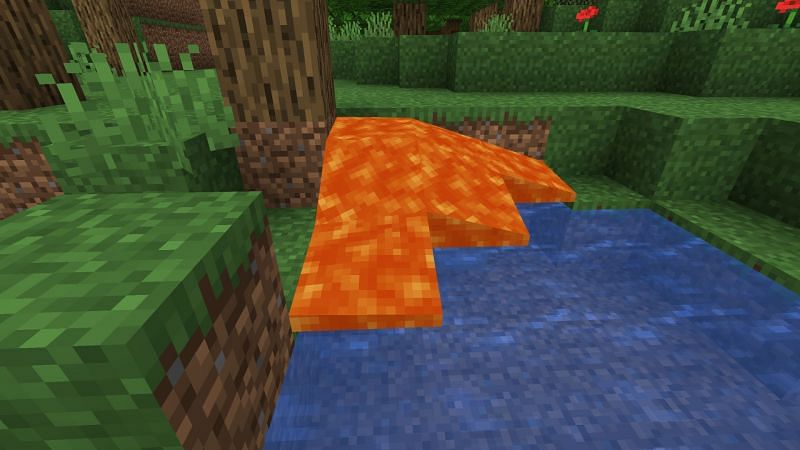
When lava touches a water block, it turns it into stone, and if it comes in contact with a source of water, then the water source becomes obsidian. This method may not seem practical, but it will be helpful for players looking to remove water and mine some stone.
Disclaimer: This article reflects the opinions of the writer.
For detailed guides, walkthroughs, tips & more, check out SK Minecraft Wiki
Edited by Srijan Sen
Thank You!
GIF
❯
Содержание
- Проблема с просмотром фильма.
- #1 OFFLINE xNatashax
- #2 OFFLINE AlexStorm
- WINRAR keeps telling me “next volume is required, you need to have the following volume to continue extraction
- 8 Answers
- Как пофиксить ошибку?
- Thread: Need following volume to continue extraction
- MediaStrazh. Be on protection!
- Что делать, недостаточно места на диске?
- Что делать, недостаточно места на диске?
Проблема с просмотром фильма.
#1 OFFLINE xNatashax


- Последний визит: 29 окт 2008 14:06
Я скачала фильм, он заархивирован WinRar-ом и я не могу вытащить его из архиватора. Я как обычно выделяю файл / жму Wizard / готово. . и появляется сообщение:
Next volume is required
You need to have the following volume to continue extraction
Insert a disk with this volume and press «OK» to try again to press «Cancel» to break extraction.
Что он от меня хочет. Помогите пожалуйста.
#2 OFFLINE AlexStorm

- Последний визит: 11 мар 2017 16:22
- Пол: Мужчина
- Откуда: Moscow
Источник
WINRAR keeps telling me “next volume is required, you need to have the following volume to continue extraction
I am downloading a movie and its in like 15 different parts, and usually when I open one in winrar it just extracts them all, but not in this case. How do I avoid this error and extract them all?
8 Answers
You have to extract each of the 15 parts separately. THEN, if there is an RAR or ZIP inside, you can then extract it. You just have to make sure that you extract each and every file. I’m going to assume this is for a home movie or one that wasn’t downloaded illegally.
This Site Might Help You.
WINRAR keeps telling me «next volume is required, you need to have the following volume to continue extraction
I am downloading a movie and its in like 15 different parts, and usually when I open one in winrar it just extracts them all, but not in this case. How do I avoid this error and extract them all?
For the best answers, search on this site https://shorturl.im/avqzE
Yea, Whattt is right. The file is too big to be loaded into 1 zip file so it’s been split into more than 1 zip. You need all zip parts downloaded in the same folder in order to unzip the whole file properly. Once all zip files (#1, #2, #3, ect.) are downloaded into the same folder/desktop, unzip #1 and it will do the rest automatically.
You only have to use one of the files to extract all 15 Winrar files. If you right-click on ANY of the files .r00, .r01. etc and select «extract here» it should unzip the compressed file.
If this doesn’t work then not all the files are present (or one or more are corrupt) and you are goosed.
That means the file has been split into multiple parts. You need to have all the parts before it can extract the file. You might need file.rar.001, file.rar.002 etc to get the file inside.
Maybe because one of the packages is damaged. You’ll try renaming the packs or downloading the first one again.
Try keeping all the packs in one folder also
you are missing a part of the rar archive. there will be more than one file of course. example — blah.rar, blah.r00, blah.r01, etc. one of those is not there. will not work without it.
Hurrah, that’s what I was looking for! Thanks to author of this question.
Источник
Как пофиксить ошибку?
Всем привет, недавно зашёл в кали и сразу проблемы. пишу apt-get install ftp пишет ошибку
E: Unmet dependencies. Try ‘apt —fix-broken install’ with no packages (or specify a solution).
пытаюсь фиксить её, пишет
E: Sub-process /usr/bin/dpkg returned an error code (1)
пытаюсь фиксить эту ошибку и опять
E: Unmet dependencies. Try ‘apt —fix-broken install’ with no packages (or specify a solution).
Как исправить? вот полный лог
Building dependency tree
Reading state information. Done
You might want to run ‘apt —fix-broken install’ to correct these.
The following packages have unmet dependencies:
bsdmainutils : Depends: calendar but it is not going to be installed
Depends: ncal but it is not going to be installed
libc-bin : Depends: libc6 ( Цитата
Приветствую! Видно, что ошибки меняются, например, последняя ошибка из-за того, что обновление пакета не завершено.
Поэтому выполните один раз команду
А затем несколько раз команду
пока сообщения об ошибках не станут одинаковыми — или пока проблема не решится. Затем напишите, на какой ошибке застряли.
# sudo apt —fix-broken install
Reading package lists. Done
Building dependency tree
Reading state information. Done
Correcting dependencies. Done
The following additional packages will be installed:
calendar cpp cpp-10 gcc-10-base libc-bin libgcc-s1 libisl22 libmpc3 libmpfr6 libstdc++6 ncal
Suggested packages:
cpp-doc gcc-10-locales
Recommended packages:
manpages
The following NEW packages will be installed:
calendar cpp cpp-10 libisl22 libmpc3 libmpfr6 ncal
The following packages will be upgraded:
gcc-10-base libc-bin libgcc-s1 libstdc++6
4 upgraded, 7 newly installed, 0 to remove and 74 not upgraded.
3 not fully installed or removed.
Need to get 0 B/12.4 MB of archives.
After this operation, 35.2 MB of additional disk space will be used.
Do you want to continue? [Y/n] y
Setting up libc6:amd64 (2.31-2) .
Checking for services that may need to be restarted.
Checking init scripts.
Nothing to restart.
sleep: cannot read realtime clock: Invalid argument
dpkg: error processing package libc6:amd64 (—configure):
installed libc6:amd64 package post-installation script subprocess returned error exit status 1
Errors were encountered while processing:
libc6:amd64
E: Sub-process /usr/bin/dpkg returned an error code (1)
root@MSI:
# sudo apt —fix-broken install
Reading package lists. Done
Building dependency tree
Reading state information. Done
Correcting dependencies. Done
The following additional packages will be installed:
calendar cpp cpp-10 gcc-10-base libc-bin libgcc-s1 libisl22 libmpc3 libmpfr6 libstdc++6 ncal
Suggested packages:
cpp-doc gcc-10-locales
Recommended packages:
manpages
The following NEW packages will be installed:
calendar cpp cpp-10 libisl22 libmpc3 libmpfr6 ncal
The following packages will be upgraded:
gcc-10-base libc-bin libgcc-s1 libstdc++6
4 upgraded, 7 newly installed, 0 to remove and 74 not upgraded.
3 not fully installed or removed.
Need to get 0 B/12.4 MB of archives.
After this operation, 35.2 MB of additional disk space will be used.
Do you want to continue? [Y/n] y
Setting up libc6:amd64 (2.31-2) .
Checking for services that may need to be restarted.
Checking init scripts.
Nothing to restart.
sleep: cannot read realtime clock: Invalid argument
dpkg: error processing package libc6:amd64 (—configure):
installed libc6:amd64 package post-installation script subprocess returned error exit status 1
Errors were encountered while processing:
libc6:amd64
E: Sub-process /usr/bin/dpkg returned an error code (1)
Эта «красота» происходит в WSL? Если да, то нужно обязательно это указывать.
Попробуйте для исправления ошибки выполнить:
Почему нужно указывать, что это WSL? Возможно вы не понимаете, что такое WSL, а ведь это вообще не Linux. Это я объясняю в самом начале статьи « Как установить Kali Linux с Win-KeX (графический интерфейс) в WSL2 (подсистему Windows для Linux) ».
Там же я говорю, что вы столкнётесь с самыми необычными ошибками. Самое правильное, что можно сделать, забыть про WSL и пользоваться полноценной виртуальной машиной, например, VirtualBox . Иначе так и будете решать бессмысленные проблемы. «Сам себе злобный Буратино».
Источник
Thread: Need following volume to continue extraction
Thread Tools
I’ve not had this problem before. Downloaded Adobe Creative Suite 2 Premium from edonkey as .rar and am not sure how to unzip now.

Seems it must have been 4 disks. I can unzip all but the 4th one before getting this message.

Use Winrar to extract .rar files
This error means you haven’t got the whole RAR set. It tells you the name of the file you need.
Why not just download the trial then search for the crack , that’s what I did .
Mind you it didn’t have Illustrator I had to get that separate .
I’m staring to hate Winrar too.
Winrar ain’t unicode, it sucks, i have no use of it. Rars have a lot of times cyclic redundancy error, maybe that is why you can’t extract it or you don’t have all parts.
What’s going on?
The thread title is Need following volume to continue extraction. There’s only one thing that the message means. that there’s another file in the set that isn’t there.
FWIW, I love WinRAR.
It extracts everything I’ve come across so far and is X64 compliant so its context menu hook works. It also creates self extracting archives (look, Winzip, doing it on its own!)
The main problem with WinRAR often lies between the chair and the keyboard.
Источник
Лучший антивирусный проект!
Что делать, недостаточно места на диске?

Что делать, недостаточно места на диске?
Недостаточно места на диске C:
Системный раздел, который чаще всего располагается на компьютерах на диске C, крайне желательно держать в чистоте и не засорять ненужной информацией. Но бывает наступает время, когда система пишет приблизительно так: «недостаточно места на диске C:» или вы не можете установить какую-нибудь программу из-за того что места элементарно не хватает, поэтому возникает вполне резонный вопрос: «как очистить диск от ненужных файлов?».
Пользователи, которые редко сталкиваются с подобной операцией (очистка диска C:), могут даже записать текущий показатель свободного пространства на диске, чтобы потом сравнить этот показатель с аналогичной цифрой, но уже после очистки, а также узнать, сколько удалось освободить места. Обычно недостаточно места на диске бывает из-за того что пользователь вовремя не удаляет скопившиеся ненужные данные например: фильмы. Также бывает недостаточно места на диске из-за самой операционной системы. Здесь я приведу несколько способов по очистке диска:
1. Прежде всего, необходимо просмотреть диск C на наличие на нём больших файлов: видео, аудио, архивов, не участвующих в работе системы. Эти файлы можно скопировать на другой диск или раздел диска. Но ни в коем случае не надо трогать системные файлы, даже если они имеют «странные» названия, работа системы может быть нарушена.
2. Далее следует запустить специальную утилиту по очистке диска. Запускается она следующим образом: надо зайти в «Мой компьютер», после чего щелкнуть правой кнопкой мышки на диске C и перейти в «Свойства», и в нем нажать кнопку «Очистка диска». В открывшемся окне необходимо выбрать виды файлов, которые будут анализироваться на возможность удаления: корзина, файлы отчетов windows, временные файлы и т.д. За тем «ОК».
3. К сожалению стандартная утилита «Очистка диска» очищает не все нужные разделы, и места на вашем диске все равно может быть недостаточно. В этом случае я рекомендую провести очистку жесткого диска вручную из временных папок Windows.
Предварительно для того чтобы увидеть многие папки надо сделать их видимыми. Располагаются эти папки по следующим путям:
c:temp,
c:windowstemp,
с:UsersВладимирAppDataLocalTemp(Владимир меняете на свою учетную запись).
Вы можете оттуда смело удалять все, у вас могут возникать ошибки с некоторыми файлами: «невозможно удалить файл», не надо пугаться. Просто файл в данный момент используется системой и его удалить нельзя.
4. Кроме очистки системного жесткого диска раздела для победы над проблемой «недостаточно места на диске» можно попробовать отключить функцию гибернации компьютера. В корневом каталоге системного раздела (прямо в корне диска С) располагается файл, с названием Hiberfil.sys. Файл является системным, поэтому он будет виден только при включённом режиме отображения скрытых и системных файлов. Размер этого файла обычно достаточно серьёзен. Если пользователем не используется гибернация, то после её отключения удалится и сам файл, что позволит освободить некоторое место на диске.
5. Достаточно опытные пользователи могут попробовать удалить ненужные/неиспользуемые программы, чтобы освободить ещё места на системном диске. Список всех установленных программ вызывается из «Панели управления» компьютера, в Win7 необходимо зайти в пункт «Программы и компоненты», а в WinXP – в «Установка и удаление программ».
6. Ещё один вариант увеличения места на системном диске: уменьшить файл подкачки. Но подобную операцию лучше не делать малоопытным пользователям, которые слабо представляют, что они вообще делают. Также можно почистить кэш используемых браузеров. Чтобы получить возможность сделать это, нужно нажать одновременно клавиши «Ctrl + Shift + Delete», находясь в самом браузере. Этот вариант рекомендуется если все равно недостаточно места на диске.
Источник